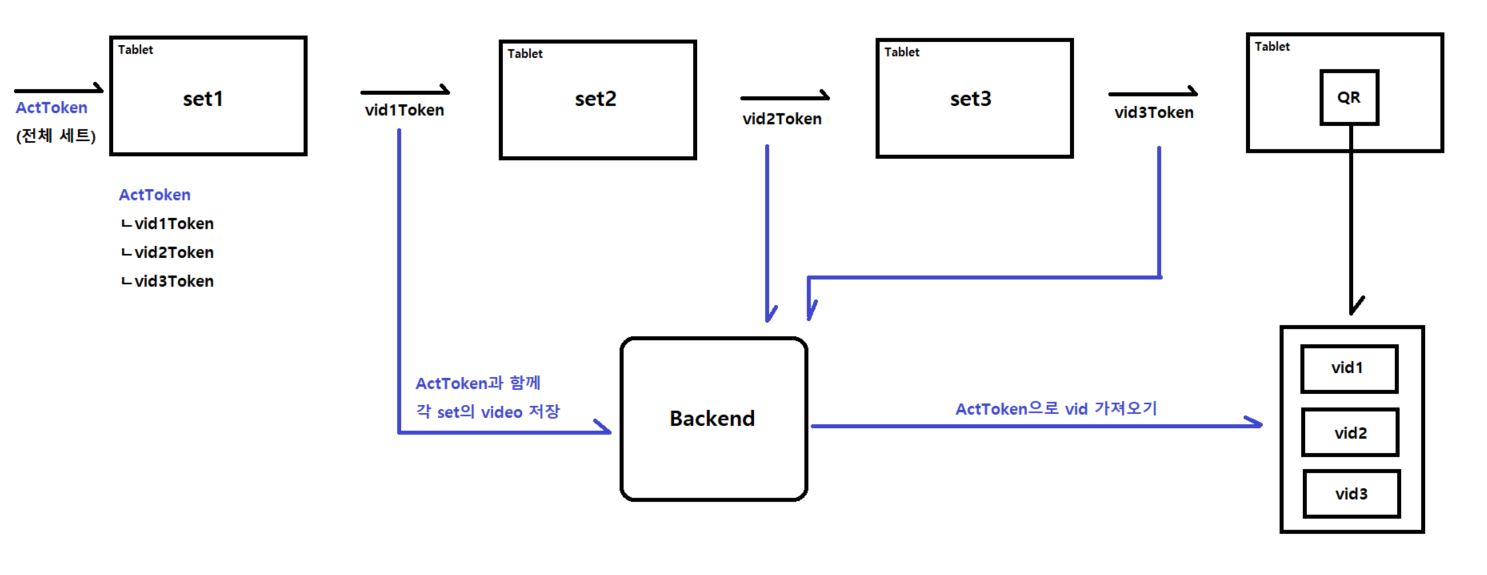
 기존 방식은 각 세트별 다시보기에서 각 세트 video 열람 주소를 가져오는 방식
하지만 사용자의 입장에서 이를 개선시키기 위해 위와 같이
하나의 Act 종료 이후 하나의 QR 주소만으로 모든 set의 video를 가져오도록 변경
Backend
Frontend video 저장 방식 변경
const actToken = useRef<String>("N/A");
  const startRecord = () => {
    ...
     // actToken 최초 1회 초기화
     if (actToken.current == "N/A")
    	actToken.current = generateRandomString(12);
    ...
    const formData = new FormData();
    ...
    formData.append("actToken", actToken.current.toString());
위와 같이 actToken을 useRef로 생성하고 Act별 독립화
formData에 actToken을 append하여 request를 전송한다
video schema 수정
const videoSchema = new mongoose.Schema({
    filename: String,   // 동영상 이름
    contentType: String,
    workout: String,    // 운동 종류
    set: Number,        // 해당 세트
    userToken: {
        type: String,
        // required: true
    },
    actToken: {         // Video들을 구분하기 위한 ActToken
        type: String,
        required: true
    },
    uploadDate: {
        type: Date,
        default: Date.now,
        required: false,
    },
});
기존에는 filename에 video 식별을 위한 토큰을 추가하여 사용
하지만 Act를 기준으로 video를 분류하고 stream해주기 위해 필드를 추가한다
const video = new VideoModel({
...
actToken: req.body.actToken,
});
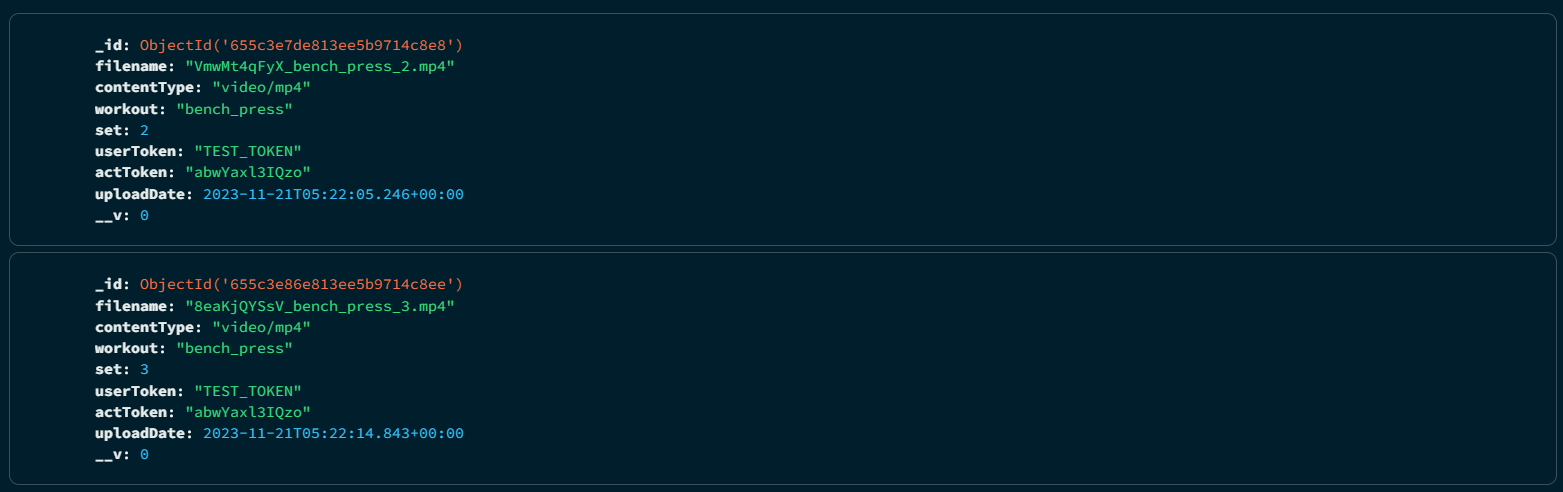
await video.save();이후 위와 같이 actToken을 추가로 body에서 받아와 넣어주면
아래와 같이 video 데이터가 정상적으로 저장되는 것을 볼 수 있다
video stream 로직 수정
actToken 필드가 일치하는 동영상들을 find하고 이후 set 필드로 오름차순 정렬
videoFiles를 stream 페이지에 전달할 filename으로 매핑
router.get('/', async (req, res) => {
	const videoFiles = await VideoModel.find({ actToken: req.query.actToken }).sort({ set: 1 });
	if (videoFiles.length > 0) {
		const filenames = videoFiles.map(video => video.filename);
		res.render('stream', { filenames });
	} else {
		res.status(500).json({
			message: "No videos found for the given ActToken",
		});
	}
});
또한 아래와 같이 videoFiles의 매핑된 filename을 차례대로 순회하며
각각 stream 페이지로 요청하여 전체 동영상을 띄워주면
<!DOCTYPE html>
<html lang="en">
<head>
<meta charset="UTF-8">
<meta name="viewport" content="width=device-width, initial-scale=1.0">
<title>RUF REPLAY</title>
<style>
body {
background-color: black;
display: flex;
flex-direction: column;
align-items: center;
justify-content: center;
max-height: 100vh;
overflow-y: auto;
padding-top: 300px;
}
img {
margin-top: 20px;
}
h3 {
color: white;
margin-top: 10px;
}
video {
margin-top: 10px;
}
</style>
</head>
<body>
<img src="images/logo.png" alt="로고 이미지">
<br />
<% for (let i=0; i < filenames.length; i++) { %>
<video controls width="640" height="360">
<source src="/video/stream?filename=<%= filenames[i] %>" type="video/mp4">
Your browser does not support the video tag.
</video>
<h3>
<%= filenames[i] %>
</h3>
<% } %>
</body>
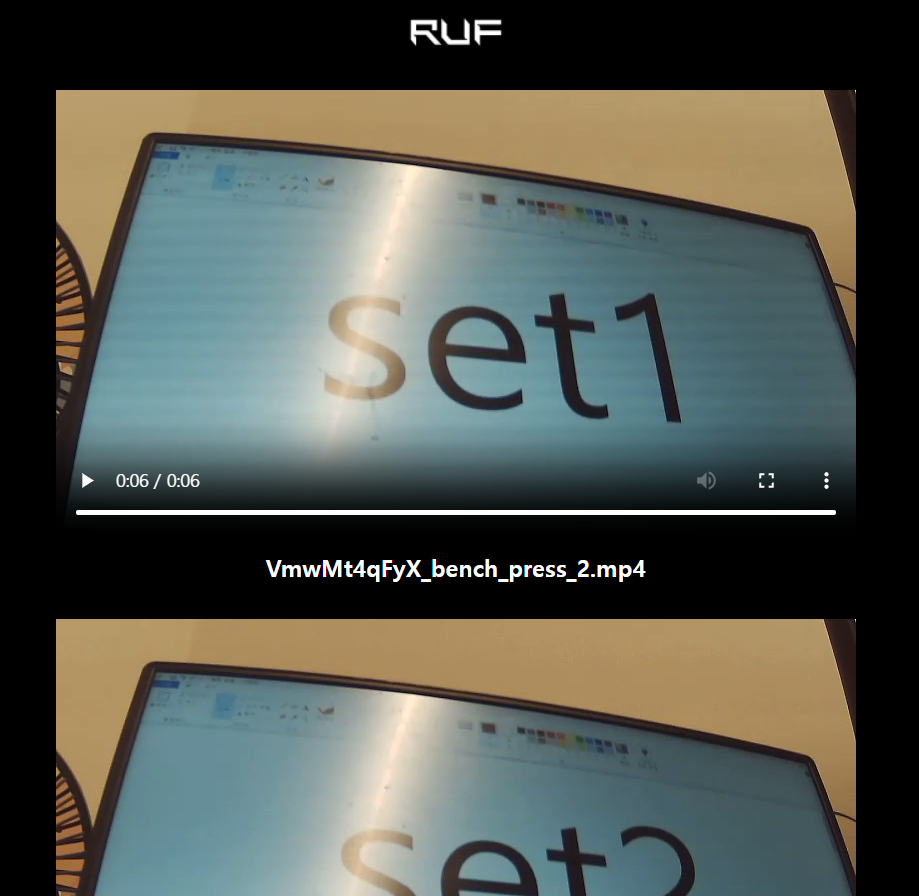
</html>아래와 같이 하나의 Act의 모든 세트를 다시볼 수 있다
다운로드 기능 추가
/video/download로 post req가 들어오면 user를 위한 attachement를 생성
매칭되는 filename에 대한 videoFile을 다운로드 받을 수 있게 한다
router.post('/download', async (req, res) => {
	const videoFile = await VideoModel.findOne({ filename: req.body.filename });
	if (videoFile) {
		try {
			const conn = mongoose.connection;
			const bucket = new mongoose.mongo.GridFSBucket(conn.db, {
				bucketName: 'videos'
			});

			const filename = req.body.filename;
			const downloadStream = bucket.openDownloadStreamByName(filename);

			res.setHeader('Content-Type', 'application/octet-stream');
			res.setHeader('Content-Disposition', `attachment; filename="${filename}"`);

			downloadStream.pipe(res);
		} catch (err) {
			console.error(err);
			res.status(500).json({
				success: false,
				message: err.message,
			});
		}
	} else {
		res.status(500).json({
			success: false,
			message: "No videos found for the given FileName",
		});
	}
});
추가적으로 ejs의 body 로직을 수정하고 style 수정을 완료하여
다운로드 기능 및 QR 다시보기 페이지를 완성할 수 있다
...
  <style>
    body {
      background-color: black;
      display: flex;
      flex-direction: column;
      align-items: center;
      justify-content: center;
      overflow-y: auto;
    }

    img {
      margin-top: 20px;
    }

    video {
      margin-top: 10px;
    }

    h3 {
      color: white;
      margin-top: 10px;
    }

    form {
      display: flex;
      flex-direction: column;
      align-items: center;
      margin-top: 10px;
    }

    button {
      background-color: #cff947;
      color: black;
      padding: 10px 20px;
      border: none;
      border-radius: 10px;
      cursor: pointer;
      font-size: 16px;
      font-weight: bold;
      margin-top: 1px;
      margin-bottom: 50px;
    }

    button:hover {
      background-color: #a3cc52;
    }
  </style>
</head>

<body>
  <img src="images/logo.png" alt="로고 이미지">
  <br />
  <% for (let i=0; i < filenames.length; i++) { %>
    <video controls width="640" height="360">
      <source src="/video/stream?filename=<%= filenames[i] %>" type="video/mp4">
      Your browser does not support the video tag.
    </video>
    <form action="/video/download" method="post">
      <input type="hidden" name="filename" value="<%= filenames[i] %>">
      <button type="submit">
        <%= i + 1 %>세트 동영상 다운로드
      </button>
    </form>
    <% } %>
</body>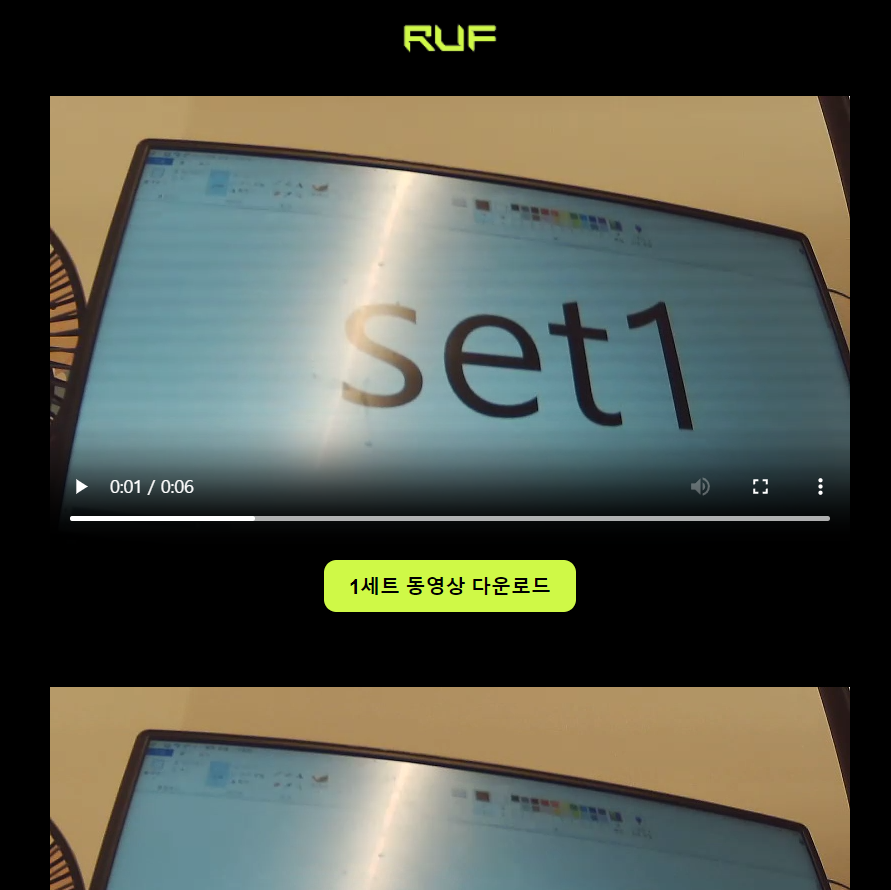

Frontend
QR 주소 생성 방식 변경
actToken 최초 1회 초기화시 아래와 같이 FileNameArrayAtom에 저장
// actToken 최초 1회 초기화
if (actToken.current == "N/A") {
    actToken.current = generateRandomString(12);

    //FileNameArray에 actToken값 저장
    setFileNameArray((prev) => {
      const newArr = [...prev, actToken.current.toString()];
      return newArr;
	});
}
fileNameArray의 0번쨰 값이 actToken값이기 때문에 이를 활용해서 QR 생성
이때 기존의 Replay에 있던 코드를 WorkoutDone 코드로 옮겨와서 기능 추가
import { useEffect, useRef } from "react";
import { useAtom } from "jotai";
import {
  fileNameArrayAtom,
} from "@/lib/globalState/atom";
import QRCode from 'qrcode-generator';

export function WorkoutDoneImpl() {
  ...

  // 페이지 로드시 filenameArray 0번에 들어있는 actToken으로 QRCode 생성
  const [fileNameArray, setFileNameArray] = useAtom(fileNameArrayAtom);
  useEffect(function initializeEventListener() {
    generateQRCode(fileNameArray[0]);
  });

  const qrCodeRef = useRef<HTMLCanvasElement>(null);
  const generateQRCode = (filename: string) => {
    const url = process.env.NEXT_PUBLIC_BACKEND_HOST + '/video?actToken=' + filename;

    if (qrCodeRef.current) {
      try
        ...
WorkoutDone UI 수정
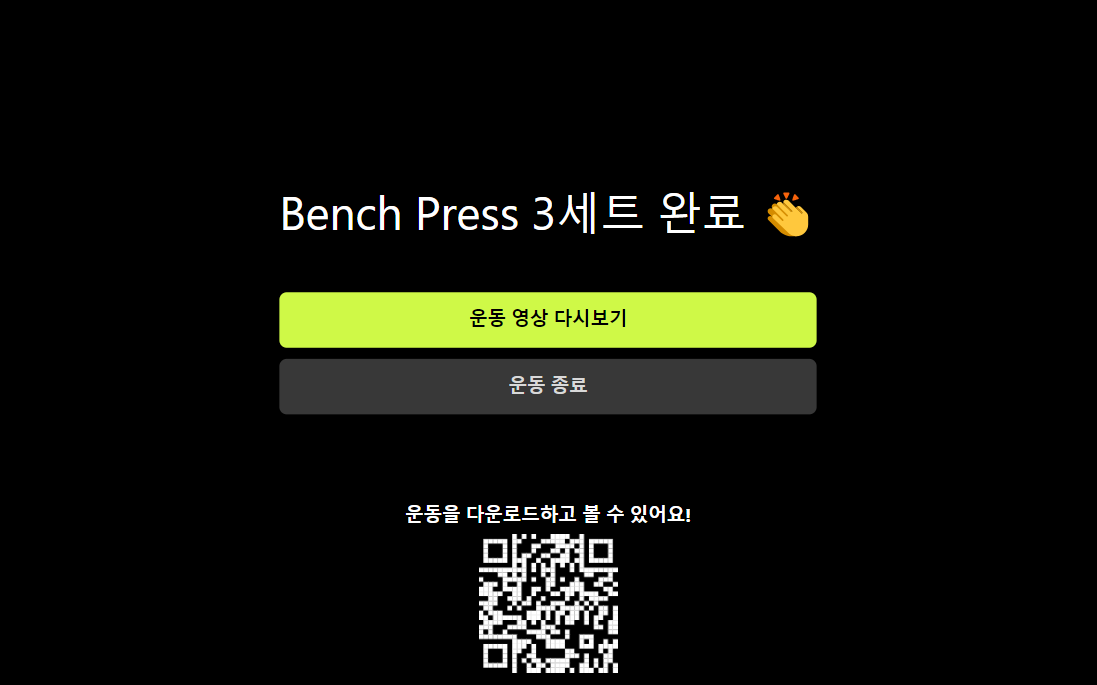
아래와 같이 WorkoutDone 페이지의 UI를 수정하여 QR 구현을 완료한다
<div className="w-full text-xl font-bold py-4 rounded-lg cursor-pointer text-center mt-10 absolute bottom-40 left-1/2 transform -translate-x-1/2">
      운동을 다운로드하고 볼 수 있어요!
</div>

<div className="w-full text-xl font-bold py-4 rounded-lg cursor-pointer">
      <canvas
        ref={qrCodeRef}
        id="qr-code"
        style={{
              position: "absolute",
              bottom: "20px", // Adjust the distance from the bottom as needed
              left: "50%", // Center horizontally
              transform: "translateX(-50%)", // Center horizontally
            }}
      />
 </div>