저는 기계번역 연구 및 개발을 하다가 백엔드를 잠시 배웠어요.
백엔드를 배운 이유는 몇 가지 궁금증과 문제점을 해결하고 싶어서였어요.
- 우리의 번역 서비스가 고객에게 어떻게 제공되는지 알고 싶었고
- 번역 성능을 향상시키기 위해서는 이따금씩 백엔드 서버 코드를 고쳐야 했고
- 개발팀과 함께 일하기 위해서는 개발 지식이 필요했기 때문이었어요.
그런데.... 한 가지가 빠졌던 것 같아요.
바로, '내가 만든 모델이 어떻게 서빙되는가' 라는 점이지요.
이번 기회에 마지막 하나의 퍼즐 조각을 채워 보려 합니다. 🧩
MLOps?
MLOps란 머신 러닝(Machine Learning)과 운영(Operations)을 합친 용어로 프로덕션 환경에서 머신 러닝(ML) 모델이 지속적이고 안정적으로 배포되도록 유지, 관리, 모니터링 해주는 것입니다.
MLOps란 단순히 ML 모델뿐만 아니라, 데이터를 수집하고 분석하는 단계(Data Collection, Ingestion, Analysis, Labeling, Validation, Preparation), 그리고 ML 모델을 학습하고 배포하는 단계(Model Training, Validation, Deployment)까지 전 과정을 AI Lifecycle로 보고, MLOps의 대상으로 보고 있다.
MLOps 에 대해 더 알고 싶다면 글또요정 변성윤님의 발표 자료를 추천합니다 😉🧚♂️
MLOps 춘추 전국 시대 정리(변성윤)
https://speakerdeck.com/mlopskr/mlops-cuncu-jeongug-sidae-jeongri-byeonseongyun
이번 글에서는 MLOps 의 단계 중 '배포' 에 초점을 맞춰 보겠습니다.
Related work..
많은 ML model serving tool(Model service framework) 이 있습니다.
- torchserve, tensorflow serving, bentoML, Triton…
이 중 제가 소개하려는 Torchserve 공식문서의 말을 빌리자면
'TorchServe is a performant, flexible and easy to use tool for serving PyTorch models in production'
이라는데, pytorch 로 개발한 모델을 서빙하기에는 아마 최적의 선택일 겁니다.
TorchServe
- pytorch로 구현된 모델은 데이터 핸들러와 함께 TorchServe에서 제공하는 torch-model–archiver를 이용해 MAR 파일로 아카이빙되고 Model store 에 등록됨
- Model store에 등록된 모델은 TorchServe의 Serving Logic에 의해 API 요청에 따라 효율적으로 서비스됨
- Management API 를 통해 각 모델의 서비스 상황을 관리할 수 있기 때문에 효과적인 운영이 가능함
- TorchServe는 Docker instance로 구동되기 때문에, 추후 kubernetes를 이용한 스케일링을 할 수 있음
이 글에서는 NLP 모델만을 다룹니다. (제가 NLP 러이기 때문이죠... 😜)
Usage (Simple ver.)
- 모델, 토크나이저 학습 후 저장
- 핸들러(Handler) 제작
- 데이터 전처리 - 추론 - 후처리 파이프라인 구성
- 학습된 모델과 핸들러를 torch-model-archiver 를 이용해 MAR 로 변환
- torchserve 로 배포 (docker 이용 가능)
Practice!
목표 : 사전 학습된 RoBERTa 모델을 TorchServe 를 이용해 서빙(배포) 해 보자 ❤️🔥
연습과제 모델로 RoBERTa sentiment classifier 를 이용하겠습니다.
(https://www.scaler.com/topics/torchserve-multiple-models/ 을 따라해 보았습니다.)
1. Download pretrained model and tokenizer
사용할 모델과 토크나이저를 다운로드하고 파일로 저장합니다.
from transformers import AutoTokenizer, AutoModelForSequenceClassification

# instantiating the tokenizer associated with the model
tokenizer = AutoTokenizer.from_pretrained("cardiffnlp/twitter-roberta-base-sentiment-latest")

# Creating the model instance
model = AutoModelForSequenceClassification.from_pretrained("cardiffnlp/twitter-roberta-base-sentiment-latest")

# save the tokenizer instance
tokenizer.save_pretrained('./my_tokenizer')

# save the model instance
model.save_pretrained('./my_model')
2. Create Custom Handler
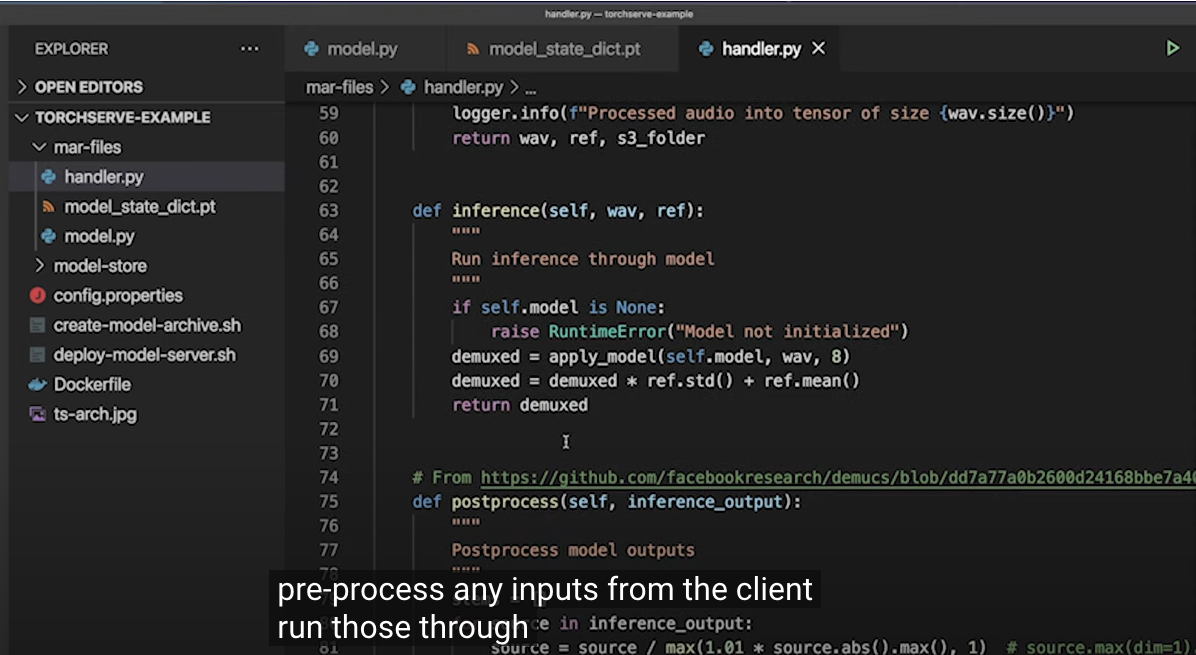
Torchserve 에서 '핸들러' 는 왜 필요할까요?
https://yangoos57.github.io/blog/mlops/torchserve/Deploying_torchserve_using_transformers/ 에서 명쾌하게 설명하고 있습니다.
Product 환경에서는 학습용 데이터와 같이 즉시 사용 가능한 데이터를 제공 받을 수 없기 때문에 예측(Predict)에 앞서 데이터 전처리가 필히 수행되어야 합니다.
예측을 통해 얻은 결과에 대한 후처리도 필요합니다. 모델 output을 반환할 때 특정 양식에 맞춰서 반환하거나 Metric을 생성해야하기 때문입니다.
이러한 데이터 전처리 - 추론 - 후처리의 파이프라인을 구성하는데 필요한 기능을 torchserve에서는 Handler라 부릅니다.
TorchServe 에서는 기본적으로 4종류의 default handler 를 제공하고 있는데요,
https://pytorch.org/serve/default_handlers.html
(image_classifer, image_segmenter, object_detector, text_classifier)
BaseHandler class 를 상속받아서 Custom handler 즉 직접 핸들러를 만들 수 있습니다.
앞서 설명했듯 핸들러의 역할은 '데이터 전처리 - 추론 - 후처리의 파이프라인 구성' 이기 때문에
핸들러 초기화 함수인 initialize 와 함께 preprocess, inference, postprocess 함수를 작성합니다.
import torch
import logging
import transformers
import os
import json
import requests

from ts.torch_handler.base_handler import BaseHandler
from transformers import AutoModelForSequenceClassification, AutoTokenizer

# creating a logger
logger = logging.getLogger(__name__)
logger.info("Transformers version %s", transformers.__version__)


# custom  model handler class
class ModelHandler(BaseHandler):

    def initialize(self, context):
        properties = context.system_properties
        self.manifest = context.manifest
        model_dir = properties.get("model_dir")

        # use GPU if available
        self. device = "cuda"  if torch. cuda.is_available()  else "cpu"


        # load the model
        model_file = self.manifest['model']['modelFile']
        model_path = os. path.join(model_dir, model_file)

        if os. path.isfile(model_path):
            self.model = AutoModelForSequenceClassification.from_pretrained(model_dir)
            self.model.to(self.device)
            self. model.eval() # to  be used for inference

        else:
            raise RuntimeError('model file missing')

        # load tokenizer
        self.tokenizer = AutoTokenizer.from_pretrained(model_dir)
        if self.tokenizer is None:
            raise RuntimeError('Missing the tokenizer object')

        # load the mapping file
        mapping_file_path = os.path.join(model_dir, 'index_to_name.json')
        if os. path.isfile(mapping_file_path):
            with open(mapping_file_path) as f:
                self.mapping = json.load(f)

        else:
            logger.warning('Mapping file missing')

        self.initialized = True

    def preprocess(self, requests):

        # unpack
        data = requests[0].get('body')
        if data is None:
            data = requests[0].get('data')

        inp_x = data.get('inputs')


        # tokenize
        tokenized_inp = self.tokenizer(inp_x,
                                        padding=True,
                                        return_tensors='pt')

        logger.info('Tokenization completed!')

        return tokenized_inp

    def inference(self, inputs):
        outputs = self.model(**inputs.to(self.device))
        probs = torch.nn.functional.softmax(outputs.logits, dim=-1)
        preds = torch.argmax(probs, axis=1)
        preds = preds.tolist()
        logger.info('Predictions generated!')

        return preds

    def postprocess(self, outputs: list):
        preds = [self.mapping[str(label)] for label in outputs]
        logger.info(f'Predicted Labels: {preds}')

        return [preds]
중간에 'index_to_name.json' 파일을 로드하는데 크게 중요한 건 아니고,
inference 즉 prediction 값이 0, 1, 2 형태라서 좀더 읽기 쉬운 label 형태로 1:1 변환하는 역할을 합니다.
{
    "0": "Negative",
    "1": "Neutral",
    "2": "Positive"
}
3. Create MAR file
torchserve 는 앞서 다운로드한 모델 파일, 작성한 핸들러, 기타 모델 구동에 필요한 파일들을 하나로 말아서(?) MAR 라는 자체 파일 포맷으로 만들어서 배포합니다.
MAR 파일은 torch-model-archiver 를 이용해 만들 수 있습니다.
torch-model-archiver  -f \
        --model-name twitter-roberta-base-sentiment-latest  \
        --version 1.0  \
        --model-file my_model/pytorch_model.bin  \
        --handler handler.py  \
        --extra-files "my_model/config.json,my_tokenizer/tokenizer.json,my_tokenizer/merges.txt,my_tokenizer/special_tokens_map.json,my_tokenizer/tokenizer_config.json,my_tokenizer/vocab.json,index_to_name.json" \
        --export-path ./model-store
이 스크립트를 실행하면 model-store 라는 디렉토리가 생기고
twitter-roberta-base-sentiment-latest.mar 파일이 저장됩니다.
(만약 다른 경로에 mar 파일이 저장된다면 model-store 디렉토리로 옮겨 주세요.)
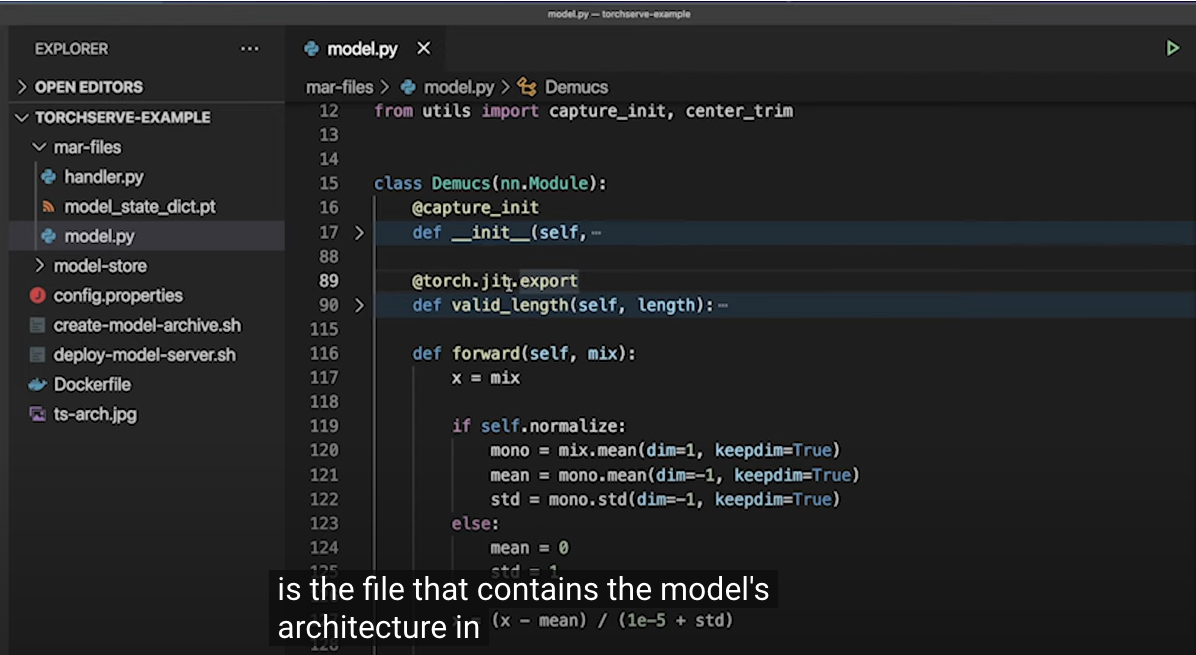
모델과 핸들러 등을 MAR 파일로 변환할 때 Eager mode 와 Script mode 2가지가 있는데,
script mode 를 이용하면 모델 파일을 torch.jit.trace 를 이용해 jit 컴파일하여 torchscript 로 변환합니다. (공식문서에서 권장)
(다만 이 경우 model.py 파일이 필요하거나 전처리가 좀 필요해서... 저는 그냥 Eager mode 사용했습니다.)
Reference
https://happy-jihye.github.io/dl/torch-2/
https://cosmoquester.github.io/torch-serve/
4. Serve!
이제 MAR 파일을 torchserve 에 태워서 모델을 배포합니다.
torchserve --start \
		--model-store /[local path or docker path]/model-store \
        --models all --ncs
--models all 옵션을 이용하면 model-store 경로의 모든 모델을 서빙하게 되는데,
하나의 모델만 서빙한다면 --models [모델명] 을 적어 주면 됩니다.
5. Result
서빙이 잘 되었는지 헬스체크를 해 볼까요?
curl http://localhost:8000/ping이렇게 돌아오면 정상입니다!
{
  "status": "Healthy"
}
이렇게 서빙된 모델은 마치 REST API 처럼 사용할 수 있습니다.
API_URL = "http://0.0.0.0:8000/predictions/twitter-roberta-base-sentiment-latest"

def query(payload):
	response = requests.post(API_URL, json=payload)
	return response.json()

output = query({
    "inputs" : ["so sleepy", "so dad", "beautiful night"]
})

print(output)
쨘!
['Neutral', 'Neutral', 'Positive']Tip : 5살도 이해하는(!) torchserve 공식 강의 👶🏻
https://www.youtube.com/watch?v=NEdZbkfHQCk
(주요 내용 캡쳐본 첨부)


Reference
Torchserve 공식문서
https://pytorch.org/serve/
distillbert
https://www.scaler.com/topics/torchserve-multiple-models/
yelp 데이터 문장 분류 transformer
https://yangoos57.github.io/blog/mlops/torchserve/Deploying_torchserve_using_transformers/

You need to take part in a contest for one of the greatest sites on the web. I am going to highly recommend this website!
https://infocampus.co.in/ui-development-training-in-bangalore.html
https://infocampus.co.in/web-development-training-in-bangalore.html
https://infocampus.co.in/mern-stack-training-in-bangalore.html
https://infocampus.co.in/reactjs-training-in-marathahalli-bangalore.html
https://infocampus.co.in/javascript-jquery-training-in-bangalore.html
https://infocampus.co.in/data-structure-algorithms-training-in-bangalore.html
https://infocampus.co.in/angularjs-training-in-bangalore.html
https://infocampus.co.in/
https://infocampus.co.in/web-designing-training-in-bangalore.html
https://infocampus.co.in/front-end-development-course-in-bangalore.html