1. contentView 오류
🔍 문제
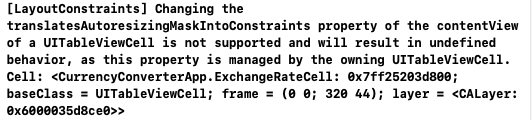
→ UITableViewCell의 contentView의 translatesAutoresizingMaskIntoConstraints를 직접 변경하면 예기치 않은 레이아웃 동작(undefined behavior)이 발생할 수 있다는 의미
UITableViewCell내부의contentView는 UIKit이 자동으로 레이아웃을 관리하는데, 아래처럼 코드에서 변경하려 했기 때문에 오류 발생
contentView.snp.makeConstraints {
  $0.edges.equalToSuperview()
  $0.height.equalTo(60)
}
💡 해결
contentView의translatesAutoresizingMaskIntoConstraints는 변경하지 말 것❗️ 해당 부분 코드 삭제- 셀 높이는 테이블뷰에서 설정
let currencyTableView: UITableView = {
  let tableView = UITableView()
  tableView.rowHeight = 60
  tableView.register(ExchangeRateCell.self, forCellReuseIdentifier: ExchangeRateCell.id)
  return tableView
}()
2. Cell Seperator 조절
| 수정 전 | 수정 후 |
|---|---|
🔍 문제
- 셀 분리선의 오른쪽 부분이 삐져 나옴
- 셀의 기본
separatorInset은 아래처럼 설정되어 있어서 삐져 나온 것
UITableViewCell().separatorInset == UIEdgeInsets(top: 0, left: 15, bottom: 0, right: 0)💡 해결
tableView의seperator를 조절하는 modifier를 사용
override func layoutSubviews() {
  super.layoutSubviews()
  separatorInset = UIEdgeInsets(top: 0, left: 16, bottom: 0, right: 16)
}
3. 버튼 컴파일 오류
🔍 문제
private let convertButton: UIButton = {
        let button = UIButton()
        button.setTitle("환율 계산", for: .normal)
        button.backgroundColor = .systemBlue
        button.setTitleColor(.white, for: .normal)
        button.titleLabel?.font = .systemFont(ofSize: 16, weight: .medium)
        button.layer.cornerRadius = 8
        button.addTarget(self, action: #selector(handleConvertButtonTap), for: .touchUpInside)
        return button
}()addTarget부분에서 컴파일 오류 발생let,var: 인스턴스가 초기화되는 시점에 클로저를 즉시 실행- 하지만 그때는 아직
self가 초기화되지 않았기 때문에 클로저 안에서self를 참조하는 게 불가능
💡 해결
private lazy var convertButton: UIButton = {
        let button = UIButton()
        button.setTitle("환율 계산", for: .normal)
        button.backgroundColor = .systemBlue
        button.setTitleColor(.white, for: .normal)
        button.titleLabel?.font = .systemFont(ofSize: 16, weight: .medium)
        button.layer.cornerRadius = 8
        button.addTarget(self, action: #selector(handleConvertButtonTap), for: .touchUpInside)
        return button
    }()
lazy var는 인스턴스가 완전히 초기화되고 첫 접근 시점에 클로저 실행- 그때는 이미
self가 완전히 초기화되어 있어self사용이 가능
4. 뒤로가기 버튼 없음
🔍 문제
class SceneDelegate: UIResponder, UIWindowSceneDelegate {

    var window: UIWindow?

    func scene(
        _ scene: UIScene,
        willConnectTo session: UISceneSession,
        options connectionOptions: UIScene.ConnectionOptions
    ) {
        guard let windowScene = scene as? UIWindowScene else { return }
        window = UIWindow(windowScene: windowScene)

        let lastScreen = CoreDataManager.shared.loadLastVisitedScreen()
        let rootViewController: UIViewController

        if lastScreen?.screenType == "calculator",
           let currencyCode = lastScreen?.currencyCode {

            let calculatorVC = CalculatorViewController()
            calculatorVC.selectedData = getSavedRate(currencyCode: currencyCode)
            rootViewController = UINavigationController(rootViewController: calculatorVC)
        } else {
            let listVC = ExchangeRateViewController()
            rootViewController = UINavigationController(rootViewController: listVC)
        }

        window?.rootViewController = rootViewController
        window?.makeKeyAndVisible()
    }
}- navigation stack 없이 root로 설정함
- 계산기 화면(
CalculatorViewController)을 앱 시작 시RootViewController로 설정하면, 이전 화면이 내비게이션 스택에 없기 때문에 뒤로가기 버튼이 생기지 않음
💡 해결
  func scene(_ scene: UIScene, willConnectTo session: UISceneSession, options connectionOptions: UIScene.ConnectionOptions) {

    guard let windowScene = (scene as? UIWindowScene) else { return }
    let window = UIWindow(windowScene: windowScene)


    let lastScreen = CoreDataManager.shared.loadLastVisitedScreen()
    let exchangeRateViewController = ExchangeRateViewController()
    let navigationController = UINavigationController(rootViewController: exchangeRateViewController)

    if lastScreen.screenType == "calculator" {
      let viewModel = CalculatorViewModel(rateData: getSavedRate(currencyCode: lastScreen.currencyCode))
      let calculatorViewController = CalculatorViewController(viewModel: viewModel)

      navigationController.pushViewController(calculatorViewController, animated: true)
    }

    window.rootViewController = navigationController
    window.makeKeyAndVisible()
    self.window = window
}UINavigationController에서push로 설정하여 해결NavigationController에 리스트 화면 → 계산기 화면 순서로Push
