
- 롤로 구성하였다.
- 각 롤을 만들어 파일과 템플릿들을 넣어줬다.
- 각 템플릿의 설정 IP, 경로는 잘 확인해서 설정해줘야 한다.
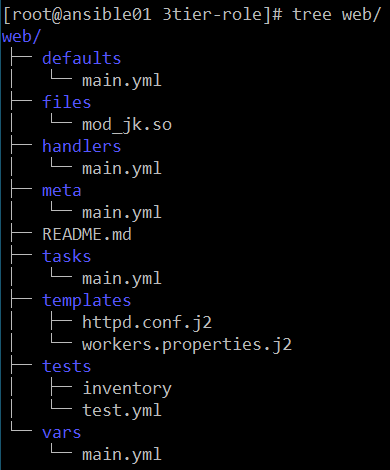
web 구성
- name: Stop SELinux
  command: setenforce 0
  become: yes

- name: Install the latest version of Apache
  yum:
    name: httpd
    state: latest

- name: Copy tomcat-connector module file
  copy:
    src: mod_jk.so
    dest: /usr/lib64/httpd/modules/mod_jk.so
    remote_src: no
  become: yes

- name: Set permission module file
  file:
    path: /usr/lib64/httpd/modules/mod_jk.so
    mode: 0755
  become: yes

- name: Copy httpd.conf file
  template:
    src: httpd.conf.j2
    dest: /etc/httpd/conf/httpd.conf
    remote_src: no
  become: yes

- name: Copy workers.properties file
  template:
    src: workers.properties.j2
    dest: /etc/httpd/conf/workers.properties
    remote_src: no
  become: yes

- name: Start Apache Web Server
  systemd:
    name: httpd
    state: restarted
  become: yes

- name: Stop Firewalld
  systemd:
    name: firewalld
    state: stopped
become: yes- files, templates 에 파일들을 옮겨놨기 때문에 모듈 작성시 절대경로를 작성하지 않고 파일이름만 적어도 실행할 수 있다.
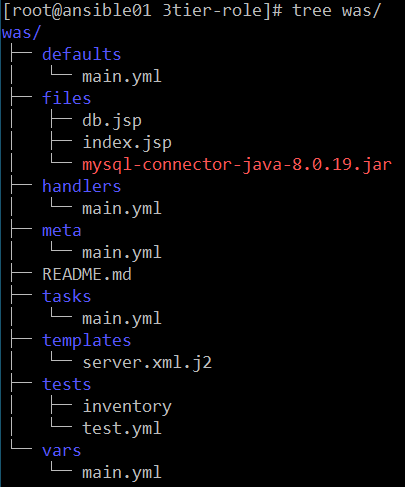
was 구성
- name: Stop SELinux
  command: setenforce 0
  become: yes

- name: Stop Firewalld
  systemd:
    name: firewalld
    state: stopped
  become: yes

- name: Install openjdk 1.8
  yum:
    name: java-1.8.0-openjdk-devel.x86_64
    state: latest

- name: Download apache-tomcat-9.0.73.tar.gz
  get_url:
    url: https://dlcdn.apache.org/tomcat/tomcat-9/v9.0.73/bin/apache-tomcat-9.0.73.tar.gz
    dest: /tmp/apache-tomcat-9.0.73.tar.gz
  become: yes

- name: Unarchive Tomcat9
  unarchive:
    src: "/tmp/apache-tomcat-9.0.73.tar.gz"
    dest: "/usr/local"
    remote_src: yes
  become: yes

- name: Move apache-tomcat-9.0.73 to tomcat9
  command: mv /usr/local/apache-tomcat-9.0.73 /usr/local/tomcat9

- name: Copy Files
  template:
    src: server.xml.j2
    dest: /usr/local/tomcat9/conf/server.xml
    remote_src: no
  become: yes

- name: Create a home directory if it does not exist
  file:
    path: /usr/local/tomcat9/webapps/ljh
    state: directory
    mode: '0755'

- name: Copy mysql connector file
  copy:
    src: mysql-connector-java-8.0.19.jar
    dest: /usr/local/tomcat9/lib/mysql-connector-java-8.0.19.jar
    remote_src: no

- name: Copy index.jsp file
  copy:
    src: "{{ item }}"
    dest: /usr/local/tomcat9/webapps/ljh/{{ item }}
    remote_src: no
  with_items:
    - index.jsp
    - db.jsp
  become: yes

- name: "Start Tomcat"
  shell: |
    /usr/local/tomcat9/bin/shutdown.sh
    sleep 5
    nohup /usr/local/tomcat9/bin/startup.sh &
become: yes- db.jsp IP 확인도 해주고
- sever.xml.j2 의 경로 설정확인해줘야 한다. 그래야 아파치 IP/폴더/db.jsp를 안하고 바로 아파치 IP/db.jsp 를 설정할 수 있다.
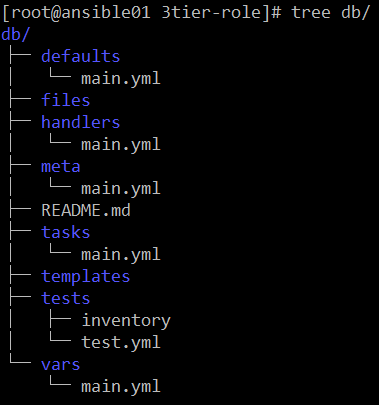
db 구성
- name: Install MySQL
  yum:
    name: "{{ item }}"
    state: latest
  with_items:
    [ 'mysql-server', 'python3', 'python3-pip' ]

- name: "Install pymysql"
  pip:
    name: pymysql

- name: Start MYSQL
  systemd:
    name: mysqld
    state: restarted
  become: yes

- name: Create user with name
  mysql_user:
    login_user: root
    login_password: ''
    name: ljh
    password: qwer1234
    host: '%'
    priv: '*.*:ALL'
    state: present

- name: Create a new database with name 'ljh_db'
  mysql_db:
    login_user: ljh
    login_password: 'qwer1234'
    name: ljh_db
    state: present

- name: Create Table student
  shell: |
    echo "CREATE TABLE ljh_db.student (sname VARCHAR(10), sage INT)" | mysql -u ljh -pqwer1234
  become: yes

- name: Insert Data
  shell: |
    echo "INSERT INTO ljh_db.student VALUES('kim',10)" | mysql -u ljh -pqwer1234
    echo "INSERT INTO ljh_db.student VALUES('lee',20)" | mysql -u ljh -pqwer1234
    echo "INSERT INTO ljh_db.student VALUES('park',30)" | mysql -u ljh -pqwer1234
    echo "INSERT INTO ljh_db.student VALUES('sim',40)" | mysql -u ljh -pqwer1234
  become: yes

- name: Stop Firewalld
  systemd:
    name: firewalld
    state: stopped
  become: yes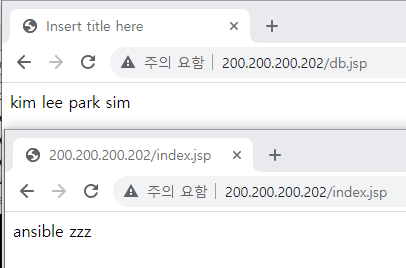

싱숭생숭늉