
node.js
- 브라우저 외부에서도 JavaScript를 사용할 수 있는 런타임 환경
HTTP 모듈
- HTTP 모듈을 사용하여 HTTP 서버를 쉽게 생성
- http.createServer()를 이용하여 요청(request)을 받고 응답(response)을 보낼 수 있음
HTTP 모듈을 이용한 서버 만들기
🖥 서버 설정하기
server.js파일 생헝 후 아래 코드 작성
const http = require("http"); // Node.js 내장 모듈 불러오기
const server = http.createServer((req, res) => {
res.setHeader("Content-Type", "text/plain; charset=utf-8"); // 한글 지원 설정
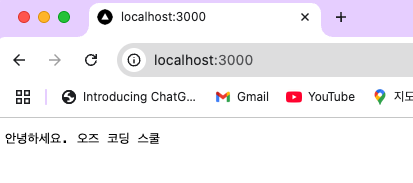
res.end("안녕하세요, 오즈 코딩 스쿨!"); // 응답 전송
});
server.listen(3000, () => {
console.log("서버가 열렸어요! 포트: 3000");
});- 터미널에서 서버 실행
node server.js- 실행 후 브라우저에서 http://localhost:3000/ 접속하면 서버의 응답을 확인할 수 있음
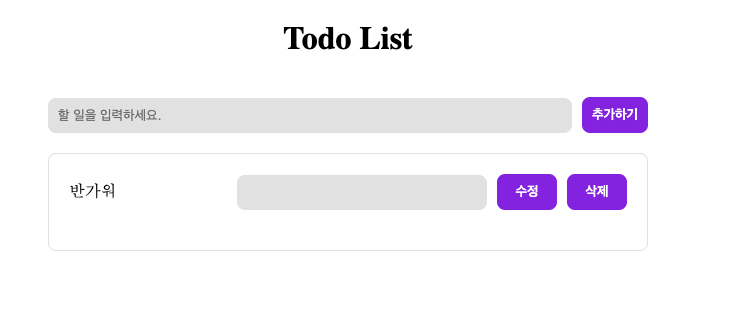
Todo List 프론트엔드와 서버 구현하기
서버에서 Todo 데이터를 CRUD (Create, Read, Update, Delete) 할 수 있도록 기능을 구현
서버 환경 설정
todo 정보를 관리할 수 있는 배열 생성
let todo = [
  { id: 1, content: "더미 데이터" },
  { id: 2, content: "더미 데이터 2" },
];
CORS 헤더 추가
- 클라이언트와 서버가 다른 포트에서 실행될 경우, CORS(Cross-Origin Resource Sharing) 설정이 필요
res.setHeader("Access-Control-Allow-Origin", "http://127.0.0.1:5500"); // 클라이언트 허용
res.setHeader("Access-Control-Allow-Methods", "OPTIONS, GET, POST, PUT, DELETE"); // 허용할 메소드 지정
Preflight 요청
- POST, PUT, DELETE 같은 요청을 보내기 전에 브라우저가 안전한지 확인하는 사전 요청(OPTIONS)을 보냄
- 이 요청을 정상적으로 처리해야 클라이언트가 데이터를 보낼 수 있음
if (req.method === "OPTIONS") {
    return res.end("요청 보내세요.");
}
Todo List 기능 구현하기 (CRUD)
Read 기능 구현
server.js에서 'GET' 요청 설정 (데이터 조회)
if (req.method === "GET") {
    return res.end(JSON.stringify(todo)); // JSON 형태로 데이터 반환
}todo.js에서readTodo와renderDisplay를 구현- readTodo
const readTodo = async () => {
  const res = await fetch("http://localhost:3000/");
  const data = await res.json();
  return data;
};- renderDisplay
const readTodo = async () => {
  const res = await fetch("http://localhost:3000/");
  const data = await res.json();
  return data;
};
Create 기능 구현
-
데이터 가져오기 → POST 요청
1️⃣
req.on('data', callback)- 데이터를 조각(chunk) 단위로 받을 때 실행
- 여러 번 실행될 수 있음 →
data += chunk.toString();사용
2️⃣
req.on('end', callback)- 모든 데이터를 다 받았을 때 실행
- 이때 데이터를 JSON으로 변환하면 실제 데이터를 활용할 수 있음
    // POST 요청 처리
    if (req.method === 'POST') {
        let data
        // chunk : 데이터가 조각 단위
        // chunk는 버퍼(Buffer) 형태이므로, .toString()을 사용해 문자열로 변환
        req.on('data', (chunk) => {
            data = chunk.toString()
        })
        // 모든 데이터 조각(chunk)이 도착하면 "end" 이벤트가 발생
        req.on('end', () => {
            const newTodo = {id : Number(new Date()), content : data}
            todo.push(newTodo)
        })
        return res.end('Todo가 추가되었습니다.')
}todo.js에서createTodo및createButton클릭 이벤트 구현createTodo- body : HTTP 요청의 본문(body)
- 클라이언트가 서버로 데이터를 보낼 때 사용
POST,PUT,PATCH등의 요청에서 사용되며, 서버에 새로운 데이터를 추가하거나 수정할 때 필요- 사용자가 입력한 문자열을 서버로 전송(body에 담아 전송)
const createTodo = () => {
    const newTodo = todoInput.value
    //서버에 POST로 데이터 전달
    fetch("http://localhost:3000/", {
        method: "POST",
        body:newTodo
    })
    .then(res => res.text())
    .then(res => console.log(res))
};

createButton.addEventListener("click", createTodo);createClick이벤트 코드-
click이벤트에서then체인 사용 -
createTodo()가 실행되면 서버에 POST 요청을 보냄 -
.then(() => readTodo())→createTodo()완료 후readTodo()실행 -
.then((res) => {...})→readTodo()완료 후 화면을 업데이트1️⃣
createTodo()가 끝나야readTodo()를 실행2️⃣
readTodo()가 끝나야 화면을 업데이트3️⃣ 이 모든 과정이 비동기적으로 순서대로 실행됨
-
createButton.addEventListener("click", () => {
  createTodo() // 서버 업데이트된 후에
    .then(() => readTodo()) // 서버에서 todo 목록 가져오기
    .then((res) => {
      removeDisplay(); // 기존 화면 지우기
      renderDisplay(res); // 새로운 목록 화면에 표시
    });
});
Update 기능 구현
server.js에서 PUT 요청 처리
  // PUT 요청 처리
  if (req.method === "PUT") {
    let data;
    req.on("data", (chunk) => {
      data = chunk.toString();
    });
    req.on("end", () => {
      const newTodo = JSON.parse(data)
      todo = todo.map((el) => {
        if (el.id === newTodo.id) {
            return newTodo
        } else {
            return el
        }
      })
    });
    return res.end("Todo가 수정되었습니다.");
}todo.js에서 개별 todo에 대한 내용 수정 및 삭제를 위한 요소 생성
const renderDisplay = (data) => {
  for (let el of data) {
    const list = document.createElement("li");
    const todoContent = document.createElement('span');
    todoContent.textContent = el.content;

    // 업데이트를 위한 input과 삭제 버튼 생성 (개별 리스트마다 필요함)
    const updateInput = document.createElement('input')
    const updateButton = document.createElement('button')
    updateButton.textContent = '수정'
    const deleteButton = document.createElement('button')
    deleteButton.textContent = '삭제'

    list.append(todoContent, updateInput, updateButton, deleteButton)
    todoList.append(list);
  }
};- 수정된 내용의 새로운 todo를 생성
const updateTodo = (newTodo) => {
    const newTodo = todoInput.value;

    return fetch("http://localhost:3000/", {
      method: "PUT",    // 수정을 위해 PUT 메소드 사용
      body: newTodo,
    })
      .then((res) => res.text()) // 서버 응답을 text로 변환
      .then((res) => console.log(res)); // 변환된 응답을 콘솔에 출력
};- renderDisplay에서 생성한 수정 버튼을 클릭하면 업데이트 이벤트가 발생하도록 해야 함
    const updateInput = document.createElement('input')
    const updateButton = document.createElement('button')

    updateButton.textContent = '수정'
    updateButton.onclick=() => {
        updateTodo({
            id : el.id,
            content : updateInput.value
        })
}- renderDisplay함수에서 updateButton 클릭 시 이벤트 수정
    // 업데이트를 위한 input과 삭제 버튼 생성 (개별 리스트마다 필요함)
    const updateInput = document.createElement('input')
    const updateButton = document.createElement('button')

    updateButton.textContent = '수정'
    updateButton.onclick=() => {
        updateTodo({
            id : el.id,
            content : updateInput.value
        })
        .then(() => readTodo())
        .then((res) => {
            removeDisplay()
            renderDisplay(res)
        })
    }
DELETE 기능 구현
server.js에서 DELETE 요청 처리
  // DELETE 요청 처리
  if (req.method === "DELETE") {
    let data;
    req.on("data", (chunk) => {
      data = chunk.toString();
    });
    req.on("end", () => {
      const id = Number(data); // 문자열로 들어오는 id 데이터를 숫자로
      todo = todo.filter((el) => el.id !== id);
    });
    return res.end("Todo가 삭제되었습니다.");
}todo.js에서 deleteTodo 메소드 생성 및 deleteButton 클릭 이벤트 관리
// 받아온 ID와 비교해서 삭제 실행
const deleteTodo = (id) => {
  return fetch("http://localhost:3000/", {
    method: "DELETE", // 삭제를 위해 DELETE 메소드 사용
    body: id,
  })
    .then((res) => res.text()) // 서버 응답을 text로 변환
    .then((res) => console.log(res)); // 변환된 응답을 콘솔에 출력
};- deleteButton 이벤트에 해당 함수 실행할 수 있도록 설정
    const deleteButton = document.createElement("button");
    deleteButton.textContent = "삭제";
    deleteButton.onclick = () => {
        deleteTodo(el.id)
}- deleteButton에서 이벤트 처리
    const deleteButton = document.createElement("button");
    deleteButton.textContent = "삭제";
    deleteButton.onclick = () => {
      deleteTodo(el.id)
        .then(() => readTodo())
        .then((res) => {
          removeDisplay();
          renderDisplay(res);
        });
    };
✅ 핵심 정리
1️⃣ Node.js의 HTTP 모듈을 사용하여 서버를 구축할 수 있다.
2️⃣ 서버는 클라이언트의 요청을 받고, 응답을 반환하는 방식으로 통신한다.
3️⃣ 클라이언트와 서버의 출처(Origin)가 다를 경우, CORS 설정을 통해 요청을 허용해야 한다.
4️⃣ 서버는 요청(Method: GET, POST, PUT, DELETE 등)에 따라 적절한 처리를 해야 하며, 이를 위해 조건문을 활용하여 분기 처리할 수 있다.
5️⃣ 특정 포트(port)를 통해 요청을 수락하고, 해당 포트에서 서버가 실행될 수 있다.

hello world!