인텔리제이에 servlet 매핑, tomcat 연동
Servlet 작성, 설정
-
pom.xml (maven)
<!-- servlet 관련 library 포함 --> <dependency> <groupId>org.springframework.boot</groupId> <artifactId>spring-boot-starter-web</artifactId> </dependency> -
MyServlet.class (extends HttpServlet) 작성
-
src/main/webapp/WEB-INF/web.xml 작성
배포 설명자: web.xml에서 web.xml 복사 붙여넣기
<servlet-name>는 서블릿 이름을 임의로 정한다.
<servlet-class>에 내가 만든 서블릿인MyServlet디렉토리를 넣는다.
Tomcat(WAS) 설치
-
Apache Tomcat에서 원하는 버전을 다운받은 후 압축을 풀고 원하는 폴더에 위치시킨다.
- 나는 8 버전을 다운받았다.
-
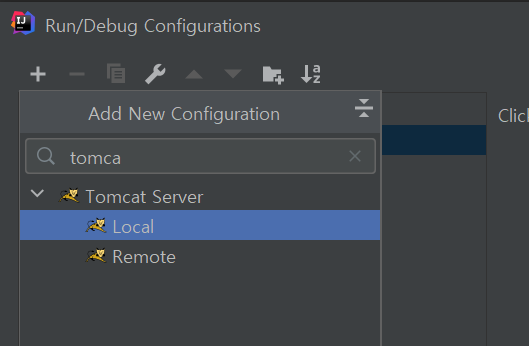
인텔리제이 Run/Edit Configurations/Run/Debug Configurations 에서 (+)(Add new Configuration) - tomcat server - local 추가
-
Server - Application server - Configure 선택 후
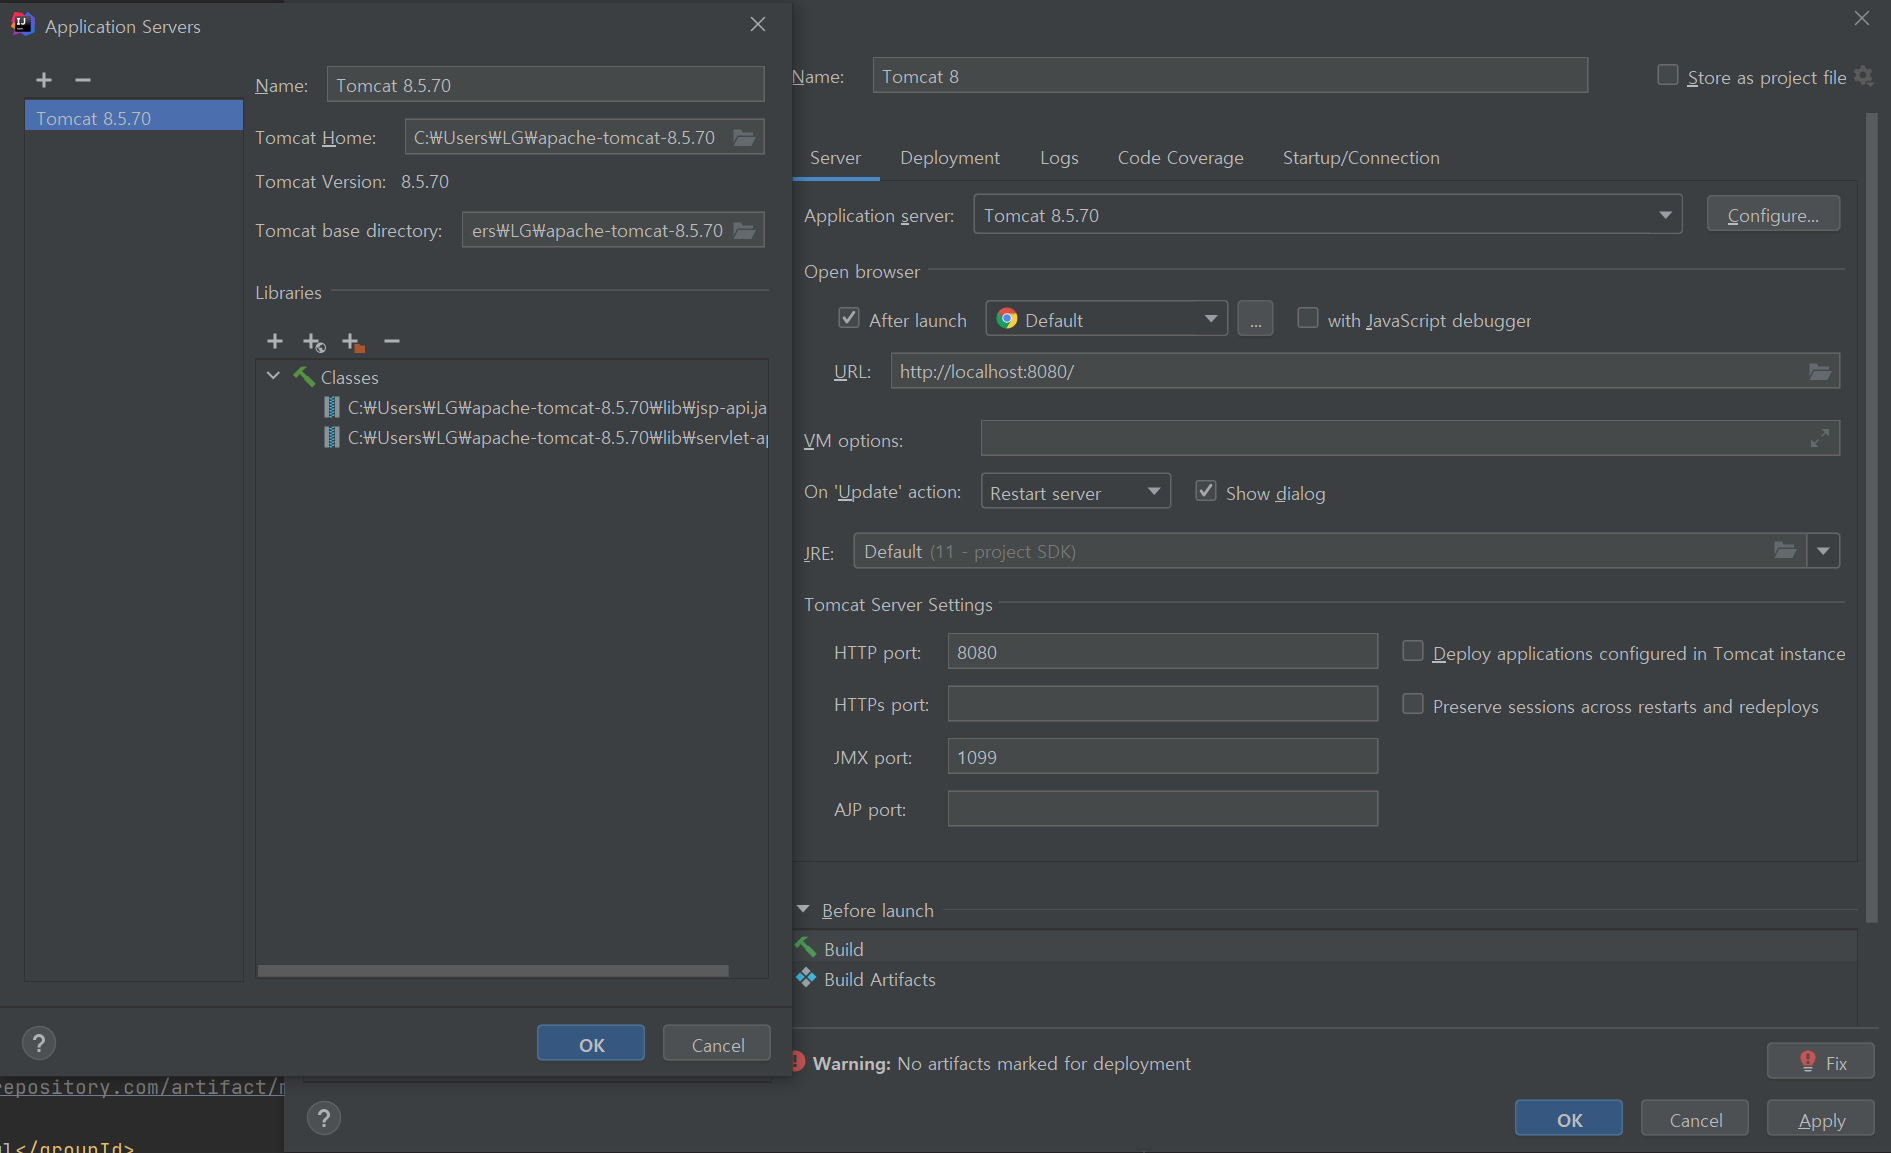
Tomcat Home과 Tomcat base directory에 1.에서 정한 폴더 위치를 지정해준다. -
상단의 Deployment 창에 들어갔을 때 nothing to deploy가 뜬다.
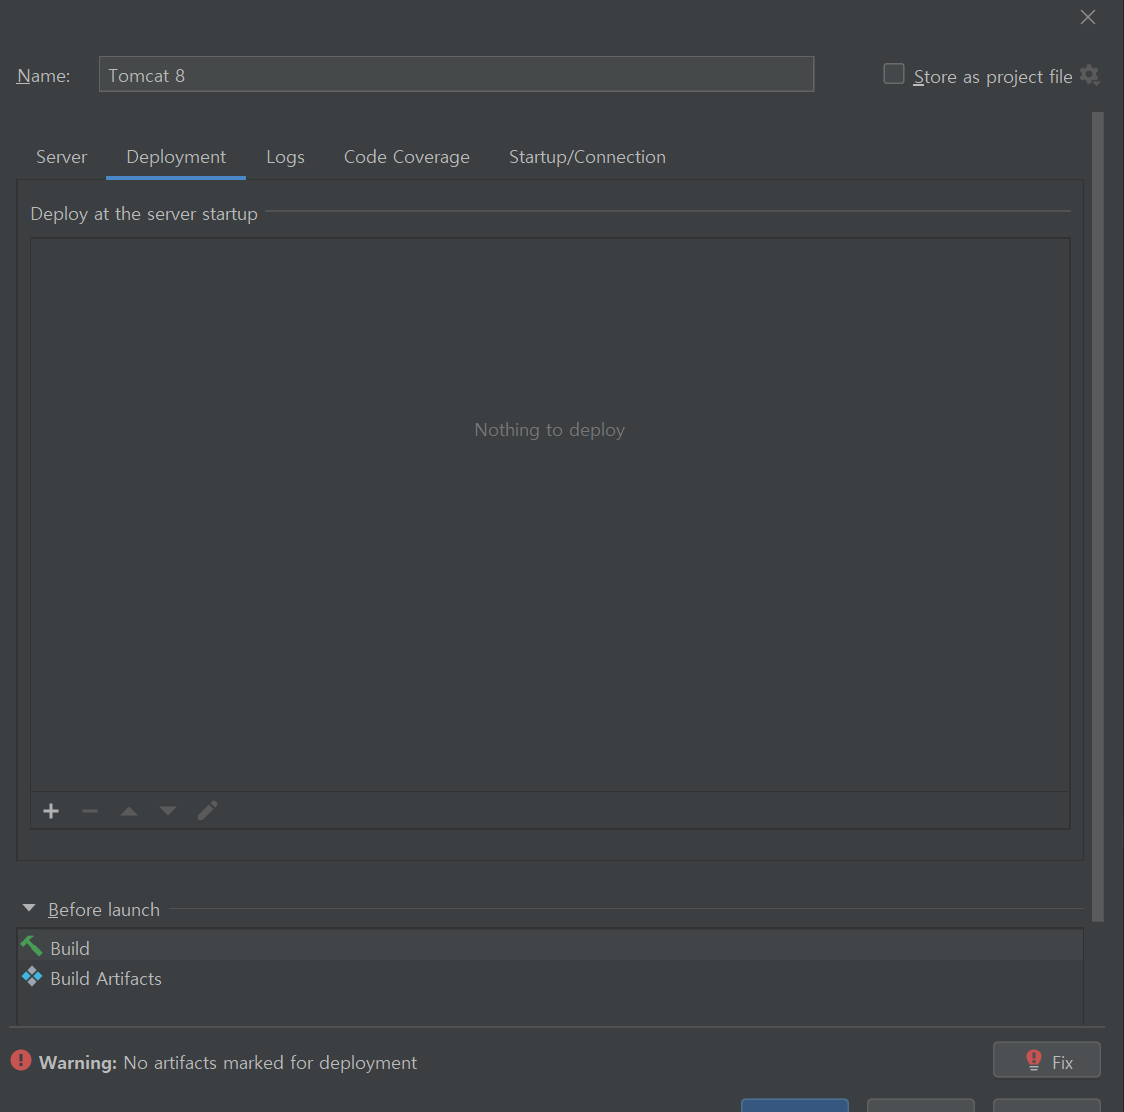
이때 아래의 Fix 버튼을 누르면 -
Project Structure(ctrl+shift+alt+s) - Project Settings - Artifacts 창이 뜨는데 아무것도 없다.
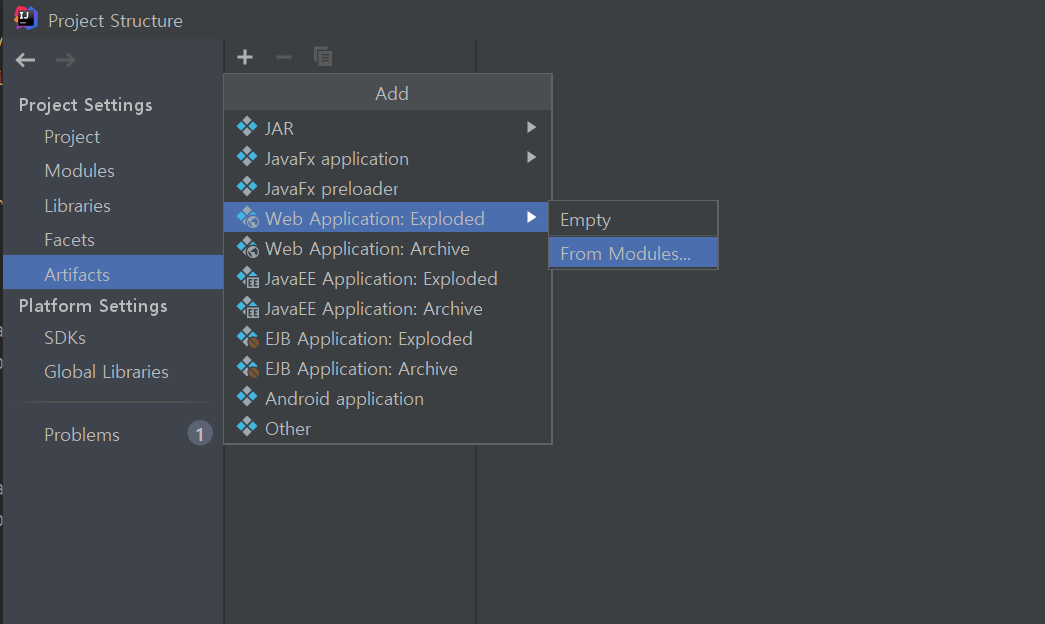
여기서 (+)(Add) - Web Application: Exploded - From Modules 를 누르고, 내 프로젝트 모듈을 선택한다.
아래와 같이 Artifacts, Facets 창에 무언가가 추가된다.
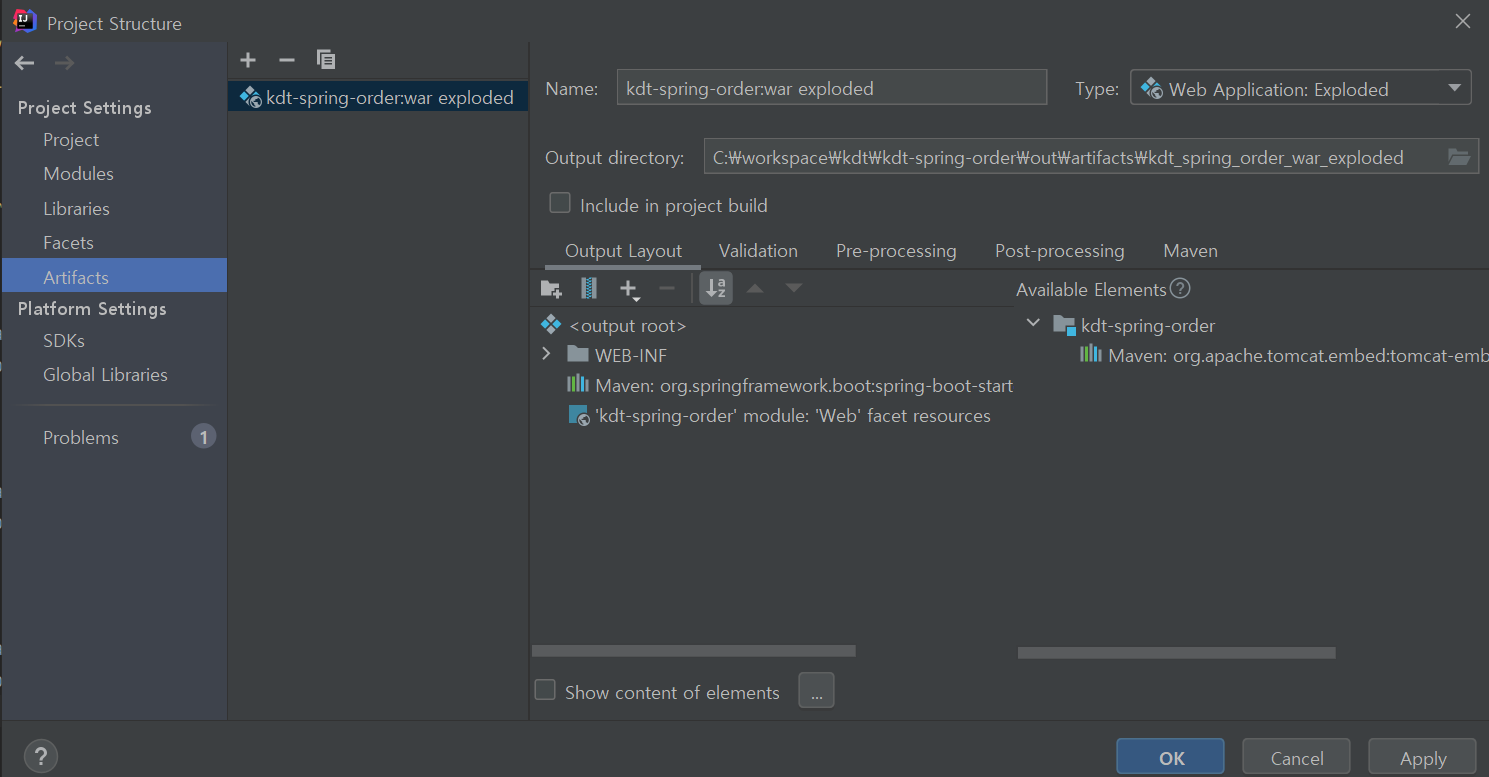
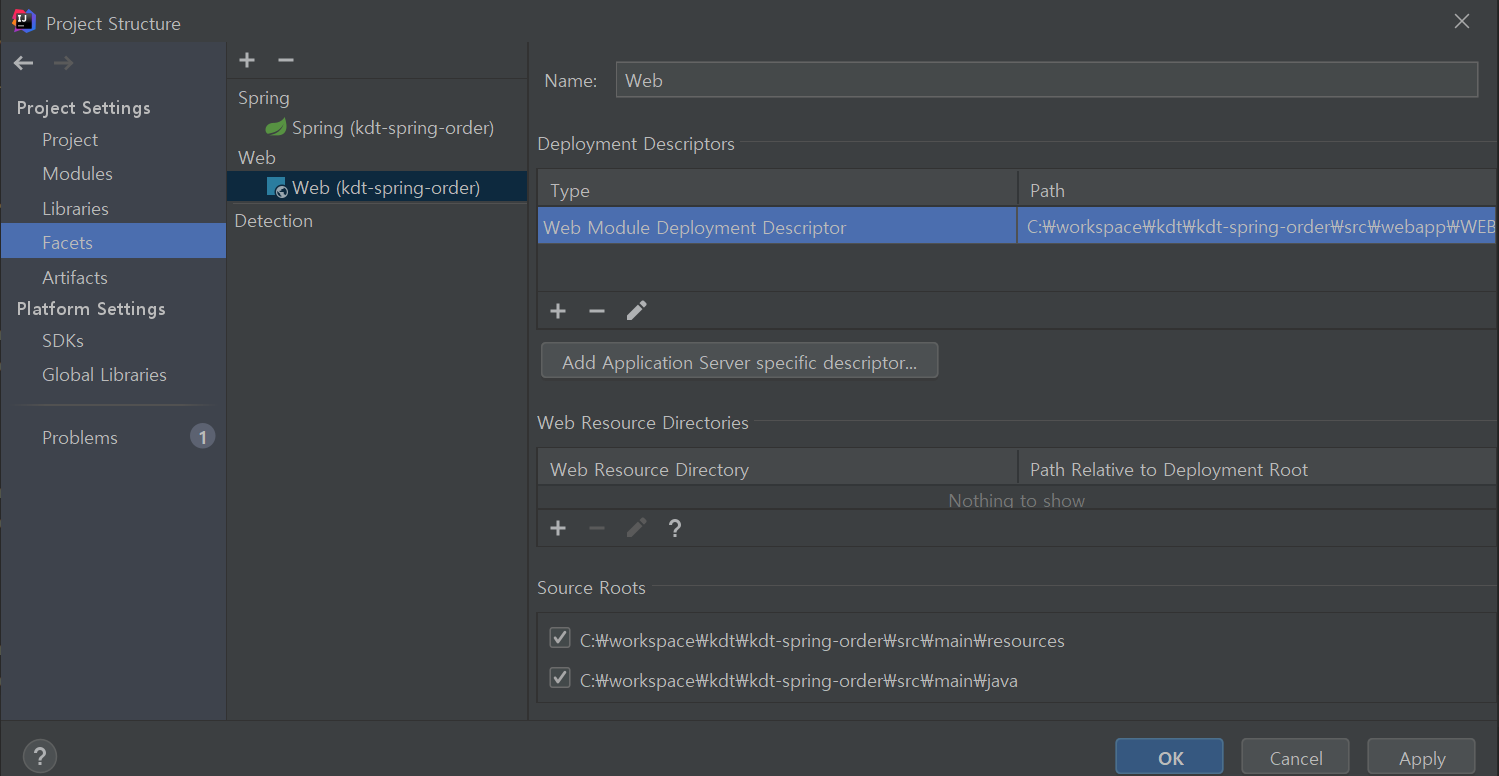
- 다시 Run/Debug Configurations으로 돌아가 Server - Open browser - URL 이 방금 Project Structure에서 추가한 모듈의 war로 설정된 것을 볼 수 있다.
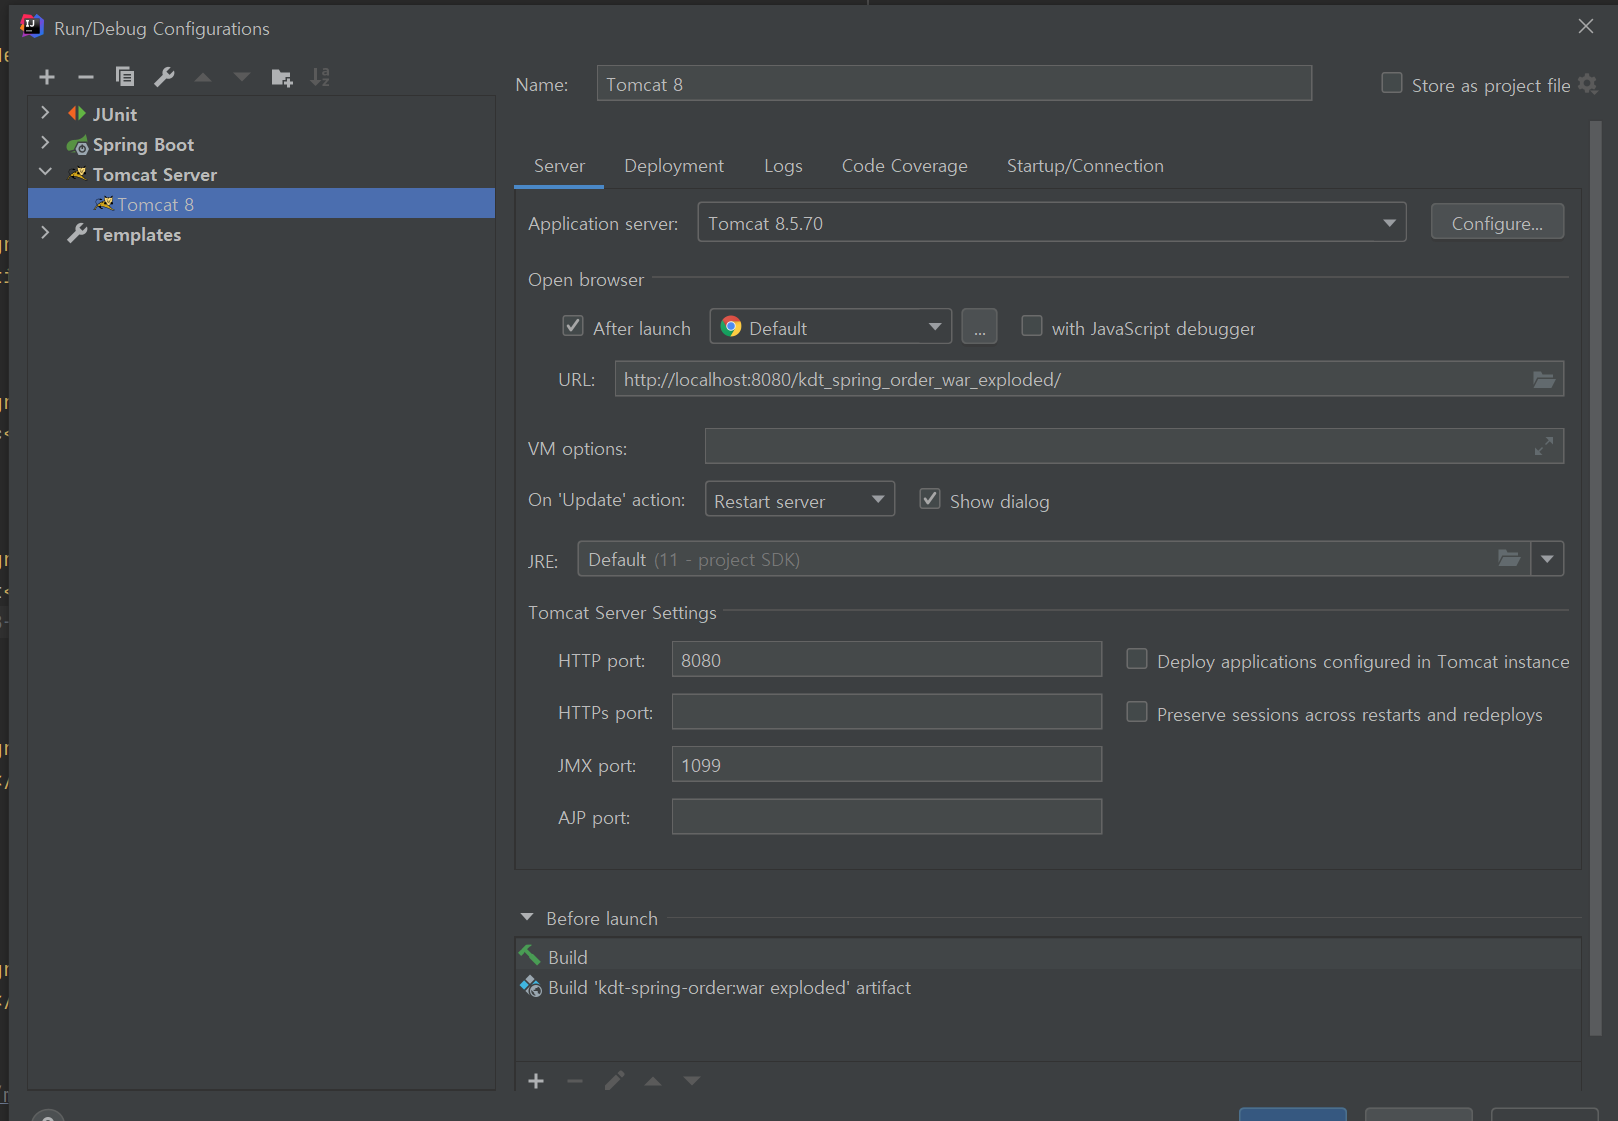
실행
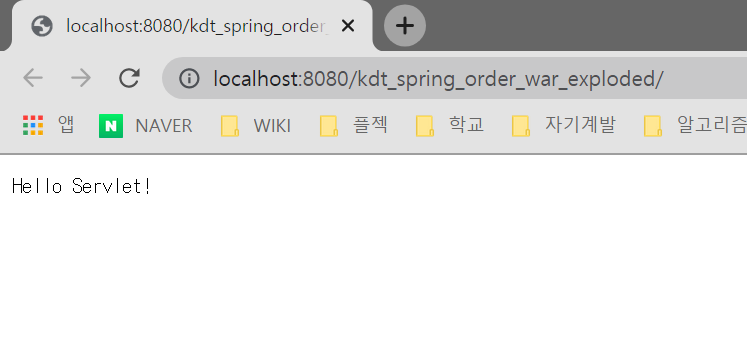
Tomcat을 실행(Run)하면 최상위 모듈 바로 아래 out 폴더가 생기고, 빌드된 것이 그 아래에 생기고 배포된다.

실행하면 작성한 웹 어플리케이션이 저절로 구동된다.
추가
[IntelliJ] IntelliJ + Tomcat 연동 방법 (Intellij 톰캣 설정)에서 더 자세한 설명을 볼 수 있다.
