주제 : styled-components + keyframes 눈알이 왔다갔다 애니메이션 만들기 프로젝트
styled-component 를 활용한 리액트 스타일링
styled-component 란?
리액트 컴포넌트 스타일을 자바스크립트 코드 내부에서 선언적으로 작성할 수 있게 해주는 라이브러리입니다. 이를 통해 컴포넌트와 스타일을 함께 정의하여 유지보수와 가독성을 향상시킬 수 있습니다.
- 설치 및 기본 사용법
npm install styled-components //프로젝트 디렉토리에서 패키지 설치import styled from 'styled-components'; //컴포넌트 파일에서 import 사용- 스타일 작성과 컴포넌트 연결
const Eyes = styled.div`
  display: flex;
  justify-content: center;
`;

.
.
.

function App() {
  return (
    <Eyes>
      <Eye>
        <Ball />
      </Eye>
      <Eye>
        <Ball />
      </Eye>
    </Eyes>
  );
}
"styled-components"의 주요 기능 중 하나는 컴포넌트와 스타일을 동시에 정의할 수 있다는 점입니다. 위의 예시에서 styled.div Eyes 컴포넌트의 스타일을 정의하고, 이를 Eyes 컴포넌트에 연결합니다.
- 장점
1) 컴파일 시간에 CSS 스타일을 생성하며, 이를 컴포넌트에 적용합니다. 스타일이 각
컴포넌트마다 고유한 클래스명으로 생성되므로 스타일 간의 충돌 우려가 줄어듭니다.
2) 기존 스타일을 확장하여 더 다양한 스타일을 생성할 수 있습니다. 이를 통해 유사한 컴포넌트에 동일한 스타일을 적용하거나, 테마 변경 시 스타일을 손쉽게 조정할 수 있습니다.
3) Props를 활용하여 스타일을 동적으로 변경할 수 있습니다.
리액트에서 keyframes를 활용한 애니메이션 구현하기
keyframes는 CSS에서 애니메이션을 정의하고 제어하는 방법 중 하나입니다. 추가적인 패키지 설치가 필요하지 않습니다.
- 애니메이션을 정의하는 keyframes 생성
import { keyframes } from 'styled-components';

const moving = keyframes`
  from {
    top: 5%;
    left: 40%;
  }
  to {
    top: 50%;
    left: 60%;
  }
`;- 해당 애니메이션을 스타일에 적용
const Ball = styled.div`
width: 50px;
height: 80px;
background-color: blue;
border-radius: 50%;
position: absolute;
animation: ${moving} 3s 0s linear alternate infinite;
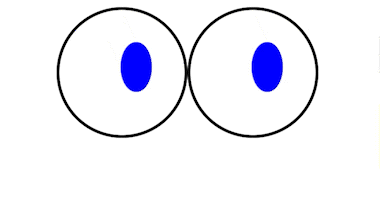
`;샘플 예제: 눈동자 움직이기
import React from "react";
import styled, { keyframes } from "styled-components";

const Eyes = styled.div`
  display: flex;
  justify-content: center;
`;
const Eye = styled.div`
  width: 200px;
  height: 200px;
  border: 5px solid black;
  border-radius: 50%;
  position: relative; // 눈알을 제어하기 위한 자식 눈동자의 위치를 기준시키기 위함.
`;


/*
  -  요소를 초기 위치에서 (위:5%, 왼:40%)에서 시작하여 최종 위치인 (위:50%, 왼:60%)로 이동
  -  애니메이션은 2초 동안 실행되며, 이징 함수를 사용하여 부드럽게 변화
  -애니메이션은 2초 동안 실행되며, 이징 함수를 사용하여 부드럽게 변화
*/
const moving = keyframes`
  from{
    top: 5%;
    left: 40%;
  }
  to{
    top: 50%;
    left: 60%;
  }
`;
const Ball = styled.div`
  width: 50px;
  height: 80px;
  background-color: blue;
  border-radius: 50%;
  position: absolute;
  //애니메이션 적용
  animation: ${moving} 3s 0s linear alternate infinite;
`;

function App() {
  return (

  /* Eyes 컴포넌트에 Eye두개를 배치 후 애니메이션 눈동자 Ball 배치*/
    <Eyes>
      <Eye>
        <Ball />
      </Eye>
      <Eye>
        <Ball />
      </Eye>![]
    </Eyes>
  );
}

export default App;
결과물
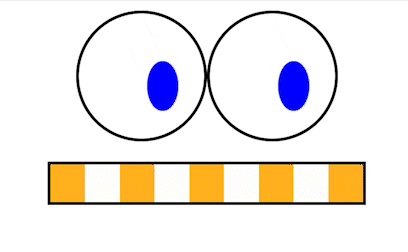
[부록] 이빨 깜빡거리기
//처음 시도한 이빨 styled 컴포넌트

  const Teeth = styled.div`
  display: flex;
  width: 70px;
  height: 60px;
  background-color: orange;
  animation: ${({ ani }) => css`${ani} 2s 0s linear infinite`};
`;
처음에 스타일드 정의된 컴포넌트 애니메이션에 props로 다른 keyframe을 적용할 수 있을까 생각해봐서 여러 시도를 한 끝에 오류가 나서 찾아보니...
실제로 keyframes를 props로 전달하려면 불가능합니다. keyframes는 CSS를 작성하는 동안에 사용되는 런타임 객체로, 컴포넌트 내부에서 값을 넘겨줄 수 없는데요.
keyframes는 정의된 후에 바로 스타일에 적용되는 방식으로 동작합니다. 따라서 Teeth 컴포넌트 내에서 props를 통해 keyframes를 조작하는 것은 지원되지 않습니다.
라고 합니다..네 ..그래서 컴포넌트 각각 따로 만들어주어 애니메이션을 각각 지정해주고 완성하였습니다.
import React from "react";
import styled, { keyframes } from "styled-components";

const Eyes = styled.div`
  display: flex;
  justify-content: center;
  margin-top: 1rem;
`;
const Eye = styled.div`
  width: 200px;
  height: 200px;
  border: 5px solid black;
  border-radius: 50%;
  position: relative; // 눈알을 제어하기 위한 자식 눈동자의 위치를 기준시키기 위함.
`;

const moving = keyframes`
  from{
    top: 5%;
    left: 40%;
  }
  to{
    top: 50%;
    left: 60%;
  }
`;
const Ball = styled.div`
  width: 50px;
  height: 80px;
  background-color: blue;
  border-radius: 50%;
  position: absolute;
  animation: ${moving} 3s 0s linear alternate infinite;
`;

const Face = styled.div`
  display: flex;
  flex-direction: column;
  justify-content: center;
  align-items: center;
`;

const Mouth = styled.div`
  width: 500px;
  height: 60px;
  border: 5px solid black;
  display: flex;
  justify-content: center;
  align-items: center; /* 수직 가운데 정렬 */
  margin-top: 2rem;
`;

const blink = keyframes`
0%, 100%{
    opacity: 1;
}
50%{
    opacity: 0;
}
`;

const reverse_blink = keyframes`
0%, 100%{
    opacity: 0;
}
50%{
    opacity: 1;
}
`;

const Teeth = styled.div`
  display: flex;
  width: 70px;
  height: 60px;
  background-color: orange;
  animation: ${blink} 2s 0s infinite;
`;

const ReverseTeeth = styled.div`
  display: flex;
  width: 70px;
  height: 60px;
  background-color: orange;
  animation: ${reverse_blink} 2s 0s linear infinite;
`;

function App() {
  return (
    <Face>
      <Eyes>
        <Eye>
          <Ball />
        </Eye>
        <Eye>
          <Ball />
        </Eye>
      </Eyes>
      <Mouth>
        <ReverseTeeth />
        <Teeth />
        <ReverseTeeth />
        <Teeth />
        <ReverseTeeth />
        <Teeth />
        <ReverseTeeth />
        <Teeth />
        <ReverseTeeth />
      </Mouth>
    </Face>
  );
}

export default App;
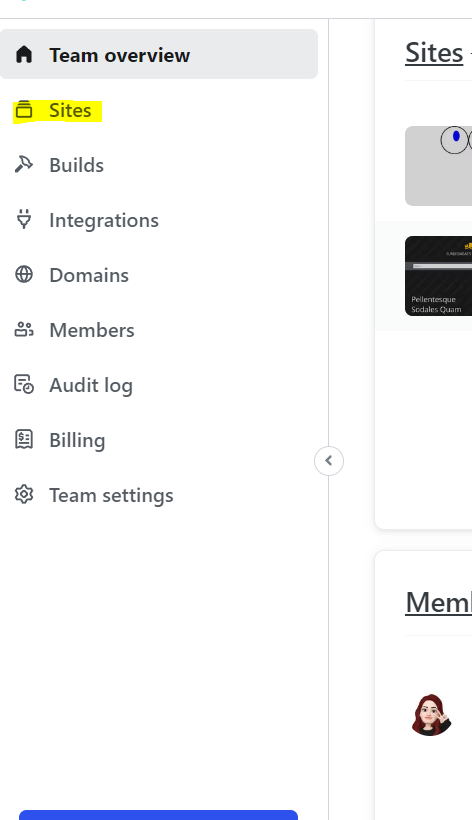
netlify 배포 과정
netlify 사이트 접속 및 로그인

team에 들어가면 sites 메뉴 클릭!
배포할 소스코드 build하기
npm build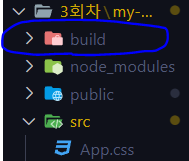
build 파일이 생긴후 이걸 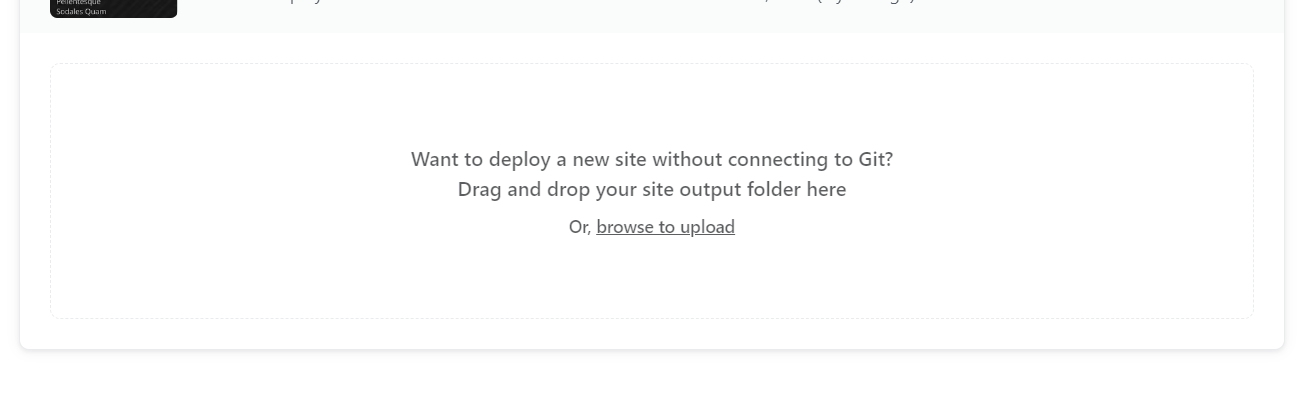
여기에다 드래그하면 배포주소 완성!!!
https://spontaneous-smakager-d1a182.netlify.app/