
유저간 실시간 동시편집 메모, 라이브메모! (데모링크)
유저간 실시간 동시편집 메모, 라이브메모! (backend깃헙링크)
sw정글에서 마지막 약 4주간 진행했던 프로젝트에서 로그인 부분을 잠깐 리뷰를 하고 넘어가고자 한다. 다른 부분들은 주제별로 글을 남기려한다. 오늘은 로그인:)
왜 구글로그인?
유저별 메모를 저장하고 이용하기 위해선 유저를 식별하고 로그인 기능을 구현했어야했다.
요즘 세상에 유저보고 소셜로그인이 아닌 아이디와 패스워드를 만들게 할 순 없었고
소셜 로그인을 선택하게 되었다. 카카오, 네이버, 페이스북 등 다양한 소셜로그인이 있지만
firebase로 배포를 하다보니 firebase에서 지원하는 유저 로그인, 인증 관련 기능을 지원한다고 하여 구글 로그인을 택하게 되었다. 허나, 로그인 기능은 firebase에서 지원하는 방식이 아닌 직접 구현을 해봐야겠다는 판단이 들어 구글 로그인으로 구현하게 되었다.
코드
// At userRouter.js
router.get('/auth/google',
  passport.authenticate('google', { scope: ["profile", "email"] })
);
우선
get요청으로 지정해놓은 경로를 들어올 경우,passport js를 이용해 구글 인증을 유저에게 요청하게 된다.
passportjs는 유저 인증과 관련한 처리를 도와주는middleware를 제공한다.
middleware는 요청 object(req), 응답 (res) 사이에 실행되는 함수로서, 그 다음 실행할 함수로next()를 이용하여 제어권을 넘기는 함수이다.
유저가 구글 로그인 버튼을 누르게 될 경우, /auth/google 로 request를 하면
scope로 유저의 어떠한 정보를 요청할지 지정해놓았고 미들웨어로 설정해놓은 세팅으로 구글 로그인 요청을 하게 된다. passport 에 미리 설정해놨던 미들웨어 설정 코드를 들여다보자.
// At AuthService.js
passport.use(
    new GoogleStrategy(
        {
            // 구글서버에 유저로그인을 요청하면서 함께 보내게 됨
            callbackURL: `https://livememo.site/api/user/auth/google/callback/`, // 유저의 로그인 결과를 이 URL로 받게됨. 이 부분도 Redirction URI 로서 구글console에 등록해줘야함
            clientID: process.env.GOOGLE_CLIENT_ID,
            clientSecret: process.env.GOOGLE_CLIENT_SECRET,
        },
        async (accessToken, refreshToken, profile, done) => { // callback 함수로 추후 결과를 받는 부분
            const email = profile.email;
            const profileName = profile.displayName;
            const picture = profile.picture;
            // check if user already exists
            const currentUser = await User.findOne({ email: email });
            if (currentUser) {
                // already have the user -> return (login)
                return done(null, currentUser);
            } else {
                // register user and return
                const newUser = await new User({ _id: v4(), email: email, profileName: profileName, picture: picture }).save();
                return done(null, newUser);
            }
        }
    )
);
우리의 백엔드 서버가 구글 서버에 인증관련 요청(request)를 할 것이고 구글 서버는 이를 manipulate, handling 한 후 이에 대한 결과(response) 한다는 점에서 client-server 관계로 정의될 수 있음으로..
우리의 백엔드 서버를 구글 서버의 client로서 해당 로그인 처리를 위한 클라이언트 등록을 해주어야한다.
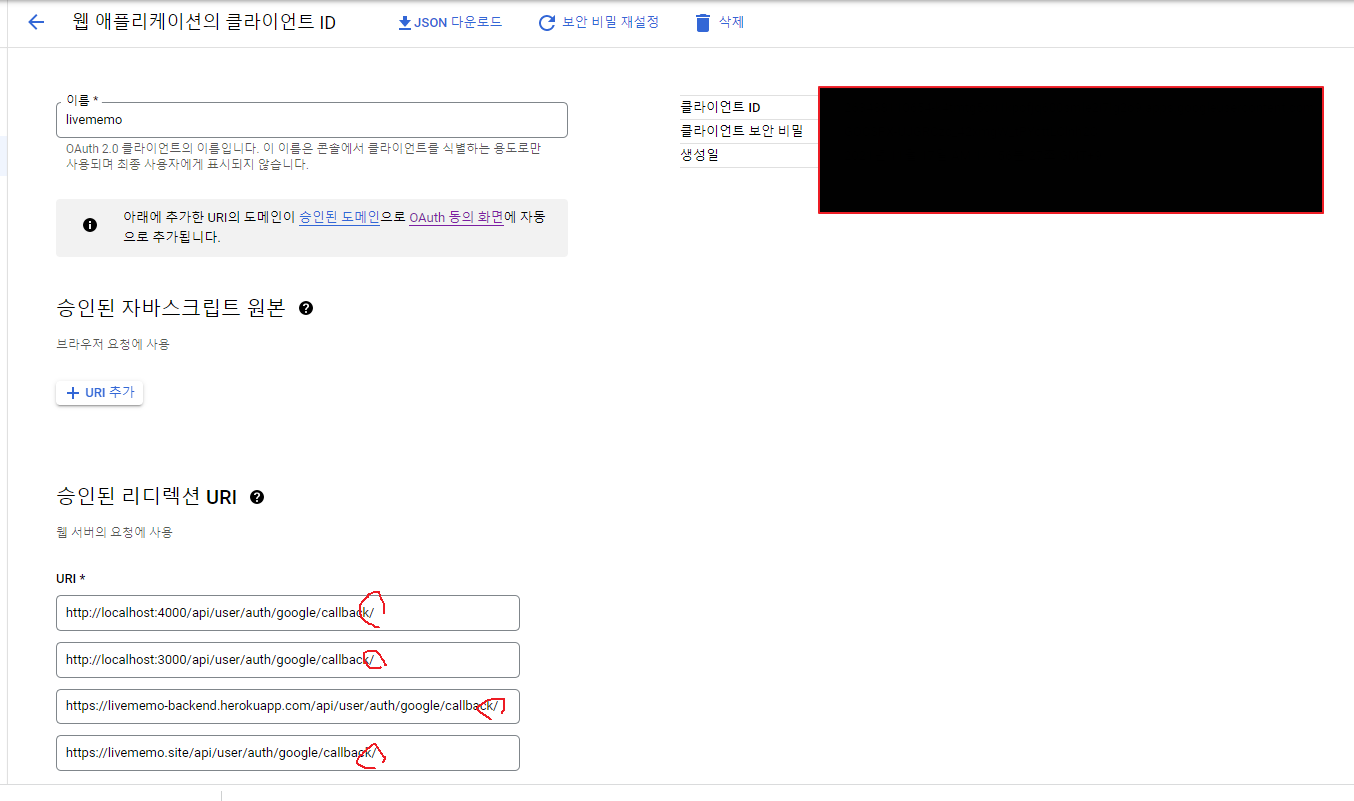
등록을 하고 나면 빨간 테두리에 검은 배경의 클라이언트 ID, 클라이언트 비밀키를 주게 되고 이를
우리의 passport 미들웨어에 요청을 보낼 때 우리의 ID와 SECRET을 함께 구글에 로그인 인증 요청을 보낼 수 있도록 설정을 해주었다. clientID: process.env.GOOGLE_CLIENT_ID, clientSecret: process.env.GOOGLE_CLIENT_SECRET 부분.
그럼 유저를 구글 로그인화면으로 임시 redirect(302) 시키게 되고 유저가 구글로 redirect된 화면에서 로그인을 하면,
아래 async 로 처리된 유저 관련 정보가 들어오게 된다.
accessToken 으로 이제 해당 유저에 관한 구글이 갖고 있는 data를 받아 올 수도 있고 accessToken이 만료될 경우 refreshToken 으로 새로 토큰을 발급 받을 수도 있는데 우리는 유저 데이터를 받아오기보다 로그인처리만 해주는 것 이기에 accessToken, refreshToken 은 사용하지 않고 profile 로 받아온 유저 정보만으로 회원가입 처리를 해주었다.
구글 console에 uri를 등록하는 부분에 끝에는 '/'를 반드시 넣어줘야한다. 저걸 안넣어줬다가 헤맨 기억이 난다.
'/' 를 넣어줘야하는 이유는 로그인 이 성공한 이후 저 uri 뒤에다
google/callback/userinformain 이런식으로 유저 정보를 전달 받고 passport 미들웨어가 /callback/ 뒷 부분을 잘라서 읽는데 '/' 를 빼먹으면 google/callbackuserinformain 이런식으로 들어오기 때문에 '/'를 빼먹어서는 안된다.
그럼 클라이언트 화면을 보면서 위의 설명한 부분을 다시 보자.
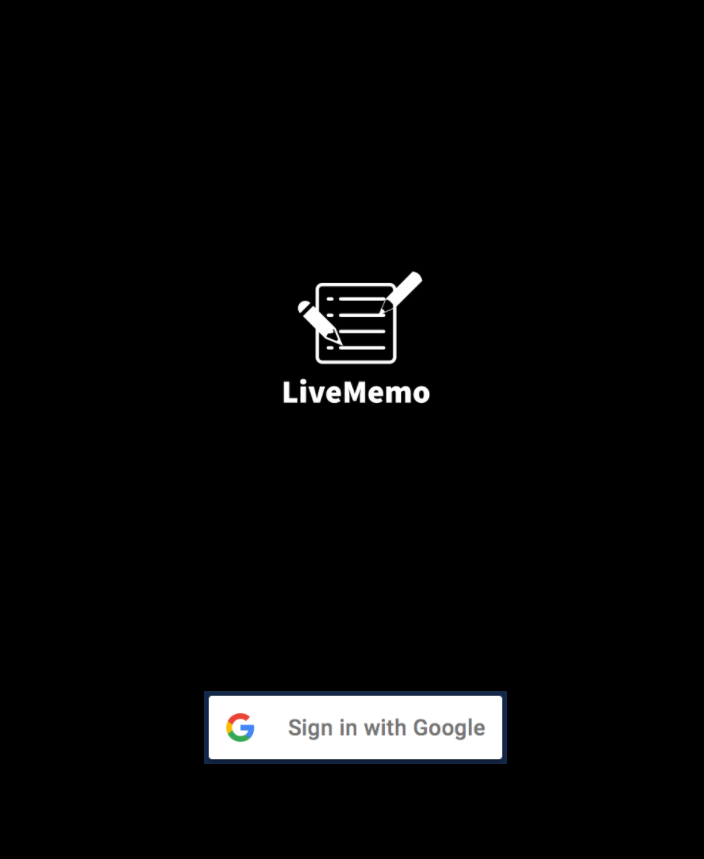
투박한 로그인 화면.. 로그인 버튼을 누르게 되면 위 설정한 경로로
router.get('/auth/google', 로 request요청이 들어온다.

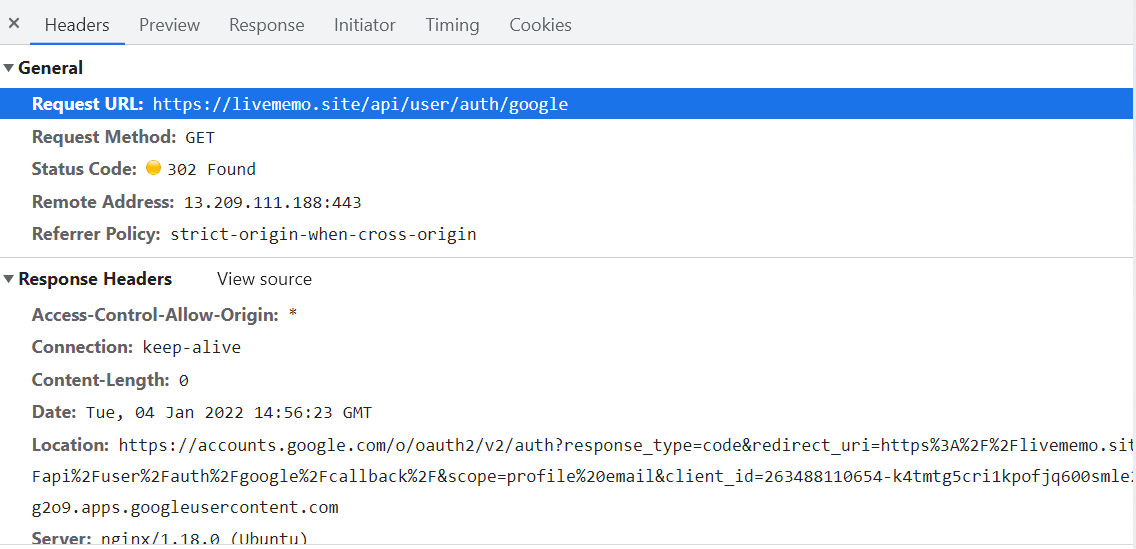
네트워크 창을 열어보면 진행 상황을 볼 수 있는데, 좀 전의 request에서
그럼 우리 node server에서는 response를 하게 되는데 status 302 redirect, header에 Location 값으로
구글 로그인화면으로 임시 redirect를 시키게 된다.
reponse header 에 location 값으로 redirect를 할때 구글 console에 등록했던 clientID, clientSecret를 비롯해 유저에게 어떤 정보를 요청하는지 등의 요구사항을 함께 location 값으로 준다.
그럼 브라우저가 다시 해당 location 값으로 구글서버에 request를 보내고 구글 서버는 구글 로그인화면을 status (200) response 해 준다.

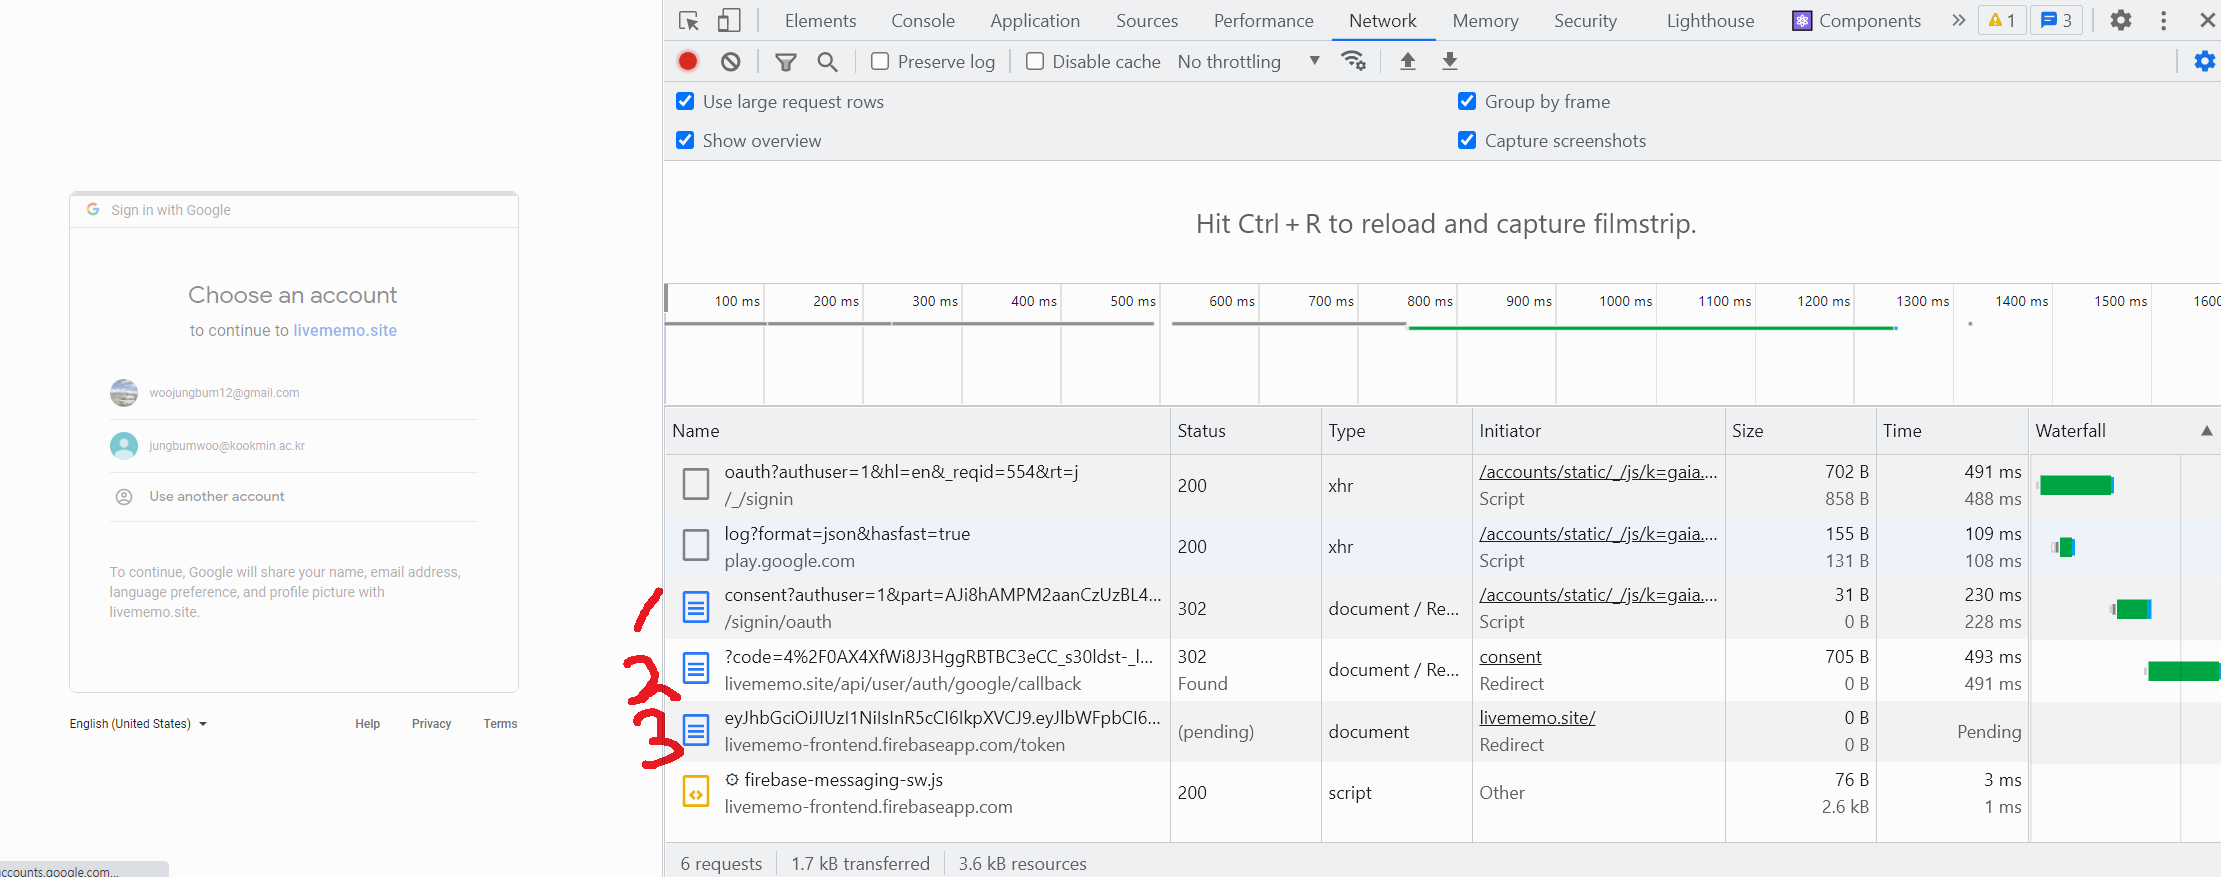
자 그럼 이후 사용자가 로그인을 하게 되고 redirect가 오가는데 캡처하기 힘들었다..
아래는 로그인 후 빠르게 등장했다가 사라지는 부분인데, 유저가 로그인을 하고(아래 이미지 1번) 로그인이 성공하면 구글 서버는 유저 정보를
리다이렉트로 등록한 주소 뒤에 ?code=authuser=1&part=blabla.. 방식으로 클라이언트를 redirect 시키게 된다.(아래 이미지 2번) 그럼 브라우저가 유저의 정보를 갖고 우리 백엔드 서버로 get 방식으로 다시 request를 한다.
// At userRouter.js
// callback url upon successful google authentication
router.get('/auth/google/callback/', passport.authenticate('google', {
  session: false, failureRedirect: '/user/auth/google'
}), signToken);
그럼 redirect 된 위의 경로로 들어오게 되고, passport middleware 를 설정했던 부분으로
유저정보를 서버가 인지하고 회원가입, 혹은 로그인 등의 처리를 해주게 된다. 그 후 middleware 이기에 그 다음 제어권이 signToken 이라는 함수로 넘어가게 되고, 이 과정에서 문제가 생겼다면 /user/auth/goolge 다시 로그인화면으로 redirect 시켰다.
// At AuthService.js
// Issue Token
export const signToken = async (req, res) => {
    // console.log(`req.user`, req.user);
    jwt.sign({ email: req.user.email, picture: req.user.picture, profileName: req.user.profileName, _id: req.user._id }, process.env.JWT_SECRET, { expiresIn: '30 days' }, (err, token) => {
        if (err) {
            return res.sendStatus(500);
        } else {
            try {
                console.log('token json send');
                // res.redirect(`https://live-memo-610d4.firebaseapp.com/token/${token}`);
                res.redirect(`https://livememo-frontend.firebaseapp.com/token/${token}`);
            } catch (err) {
                console.log(`err`, err)
            }
        }
    });
}
SignToken 함수에서는 받아온 정보를 jsonWebToken 으로 유저정보를 토큰화 한 다음,
res.redirect(https://livememo-frontend.firebaseapp.com/token/${token});
token과 함께 response한다. 그럼 위 이미지의 3번에 보이는대로 token값으로 함께 해당 주소로 다시 이동하게 된다.
그럼 react로 클라이언트 측에서 뒤에 토큰 부분만 받아서 localStorage에 토큰을 저장하고
window.location.href = '/'; 메인화면으로 이동시키면 로그인 처리가 완료된다.
로그인에 필요했던 리액트 코드를 밑에 조금 첨부하지만 프론트 깃헙링크도 함께 첨부한다.
// GetToken.js
const GetToken = (props) => {
    // const { search } = useLocation();
    // console.log(search);
    // const { token } = qs.parse(search); // 쿼리 스트링 문자열을 객체로 만들어준다. {}
    // console.log(`qs.parse(search)`, qs.parse(search));
    // console.log(`qs.parse(search.slice(1))`, qs.parse(search.slice(1)));
    // console.log(`token`, token);
    const current = decodeURI(window.location.href);
    console.log("here", current)
    const search = current.split("/token/")[1];
    console.log(search)
    const token = search.substring(0, search.length - 1);
    console.log('here?')


    useEffect(() => {
        console.log(`token`, token);
        if (token && typeof token === "string") {
            // localStorage.setItem("livememo-token", tokencookie.setItem('livememo-token', token));
            console.log(token);
            localStorage.setItem("livememo-token", token);
            window.location.href = '/';
        }
    }, []);
    // return <Navigate to="/" push={false} />;
    return (
        <Box className="spinner" >
            <CircularProgress className="spinner__icon" color="secondary" />
        </Box>
    )
}
export default GetToken
// App.js
{!token ? (
          <Routes>
            <Route path="/" element={<Login />} />
            <Route path="/token/:token" element={<GetToken />} />
          </Routes>
        ) :
// Login.js
        function Login() {
    const cookies = new Cookies();
    const token = cookies.get('livememo-token');


    const signIn = async (dispatch) => {
        try {
            // window.location.href = 'https://livememo-backend.herokuapp.com/api/user/auth/google';
            window.location.href = `${baseUrl}api/user/auth/google`;
        } catch (err) {
            console.log(`err`, err);
        }
    }


    return (

        <div className="login" >
            <div className="login__container">
                <img className="main_img" src="./././icons/LiveMemo.png" />
            </div>
            <div className="login_google">
                <button className="btn_login" variant="contained" onClick={signIn}>
                    <img className="login_img" src="./././icons/btn_google.png" />
                </button>
            </div>
        </div>
    )
}

export default Login
혹시 본 게시글에 틀린 부분이 있다면 댓글 혹은 어떠한 방법으로라도 알려주시면 정말 감사합니다!

훌륭하네여