암호화의 2가지 방식
- Symmetric Encryption (대칭 암호화)
- 같은 키 값을 사용해 암호화
- Asymmetric Encryption (비대칭 암호화)
- 서로 다른 키 값을 사용해 암호화와 복호화를 담당한다.
- java에선 keytool사용
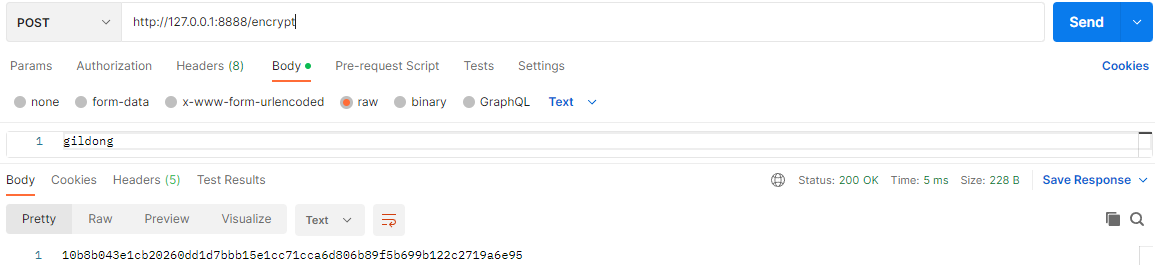
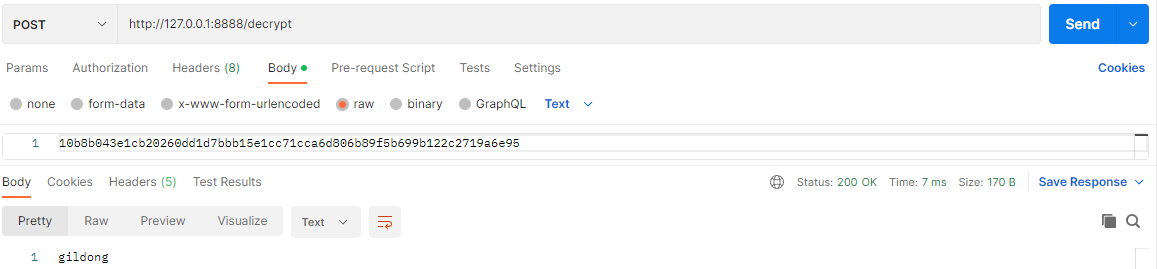
Symmetric Encryption (대칭 암호화)
bootstrap.yml 생성
// bootstrap.yml

encrypt:
  key: abcdefghijklmnopqrstuvwxyz0123456789 # 암호화 키
테스트
서비스 적용
UserService의 property수정
// appication.yml
// spring.datasource.* 부분을 주석 혹은 삭제

spring:
  application:
    name: user-service
  rabbitmq:
    host: 127.0.0.1
    port: 5672
    username: guest
    password: guest
  h2:
    console:
      enabled: true
      settings:
        web-allow-others: true
      path: /h2-console
#  datasource:
#    driver-class-name: org.h2.Driver
#    url: jdbc:h2:mem:testdb
#    username: sa
#    password: sa
// bootstrap.yml
// configservice에서 지정한 경로의 user-service.yml파일과 연결

spring:
  cloud:
    config:
      uri: http://127.0.0.1:8888
      name: user-service
user-service.yml 파일 수정
// user-service.yml

spring:
  datasource:
    driver-class-name: org.h2.Driver
    url: jdbc:h2:mem:testdb
    username: sa
    password: sa
위에서 주석처리한 datasource를 지정한다.
datasource설정 암호화
- 위에서 설정한 비밀번호를 encrypt처리해서 나온 값으로 변경
spring:
  datasource:
    driver-class-name: org.h2.Driver
    url: jdbc:h2:mem:testdb
    username: sa
    password: '{cipher}4ecf1d3fa008a040187238acf43539ef05914db55dd8c0bc76391f10747fa60b'
{cipher} < encrypt되었다는 표시 싱글쿼테이션도 걸어준다.
확인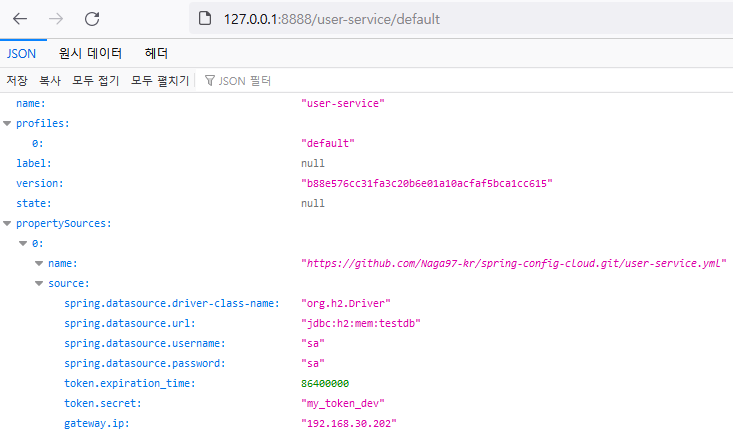
datasource.password가 제대로 표기되어 있는 것을 볼 수 있다.
Asymmetric Encryption (비대칭 암호화)
- Public, Private Key 생성 -> JDK keytool 이용
- {ContextPath}/keystore 경로에 키 생성
- keytool(RSA) 사용
apiEncryptionKey.jks 파일생성
- cmd창을 열어 키를 저장할 디렉토리에서
keytool -genkeypair -alias apiEncryptionKey -keyalg RSA -dname "CN=사용자 이름, OU=API Development, O=joneconsulting.co.kr, L=Seoul, C=KR" -keypass "비밀번호" -keystore apiEncryptionKey.jks -storepass "비밀번호"입력 - 확인을 위해
keytool -list -keystore apiEncryptionKey.jks -v입력 - 인증서 생성을 위해
keytool -export -alias apiEncryptionKey -keystore apiEncryptionKey.jks -rfc -file trustServer.cer입력 - cer파일을 publickey로 생성하려면
keytool -import -alias trustServer -file trustServer.cer -keystore publicKey.jks을 입력해 생성할 수 있다. apiEncryptionKey.jks는 PrivateKeypublicKey.jks는 PublicKey
ConfigService 설정 수정
// bootstrap.yml

encrypt:
#  key: abcdefghijklmnopqrstuvwxyz0123456789
  key-store:
    location: file:///${user.home}/IdeaProjects/work/keystore/apiEncryptionKey.jks
    password: test1234
    alias: apiEncryptionKey
이제 직접 설정한 key대신 keytool로 생성된 키를 이용해 key를 지정할 수 있다.
주의할점) 설정할 때 token값을 암호화 하는 경우도 있는데 이 경우 API Gateway에서 사용한 property의 token값과 UserService에서 사용한 property의 token이 일치해야 토큰인증이 통과된다.

개발자로써 성장하는 방법