이전 게시글1 - Jwt 인증 + Redis BlackList
이전 게시글2 - Redis Master-Slave
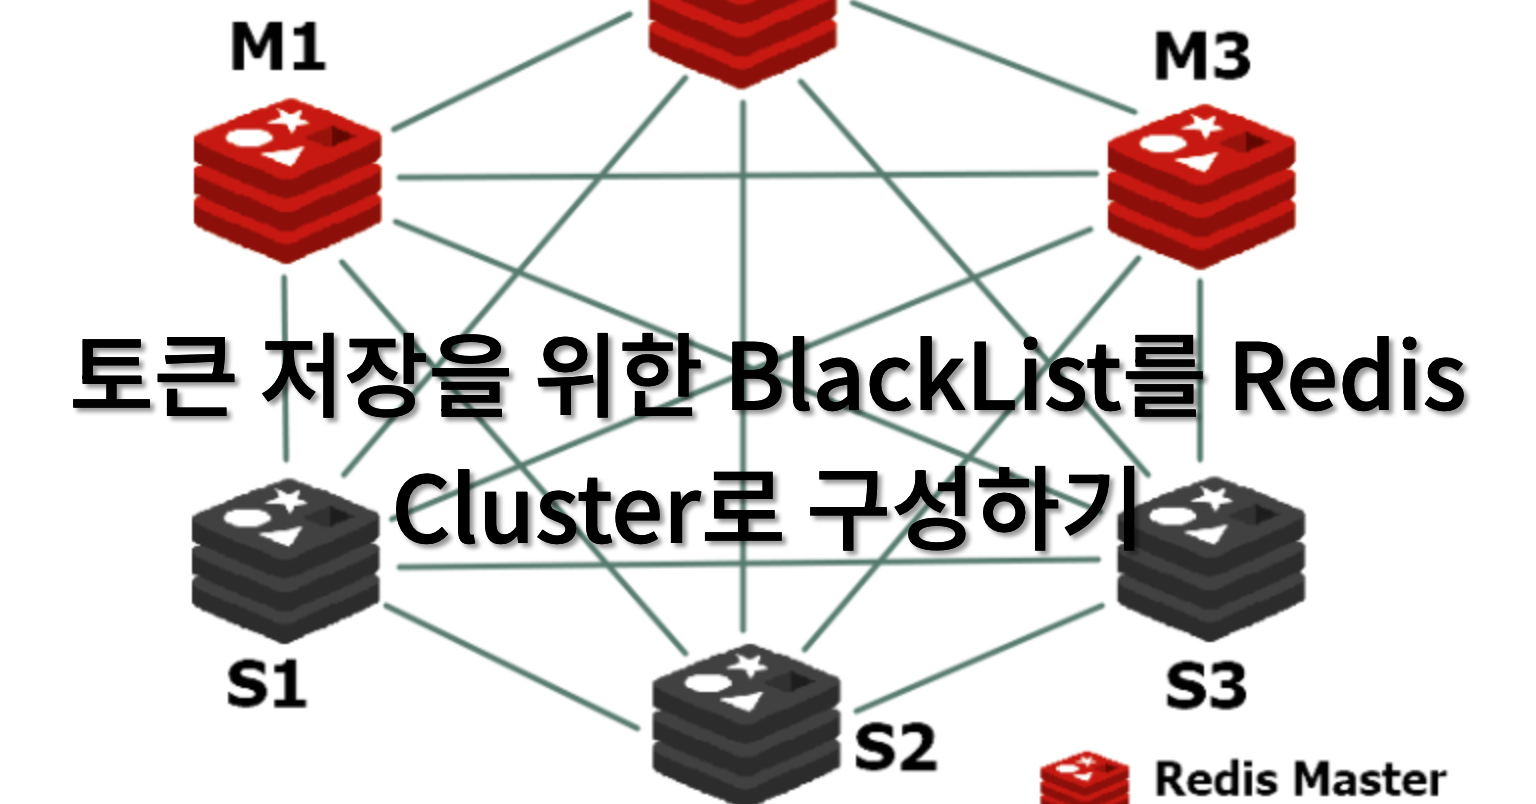
🤔Cluster로 구성하는 이유
- 이전 게시물에서 Redis를 Master와 Slave로 구성을 했을 때 Master가 죽게되면 read가 가능해지고 다른 작업들은 모두 실행되지 않았다. 그러면 결국 근본적인 문제가 해결되지 않은 것이다.
- Cluster로 여러대의 Master를 구성시켜 놓으면 처음 Master 서버가 죽게 되더라도 이후 대기중인 Slave 서버가 Master 서버로 승격되어 해당 작업을 이어갈 수 있는 것이다. 결국 데이터의 복제본을 유지하여 고가용성을 제공해줄 수 있는 것이다. 또한 여러 노드로 구성되어 데이터를 분산하여 저장하여 부하 분산과 확장성에도 용이하다.

- 공식 문서에 따르면 최소 클러스터는 최소 3개의 마스터 노드가 있어야 하며 배포 시에는 6개의 노드, 즉 3개의 Master 노드와 3개의 Slave 노드를 추천한다고 적혀있다!
redis.conf
port 7000

#cluster 사용 여부
cluster-enabled yes

#cluster 설정 파일 이름
cluster-config-file node.conf

#timeout 시간 지정 (ms)
cluster-node-timeout 5000

#failover된 redis node 재실행 시 이전 데이터를 다시 로드해올 수 있음
appendonly yes- 노드 간 통신이나 감지가 5초 동안 이루어지지 않으면 해당 노드는 장애로 간주한다.
- Redis는 데이터를 메모리에만 저장하는 것이 아니라 AOF 파일에도 기록하므로, Redis가 다시 시작될 때 이 파일을 로드하여 이전에 발생한 데이터 변경 사항을 복원할 수 있다. → 데이터의 지속성과 복구성을 향상시키는 데 사용되며, 특히 시스템이 비정상적으로 종료되는 경우에도 데이터의 일관성을 유지하는 데 도움이 된다.
- 다른 노드들의 conf 역시 포트만 다르게 하고 나머지는 같게 설정을 하였다. 기본적인 conf이다.
docker compose.yml
node1:
    container_name: node1
    image: redis
    volumes:
      - ./redis/redis1.conf:/usr/local/etc/redis/redis.conf
    command: redis-server /usr/local/etc/redis/redis.conf
    ports:
      - 7000:7000
      - 7001:7001
      - 7002:7002
      - 7003:7003
      - 7004:7004
      - 7005:7005

  node2:
    network_mode: "service:node1"
    container_name: node2
    image: redis
    volumes:
      - ./redis/redis2.conf:/usr/local/etc/redis/redis.conf
    command: redis-server /usr/local/etc/redis/redis.conf

  node3:
    network_mode: "service:node1"
    container_name: node3
    image: redis
    volumes:
      - ./redis/redis3.conf:/usr/local/etc/redis/redis.conf
    command: redis-server /usr/local/etc/redis/redis.conf

  node4:
    network_mode: "service:node1"
    container_name: node4
    image: redis
    volumes:
      - ./redis/redis4.conf:/usr/local/etc/redis/redis.conf
    command: redis-server /usr/local/etc/redis/redis.conf

  node5:
    network_mode: "service:node1"
    container_name: node5
    image: redis
    volumes:
      - ./redis/redis5.conf:/usr/local/etc/redis/redis.conf
    command: redis-server /usr/local/etc/redis/redis.conf

  node6:
    network_mode: "service:node1"
    container_name: node6
    image: redis
    volumes:
      - ./redis/redis6.conf:/usr/local/etc/redis/redis.conf
    command: redis-server /usr/local/etc/redis/redis.conf

  redis-cluster-entry:
    network_mode: "service:node1"
    image: redis
    container_name: redis-cluster
    command: redis-cli --cluster create 127.0.0.1:7000 127.0.0.1:7001 127.0.0.1:7002 127.0.0.1:7003 127.0.0.1:7004 127.0.0.1:7005 --cluster-replicas 1 --cluster-yes
    depends_on:
      - node1
      - node2
      - node3
      - node4
      - node5
- node6- node1에만 ports가 적혀있고 다른 노드들은 network-mode로 모두 node1 네트워크를 공유해서 사용한다.
- redis-cluster-entry의 노드들을 cluster로 연결해주는 명령어를 실행시켜주고 종료된다.
--cluster-replicas 1는 cluster를 구성할 때 master-slave 구성을 한다는 의미다. 1은 slave의 개수이다. 또한 slave는 cluster를 만들 때 사용한 명령어에 적힌 순서대로 redis가 자동으로 나눠서 붙여준다.
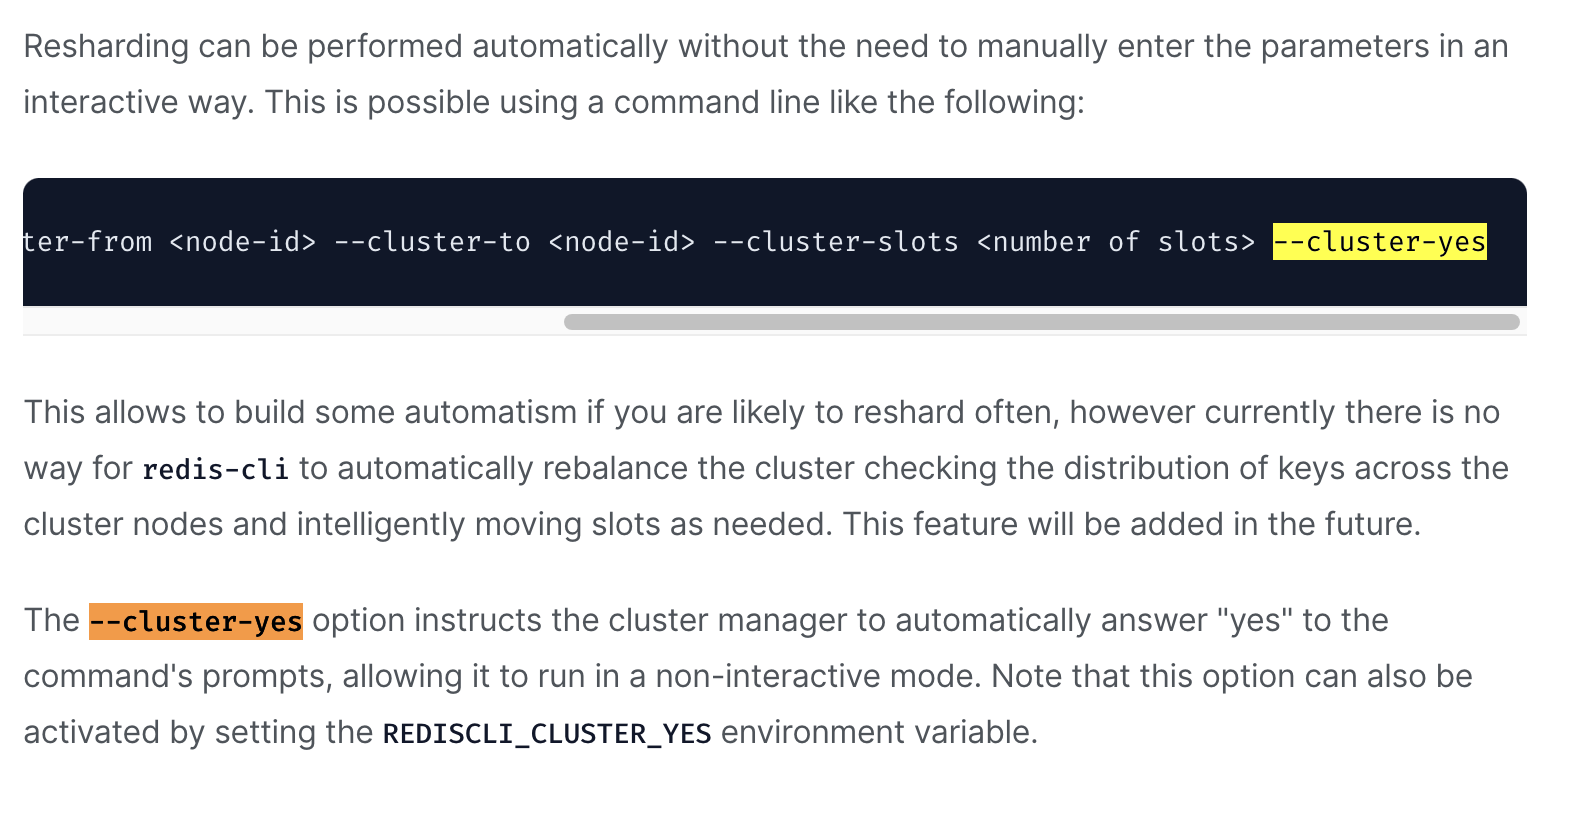
--cluster-yes는 클러스터 관리자에게 자동으로 응답하도록 지시한다. "예" 명령 프롬프트에 추가하여 비대화형 모드에서 실행할 수 있도록 한다. 이 옵션이 없으면 Redis Cluster를 생성할 때 각 서버에 대해 사용자에게 "yes"를 입력하라는 메시지가 표시된다. 즉, yes 입력을 자동으로 해줌
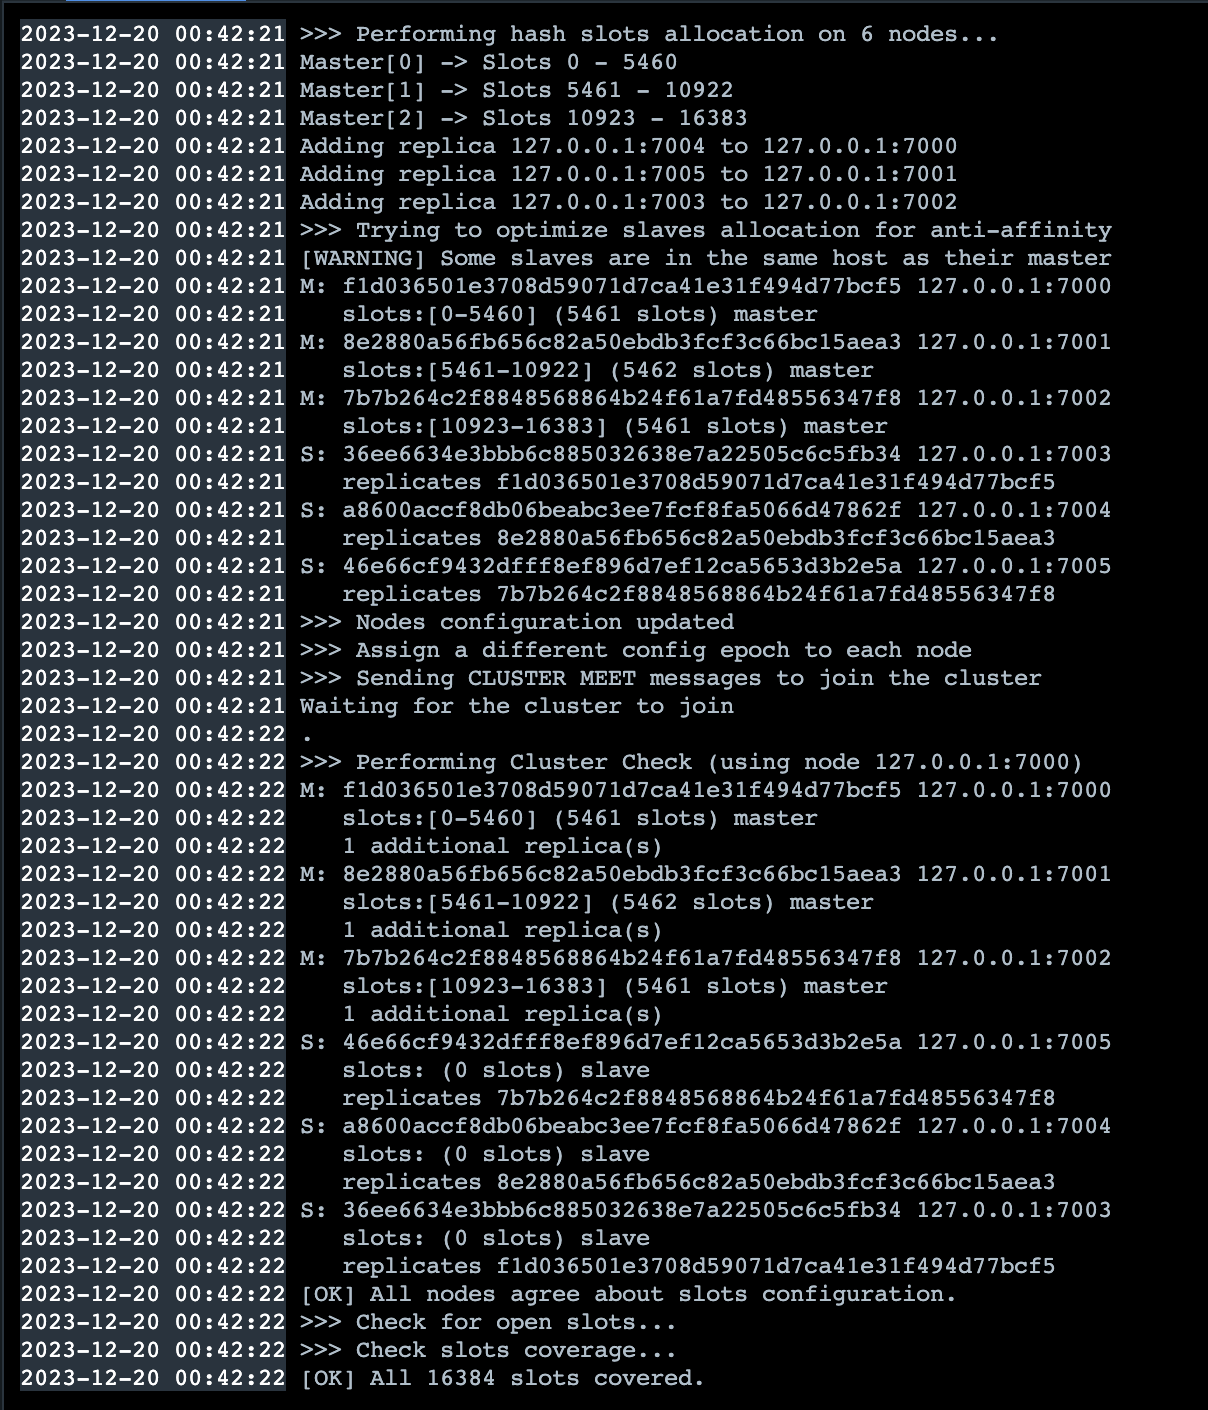
- 7000번 노드와 7004번 노드가 master-slave 관계를 맺었고, 7001-7005, 7002-7006이 연결되었다.
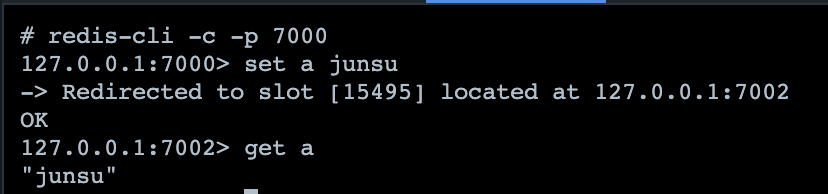
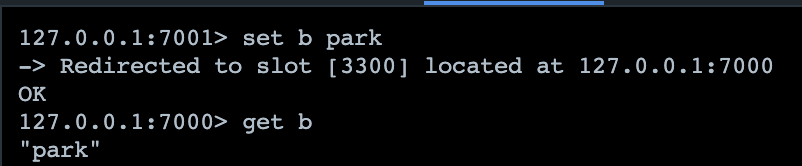

- node에 접속을 해서 key, value를 저장하니깐 자동으로 다른 노드에 저장을 하면서 리다이렉트 된다.
- 7000번에 (a, junsu)를 저장하려니깐 7002번에 저장하면서 자동으로 리다이렉트 된다. 다른 master노드도 마찬가지이다.
😝노드를 죽여보자
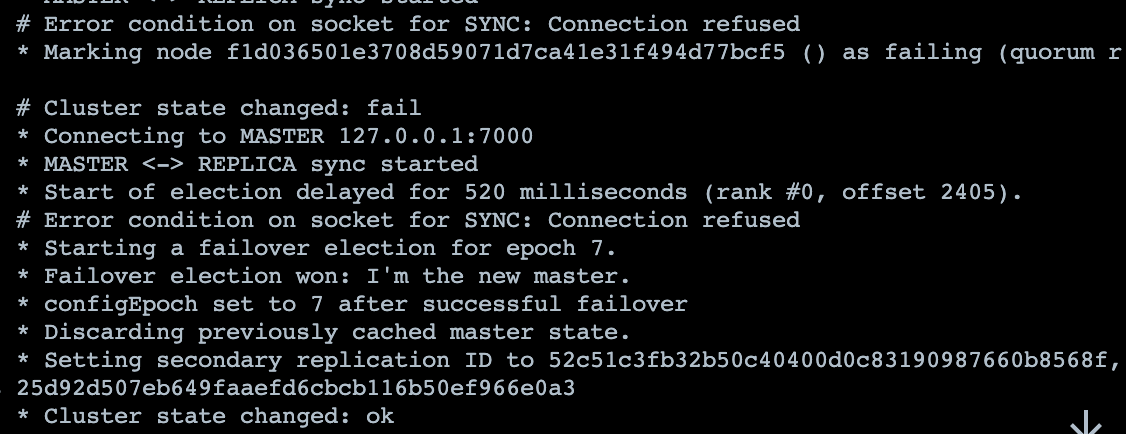
- Master노드였던 node1을 죽여버리니깐 Slave노드였던 node4에서 연결이 끊긴걸 감지하고 master로 승격을 하였다.
- node4는 마스터로서 잘 저장이 되고 값도 잘 가져온다.
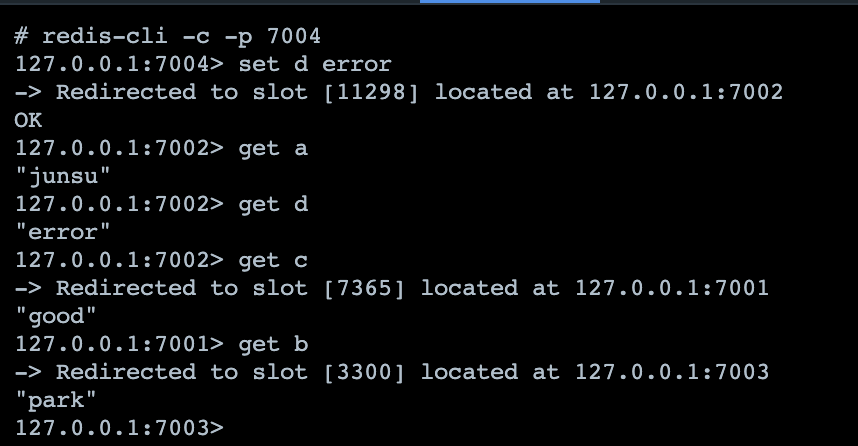
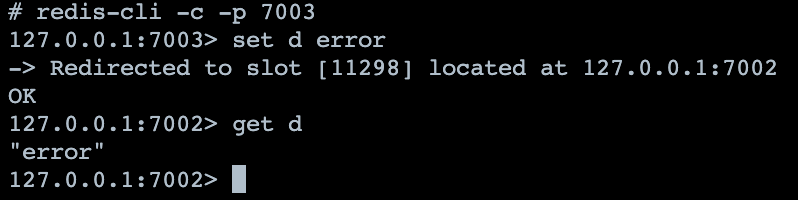
- 참고로 Cluster로 구성하면 Slave 노드에서 set도 잘 된다. 그리고 get을 할 때는 저장을 했던 노드에서 값을 가져오면서 redirect가 된다.
🧐Spring boot에 적용해보자
redis:
    cluster:
      nodes:
        - 127.0.0.1:7000
        - 127.0.0.1:7001
        - 127.0.0.1:7002
        - 127.0.0.1:7003
        - 127.0.0.1:7004
- 127.0.0.1:7005- application.yml에 다음과 같이 설정을 한다.
@RequiredArgsConstructor
@Configuration
@EnableRedisRepositories
public class RedisRepositoryConfig {

    @Bean
    public RedisConnectionFactory redisConnectionFactory() {
        LettuceClientConfiguration clientConfig = LettuceClientConfiguration.builder()
            .readFrom(ReadFrom.REPLICA_PREFERRED)
            .build();

        RedisClusterConfiguration clusterConfiguration = new RedisClusterConfiguration();
        List<RedisNode> redisNodes = IntStream.rangeClosed(7000, 7005)
            .mapToObj(port -> new RedisNode("127.0.0.1", port))
            .collect(Collectors.toList());
        clusterConfiguration.setClusterNodes(redisNodes);

        return new LettuceConnectionFactory(clusterConfiguration, clientConfig);
    }

    @Bean
    public RedisTemplate<String, Object> redisTemplate() {
        RedisTemplate<String, Object> redisTemplate = new RedisTemplate<>();
        redisTemplate.setKeySerializer(new StringRedisSerializer());
        redisTemplate.setValueSerializer(new StringRedisSerializer());
        redisTemplate.setConnectionFactory(redisConnectionFactory());
        return redisTemplate;
    }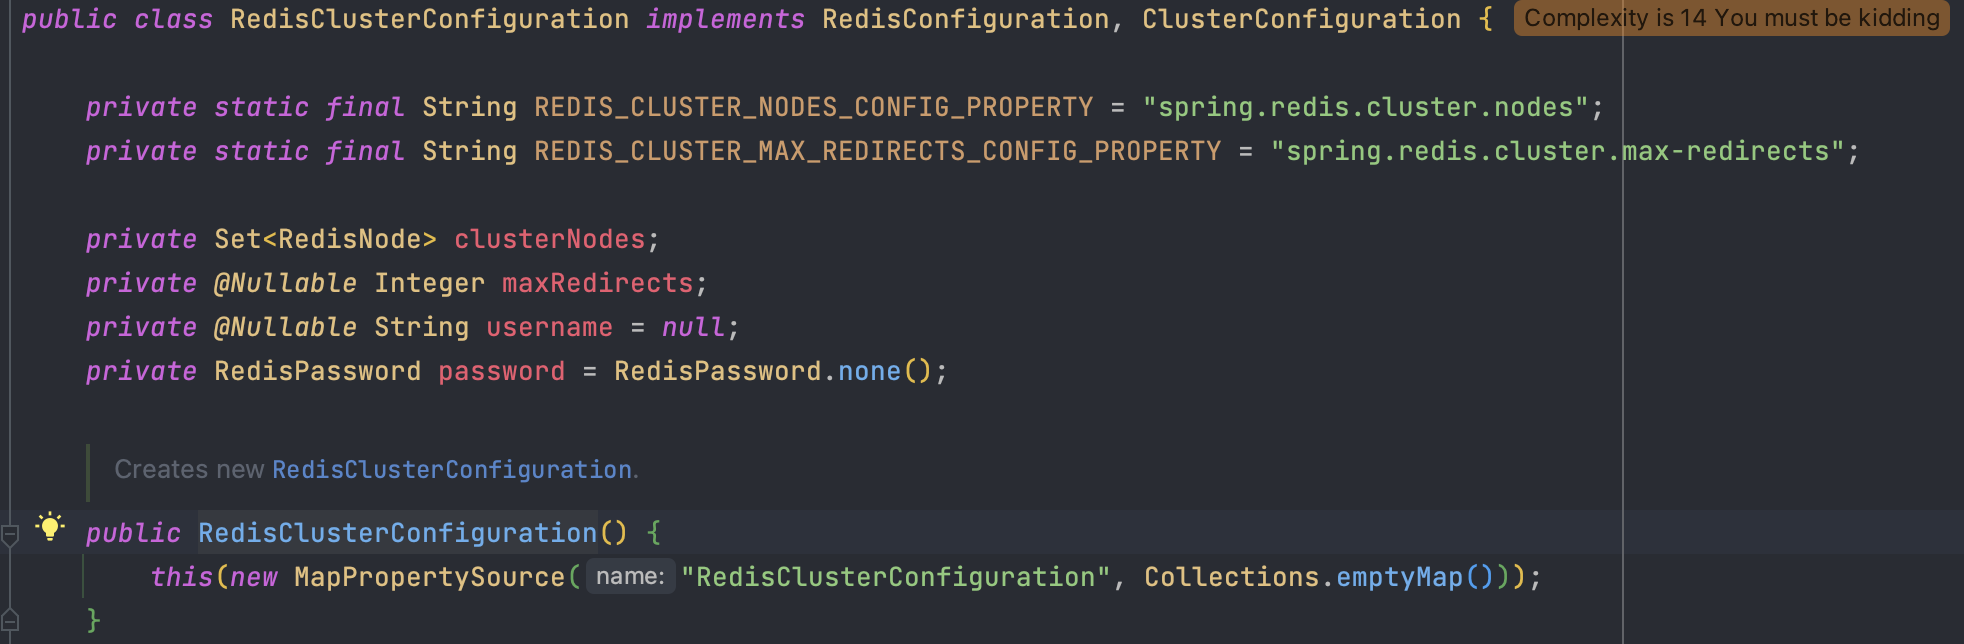
}- 찾아보니 RedisClusterConfiguration 객체로 클러스터 설정을 해주면 된다.

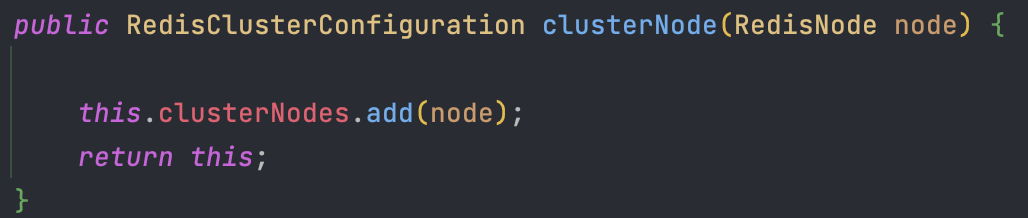
- clusterNodes를 설정하는 메서드를 찾던 중 clusterNode가 있었는데
clusterConfiguratoin.clusterNode("127.0.0.1", 7000);이런식으로 redis의 host와 port를 지정하면 RedisNode 객체가 생성되고 clusterNodes에 추가가 되는 구조였다.
clusterConfiguratoin.clusterNode("127.0.0.1", 7000);
clusterConfiguratoin.clusterNode("127.0.0.1", 7001);
clusterConfiguratoin.clusterNode("127.0.0.1", 7002);
...
clusterConfiguratoin.clusterNode("127.0.0.1", 7005);- 이렇게 하면 되나? 싶었지만 set함수가 있었네 ~
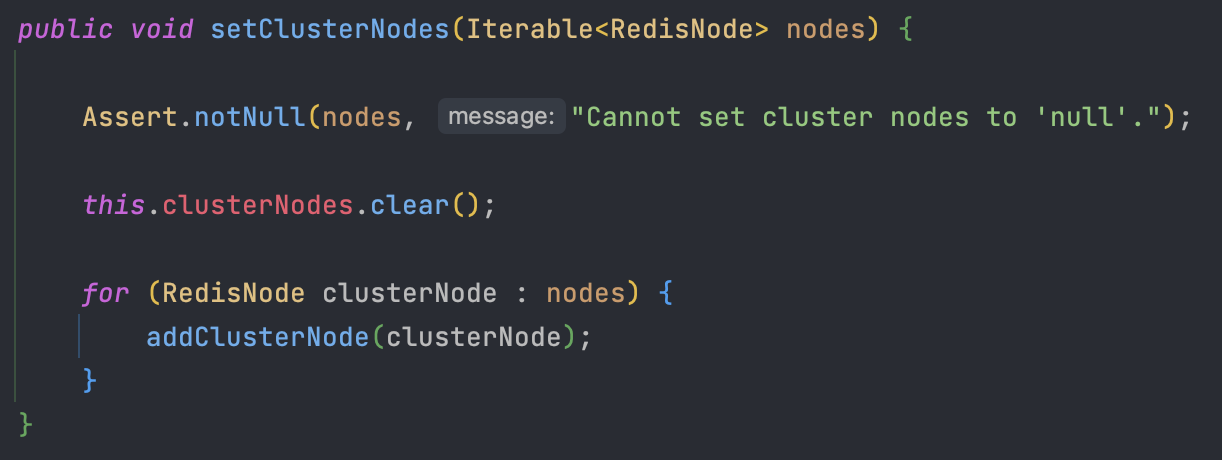
- 따라서 위의 코드와 같이 Stream으로 노드들을 생성한 후 설정해주었다!
😎테스트
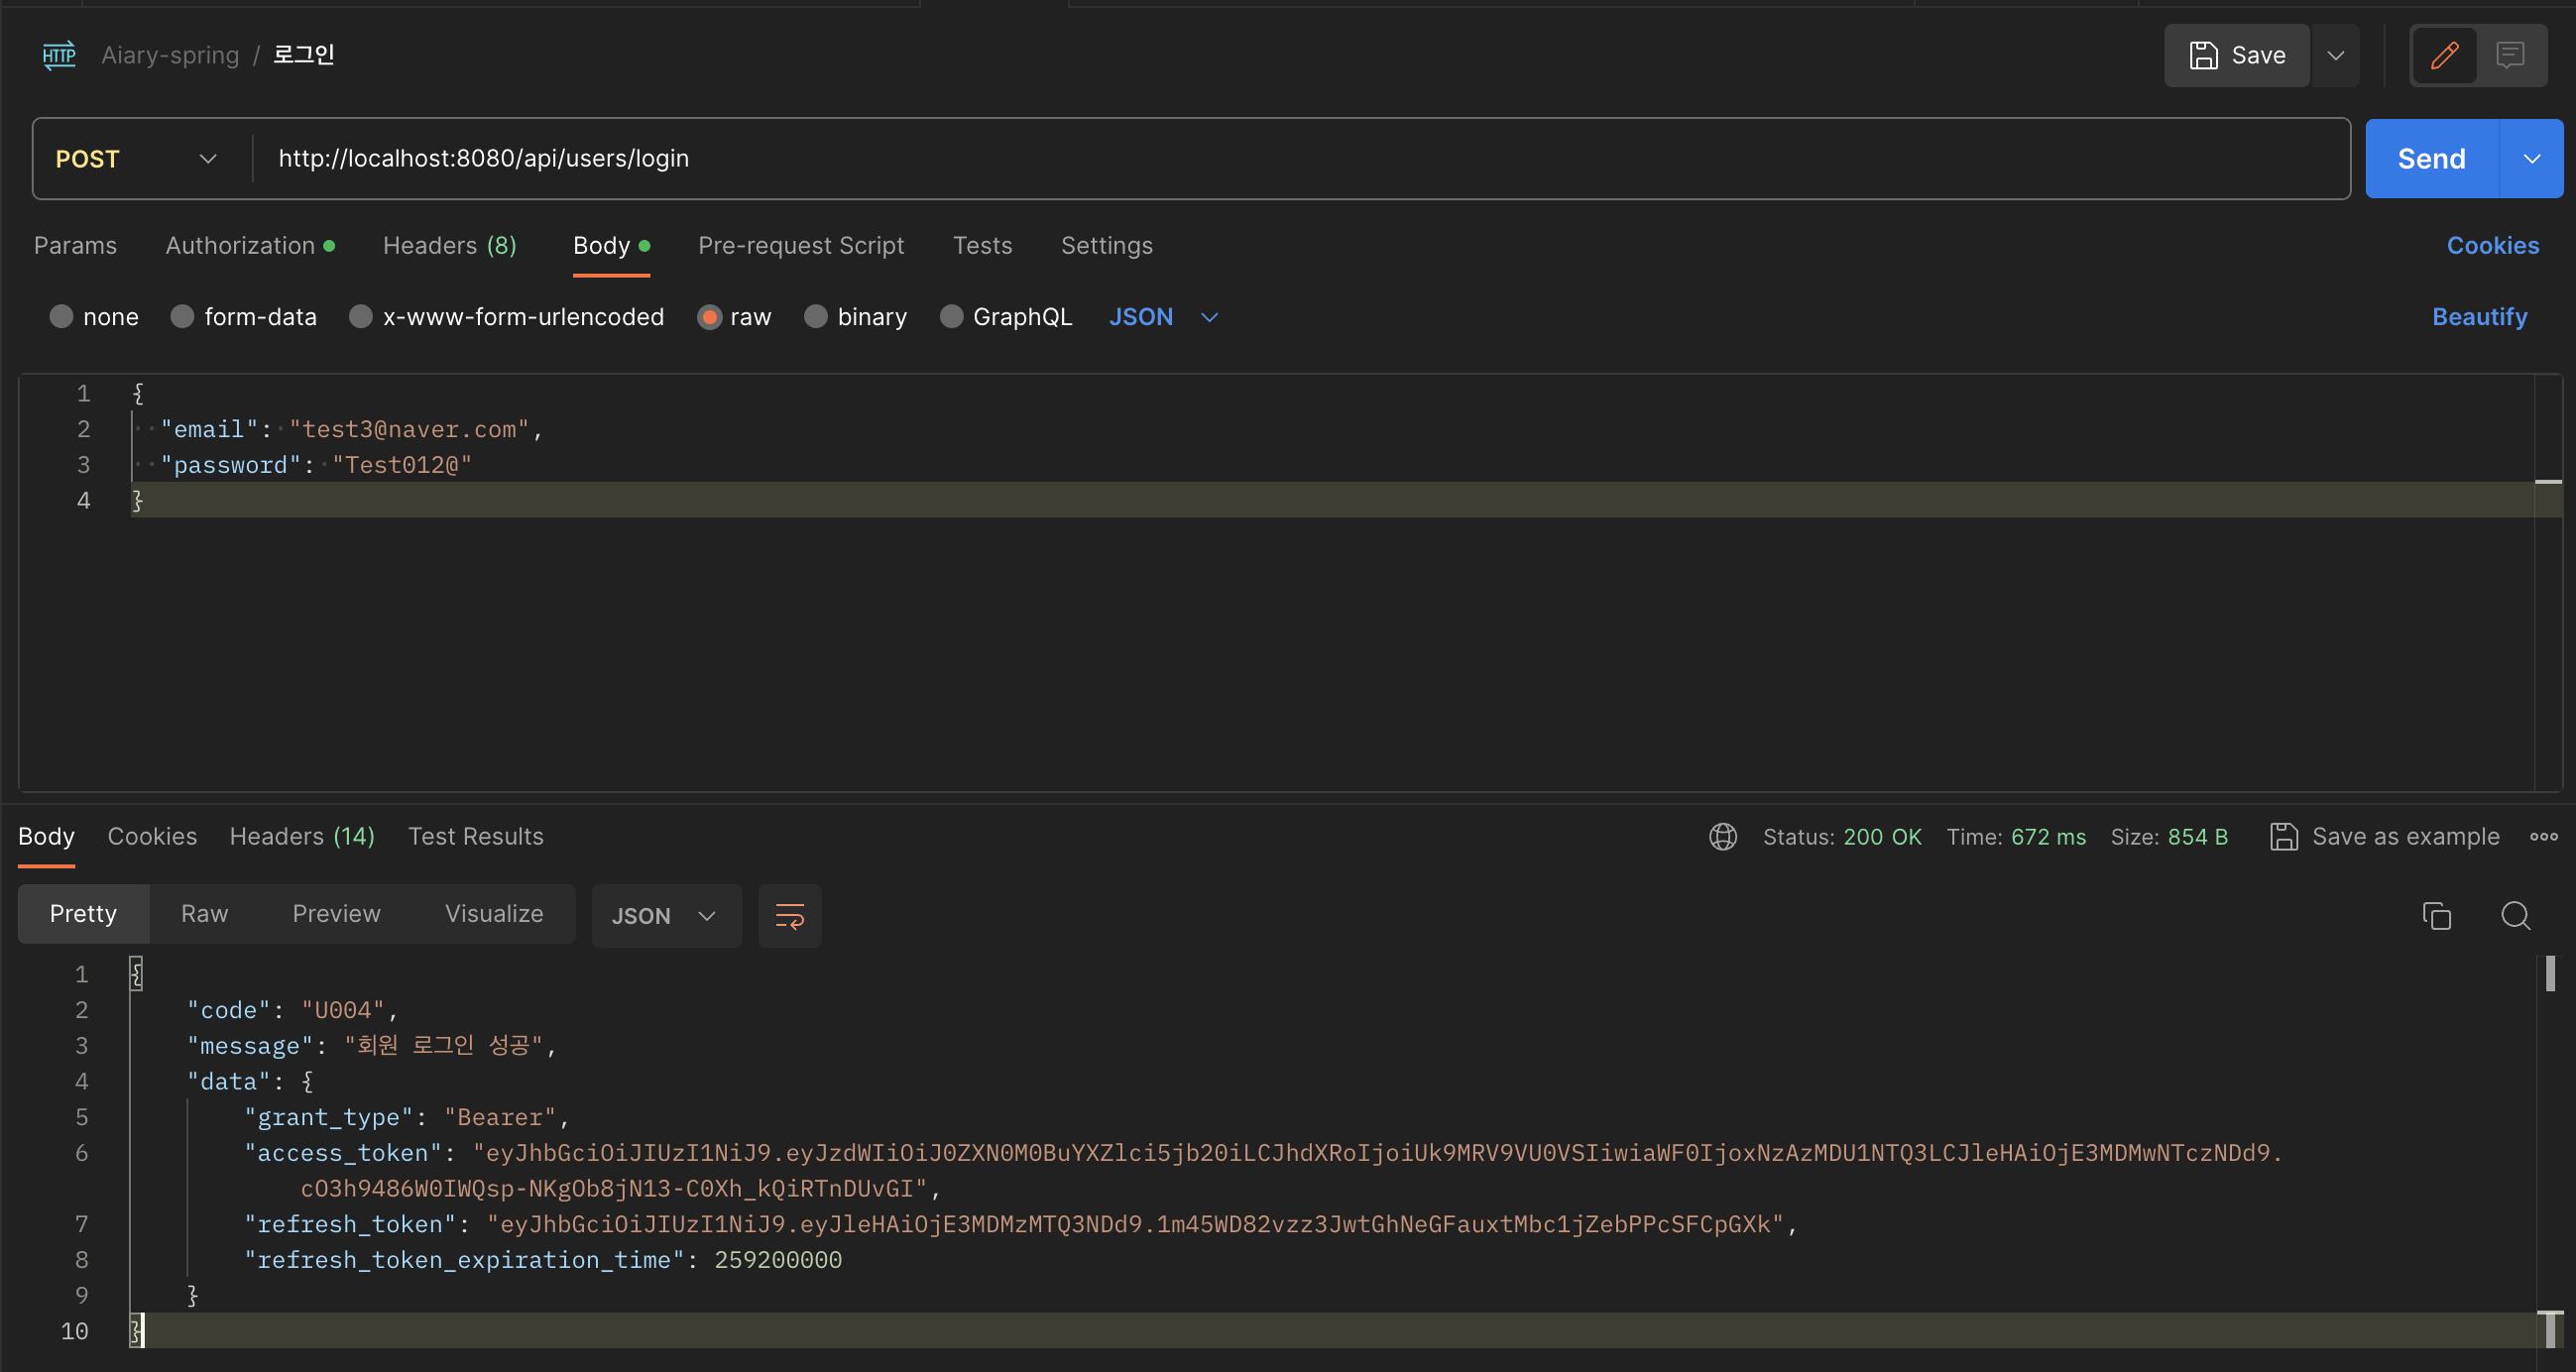
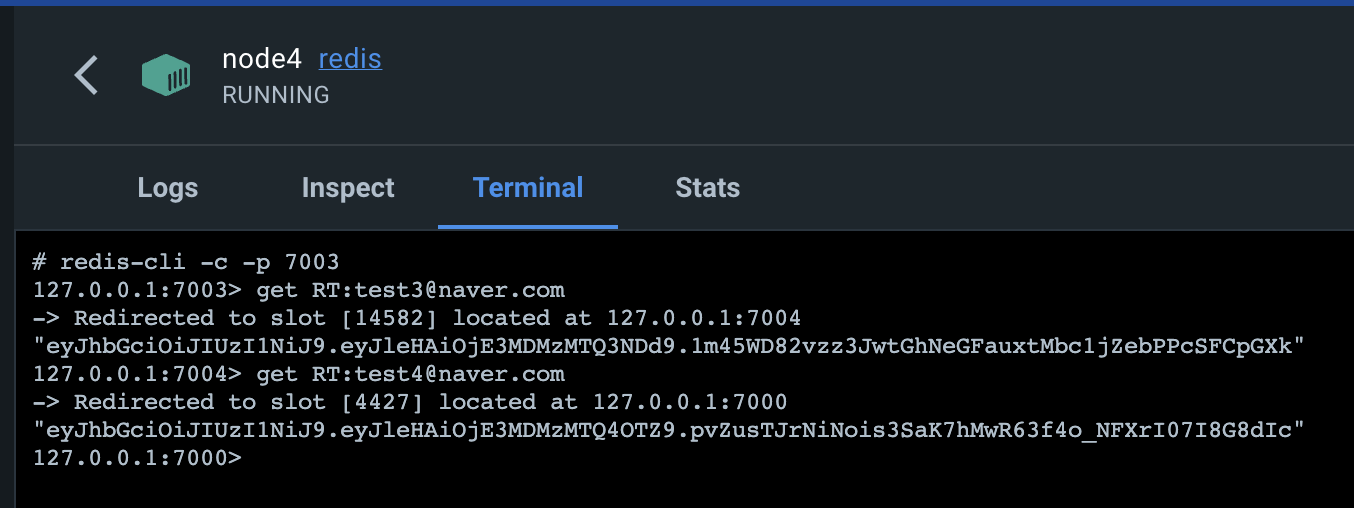
- test3@naver.com 과 test4@naver.com 로그인 후 레디스 클러스터로 확인해보았다.

- test3@naver.com은 7002번 노드에 test4@naver.com는 7000번에 저장이 된것을 알 수 있었다. -> 부하 분산
그러면 test3@naver.com이 저장된 7002번 노드가 만약에 알 수 없는 장애로 꺼져버리거나 중단이 되었을 경우를 가정해보자. 7002번 노드는 7003번과 Master-Slave 관계를 가지고 있기에 7003번 노드가 Master로 승격을 해서 고가용성을 확보해야한다.

- 7002번 노드를 끄고 7003번 노드를 확인하니 연결이 끊김을 감지하고
Cluster State changed:ok가 뜨고 Master 노드로 승격한 것을 확인할 수 있었다. test3@naver.com, test4@naver.com의 값을 확인해보니 토큰을 잘 가져오는 것을 확인하면서 잘 작동이 됨을 알 수 있었다. -> 고가용성
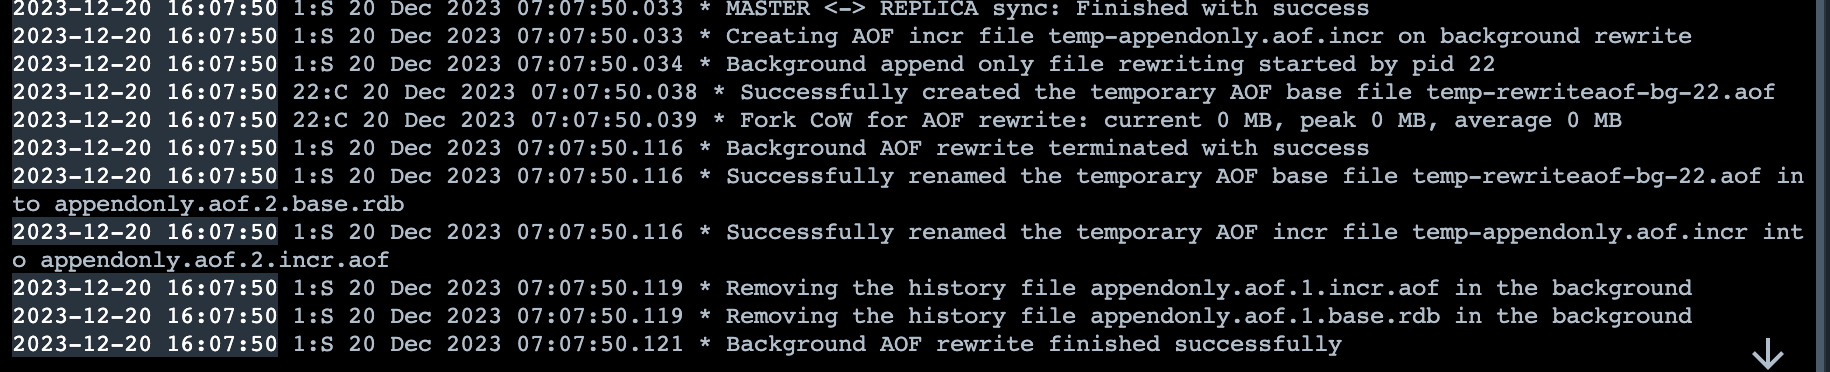
- 그럼 7002번 노드를 다시 한번 실행시켜보자.
Background AOF rewite finished successfully가 뜨면서 AOF를 통해 저장된 데이터를 가져왔음을 알 수 있었다. -> 확장성

- 7002번 노드(node3) 역시 test3@naver.com, test4@naver.com의 값을 확인해보니 토큰을 잘 가져오는 것을 확인하면서 잘 작동이 됨을 알 수 있었다.
결론
- 이전 게시물로부터 JWT를 사용하게된 과정 → JWT에 Redis의 BlackList를 사용하게 된 과정 → Redis의 Master-Slave 구조를 사용하게 된 과정 → Redis Cluster를 사용하게 된 과정을 쭈욱 작성해보았다. 처음부터 Redis Cluster를 사용해야겠다는 생각은 들지 않았지만, 어떠한 문제가 발생했을 시 어떻게 해결해야 할지를 스스로 고민을 하면서 Redis Cluster까지 오게 되었다.
- Redis Cluster를 사용함으로써 Redis를 이용한 블랙리스트가 알 수 없는 오류로 문제가 발생했을 때를 대비 하여 데이터를 분산하여 저장하고(분산환경), 노드가 추가되었을 때는 데이터가 자동으로 재분배되고, 기존 노드의 장애시 다른 노드로 이전되는 확장성, 고가용성을 얻을 수 있었다.
참고 자료

방구석개발자