들어가기
사용: HTML, CSS, jQuery
콜백함수: 어떤 함수에서 complete라는 인자를 받는다면 해당 함수를 모두 종료한 뒤 complete에 입력한 함수를 실행합니다. 이때, complete에 입력한 함수를 콜백함수라고 합니다.
본격적으로~
1. CSS 애니메이션으로 조절하기
클래스를 추가하고 삭제하는 메서드를 사용하여 css 애니메이션이 있는 클래스를 이용해 다음과 같이 공격하는 모션을 주었습니다.
사용: addClass, removeClass
생각하기
- CSS에 애니메이션 키프레임과 애니메이션을 가진 클래스를 별도로 생성합니다.
- 생성한 클래스를
click이벤트의 콜백함수에서 삭제하고 추가하는 등의 작업을 합니다. click이벤트를 실행하기 전엔 애니메이션 클래스가 없는 상태로 되야 하니, 애니메이션 동작시간 이후에 모든 클래스를 지워줍니다. -setTimeout이라는 메서드를 추가로 사용했습니다.
코드: css 클래스 추가 및 삭제
<!DOCTYPE html>
<html lang="ko">
<head>
<meta charset="UTF-8">
<title>스타크래프트</title>
<style>
.background {
position: relative;
background-image: url('background.png');
background-size: 500px 330px;
width: 500px;
height: 330px;
}
#drone {
position: absolute;
width: 100px;
height: 100px;
top: 100px;
left: 60px;
}
#bunker {
position: absolute;
width: 150px;
height: 150px;
top: 80px;
right: 20px;
}
#spit {
display: none;
position: absolute;
top: 140px;
left: 150px;
width: 50px;
height: 30px;
z-index: 2;
}
#spit.attack{
display: block;
animation: shot 1s;
}
#bunker.minus{
animation: blood 0.5s;
}
@keyframes shot{
0%{
left: 150px;
}
100%{
left: 300px;
}
}
@keyframes blood{
0%{
opacity: 0.5;
}
100%{
opacity: 1;
}
}
</style>
</head>
<body>
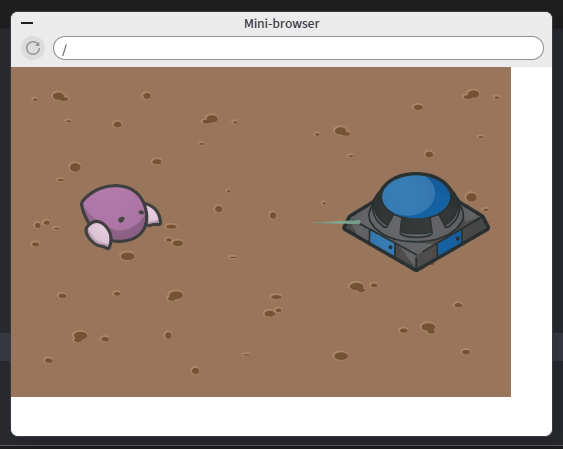
<div class='background'>
<img id='drone' src="drone.png" alt="drone">
<img id='spit' src="spit.png" alt="spit">
<img id='bunker' src="bunker.png" alt="bunker">
</div>
<script
src="https://code.jquery.com/jquery-3.5.1.js"
integrity="sha256-QWo7LDvxbWT2tbbQ97B53yJnYU3WhH/C8ycbRAkjPDc="
crossorigin="anonymous"></script>
<script>
$('#drone').click(function(){
$('#bunker').removeClass('minus');
$('#spit').addClass('attack');
setTimeout(function(){
$('#spit').removeClass('attack');
$('#bunker').addClass('minus');
}, 1000);
});
</script>
</body>
</html>2. 자체 메서드로 조절하기
fade 클래스를 줘서 했던 방법과는 달리 script 내부에 들여쓰기가 많이 생긴 것을 확인할 수 있습니다. 또한 그만큼 콜백함수가 많이 쌓여서 이것만 사용하기엔 무리가 있습니다. 물론 지연시간만 잘 계산해주면 콜백없이도 가능합니다.
사용: fadeIn, fadeOut
fadeIn(duration, complete);
- duration: 실행시간 ms 단위
- complete: 완료 후 실행할 함수
생각하기
jQuery로 위치값을 변경하기 위해 css()를 사용했습니다. animation이 아닌 transform을 사용했기 때문에 fadeOut된 상태에서도 transform의 값이 유지됩니다. 따라서 마지막엔 다시 원점으로 돌려주어야 합니다.
코드: fade 사용
<script src="https://code.jquery.com/jquery-3.5.1.js"
  integrity="sha256-QWo7LDvxbWT2tbbQ97B53yJnYU3WhH/C8ycbRAkjPDc="
  crossorigin="anonymous">
</script>
<script>
    $('#drone').click(function(){
        $('#spit:hidden').fadeIn(10, function(){
  		$('#spit').css({'transform':'translateX(120px)'});
  			$('#spit').fadeOut(1000, function(){
  				$('#bunker').fadeOut(10, function(){
  					$('#bunker').fadeIn(10, function(){
  						$('#spit').css({'transform':'translateX(0)'});
                    })
                })
            })
        })
	});
</script>
animate 필수적으로 들어가야하는 css 속성들 작성하는 것 외에는 모두 옵션들이어서 작성이 비교적 쉽습니다.
사용: .animate( properties [, duration ] [, easing ] [, complete ] ), fadeIn(), fadeOut
- properties:
{ }안에 css 속성을 직접 작성할 수 있습니다. 단, 정해진 속성들이 있어서 찾아보고 쓰시는 걸 추천드립니다. - duration: 지속시간입니다. 기본값은 400ms입니다.
- easing: 애니메이션 효과의 방식을 정합니다. swing과 linear이 가능하며, 기본값은 swing입니다.
- complete: 요소가 사라진 후 수행할 작업을 정합니다.
코드: animate 사용
<script
  src="https://code.jquery.com/jquery-3.5.1.js"
  integrity="sha256-QWo7LDvxbWT2tbbQ97B53yJnYU3WhH/C8ycbRAkjPDc="
  crossorigin="anonymous"></script>
<script>
  $('#drone').click(function(){
  	$('#spit').fadeIn();
  	$('#spit').animate({left:250});
  	$('#spit').fadeOut(1000);
  	$('#spit').animate({left:150});
  });
</script>
결과

추가
콜백함수를 이용해 특정 애니메이션이 끝난 후에 hp를 감소시킬 수 있습니다.
코드: hp 감소
<body>
    <h1 id='hp'>HP: 3</h1>
  <!--생략-->

    <script
  src="https://code.jquery.com/jquery-3.5.1.js"
  integrity="sha256-QWo7LDvxbWT2tbbQ97B53yJnYU3WhH/C8ycbRAkjPDc="
  crossorigin="anonymous"></script>
    <script>
        let hp = 3; //값이 변하기 때문에 let키워드를 사용합니다.
        $('#drone').click(function(){
            $('#spit').fadeIn();
            $('#spit').animate({left: '+=250'});
            $('#spit').fadeOut(function(){
                hp = hp - 1;
                $('#hp').text('HP: ' + hp);
            });
            $('#spit').css({left: '150px'});
        });
    </script>
</body>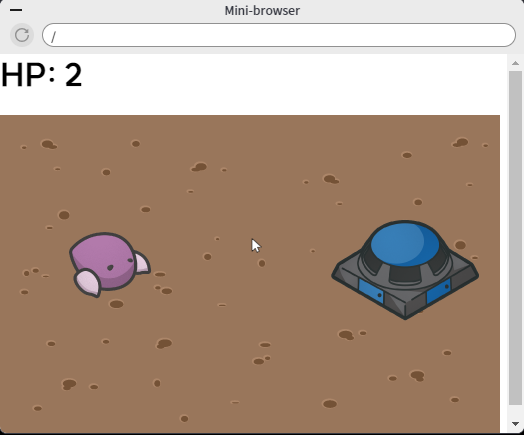
상단의 HP 표시가 공격이 끝난 이후에 하나씩 줄어드는 것을 확인할 수 있습니다.
HP가 0이라면 벙커가 사라지게 하기
조건문을 사용하여 HP가 0일 경우를 고려합니다.
코드: hp가 없으면 사라지기
<!--생략-->
<script>
  //생략
	$('#spit').fadeOut(function(){
		hp = hp - 1;
		$('#hp').text('HP: ' + hp);
		if(hp == 0) {
			$('#bunker').fadeOut();
		}
	});
  //생략
</script>
결론
기존에 알고 있던 jQuery였지만 사용을 직접 하자니 또 잘 안 나옵니다. 구현을 하기 전에 생각을 하고 어느 정도 코드 순서를 잡아보는 연습도 되었습니다. 또한 여러가지 메서드들이 있지만 그걸 섞어서 쓰기 보다는 한 가지 방법 내에서 사용을 하는 습관이 있는 듯합니다. 이 부분도 앞으로 코드를 작성할 때 좀 더 시야를 넓게 보고 다양한 시도를 해보도록 해야겠습니다.