Error: Looks like you have nested a 'NavigationContainer' inside another.
리액트 네이티브 - expo 환경에서 bottom bar를 구현하는 중 curved bar를 구현하고 싶어 찾아보던 중, react-native-curved-bottom-bar 라는 서드파티 모듈을 발견했다.
npm으로 깔아야 하는 패키지들을 모두 깔아준 후, 공식 문서에 있는 예제 코드를 VS Code에서 그대로 실행해봤는데, 다음과 같은 오류가 발생했다.
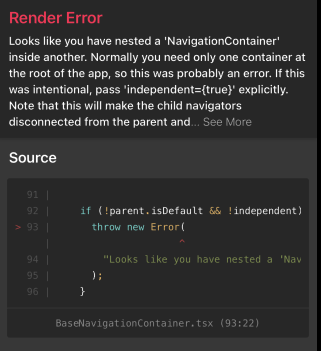
Error: Looks like you have nested a 'NavigationContainer' inside another.
Normally you need only one container at the root of the app, so this was probably an error.
If this was intentional, pass 'independent={true}' explicitly.
Note that this will make the child navigators disconnected from the parent and you won't be able to navigate between them.
이 말인 즉슨, NavigationContainer는 중첩해서 사용할 수 없다는 것이다.
당연하게도 Navigation Bar는 GNB로 작동해야 하기 때문에 한 곳에서만 선언, 사용되어야 한다.
그럼 도대체 어디서 중첩 선언을 했지..? 난 분명 공식 문서 코드를 복사해서 붙여넣기 했을뿐인데...
먼저 Bottom Bar 컴포넌트 파일인 AppBar.js를 먼저 보면,
// /components/AppBar.js

import React from "react";
import {
  Alert,
  Animated,
  StyleSheet,
  TouchableOpacity,
  View,
  LogBox,
} from "react-native";
import { CurvedBottomBarExpo } from "react-native-curved-bottom-bar";
import Ionicons from "@expo/vector-icons/Ionicons";
import { NavigationContainer } from "@react-navigation/native";

LogBox.ignoreAllLogs();

const Screen1 = () => {
  return <View style={styles.screen1} />;
};

const Screen2 = () => {
  return <View style={styles.screen2} />;
};

export default function AppBar() {
  const _renderIcon = (routeName, selectedTab) => {
    let icon = "";

    switch (routeName) {
      case "title1":
        icon = "ios-home-outline";
        break;
      case "title2":
        icon = "settings-outline";
        break;
    }

    return (
      <Ionicons
        name={icon}
        size={25}
        color={routeName === selectedTab ? "black" : "gray"}
      />
    );
  };
  const renderTabBar = ({ routeName, selectedTab, navigate }) => {
    return (
      <TouchableOpacity
        onPress={() => navigate(routeName)}
        style={styles.tabbarItem}
      >
        {_renderIcon(routeName, selectedTab)}
      </TouchableOpacity>
    );
  };

  return (
    <NavigationContainer> // NavigationContainer 태그
      <CurvedBottomBarExpo.Navigator
        type="DOWN"
        style={styles.bottomBar}
        shadowStyle={styles.shawdow}
        height={55}
        circleWidth={50}
        bgColor="white"
        initialRouteName="title1"
        borderTopLeftRight
        renderCircle={({ selectedTab, navigate }) => (
          <Animated.View style={styles.btnCircleUp}>
            <TouchableOpacity
              style={styles.button}
              onPress={() => Alert.alert("Click Action")}
            >
              <Ionicons name={"apps-sharp"} color="gray" size={25} />
            </TouchableOpacity>
          </Animated.View>
        )}
        tabBar={renderTabBar}
      >
        <CurvedBottomBarExpo.Screen
          name="title1"
          position="LEFT"
          component={() => <Screen1 />}
        />
        <CurvedBottomBarExpo.Screen
          name="title2"
          component={() => <Screen2 />}
          position="RIGHT"
        />
      </CurvedBottomBarExpo.Navigator>
    </NavigationContainer>
  );
}

export const styles = StyleSheet.create({
  container: {
    flex: 1,
    padding: 20,
  },
  shawdow: {
    shadowColor: "#DDDDDD",
    shadowOffset: {
      width: 0,
      height: 0,
    },
    shadowOpacity: 1,
    shadowRadius: 5,
  },
  button: {
    flex: 1,
    justifyContent: "center",
  },
  bottomBar: {},
  btnCircleUp: {
    width: 60,
    height: 60,
    borderRadius: 30,
    alignItems: "center",
    justifyContent: "center",
    backgroundColor: "#E8E8E8",
    bottom: 30,
    shadowColor: "#000",
    shadowOffset: {
      width: 0,
      height: 1,
    },
    shadowOpacity: 0.2,
    shadowRadius: 1.41,
    elevation: 1,
  },
  imgCircle: {
    width: 30,
    height: 30,
    tintColor: "gray",
  },
  tabbarItem: {
    flex: 1,
    alignItems: "center",
    justifyContent: "center",
  },
  img: {
    width: 30,
    height: 30,
  },
  screen1: {
    flex: 1,
    backgroundColor: "#BFEFFF",
  },
  screen2: {
    flex: 1,
    backgroundColor: "#FFEBCD",
  },
});NavigationContainer가 선언된 건 이 한 부분밖에 없다. 공식 문서의 유튜브 영상에서도 보면, 코드의 수정 없이 그대로 실행했을 때 정상 작동하는 모습을 보였다.
그럼 어디서 문제인가..?
답은 App.js에 있었다.
// App.js

import React from "react";
import { NavigationContainer } from "@react-navigation/native";
import AppBar from "./components/AppBar";

const App = () => {
  return (
    <NavigationContainer>
      <AppBar />
    </NavigationContainer>
  );
};

export default App;
보다시피 AppBar가 NavigationContainer에 감싸져 있다. curved bar로 구현하려 하기 전에, 연습을 할 때 이렇게 코드를 짜고 수정을 안 한 상태에서 실행을 돌리니까 중첩 오류가 발생한 것이었다...
오류 메세지를 다시 보면,
Error: Looks like you have nested a 'NavigationContainer' inside another.
Normally you need only one container at the root of the app, so this was probably an error.
If this was intentional, pass 'independent={true}' explicitly.
Note that this will make the child navigators disconnected from the parent and you won't be able to navigate between them.
내용을 해석하다보면, 만약 중첩이 의도한 것이라면 NavigationContainer에 <independent={true}> 속성을 적용시켜서 독립성을 보장하라고 한다. 하지만 그럴 경우는 거의 없고 나는 의도한 것이 아니기 때문에 깔끔하게 지워주기로 했다.
// App.js

import React from "react";
import { NavigationContainer } from "@react-navigation/native";
import AppBar from "./components/AppBar";

const App = () => {
  return (
  	<>
      <AppBar />
  	</>
  );
};

export default App;
이렇게 하니 오류가 사라지고 렌더링이 잘 된다.

출처: https://github.com/hoaphantn7604/react-native-curved-bottom-bar