실용주의 프로그래머님의 인프런 강의를 듣고 작성하였습니다.
출처: https://www.inflearn.com/course/%EC%9E%A5%EA%B3%A0-%ED%95%80%ED%84%B0%EB%A0%88%EC%8A%A4%ED%8A%B8/lecture/62871?tab=note&speed=1.25
Comment App
- Create / Delete View
- Success_url to related article
- Model (article 어떤 글인지 /writer 글쓴이가 누구 인지 /content 댓글 내용은 무엇인지 /created_at 언제 작성되었는지)
Mixin이란? Detail view를 Form으로 하고 싶다면 Mixin을 이용해야 한다. FormMixin을 사용하면 form_class를 지정해줌으로써 deatail view에서도 form을 사용할 수 있다.
- python manage.py startapp commentapp 을 통해 commentapp 생성
- settings와 url에서 commentapp과 path를 추가
path('comments/', include('commentary.urls')),- urls.py 생성
from django.urls import path

from commentapp.views import CommentCreateView

app_name = 'commnetapp'

urlpatterns = [
    path('create/', CommentCreateView.as_view(), name='create')
]- models.py에서 Comment 모델 작성
from django.contrib.auth.models import User
from django.db import models

# Create your models here.
from articleapp.models import Article


class Comment(models.Model):
    article = models.ForeignKey(Article, on_delete=models.SET_NULL, null=True, related_name='commnet')
    writer = models.ForeignKey(User, on_delete=models.SET_NULL, null=True, related_name='commnet')

    content = models.TextField(null=False)

created_at = models.DateTimeField(auto_now=True)- views.py
from django.shortcuts import render

# Create your views here.
from django.views.generic import CreateView

from commentapp.models import Comment


class CommentCreateView(CreateView):
    model = Comment
    form_class = CommentCreationForm
    template_name = 'commentapp/create.html'

    def get_success_url(self):
return reverse('articleapp:detail', kwargs={'pk': self.object.article.pk})- forms.py 생성
from django.forms import ModelForm

from commentapp.models import Comment


class CommentCreationForm(ModelForm):
    class Meta:
        model = Comment
fields = ['content']- migration 작업
python manage.py makemigrations
python manage.py migrate
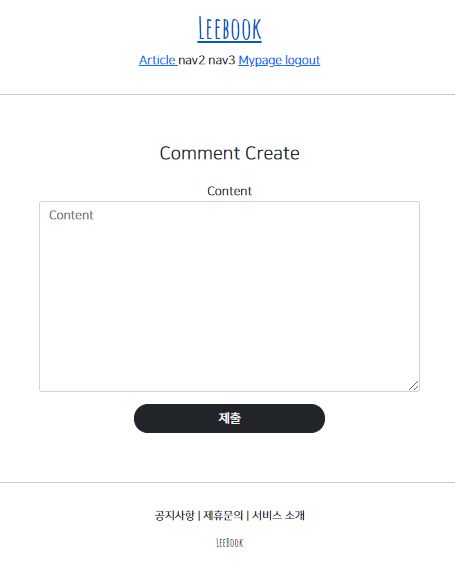
- create.html
<!--{% extends 'base.html' %}-->
<!--나중에 articleapp/detail.html에서 불러와서 쓸 것이기 때문에
거기서도 base.html을 extends 하기 때문에 여기서는 지워준다.-->
{% load bootstrap4 %}


{% block content %}

    <div style="text-align: center; max-width: 500px; margin: 4rem auto">
        <div class="mb-4">
            <h4>
                Comment Create
            </h4>
        </div>
        <form action="{% url 'commentapp:create' %}" method="post">
            {% csrf_token %}
            {% bootstrap_form form %}

            <input type="submit" class="btn btn-dark rounded-pill col-6 mt-3">
          <!--            현재 article의 pk 값을 얻어와서 나중에 article detail에 넘겨준다.-->
            <input type="hidden" name="article_pk" value="{{ article.pk }}">
        </form>
    </div>

{% endblock %}
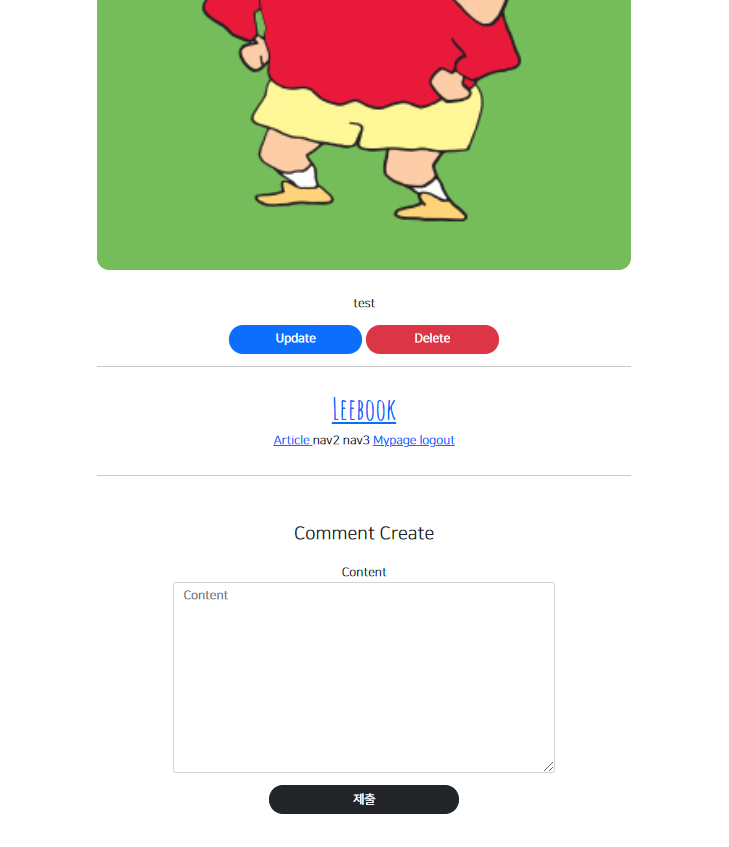
근데 이렇게 댓글을 달기 위해 새 페이지로 들어오는 것이 아닌 게시글에서 바로 댓글을 달 수 있도록 해야 한다.
articleapp/templates/articleapp/detail.html에서 include를 통해 저 페이지를 박아넣는다.
{% include 'commnetapp/create.html' with article=target_article %}
또한 articleapp/view.py에서 DetailView를 보면 Form이 없다. FormMixin을 가져와서 다중 상속 시켜준다.
class ArticleDetailView(DetailView, FormMixin):
    model = Article
    form_class = CommentCreationForm
    context_object_name = 'target_article'
    template_name = 'articleapp/detail.html'
이렇게 한다고 완성된 것이 아니라 서버에서 설정해줘야 할 것이 있다.
commentapp/views.py
class CommentCreateView(CreateView):

    def form_valid(self, form):
        temp_comment = form.save(commit=False)
        temp_comment.article = Article.objects.get(pk=self.request.POST['article_pk'])
        temp_comment.writer = self.request.user
        temp_comment.save()
        return super().form_valid(form)
그 전에 commentapp/create에서 로그인 댓글을 달게 요청하는 버튼을 로그인이 되어 있을 경우에만 보여주도록 하고 로그인이 안됐을 경우 로그인하는 창으로 가도록 해준다.
            {% if user.is_authenticated %}
            <input type="submit" class="btn btn-dark rounded-pill col-6 mt-3">
            {% else %}
<!--            next를 통해 어디로 되돌아 와야 하는지도 설정해준다.-->
            <a href="{% url 'accountapp:login' %}?next={{ request.path }}"
                class="btn btn-dark rounded-pill col-6 mt-3">
                Login
            </a>
            {% endif %}
이제 작성한 댓글을 보이도록 해보자
articleapp/templates/articleapp/detail.html
            {% for comment in target_article.comment.all %}
                {% include 'commentapp/detail.html' with comment=comment %}
            {% endfor %}
commentapp/templates/commentapp/detail.html 생성
<div style="border: 1px solid; text-align: left; padding: 4%; margin: 1rem 0; border-radius:1rem;
border-color: #bbb;">
<div>
<strong>
{{ comment.writer.profile.nickname }}
</strong>
   
{{ comment.created_at }}
</div>
<div style="margin: 1rem 0">
{{ comment.content }}
</div>
</div>이제 댓글 삭제 기능을 구현한다.
commentapp/views.py
class CommentDeleteView(DeleteView):
    model = Comment
    context_object_name = 'target_comment'
    template_name = 'commentapp/delete.html'

    def get_success_url(self):
        return reverse('articleapp:detail', kwargs={'pk': self.object.article.pk})
commentapp/delete.html을 생성해준다.
<div style="border: 1px solid; text-align: left; padding: 4%; margin: 1rem 0; border-radius:1rem;
border-color: #bbb;">
<div>
<strong>
{{ comment.writer.profile.nickname }}
</strong>
   
{{ comment.created_at }}
</div>
<div style="margin: 1rem 0">
{{ comment.content }}
</div>
{% if comment.writer == user %}
<div style="text-align: right">
<a href="{% url 'commentapp:delete' pk=comment.pk %}"\\
class="btn btn-danger rounded-pill">
Delete
</a>
</div>
{% endif%}
</div>commentapp/detail.html에서 삭제 링크를 추가한다.
    <div style="text-align: right">
        <a href="{% url 'commentapp:delete' pk=comment.pk%}">
            Delete
        </a>
    </div>
url에도 당연히 추가를 해줘야 한다.
commentapp/urls.py
path('delete/<int:pk>', CommentDeleteView.as_view(), name='delete')
이 삭제 버튼을 항상 보여주면 안된다. 그 댓글을 작성한 유저만 볼 수 있도록 해야 한다.
    {% if comment.writer == user %}
		...
    {% endif%}
delete view에도 댓글의 주인을 확인하는 데코레이터를 적용시키기 위해 decorators.py를 생성하고 적용시켜준다.
commentapp/decorators.py
from django.contrib.auth.models import User
from django.http import HttpResponseForbidden

from commentapp.models import Comment


def comment_ownership_required(func):
    def decorated(request, *args, **kwargs):
        comment = Comment.objects.get(pk=kwargs['pk'])
        if not comment.writer == request.user:
            return HttpResponseForbidden()
        return func(request, *args, **kwargs)
    return decorated