##################################################################
나도 코딩 강의를 듣고 정리한 내용입니다.
출처 : 나도코딩 https://www.youtube.com/channel/UC7iAOLiALt2rtMVAWWl4pnw
##################################################################
Project) 여러 이미지를 합치는 프로그램을 만드시오
프로젝트
[사용자 시나리오]
1. 사용자는 합치려는 이미지를 1개 이상 선택한다.
2. 합쳐진 이미지가 저장될 경로를 지정한다.
3. 가로넓이, 간격, 포맷 옵션을 지정한다.
4. 시작 버튼을 통해 이미지를 합친다.
5. 닫기 버튼을 통해 프로그램을 종료한다.
[기능 명세]
1. 파일추가 : 리스트 박스에 파일 추가
2. 선택삭제 : 리스트 박스에서 선택된 항목 삭제
3. 찾아보기 : 저장 폴더를 선택하면 텍스트 위젯에 입력
4. 가로넓이 : 이미지 넓이 지정 (원본유지, 1024, 800, 640)
5. 간격 : 이미지 간의 간격 지정 (없음, 좁게, 보통, 넓게)
6. 포맷 : 저장 이미지 포맷 지정 (PNG, JPG, BMP)
7. 시작 : 이미지 합치기 작업 실행
8. 진행상황 : 현재 진행중인 파일 순서에 맞게 반영
9. 닫기 : 프로그램 종료
레이아웃
from tkinter import *

root = Tk()
root.title("Ju GUI")


# 파일 프레임 (파일 추가, 선택 삭제)
file_frame = Frame(root)
file_frame.pack(fill="x", padx=5, pady=5) # pad로 간격 띄우기

btn_add_file = Button(file_frame, padx=5, pady=5, width=12, text="파일추가")
btn_add_file.pack(side="left")

btn_del_file = Button(file_frame, padx=5, pady=5, width=12, text="파일삭제")
btn_del_file.pack(side="right")

# 리스트 프레임
list_frame = Frame(root)
list_frame.pack(fill="both", padx=5, pady=5)

scrollbar = Scrollbar(list_frame)
scrollbar.pack(side="right", fill="y")

list_file = Listbox(list_frame, selectmode="extended", height=15, yscrollcommand=scrollbar.set)
list_file.pack(side="left", fill="both", expand=True)
scrollbar.config(command=list_file.yview)


# 저장 경로 프레임
path_frame = LabelFrame(root, text="저장경로")
path_frame.pack(fill="x", padx=5, pady=5, ipady=5)

txt_dest_path = Entry(path_frame)
txt_dest_path.pack(side="left", fill="x", expand=True, ipady=4, padx=5, pady=5) # ipady 높이 변경

btn_dest_path = Button(path_frame, text="찾아보기", width=10)
btn_dest_path.pack(side="right", padx=5, pady=5)

# 옵션 프레임
frame_option = LabelFrame(root, text="옵션")
frame_option.pack(padx=5, pady=5, ipady=5)

# 1. 가로 넓이 옵션
# 가로 넓이 레이블
lbl_width = Label(frame_option, text="가로넓이", width=8)
lbl_width.pack(side="left", padx=5, pady=5)

# 가로 넓이 콤버
import tkinter.ttk as ttk
opt_width = ["원본유지", "1024", "800", "640"]
cmb_width = ttk.Combobox(frame_option, state="readonly", values=opt_width, width=10)
cmb_width.current(0)
cmb_width.pack(side="left", padx=5, pady=5)

# 2. 간격 옵션
# 간격 옵션 레이블
lbl_space = Label(frame_option, text="간격", width=8)
lbl_space.pack(side="left", padx=5, pady=5)

# 간격 옵션 콤보
import tkinter.ttk as ttk
opt_space = ["없음", "좁게", "보통", "넓게"]
cmb_space = ttk.Combobox(frame_option, state="readonly", values=opt_space, width=10)
cmb_space.current(0)
cmb_space.pack(side="left", padx=5, pady=5)

# 3. 파일 포맷 옵션
# 파일 포맷 옵션 레이블
lbl_format = Label(frame_option, text="포맷", width=8)
lbl_format.pack(side="left", padx=5, pady=5)

# 파일 포맷 옵션 콤보
import tkinter.ttk as ttk
opt_format = ["PNG", "JPG", "BMP"]
cmb_format = ttk.Combobox(frame_option, state="readonly", values=opt_format, width=10)
cmb_format.current(0)
cmb_format.pack(side="left", padx=5, pady=5)

# 진행 상황 Progress Bar
frame_progress = LabelFrame(root, text="진행상황")
frame_progress.pack(fill="x", padx=5, pady=5, ipady=5)

p_var = DoubleVar()
progress_bar = ttk.Progressbar(frame_progress, maximum=100, variable=p_var)
progress_bar.pack(fill="x", padx=5, pady=5)

# 실행 프레임
frame_run = Frame(root)
frame_run.pack(fill="x", padx=5, pady=5)

btn_close = Button(frame_run, padx=5, pady=5, text="닫기", width=12, command=root.quit)
btn_close.pack(side="right", padx=5, pady=5)

btn_start = Button(frame_run, padx=5, pady=5, text="시작", width=12)
btn_start.pack(side="right", padx=5, pady=5)


root.resizable(True, True)
root.mainloop()
파일 추가 & 선택 삭제
- 버튼에 command 추가
btn_add_file = Button(file_frame, padx=5, pady=5, width=12, text="파일추가", command=add_file)
btn_add_file.pack(side="left")

btn_del_file = Button(file_frame, padx=5, pady=5, width=12, text="파일삭제", command=del_file)
btn_del_file.pack(side="right")- 파일 추가 함수
-> askopenfilenames : 사용자에게 복수개의 파일 선택하도록
-> filetypes : 불러올 파일 타입 지정
-> initialdir : 최초에 C:/ 경로를 보여줌
# 파일 추가
def add_file():
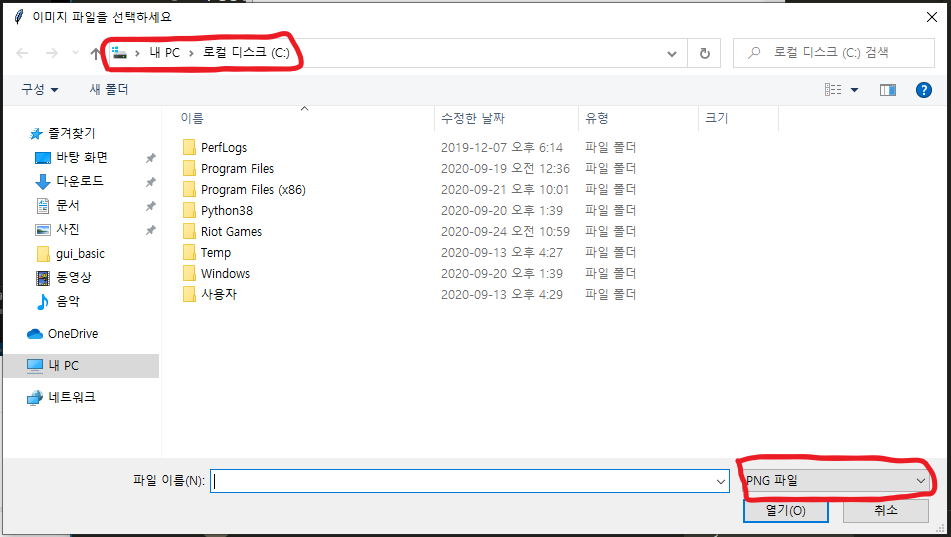
files = filedialog.askopenfilenames(title="이미지 파일을 선택하세요", \
filetypes=(("PNG 파일", "*.png"), ("모든 파일", "*.*")), \
initialdir="C:/" )
# 사용자가 선택한 파일 목록
for file in files:
list_file.insert(END, file)- 선택 삭제 함수
-> 인덱스 순서대로 지울 때 앞부터 지우면 인덱스에 변화가 생기니까 reversed를 통해 뒤에서부터 가져와서 지운다.
# 선택 삭제
def del_file():
    for index in reversed(list_file.curselection()):
list_file.delete(index)- 파일 추가 버튼 눌렀을 때
저장 경로 (폴더)
- 저장 경로 프레임에서 찾아보기 버튼 누르면 함수 browse_dest_path 발동하도록 작성
btn_dest_path = Button(path_frame, text="찾아보기", width=10, \
command=browse_dest_path)- 함수 browse_dest_path
# 저장 경로 (폴더)
def browse_dest_path():
    folder_selected = filedialog.askdirectory()
    if folder_selected is None: # 사용자가 취소를 누를 때
        return
    txt_dest_path.delete(0, END) # 엔트리니까 0, text였으면 1.0
    txt_dest_path.insert(0, folder_selected)
시작 버튼
- 시작 버튼에 start command 추가
btn_start = Button(frame_run, padx=5, pady=5, text="시작",\
width=12, command=start)- 시작 함수
- 파일 목록과 저장 경로 지정했는지 확인해주기
import tkinter.messagebox as msgbox
# 시작
def start():
    # 각 옵션들 값을 확인
    print(f"가로넓이 : {cmb_width.get()}")
    print(f"간격 : {cmb_space.get()}")
    print(f"포맷 : {cmb_format.get()}")

    # 파일 목록 확인
    if list_file.size() == 0:
        msgbox.showwarning("경고", "이미지 파일을 추가하세요")
        return

    # 저장 경로 확인
    if len(txt_dest_path.get()) == 0:
        msgbox.showwarning("경고", "저장 경로를 추가하세요")
        return
미니 프로그램 자동스크린샷
- 편의를 위해 자동으로 스크린샷을 찍어주는 프로그램을 작성한다.
- 5초의 대기시간 후에 2초 간격으로 스크린샷을 찍는다.
- PIL을 사용하기 위해 터미널에 pip install pillow를 해준다.
# Python Image Library
from PIL import ImageGrab
import time

time.sleep(5) # 5초 대기. 사용자가 준비하는 시간

for i in range(1, 11): # 2초 간격으로 10개 이미지 저장
    img = ImageGrab.grab() # 현재 스크린샷
    img.save(f"image{i}.png") # 파일로 저장
    time.sleep(2) # 2초 단위
- 내가 원할 때 찍을 수 있는 스크린샷 프로그램
- pip install keyboard 필수
import keyboard
from PIL import ImageGrab
import time

def screenshot():
    # 2020년 6월 1일 10시 20분 30초 -> _20200601_102030
    curr_time = time.strftime("_%y%m%d_%H%M%S")
    img = ImageGrab.grab()
    img.save(f"image{curr_time}.png")

keyboard.add_hotkey("F9", screenshot) # 사용자가 F9 키를 누르면 스크린 샷 저장

keyboard.wait("esc") # 사용자가 esc 누를 때까지 프로그램 수행
이미지 합치기
- start 함수에 merge_image() 처리.
- 함수 merge_image()
from PIL import Image
import os
# 이미지 통합
def merge_image():
    images = [Image.open(x)for x in list_file.get(0, END)]

    # size -> size[0] : width, size[1] : height
    widths = [x.size[0] for x in images]
    heights = [x.size[1] for x in images]

    # 가장 width가 넓고 heights를 다 합친 큰 스케치북을 준비
    # 먼저 최대 넓이, 전체 높이 구해오기
    max_width, total_height = max(widths), sum(heights)

    # 스케치북 준비
    result_img = Image.new("RGB", (max_width, total_height), (255, 255, 255))
    y_offset = 0 # y 위치 정보
    for img in images:
        result_img.paste(img, (0, y_offset))
        y_offset += img.size[1] # height 값 만큼 더해줌

    dest_path = os.path.join(txt_dest_path.get(), "Ju_photo.jpg")
    result_img.save(dest_path)
    msgbox.showinfo("알림", "작업이 완료되었습니다.")
프로그래스바 연동
for idx, img in enumerate(images):
        result_img.paste(img, (0, y_offset))
        y_offset += img.size[1]

        progress = (idx + 1) / len(images) * 100 # 실제 percent 정보를 계산
        p_var.set(progress)
        progress_bar.update()
zip
- 두 리스트르 사과는 apple 바나나는 banana 방식으로 합쳐준다.
kor = ["사과", "바나나", "오렌지"]
eng = ["apple", "banana", "orange"]

print(list(zip(kor, eng)))- 반대로 unzip도 가능하다.
- 첫번째 끼리 두번째 끼리 분리
mixed = [("사과","apple"),("바나나","banana"),("오렌지","orange")]
kor2, eng2 = zip(*zip)
print(kor2)
print(eng2)- 이 zip을 통해 다음과 같이 바꿀 수 있다.
    # size -> size[0] : width, size[1] : height
    # widths = [x.size[0] for x in images]
    # heights = [x.size[1] for x in images]

    # [(10, 10), (20, 20), (30, 30)]
    widths, heights = zip(*(x.size for x in images))
옵션
- 이제 가로넓이, 간격, 포맷 옵션에 따라 이미지가 통합되도록 한다.
def merge_image():

    # 가로넓이
    img_width = cmb_width.get()
    if img_width == "원본유지":
        img_width = -1 # -1 일때는 원본 기준
    else:
        img_width = int(img_width)

    # 간격
    img_space = cmb_space.get()
    if img_space == "좁게":
        img_space = 30
    elif img_space == "보통":
        img_space = 60
    elif img_space == "넓게":
        img_space = 90
    else: # 없음
        img_space = 0

    # 포맷
img_format = cmb_format.get().lower()-
image_sizes를 리스트에 넣어서 하나씩 처리한다.
-
원본 사이즈의 경우 그냥 적용하면 되고 아닐 경우 다음과 같은 계산식을 사용한다.
-
계산식
100 * 60 이미지가 있음. -> width를 80으로 줄이면 height는?
(원본 width) : (원본 heigth) = (변경 width) : (변경 height)
100 : 60 = 80 : ?
? = 60*80/100. ? = 48. 결국 x:y = x':y'이라고 하면 y'=x'y/x가 계산식이 된다.우리 코드에 대입하려면?
x = width = size[0]
y = height = size[1]
x' = img_width
y' = img_width * size[1] / size[0]
images = [Image.open(x)for x in list_file.get(0, END)]

# 이미지 사이즈를 리스트에 넣어서 하나씩 처리
    image_sizes = [] # [(width1, height1), (width2, height2), ...]
    if img_width > -1:
        # width  값 변경
        image_sizes = [(int(img_width), int(img_width * x.size[1] \
        / x.size[0])) for x in images]
    else:
        # 원본 사이즈 사용
image_sizes = [(x.size[0], x.size[1]) for x in images]- 전에 작성했던 widths, heights = zip(*(x.size for x in images))도 이젠 옵션에 맞게 바꿔주어야 한다.
widths, heights = zip(*(image_sizes))- 스케치북에 옵션 적용하기
# 스케치북 준비
    if img_space > 0: # 이미지 간격 옵션 적용
        total_height + (img_space * (len(images)-1))

    result_img = Image.new("RGB", (max_width, total_height), (255, 255, 255))
    y_offset = 0 # y 위치 정보

    for idx, img in enumerate(images):
        # width가 원본유지가 아닐 때에는 이미지 크기 조정
        if img_width > -1:
            img = img.resize(image_sizes[idx])

        result_img.paste(img, (0, y_offset))
        y_offset += (img.size[1] + img_space) # heigth 값 + 사용자가 지정한 간격

        progress = (idx + 1) / len(images) * 100 # 실제 percent 정보를 계산
        p_var.set(progress)
        progress_bar.update()


    # 포맷 옵션 처리
    file_name= "Ju_photo." + img_format
    dest_path = os.path.join(txt_dest_path.get(), file_name)
    result_img.save(dest_path)
    msgbox.showinfo("알림", "작업이 완료되었습니다.")
버그 수정
- 경로 선택 후 다시 찾아보기 눌러서 취소 누르면 선택한 경로 사라지는 버그
if folder_selected is None: # 사용자가 취소를 누를 때
        return
를
if folder_selected == '': # 사용자가 취소를 누를 때
        return
로 고친다.
- 저장 경로를 C:/로 할 경우 권한이 없다는 오류
- 또한 존재하지 않는 경로를 했을 때 생기는 오류
- 위 두 오류에 대한 경고문이 뜨도록 고쳐준다.
try:
except Exception as err : # 예외처리
        msgbox.showerror("에러", err)
예외처리문으로 이미지통합 코드 부문을 감싸주어서 해결한다.
최종 코드
import tkinter.ttk as ttk
import tkinter.messagebox as msgbox
from tkinter import * # __all__
from tkinter import filedialog # 별도로 해줘야함
from PIL import Image
import os


root = Tk()
root.title("Ju GUI")

# 파일 추가
def add_file():
    files = filedialog.askopenfilenames(title="이미지 파일을 선택하세요", \
        filetypes=(("PNG 파일", "*.png"), ("모든 파일", "*.*")), \
            initialdir=r"C:\Users\jubin\Desktop\Python_workspace\gui_basic" )

    # 사용자가 선택한 파일 목록
    for file in files:
        list_file.insert(END, file)

# askopenfilenames : 사용자에게 복수개의 파일 선택하도록
# filetypes : 불러올 파일 타입 지정
# initialdir : 최초에 C:/ 경로를 보여줌

# 선택 삭제
def del_file():
    # print(list_file.curselection())
    # 인덱스 순서대로 지울 때 앞부터 지우면 인덱스에 변화가 생기니까 reversed를 통해 뒤에서부터 가져와서 지운다.
    for index in reversed(list_file.curselection()):
        list_file.delete(index)

# 저장 경로 (폴더)
def browse_dest_path():
    folder_selected = filedialog.askdirectory()
    if folder_selected == '': # 사용자가 취소를 누를 때
        return
    txt_dest_path.delete(0, END) # 엔트리니까 0, text였으면 1.0
    txt_dest_path.insert(0, folder_selected)

# 이미지 통합
def merge_image():

    try:
        # 가로넓이
        img_width = cmb_width.get()
        if img_width == "원본유지":
            img_width = -1 # -1 일때는 원본 기준
        else:
            img_width = int(img_width)

        # 간격
        img_space = cmb_space.get()
        if img_space == "좁게":
            img_space = 30
        elif img_space == "보통":
            img_space = 60
        elif img_space == "넓게":
            img_space = 90
        else: # 없음
            img_space = 0

        # 포맷
        img_format = cmb_format.get().lower()

        #######################################################

        images = [Image.open(x)for x in list_file.get(0, END)]

        # 이미지 사이즈를 리스트에 넣어서 하나씩 처리
        image_sizes = [] # [(width1, height1), (width2, height2), ...]
        if img_width > -1:
            # width  값 변경
            image_sizes = [(int(img_width), int(img_width * x.size[1] / x.size[0])) for x in images]
        else:
            # 원본 사이즈 사용
            image_sizes = [(x.size[0], x.size[1]) for x in images]

        # widths, heights = zip(*(x.size for x in images))
        widths, heights = zip(*(image_sizes))


        # 가장 width가 넓고 heights를 다 합친 큰 스케치북을 준비
        # 먼저 최대 넓이, 전체 높이 구해오기
        max_width, total_height = max(widths), sum(heights)

        # 스케치북 준비
        if img_space > 0: # 이미지 간격 옵션 적용
            total_height + (img_space * (len(images)-1))

        result_img = Image.new("RGB", (max_width, total_height), (255, 255, 255)) # 배경 흰색
        y_offset = 0 # y 위치 정보

        for idx, img in enumerate(images):
            # width가 원본유지가 아닐 때에는 이미지 크기 조정
            if img_width > -1:
                img = img.resize(image_sizes[idx])

            result_img.paste(img, (0, y_offset))
            y_offset += (img.size[1] + img_space) # heigth 값 + 사용자가 지정한 간격

            progress = (idx + 1) / len(images) * 100 # 실제 percent 정보를 계산
            p_var.set(progress)
            progress_bar.update()


        # 포맷 옵션 처리
        file_name= "Ju_photo." + img_format
        dest_path = os.path.join(txt_dest_path.get(), file_name)
        result_img.save(dest_path)
        msgbox.showinfo("알림", "작업이 완료되었습니다.")
    except Exception as err : # 예외처리
        msgbox.showerror("에러", err)

# 시작
def start():
    # 각 옵션들 값을 확인
    # print(f"가로넓이 : {cmb_width.get()}")
    # print(f"간격 : {cmb_space.get()}")
    # print(f"포맷 : {cmb_format.get()}")

    # 파일 목록 확인
    if list_file.size() == 0:
        msgbox.showwarning("경고", "이미지 파일을 추가하세요")
        return

    # 저장 경로 확인
    if len(txt_dest_path.get()) == 0:
        msgbox.showwarning("경고", "저장 경로를 추가하세요")
        return

    # 이미지 통합 작업
    merge_image()


# 파일 프레임 (파일 추가, 선택 삭제)
file_frame = Frame(root)
file_frame.pack(fill="x", padx=5, pady=5) # pad로 간격 띄우기

btn_add_file = Button(file_frame, padx=5, pady=5, width=12, text="파일추가", command=add_file)
btn_add_file.pack(side="left")

btn_del_file = Button(file_frame, padx=5, pady=5, width=12, text="파일삭제", command=del_file)
btn_del_file.pack(side="right")

# 리스트 프레임
list_frame = Frame(root)
list_frame.pack(fill="both", padx=5, pady=5)

scrollbar = Scrollbar(list_frame)
scrollbar.pack(side="right", fill="y")

list_file = Listbox(list_frame, selectmode="extended", height=15, yscrollcommand=scrollbar.set)
list_file.pack(side="left", fill="both", expand=True)
scrollbar.config(command=list_file.yview)


# 저장 경로 프레임
path_frame = LabelFrame(root, text="저장경로")
path_frame.pack(fill="x", padx=5, pady=5, ipady=5)

txt_dest_path = Entry(path_frame)
txt_dest_path.pack(side="left", fill="x", expand=True, ipady=4, padx=5, pady=5) # ipady 높이 변경

btn_dest_path = Button(path_frame, text="찾아보기", width=10, command=browse_dest_path)
btn_dest_path.pack(side="right", padx=5, pady=5)

# 옵션 프레임
frame_option = LabelFrame(root, text="옵션")
frame_option.pack(padx=5, pady=5, ipady=5)

# 1. 가로 넓이 옵션
# 가로 넓이 레이블
lbl_width = Label(frame_option, text="가로넓이", width=8)
lbl_width.pack(side="left", padx=5, pady=5)

# 가로 넓이 콤버
opt_width = ["원본유지", "1024", "800", "640"]
cmb_width = ttk.Combobox(frame_option, state="readonly", values=opt_width, width=10)
cmb_width.current(0)
cmb_width.pack(side="left", padx=5, pady=5)

# 2. 간격 옵션
# 간격 옵션 레이블
lbl_space = Label(frame_option, text="간격", width=8)
lbl_space.pack(side="left", padx=5, pady=5)

# 간격 옵션 콤보
opt_space = ["없음", "좁게", "보통", "넓게"]
cmb_space = ttk.Combobox(frame_option, state="readonly", values=opt_space, width=10)
cmb_space.current(0)
cmb_space.pack(side="left", padx=5, pady=5)

# 3. 파일 포맷 옵션
# 파일 포맷 옵션 레이블
lbl_format = Label(frame_option, text="포맷", width=8)
lbl_format.pack(side="left", padx=5, pady=5)

# 파일 포맷 옵션 콤보
opt_format = ["PNG", "JPG", "BMP"]
cmb_format = ttk.Combobox(frame_option, state="readonly", values=opt_format, width=10)
cmb_format.current(0)
cmb_format.pack(side="left", padx=5, pady=5)

# 진행 상황 Progress Bar
frame_progress = LabelFrame(root, text="진행상황")
frame_progress.pack(fill="x", padx=5, pady=5, ipady=5)

p_var = DoubleVar()
progress_bar = ttk.Progressbar(frame_progress, maximum=100, variable=p_var)
progress_bar.pack(fill="x", padx=5, pady=5)

# 실행 프레임
frame_run = Frame(root)
frame_run.pack(fill="x", padx=5, pady=5)

btn_close = Button(frame_run, padx=5, pady=5, text="닫기", width=12, command=root.quit)
btn_close.pack(side="right", padx=5, pady=5)

btn_start = Button(frame_run, padx=5, pady=5, text="시작", width=12, command=start)
btn_start.pack(side="right", padx=5, pady=5)


root.resizable(True, True)
root.mainloop()