alert()대신 customAlert() 만들기
https://velog.io/@juwon98/customAlert
위 포스팅에 이어지는 내용입니다
prompt(), confirm()
JavaScript 내장 함수 중
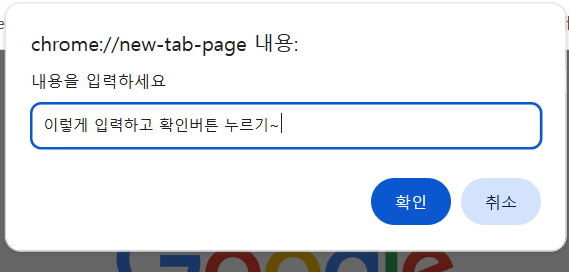
prompt()는 텍스트를 입력받기 위한 창을 띄우는 함수,
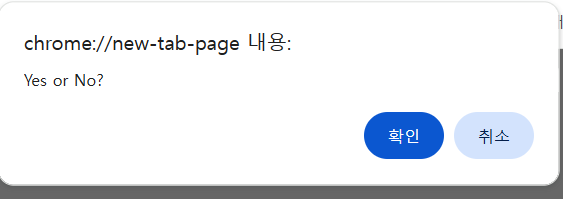
confirm()은 어떤 내용에 대해 Yes / No를 선택하도록 창을 띄우는 함수이다.
prompt()
confirm()
왜 만들까?
- 통일감을 주기 위해 JavaScript 내장 함수
prompt(),confirm()과 같은 역할을 하는 디자인만 다른 창을 만들고자 함 customAlert()처럼 비동기 작업의 콜백으로 안정적으로 사용하기 위함
보통 React 컴포넌트처럼 만들면 안되나?
물론, 가능하다.
하지만, alert()처럼 prompt(), confirm()도 기본적으로 JavaScript의 명령형 프로그래밍 흐름을 따르게 된다.
아래의 상황을 살펴보면서 어떻게 구현하는 것이 더 편할지 생각해보자.
1. 페이지에서 '승인' 버튼 클릭 -> "정말 승인하시겠습니까?" 문구가 적힌 confirm 창 열림
2. confirm 창의 '확인' 버튼 클릭 -> "추가 요청사항을 입력해주세요" 문구가 적힌 prompt 창 열림
3. prompt 창에 요청사항 입력 후 '확인' 버튼 클릭 -> 서버 요청 및 응답이 끝나면 "완료되었습니다" 문구가 적힌 alert 창 열림
4. alert 창의 '확인' 버튼 클릭 -> 다른 페이지로 이동
일반적인 React 컴포넌트(모달창)로 구현하기
간략하게 코드를 짜보면 아래와 같다.
const router = useRouter();
const [openedModal, setOpenedModal] = useState<'alert' | 'prompt' | 'confirm' | ''>('');

// ...

return (
  <button
    type="button"
    onClick={() => setOpenModal('confirm')}
  >
    승인
  </button>
  { /* ... */ }
  <ConfirmModal
    isOpen={openedModal === 'confirm'}
    onConfirm={() => {
      // ...
      setOpenModal('prompt');
    }}
    onClose={() => setOpenedModal('')}
    // ...
  />
  <PromptModal
    isOpen={openedModal === 'prompt'}
    onConfirm={() => {
      // ...
      setOpenModal('alert');
    }}
    onClose={() => setOpenedModal('')}
    // ...
  />
  <AlertModal
    isOpen={openedModal === 'alert'}
    onClose={() => setOpenedModal('')}
    // ...
  />
)
창이 열렸을 때의 사용자의 상호작용이 한정된 상태에서 각 상황에 따라 state를 관리하려고 생각하면 머리가 아프다...
지금처럼 간단한 상황에도 복잡한데, 한 페이지에서 여러 상황이 나올 수 있다면 정말 지옥일 것이다.
이렇게 React가 가지는 선언형 프로그래밍의 장점을 전혀 살리지 못하게 된다.
이런 상황에는 아래와 같이 시간 순으로 사용자가 버튼을 클릭함에 따른 렌더링을 직접 제어할 수 있는 명령형 프로그래밍이 유리하다고 생각한다.
const router = useRouter();

return (
  <button
    type="button"
    onClick={async () => {
      const isConfirmed = await customConfirm('정말 승인하시겠습니까?');
      if (isConfirmed) const inputText = await customPrompt('추가 요청사항을 입력해주세요.');
      await handleSubmit(inputText);
      await customAlert('완료되었습니다.');
      router.push('/example');
    }}
  >
    승인
  </button>
)
기가 막히죠?
구현하기
맨 위에 링크한 customAlert() 만들기에 이어서 구현하였다.
코드에 대한 설명은 주석 참고.
customAlert.ts
import { ReactNode } from 'react';

// 모달창 구분
export type ModalType = 'alert' | 'confirm' | 'prompt';

export type ModalOptions = {
  type: ModalType;
  message: ReactNode;
};

// confirm()은 ture/false를 반환하고, prompt()는 입력 내용을 반환하기 때문에 제네릭 함수로 재사용
type Resolver<T> = (value: T) => void;
// ImplementFn은 제네릭 함수를 매개변수로 가지는 함수. 호출 시 <T>를 생략하면 자동으로 타입 추론.
type ImplementFn = <T>(options: ModalOptions, resolve: Resolver<T>) => void;

let implement: ImplementFn | null = null;

export const setAlertImplementation = (fn: ImplementFn) => {
  implement = fn;
};

// alert() 대신 사용할 함수
export const customAlert = (message: ReactNode): Promise<void> => {
  if (typeof window === 'undefined' || !implement) return Promise.resolve(); // SSR 방지

  return new Promise((resolve) => {
    implement?.({ type: 'alert', message }, resolve);
  });
};

// confirm() 대신 사용할 함수
export const customConfirm = (message: ReactNode): Promise<boolean> => {
  if (typeof window === 'undefined' || !implement)
    return Promise.resolve(false);

  return new Promise((resolve) => {
    implement?.({ type: 'confirm', message }, resolve);
  });
};

// prompt() 대신 사용할 함수
export const customPrompt = (
  message: ReactNode,
): Promise<string | null> => {
  if (typeof window === 'undefined' || !implement) return Promise.resolve(null);

  return new Promise((resolve) => {
    implement?.({ type: 'prompt', message }, resolve);
  });
};
AlertProvider.tsx
'use client';
import {
ModalOptions,
ModalType,
setAlertImplementation,
} from '@/lib/customAlert';
import { ReactNode, useEffect, useState } from 'react';
export const AlertProvider = () => {
const [type, setType] = useState<ModalType | null>(null); // 모달창 타입 구분
const [message, setMessage] = useState<ReactNode | null>(null); // 내용
const [inputValue, setInputValue] = useState<string>(''); // prompt의 텍스트 입력 내용
const [resolver, setResolver] = useState<
((value?: boolean | string | null) => void) | null
>(null); // Promise의 resolve
const reset = () => {
setType(null);
setMessage(null);
setInputValue('');
setResolver(null);
};
// 확인 버튼 클릭 시 모달창 타입에 따라 다른 값 반환
const handleConfirm = () => {
if (!resolver) return;
if (type === 'alert') resolver();
if (type === 'confirm') resolver(true);
if (type === 'prompt') resolver(inputValue);
reset();
};
// 취소 버튼 클릭 시 모달창 타입에 따라 다른 값 반환
const handleClose = () => {
if (!resolver) return;
if (type === 'alert') resolver();
if (type === 'confirm') resolver(false);
if (type === 'prompt') resolver(null);
reset();
};
// customAlert(), customPrompt(), customConfirm() 호출(오픈) 시 실행될 함수
const implement = <T,>(
payload: ModalOptions,
resolve: (value: T) => void
) => {
// type, title, message, resolve를 설정하여 내용을 보여주고, 닫힐 때의 동작을 설정해둠
setType(payload.type);
setMessage(payload.message);
setResolver(() => resolve);
};
useEffect(() => {
setAlertImplementation(implement);
}, []);
if (!message || !type) return null;
/* customAlert(), costumConfirm() 호출 시 열릴 창 JSX */
if (type === 'alert' || type === 'confirm')
return (
<div
role="dialog"
className="fixed top-[50%] left-[50%] bg-black text-white py-4 px-6 rounded shadow max-w-sm -translate-x-1/2 -translate-y-1/2 flex flex-col z-[9999]">
<div className="mb-2 mx-auto">{message}</div>
<div className="flex gap-2">
<button
type="button"
className="mt-2 bg-white text-black px-3 py-1 rounded hover:bg-gray-100"
onClick={handleConfirm}>
확인
</button>
{type !== 'alert' && (
<button
type="button"
className="mt-2 bg-gray-400 text-black px-3 py-1 rounded hover:bg-gray-100"
onClick={handleClose}>
취소
</button>
)}
</div>
</div>
);
/* customPrompt() 호출 시 열릴 창 JSX */
if (type === 'prompt')
return (
<div
role="dialog"
className="fixed top-[50%] left-[50%] bg-black text-white py-4 px-6 rounded shadow max-w-sm -translate-x-1/2 -translate-y-1/2 flex flex-col z-[9999]">
<label className="mb-2 mx-auto">{message}</label>
<input
type="text"
className="bg-gray-100 h-12"
onChange={(e) => setInputValue(e.target.value)}
onKeyDown={(e) => {
if (e.key === 'Enter' && !e.shiftKey) {
e.preventDefault();
handleConfirm();
}
}}
/>
<div className="mt-2 gap-2 flex justify-around">
<button
type="button"
className="bg-white flex-1 text-black py-1 rounded hover:bg-gray-100"
onClick={handleConfirm}>
확인
</button>
<button
type="button"
className="bg-gray-400 flex-1 text-black py-1 rounded hover:bg-gray-100"
onClick={handleClose}>
취소
</button>
</div>
</div>
);
return null;
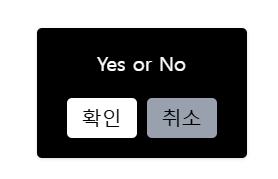
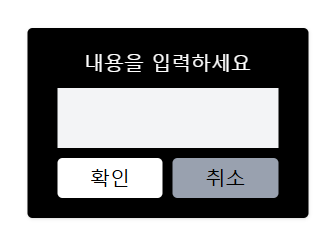
};결과
사용 예시는 위에서 명령형/선언형 프로그래밍과 함께 설명했기 때문에 생략.
customPrompt()
customConfirm()