
- 셀프 프로젝트를 진행하면서 배경화면으로 사용할 이미지를 위해 Unsplash API를 이용하였습니다. Unsplash 사이트는 다양한 사진을 무료로 제공하고 있습니다.
- Unsplash 사이트 : https://unsplash.com/developers
Unsplash API 사용법
1. API Key를 발급 받습니다.
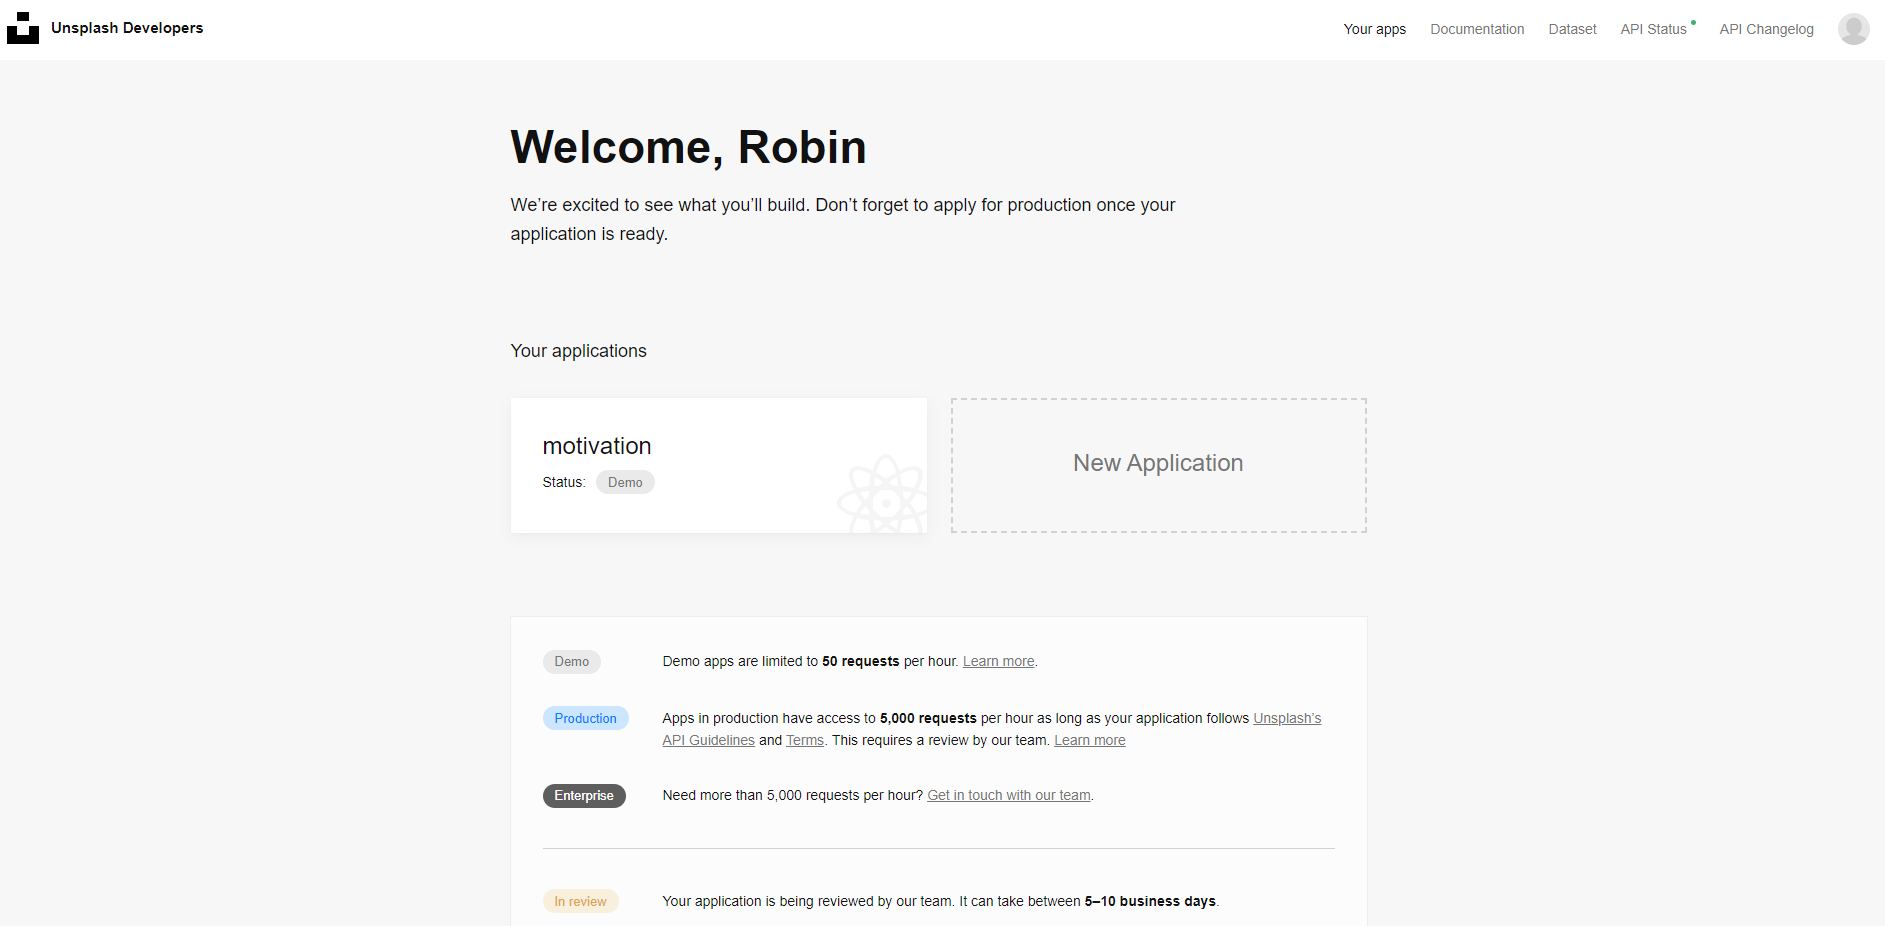 우선 Unsplash Developer 사이트에 접속해 로그인을 하고, Your app 메뉴로 이동합니다.
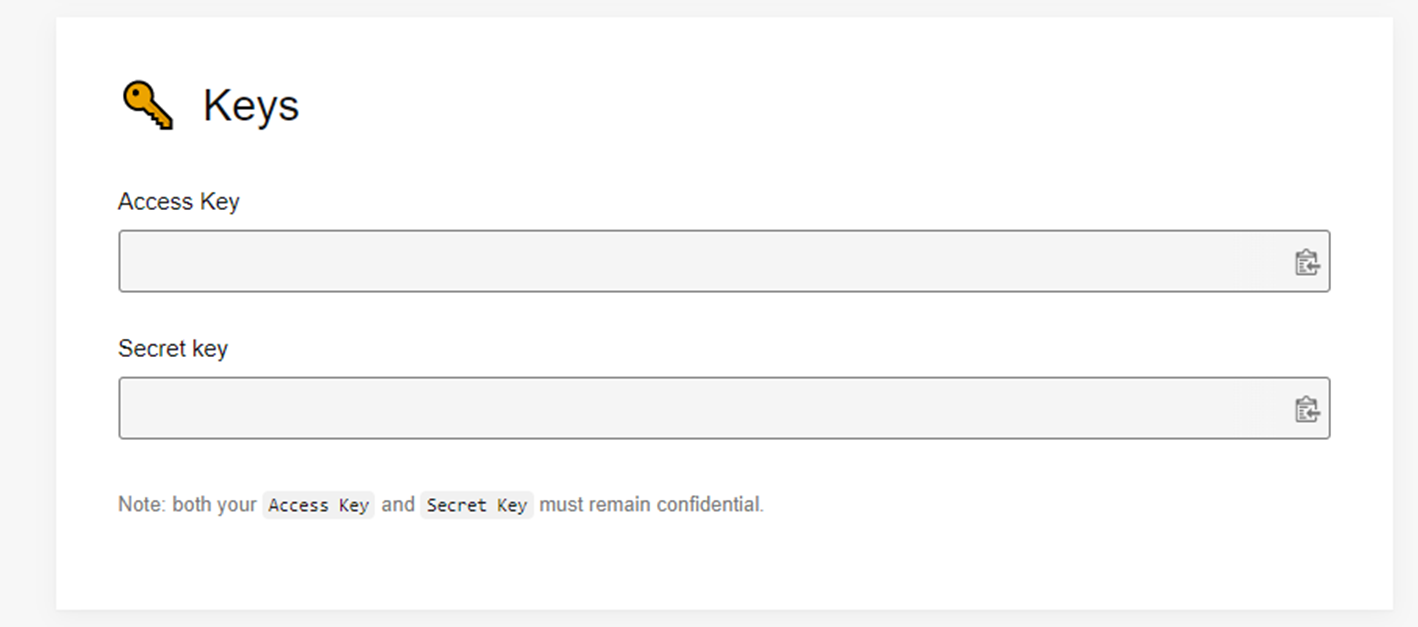 New Application을 클릭해 Demo버전의 Application 생성하고, API를 사용할 수 있는 key를 발급 받습니다.
2. 공식문서를 통해 사용법을 익힙니다.
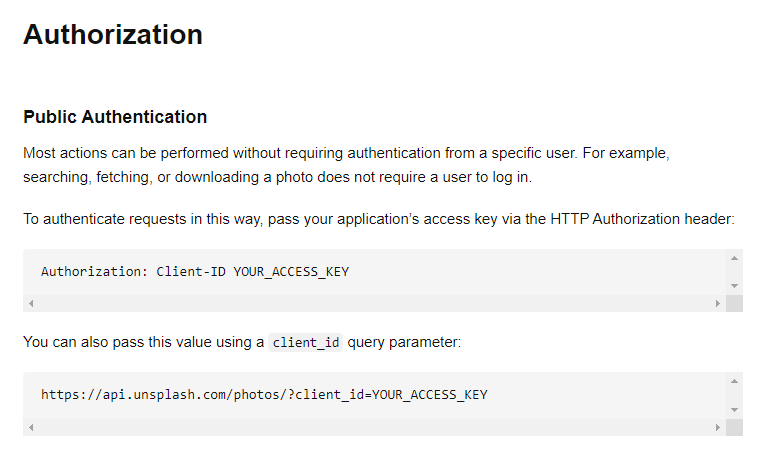
- 기본 인증 방법
client_id=YOUR_ACCESS_KEY는 발급 받은 API Key를 적습니다.
https://api.unsplash.com/photos/?client_id=YOUR_ACCESS_KEY- 랜덤 이미지 불러오는 법
GET /photos/random- GET 방식을 통해 주소를 불러옵니다.
- 기존의 request에 /random 을 붙이면 됩니다.
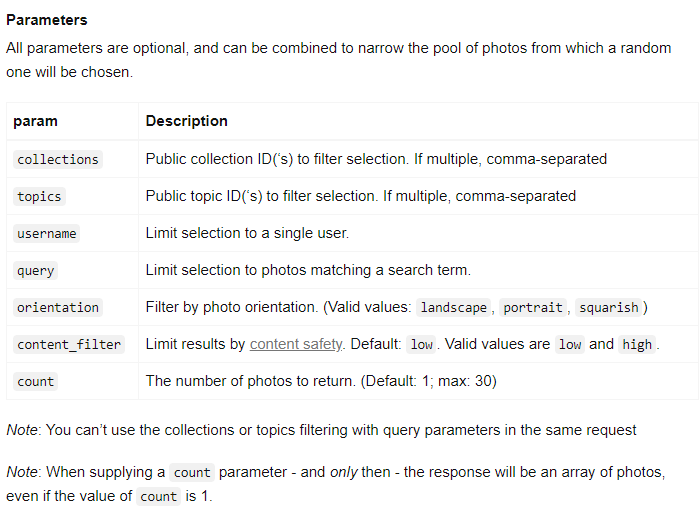
https://api.unsplash.com/photos/random?client_id=YOUR_ACCESS_KEY- 파라미터
- 선택적으로 파라미터를 추가할 수 있습니다. 여기서 이미지 개수인
count와 이미지 검색 키워드인query를 사용할 예정입니다.
- 선택적으로 파라미터를 추가할 수 있습니다. 여기서 이미지 개수인
- **Response 예시**
{
  "id": "pXhwzz1JtQU",
  "updated_at": "2016-07-10T11:00:01-05:00",
  "username": "jimmyexample",
  "first_name": "James",
  "last_name": "Example",
  "twitter_username": "jimmy",
  "portfolio_url": null,
  "bio": "The user's bio",
  "location": "Montreal, Qc",
  "total_likes": 20,
  "total_photos": 10,
  "total_collections": 5,
  "followed_by_user": false,
  "downloads": 4321,
  "uploads_remaining": 4,
  "instagram_username": "james-example",
  "location": null,
  "email": "jim@example.com",
  "links": {
    "self": "https://api.unsplash.com/users/jimmyexample",
    "html": "https://unsplash.com/jimmyexample",
    "photos": "https://api.unsplash.com/users/jimmyexample/photos",
    "likes": "https://api.unsplash.com/users/jimmyexample/likes",
    "portfolio": "https://api.unsplash.com/users/jimmyexample/portfolio"
  }
}
Axios 라이브러리
- Axios 공식문서 바로가기
- Axios는 브라우저, Node.js를 위한 Promise API를 활용하는 HTTP 비동기 통신 라이브러리 입니다.
- 운영환경에 따라서 브라우저의 XMLHttpRequest 객체 또는 Node.js의 HTTP API 사용
- Promise(ES6) API 사용
- 요청과 응답 데이터의 변형
- HTTP 요청 취소 및 요청과 응답을 JSON 형태로 자동 변환
axios 환경 구축
npm i axios
// 또는
yarn add axios
// 실행하고자 하는 프로젝트의 상위에 axios 라이브러리를 import 합니다.
import axios from 'axios'axios instance 사용 (& unsplash API)
- 사용자 지정 config로 새로운 axios 인스턴스를 만들 수 있습니다.
import axios from "axios";

const instance = axios.create({
    baseURL: 'https://api.unsplash.com/photos/random',
    params: {
        client_id: process.env.REACT_APP_MOTIVATION_API_KEY,
        count: 30,
    }
});

export default instance;
요청 전송하기 (비동기 처리 방식)
const fetchData = async () => {
  const imgData = await axios.get();
};- 추가로 쿼리 값을 받아 요청 하고 싶을 때, 아래와 같이 파라미터를 추가할 수 있습니다.
const fetchData = async () => {
  const imgData = await axios.get('', {
      params: {
          query: { query }
      }
  });
};
useEffect로 관리하기 (구현 코드)
- useEffect 훅을 사용해 어떤 변화가 있을 때 함수를 불러올 것인지 관리하도록 합니다.
import axios from '../api/axios';
import { useContext, useEffect, useState } from 'react'
import styled from 'styled-components';
import { stateContext } from '../utils/stateContext'

const Background = () => {
    const [backImgUrl, setBackImgUrl] = useState("");
    const { query } = useContext(stateContext);

// 쿼리 값이 변화가 있을 때마다 fetchData() 를 불러 옵니다.
    useEffect(() => {
        fetchData();
    }, [query]);

// 이미지 크기 조절을 위한 함수
    const settleImg = (imgData) => {
        let index = 0;
        while (true) {
            if (imgData[index].width / imgData[index].height > 1) {
                setBackImgUrl(imgData[index].urls['full']);
                break;
            }
            index++;
        }
    }

    const fetchData = async () => {
        const imgData = await axios.get('', {
            params: {
                query: { query }
            }
        });
        settleImg(imgData.data);
    };

    return (
        <>
            <BackgroundImg
                style={{
                    backgroundImage: `linear-gradient( rgba(0, 0, 0, 0.7), rgba(0, 0, 0, 0.7) )`,
                    backgroundImage: `linear-gradient( rgba(0, 0, 0, 0.7), rgba(0, 0, 0, 0.7) ), url(${backImgUrl})`,
                    backgroundPosition: "top center",
                    backgroundSize: "cover",
                }} />
        </>
    )
}

export default Background;

const BackgroundImg = styled.div`
    background-size:cover;
    background-repeat: no-repeat;
    position: absolute;
    max-height: 100%;
    margin:0;
    padding:0;
    width: 100vw;
    height: 100vh;
    z-index: -1;
    opacity: 0.8;
`
나의 과정들