GlassEffectContainer와 올바른 API 선택으로 오프스크린 렌더링 66% 줄이기
들어가며
이전 글에서는 SwiftUI 관점에서 렌더링 최적화 방법에 대해 얘기했다면, 이번 포스팅에서는 Liquid Glass의 제대로된 사용법이 무엇인지에 대해 초점을 맞춰보겠습니다. Liquid Glass는 자체만으로도 GPU 부하가 있는데, 잘못 사용한다면 엄청난 GPU 리소스 증가가 발생할 수 있기 때문입니다.
따라서 해당 포스팅에서는 Liquid Glass 관련 API들의 성능 특성과 올바른 사용법을 다뤄보겠습니다.
- safeAreaBar vs safeAreaInset - 언제 무엇을 사용할까?
- glassEffectID vs glassEffectUnion - 성능 차이 이해하기
- GlassEffectContainer - 오프스크린 렌더링 최적화
1. SafeAreaBar vs SafeAreaInset
차이점
고정 헤더/푸터를 구현할 때, iOS 15부터 사용 가능한 safeAreaInset과 iOS 26에서 새로 도입된 safeAreaBar 중 선택해야 합니다.
| 항목 | safeAreaInset | safeAreaBar (iOS 26) |
|---|---|---|
| 블러 효과 | X | O (edge effect) |
| 스크롤 반응 | 고정만 | 스크롤 시 블러 적용 |
| 사용 시점 | 콘텐츠를 가리지 않을 때 | 블러 효과가 필요할 때 |
safeAreaInset
스크롤해도 고정되지만 블러 효과가 없습니다.
ScrollView {
    content
}
.safeAreaInset(edge: .top) {
    CustomHeader()
}- iOS 15부터 사용 가능
- 고정된 헤더/푸터 구현에 적합
- 콘텐츠를 가리는 게 없다면 이것으로 충분
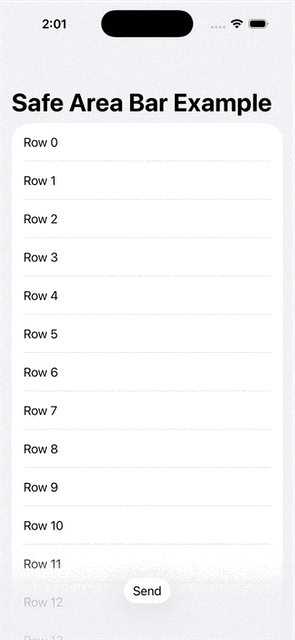
safeAreaBar
스크롤 시 edge effect가 적용됩니다.
iOS 26에서 새로 도입되었으며, Liquid Glass 컴포넌트와 함께 사용됩니다.
List(0..<100) { i in
    Text("Row \(i)")
}
.navigationTitle("Safe Area Bar Example")
.safeAreaBar(edge: .bottom) { // Add content using the new API
    Button("Send") {
        // action
    }
    .buttonStyle(.glass)
    .padding()
}
즉, 블러 효과가 필요 없다면 safeAreaInset을 사용하고, Liquid Glass와 같은 요소를 사용한다면 safeAreaBar를 사용하면 될거 같네요.
2. glassEffectID vs glassEffectUnion
두 API 모두 glass 요소들을 연결하는 역할을 하지만, 성능 특성이 다릅니다.
핵심 차이
| 항목 | glassEffectID | glassEffectUnion |
|---|---|---|
| 목적 | Morphing 전환 애니메이션 | 멀리 떨어진 요소 합치기 |
| 렌더링 타겟 | O (뷰가 렌더링 타겟이 됨) | X |
| CPU 프로파일 | 렌더링 대기 시간 증가 | 영향 없음 |
| 사용 시점 | 요소 appear/disappear 시 | 항상 연결된 UI 표현 시 |
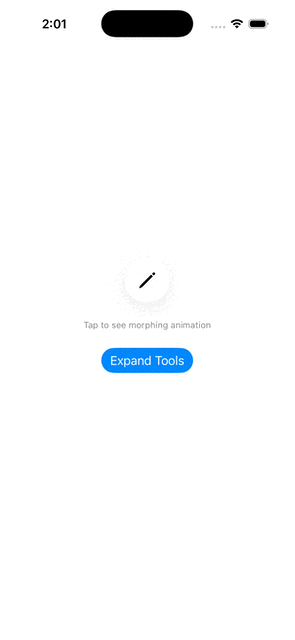
glassEffectID
Morphing 전환 애니메이션을 가능하게 합니다.
struct GlassEffectIDExample: View {
    @State private var isExpanded = false
    @Namespace private var namespace

    var body: some View {
        VStack(spacing: 24) {
            GlassEffectContainer(spacing: 40) {
                HStack(spacing: 40) {
                    // Primary button - always visible
                    Image(systemName: "pencil")
                        .font(.title)
                        .frame(width: 60, height: 60)
                        .glassEffect()
                        .glassEffectID("pencil", in: namespace)

                    // Secondary button - toggleable with morphing animation
                    if isExpanded {
                        Image(systemName: "eraser.fill")
                            .font(.title)
                            .frame(width: 60, height: 60)
                            .glassEffect()
                            .glassEffectID("eraser", in: namespace)
                    }

                    // Third button - toggleable
                    if isExpanded {
                        Image(systemName: "paintbrush.fill")
                            .font(.title)
                            .frame(width: 60, height: 60)
                            .glassEffect()
                            .glassEffectID("brush", in: namespace)
                    }
                }
            }

            Text("Tap to see morphing animation")
                .font(.caption)
                .foregroundStyle(.secondary)

            // Toggle button
            Button(isExpanded ? "Collapse Tools" : "Expand Tools") {
                withAnimation(.spring(response: 0.4, dampingFraction: 0.8)) {
                    isExpanded.toggle()
                }
            }
            .buttonStyle(.borderedProminent)
            .padding(.bottom, 40)
        }
    }
}
주의사항
- 뷰가 렌더링 타겟으로 지정됨
- 렌더링이 완료되어야 다음 값을 처리할 수 있음
- CPU 프로파일에서 대기 시간 증가 관찰됨
ID가 걸려있으면 뷰가 렌더링 타겟으로 지정됨 → 렌더링 끝내야만 다음 값을 처리할 수 있음
glassEffectUnion
멀리 떨어진 요소들을 하나의 glass 형태로 합칩니다.
import SwiftUI

struct ContentView: View {

    @Namespace var namespace

    var body: some View {
        GlassEffectContainer {
            HStack {
                Image(systemName: "cloud.bolt.rain.fill")
                    .frame(width: 80, height: 80)
                    .glassEffect()
                    .glassEffectUnion(id: 1, namespace: namespace)

                Image(systemName: "cloud.bolt.rain.fill")
                    .frame(width: 80, height: 80)
                    .glassEffect()
                    .glassEffectUnion(id: 1, namespace: namespace)

                Image(systemName: "cloud.bolt.rain.fill")
                    .frame(width: 80, height: 80)
                    .glassEffect()
                    .glassEffectUnion(id: 2, namespace: namespace)

                Image(systemName: "cloud.bolt.rain.fill")
                    .frame(width: 80, height: 80)
                    .glassEffect()
                    .glassEffectUnion(id: 2, namespace: namespace)
            }
        }
        .frame(maxWidth: .infinity, maxHeight: .infinity)
        .background(.blue)
    }
}

#Preview {
    ContentView()
}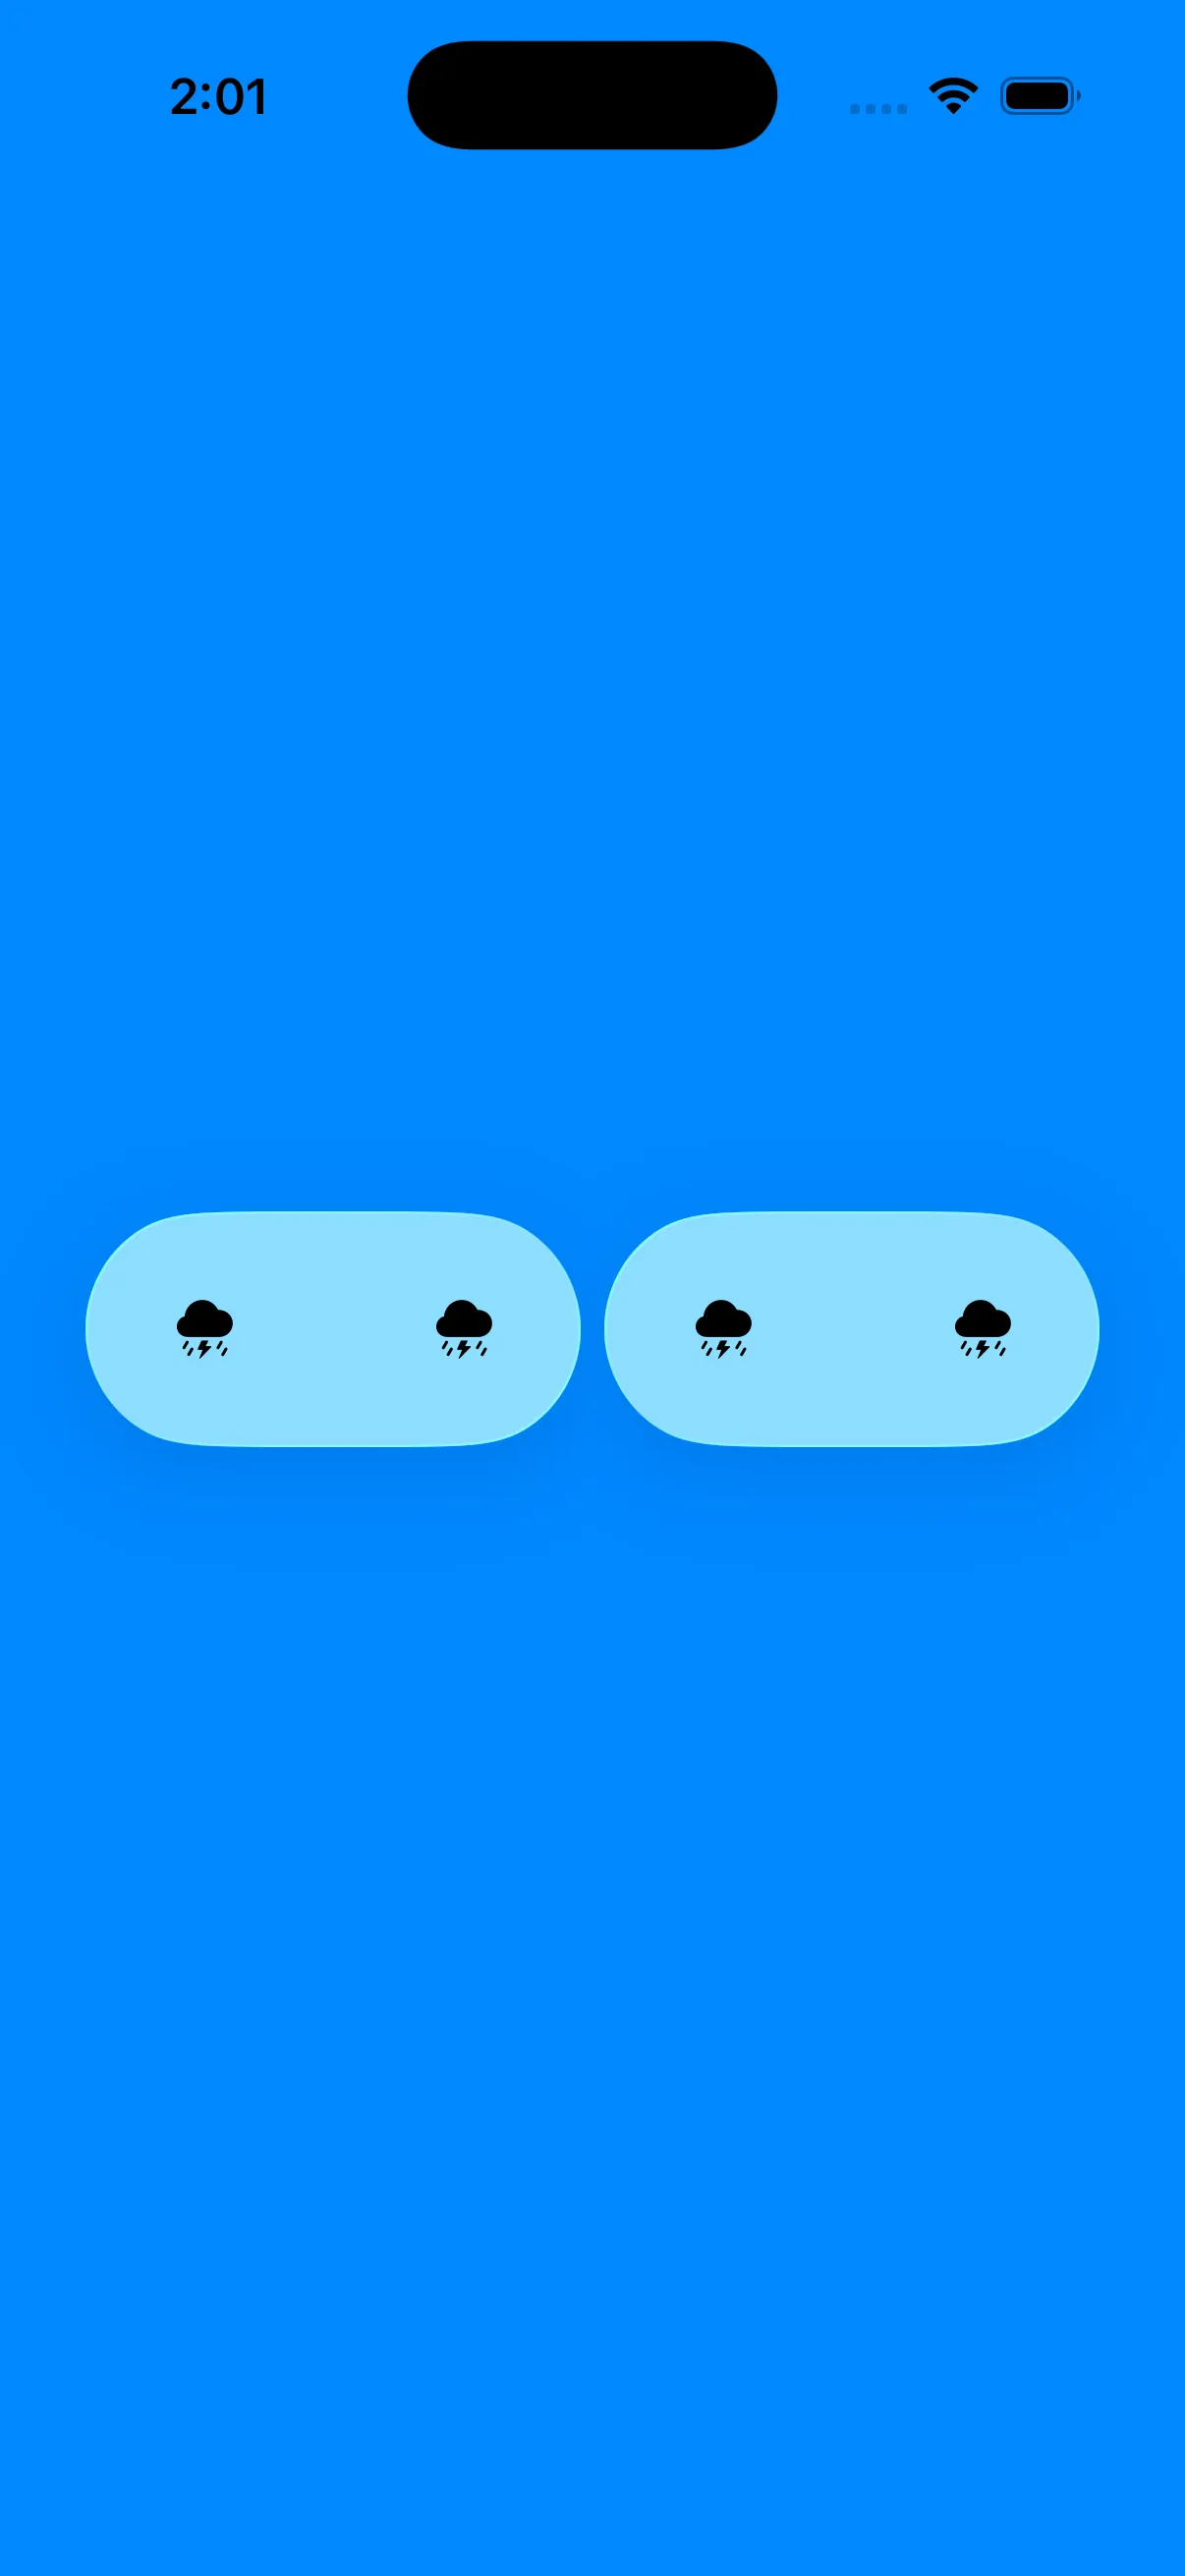
사용 시점
GlassEffectContainer의 spacing 파라미터로 커버되지 않는 거리- 항상 연결되어 보여야 하는 UI (예: Apple Maps 줌 컨트롤)
제약 조건
- 동일한 effect type
- 유사한 shape
- 동일한 identifier와 namespace
Swift with Majid에서는 이를 다음과 같이 설명합니다
"The glassEffectUnion view modifier combines glasses only when they have the same effect types, similar shapes, and identifiers."
선택 가이드
전환 애니메이션이 필요하다면? → glassEffectID
  └─ 주의: 렌더링 타겟 지정으로 CPU 부하 증가

항상 연결된 UI가 필요하다면? → glassEffectUnion
  └─ spacing으로 안 되는 큰 간격일 때
즉, glassEffectID는 전환 애니메이션에만 사용해야 합니다. 불필요한 사용은 CPU 부하를 증가시키기 때문입니다.
3. GlassEffectContainer 성능 최적화
CABackdropLayer와 오프스크린 렌더링
각 glass 효과는 CABackdropLayer를 생성하며, 이는 3개의 오프스크린 텍스처를 필요로 합니다.
CABackdropLayer 1개 = 오프스크린 텍스처 3개
→ 오프스크린 렌더링이 많을수록 GPU 부하 증가
JuniperPhoton은 이를 다음과 같이 설명합니다
"Keeping the offscreen rendering count as less possible is crucial to achieve high performance."
Container 없이 사용 (비효율적)
// 비효율적: CABackdropLayer 3개 생성
HStack {
    Button("Action 1") { }
        .glassEffect()  // CABackdropLayer 1
    Button("Action 2") { }
        .glassEffect()  // CABackdropLayer 2
    Button("Action 3") { }
        .glassEffect()  // CABackdropLayer 3
}
// → 오프스크린 렌더링 9회 (3개 × 3텍스처)
GlassEffectContainer 사용 (효율적)
// 효율적: CABackdropLayer 1개로 통합
GlassEffectContainer(spacing: 16) {
    HStack {
        Button("Action 1") { }
            .glassEffect()
        Button("Action 2") { }
            .glassEffect()
        Button("Action 3") { }
            .glassEffect()
    }
}
// → 오프스크린 렌더링 3회 (1개 × 3텍스처)
spacing 파라미터
spacing 파라미터는 morphing 거리를 제어합니다.
GlassEffectContainer(spacing: 30) {
    // 30pt 이내의 glass 요소들은 서로 morphing됨
    // 30pt 초과 시 별개의 glass로 표시
}
"Elements within this distance visually blend and morph together during transitions."
성능 비교
| 방식 | CABackdropLayer | 오프스크린 텍스처 |
|---|---|---|
| Container 없음 (3개) | 3개 | 9개 |
| Container 사용 | 1개 | 3개 |
| 절감율 | 66% | 66% |
즉, 여러 glass 효과가 있다면 반드시 GlassEffectContainer로 그룹화해야 오프스크린 렌더링을 최적화 할 수 있습니다.
웬만한 경우에는 Apple에서 제공하는 방식대로 하는게 옳은거 같네요😊
참고 자료
공식 문서
- Apple Developer - safeAreaBar
- Apple Developer - glassEffectUnion
- Apple Developer - Applying Liquid Glass to custom views
- WWDC25 - Build a SwiftUI app with the new design
기술 블로그
- Swift with Majid - Glassifying custom SwiftUI views
- Swift with Majid - Glassifying custom SwiftUI views: Groups
- JuniperPhoton - Adopting Liquid Glass: Experiences and Pitfalls
- Hacking with Swift - What's new in SwiftUI for iOS 26
오픈소스 참고