간단한 리액트 토이 프로젝트로 투두 리스트를 개발하기로 했다!
github: https://github.com/jwo0o0/Todo-list
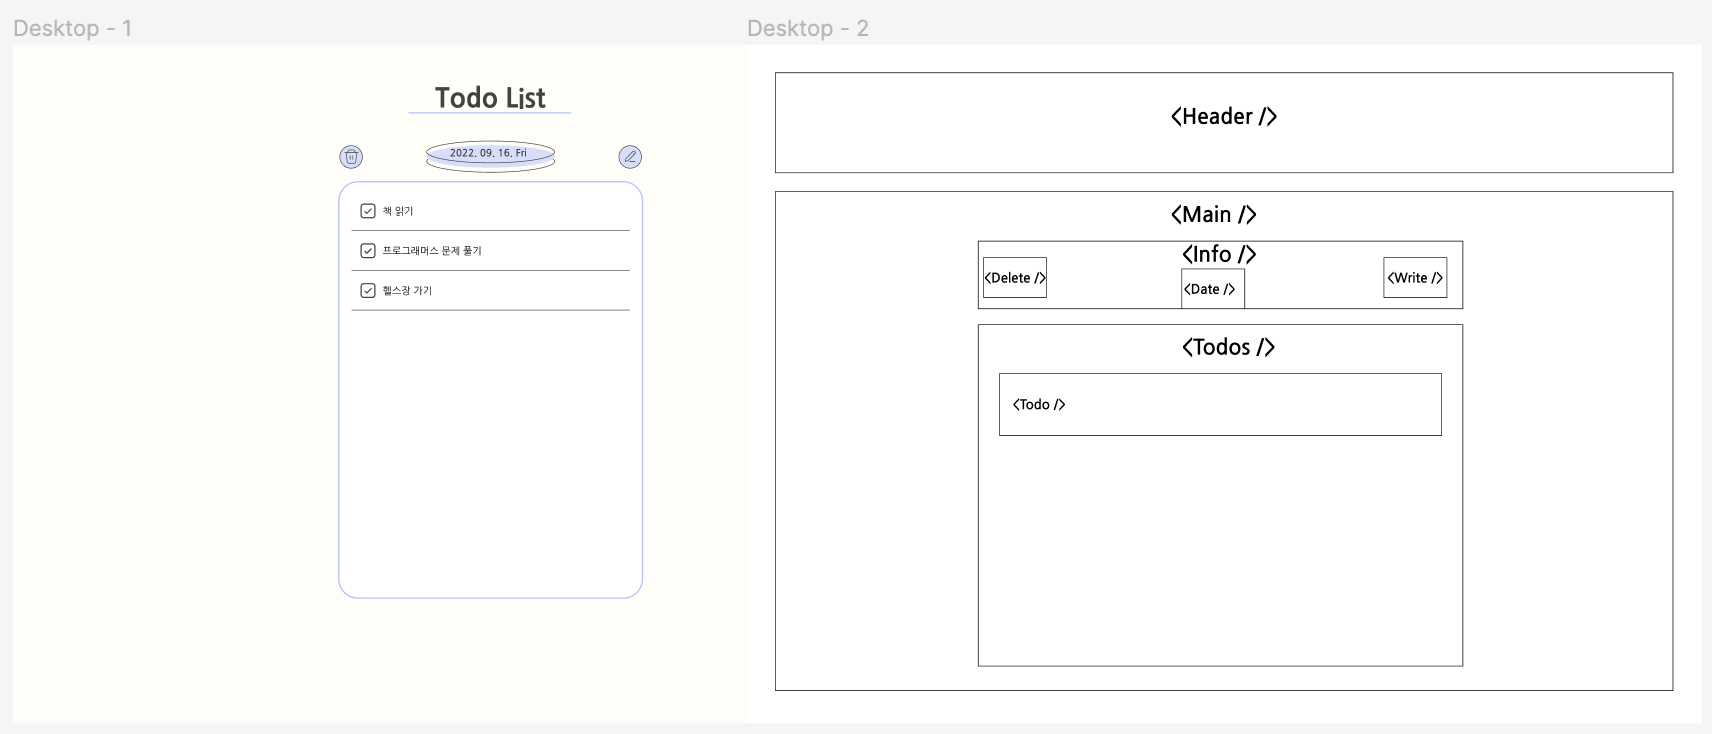
우선 피그마로 간단하게 디자인해주고 와이어프레임 만들고 시작했다.
컴포넌트 구조까지 대략적으로 그리고 시작하는게 개발 시간 단축에 효과적인 것 같다.
➕ 앞으로 적용해볼 것들
- 생성 날짜 표시 기능
- 기존 todo 내용 수정 기능
- 리액트로 빌드, github page로 배포
- lighthouse 테스트 후 최적화 적용
개발 로그
시작: 2022.09.30 ~
2022.10.02
대략적인 컴포넌트 생성 및 배치는 완료한 상태에서
- json-server로 db, 서버 구축
- 삭제 버튼, 투두 생성 input 조건부 렌더링
까지 완료
2022.10.03
- axios로 기본적인 http CRUD 구현
- POST: 투두 생성,
- GET: 투두 렌더링
- DELETE: 투두 삭제
- PATCH: 투두 완료 여부 수정
export const TodoList = ({ isDelete, isWrite }) => {
  const [todos, setTodos] = useState([]);

  const renderTodos = () => {
    axios.get("http://localhost:3001/todos?_sort=id&_order=DESC")
      .then((res) => {
        setTodos(res.data);
      })
      .catch((error) => {
        console.error('ERROR: ', error);
      })
  }

  useEffect(() => {
    renderTodos();
  }, [])

  return (
    <TodoListContainer>
        <TodoListBox>
          <WriteInput isWrite={isWrite} renderTodos={renderTodos}/>
          {todos.map((todo) => {
            return <Todo
              key={todo.id}
              id={todo.id}
              text={todo.text}
              done={todo.done}
              isDelete={isDelete}
              renderTodos={renderTodos}
            />
          })}
        </TodoListBox>
    </TodoListContainer>
  )
}- ✏️
TodoList 컴포넌트에서 axios GET 요청을 보내는 renderTodos() 함수를 따로 만들었다. 요청을 받으면 setTodos()로 todos state 상태를 바꿔준다. 이 renderTodos() 함수를 하위 컴포넌트들에 props로 전달해서 todo를 삭제하거나 생성할 때마다 todo들이 업데이트된 상태로 화면에 렌더링된다! - ✏️
GET 요청을 보낼 때는 url에 쿼리 파라미터를 줘서axios.get("http://localhost:3001/todos?_sort=id&_order=DESC")id 역순으로 정렬 해준다. 이렇게 하면 input창에서 입력하면 바로 아래에 생성된다!
(참고: https://redux-advanced.vlpt.us/3/01.html)
export const WriteInput = ({ isWrite, renderTodos }) => {
const [writeinput, setWriteinput] = useState('');
const writeinputEl = useRef(null);
const handleWriteInputChange = (event) => {
setWriteinput(event.target.value);
}
const handleWriteSubmitBtnClick = () => {
axios({
method: 'post',
url: 'http://localhost:3001/todos',
data: {
text:writeinput,
done: false
}
})
.then(() => {
writeinputEl.current.value = "";
renderTodos();
})
.catch((error) => {
console.error('ERROR: ', error);
})
}
const handleOnKeyPress = (e) => {
if (e.key === 'Enter') {
handleWriteSubmitBtnClick();
}
}
return (
<WriteInputContainer className={isWrite ? "" : "not-active"}>
<label htmlFor="todo_write">Todo</label>
<WriteInputForm
type="text"
id="todo_write"
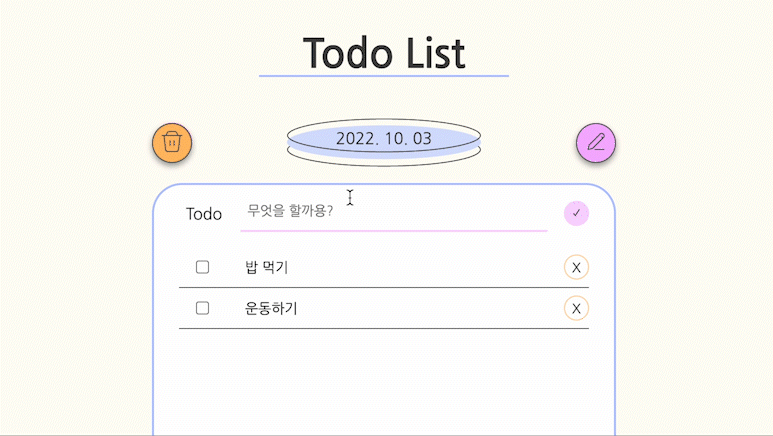
placeholder="무엇을 할까용?"
maxLength={30}
ref={writeinputEl}
onChange={(e) => {handleWriteInputChange(e)}}
onKeyPress={handleOnKeyPress}
/>
<WriteSubmitBtn onClick={handleWriteSubmitBtnClick}>✓</WriteSubmitBtn>
</WriteInputContainer>
)
}-
✏️ enter 키로 생성하기
input 요소에onKeyPress이벤트를 등록하고handleOnKeyPress이벤트 핸들러에서 키가 Enter인지 확인한 후 생성 작업을 해준다. -
✏️ 입력 후 input 창 비우기
useRef로 직접 DOM을 건들여줬다.
input 요소에ref={input 요소 주소값}속성을 설정해준다. 그리고 todo 생성 후writeinputEl(주소값).current.value=""로 비워주었다! -
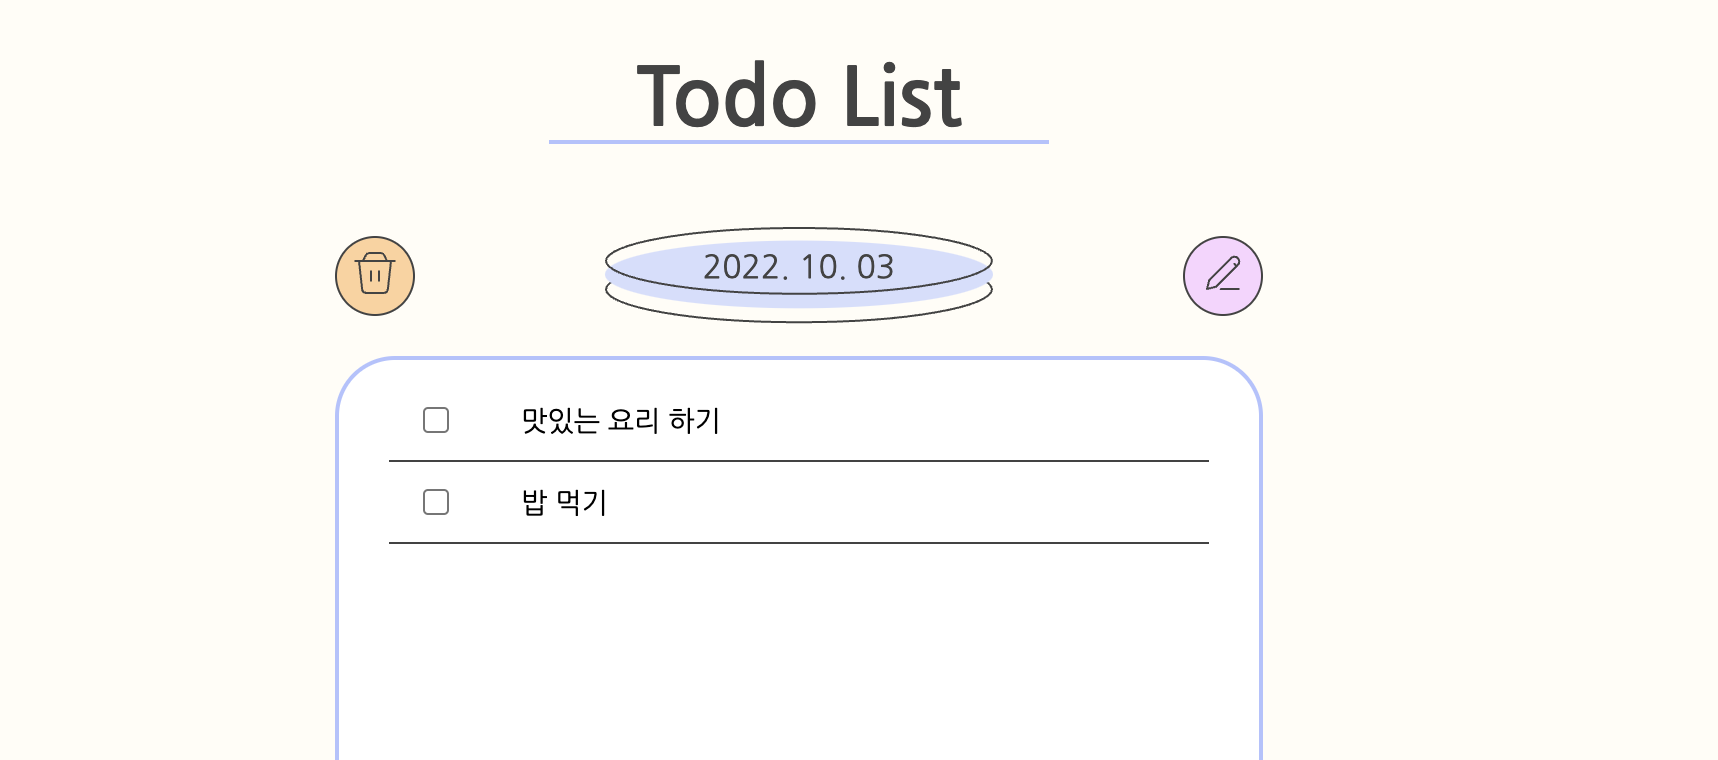
✏️ 이미지 위에 텍스트 겹치게 배치하기
날짜 표시 부분에서 배경 이미지를 피그마로 만들고 svg 파일로 추출해서 넣어주고, 날짜는 javascript 코드에서 생성되게 했다.
부모 요소 div는position: relative,
a 요소는position: absolutetop: 40%; left: 50%; transform: translate(-50%, -50%);로 설정
export const TodayDate = styled.div`
    width: 194px;
    position: relative;
    text-align: center;
    margin: 0 90px;

    > img {
        width: 100%;
        vertical-align: middle;
    }
    > a {
        position: absolute;
        top: 40%;
        left: 50%;
        text-align: center;
        transform: translate(-50%, -50%);
        background-color: transparent;
        color: #434343;
    }
`- 🧐
현재 UI는 별도의 버튼을 통해 할 수 있고/없고의 상태를 설정해서 todo 입력과 삭제를 하는데 1. 기본 상태에서 더 깔끔해 보이지만, 2. 사용 시 불편한거 아닌가 싶어서 수정해야 하나 고민이 된다.
간단한 사이드 프로젝트지만 UI/UX 측면에서도 고민하게 돼서 관련 책을 한권 읽어볼까 싶다!
2022.10.08

- 아이콘을 수정했다. 기존에 생성 아이콘은 투두 내용 수정 기능을 넣게 되면 그 때 사용하고, 투두 생성은 플러스 모양 아이콘이 더 직관적인 것 같아 수정했다.
const renderTodos = () => {
    axios.get("http://localhost:3001/todos?_sort=id&_order=DESC")
      .then((res) => {
        const notFinishedTodos = res.data.filter(el => el.done === false);
        const FinishedTodos = res.data.filter(el => el.done === true);
        setTodos([...notFinishedTodos, ...FinishedTodos]);
      })
      .catch((error) => {
        console.error('ERROR: ', error);
      })
}- GET 요청 후 렌더링하는 함수에서 투두 정렬 방식을 바꿨다. 기존에는 생성 순서대로만 배치했는데 이제 미완료 투두가 위에, 그리고 완료 투두가 아래에 모여서 배치된다. 그리고 미완료 투두를 완료 체크하면 아래로 내려간다.
근데 id순으로 정렬 + 미완료/완료 정렬 두가지 방식이 합쳐져 있어 동작하는게 뭔가 어색한 느낌이 있다. 아예 완료 투두 state와 미완료 투두 state를 만드는 방식으로 바꾸면 나아질 것 같은데 기존 서비스를 참고해보면 좋을 것 같다.
2022.10.18
- Todo 생성 날짜 표시 기능
- Todo 내용 수정 기능
- github page로 배포
https://jwo0o0.github.io/Todo-list/
까지 완료했는데 일단 update 기능까지 구현하는걸 목표로 두고 와다다 코딩했더니 추후에 리팩토링을 해야겠다.

프론트엔드 개발을 해보자