2023.03.20 댓글 엔티티와 리파지터리(feat. 데이터의 관계)
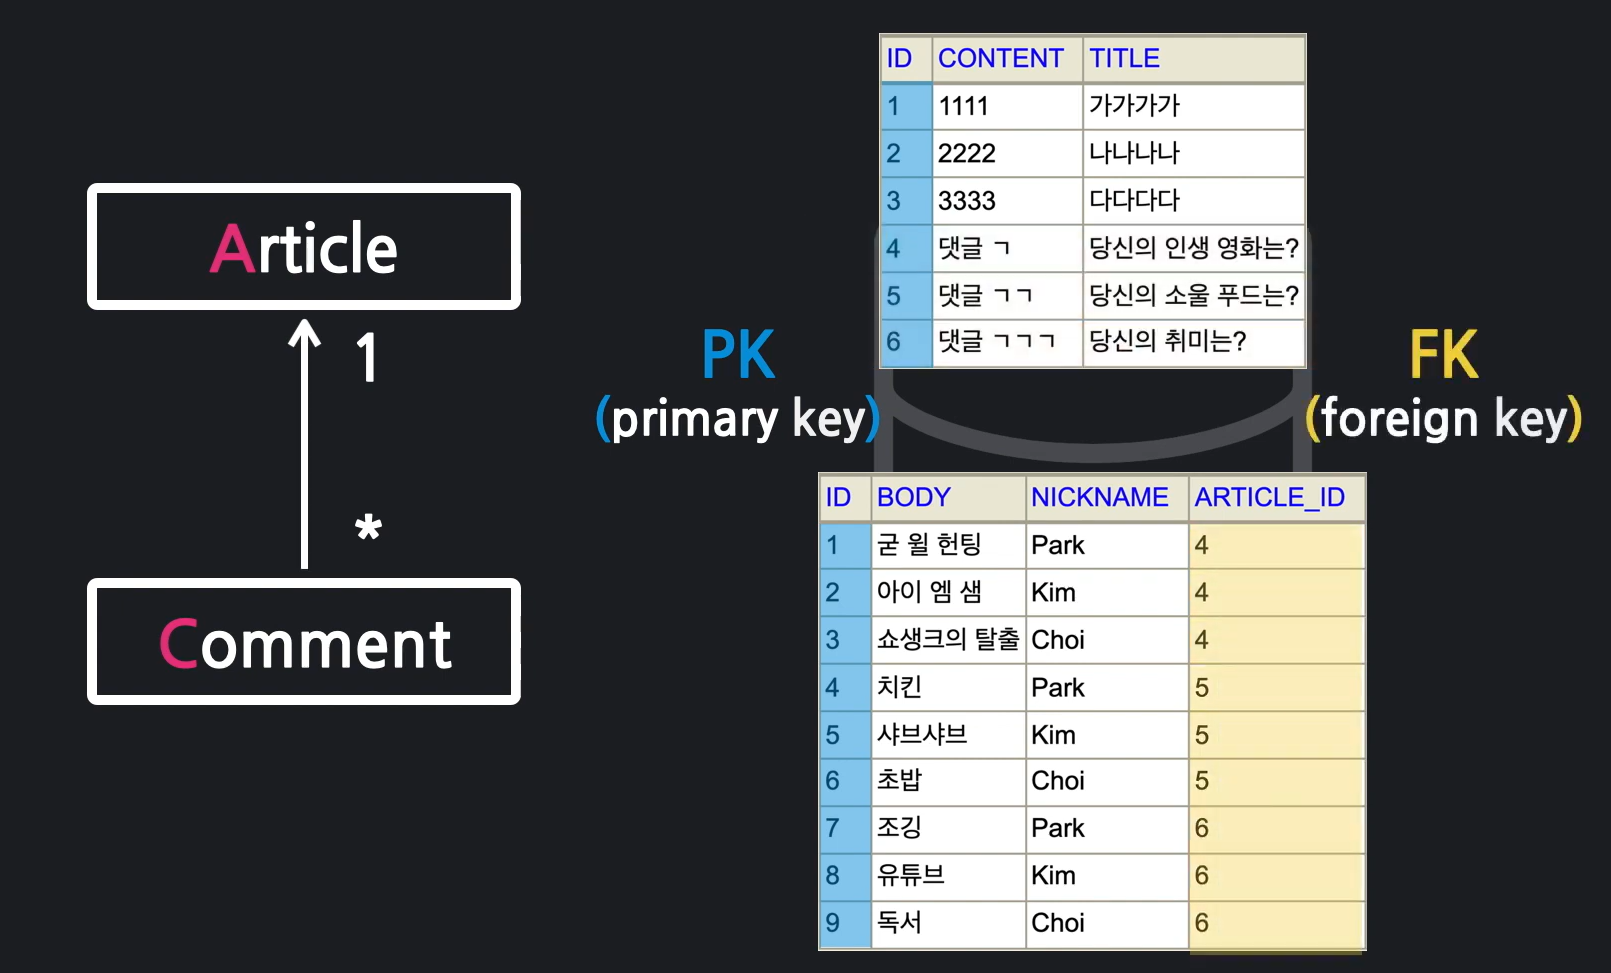
PK, FK
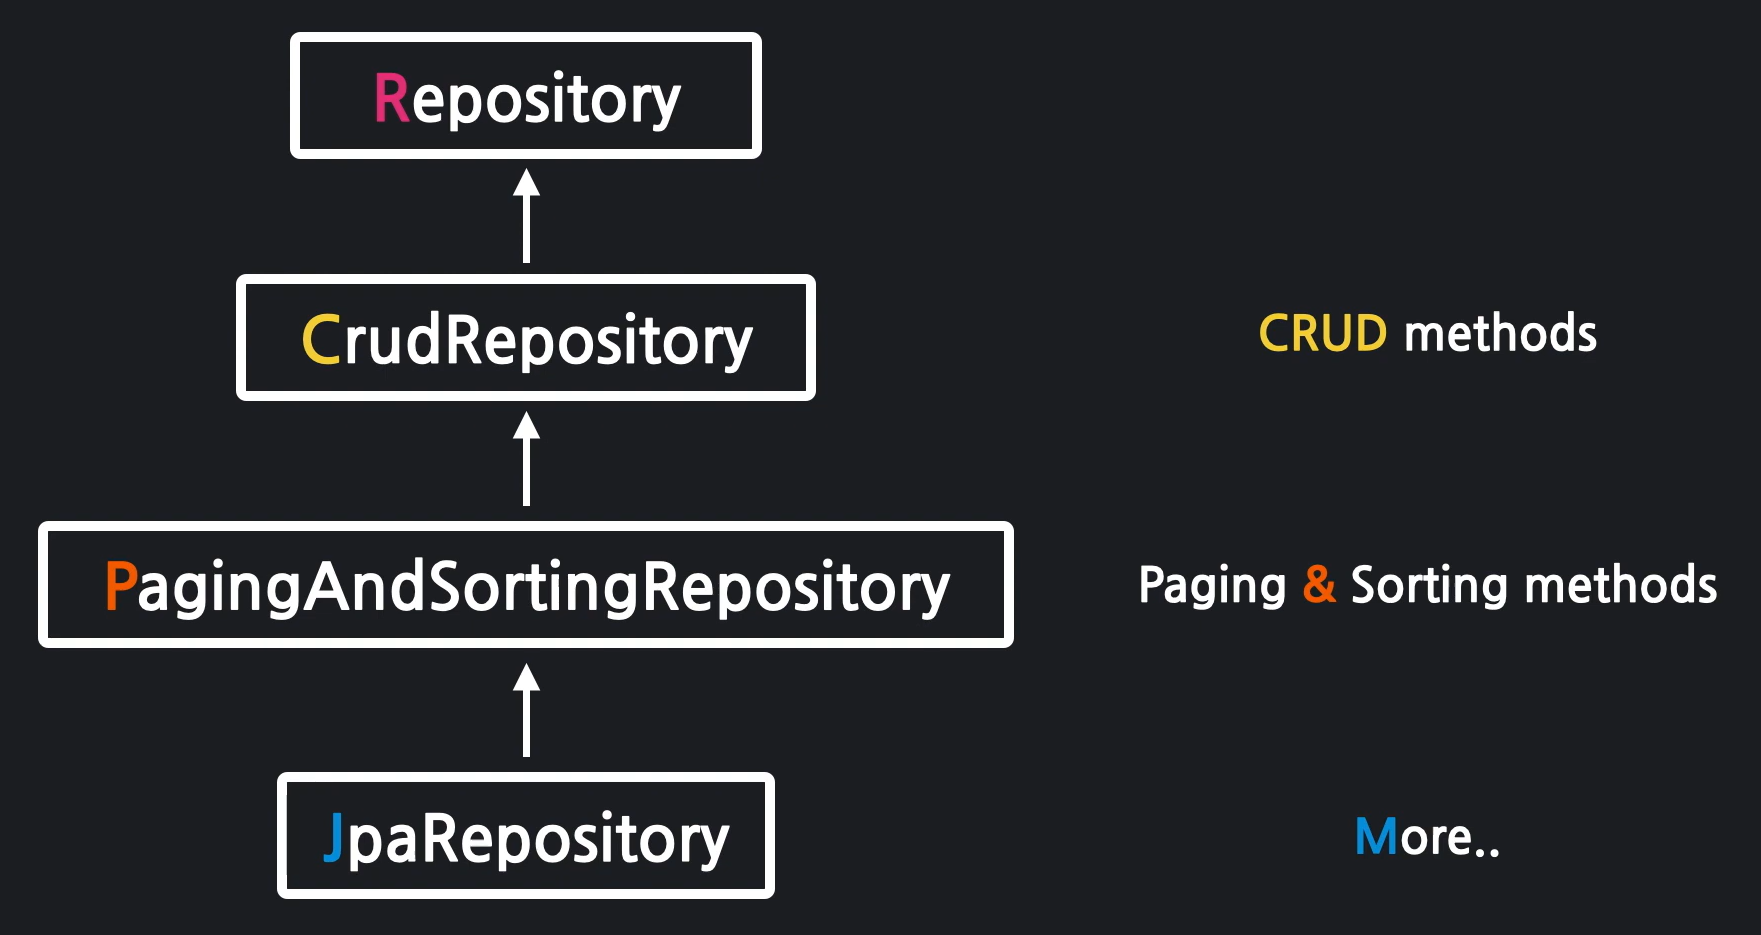
JPA 리파지터리
CrudRepository 말고 이를 확장한 JpaRepository를 사용해보자.
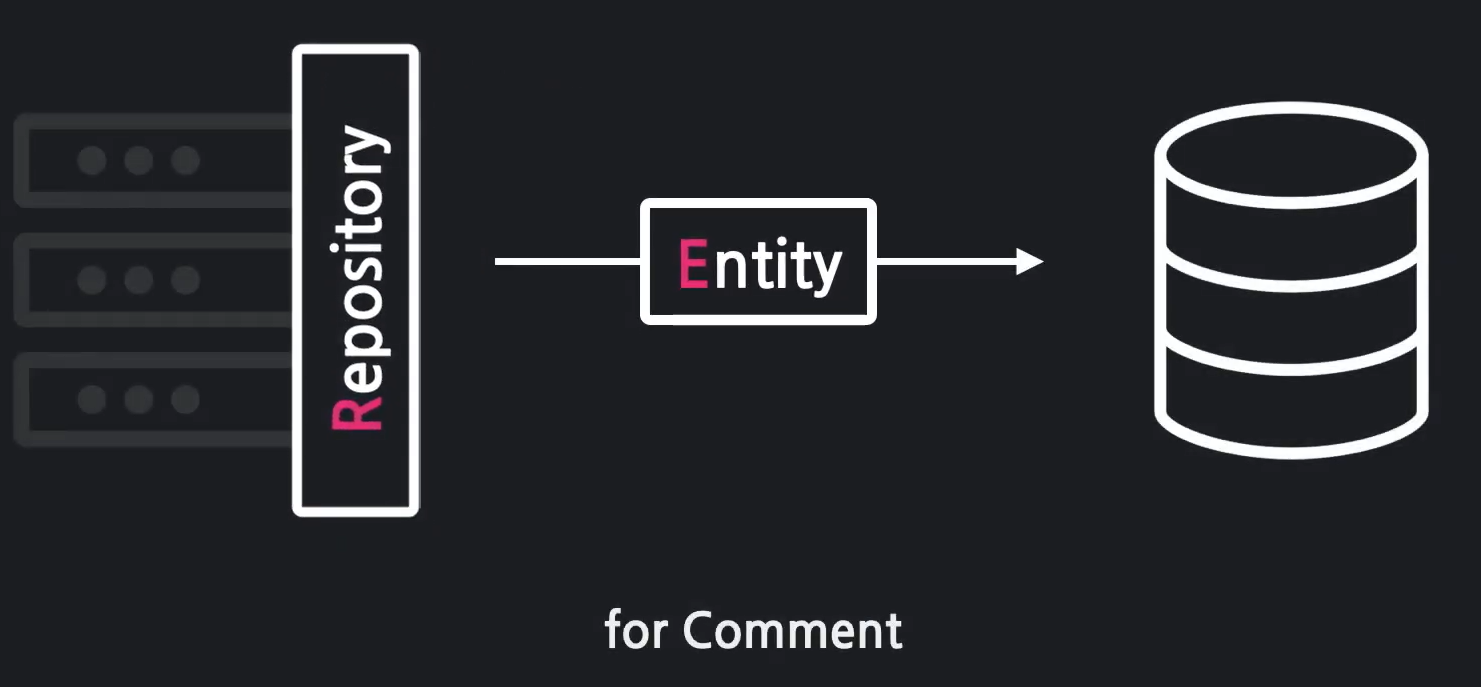
댓글 엔티티

package com.example.firstproject.entity;

import lombok.AllArgsConstructor;
import lombok.Getter;
import lombok.NoArgsConstructor;
import lombok.ToString;

import javax.persistence.*;

@Entity
@Getter
@ToString
@AllArgsConstructor
@NoArgsConstructor
public class Comment {

    @Id
    @GeneratedValue(strategy = GenerationType.IDENTITY)
    private Long id;

    @ManyToOne // 해당 댓글 엔티티 여러개가 하나의 Article에 연관된다!!
    @JoinColumn(name = "article_id") // article 테이블의 id를 가져올떄 name
    private Article article; // 댓글의 부모 게시글

    @Column
    private String nickname;

    @Column
    private String body;
}
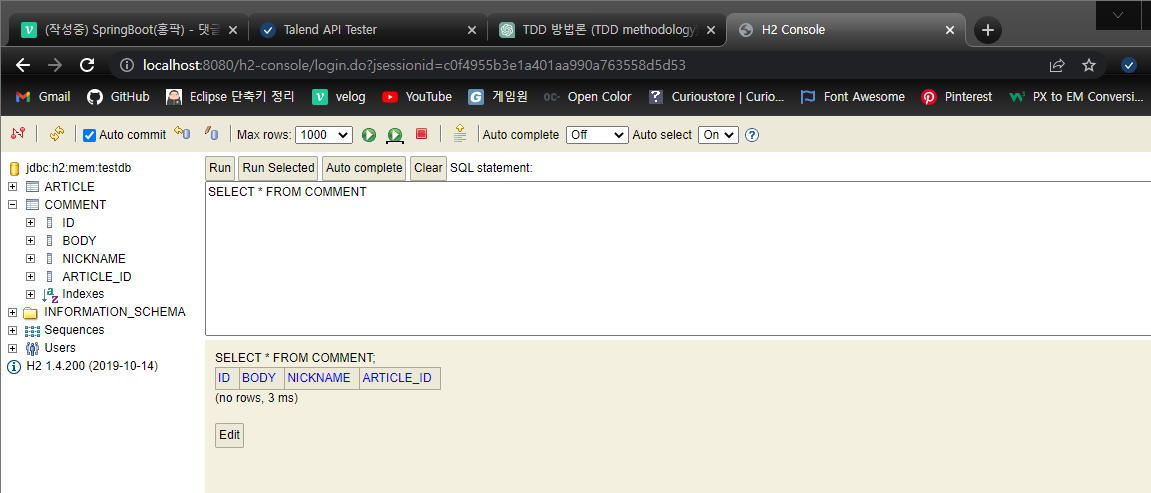
서버 돌리면 콘솔에서 table 생성 쿼리 확인 가능.
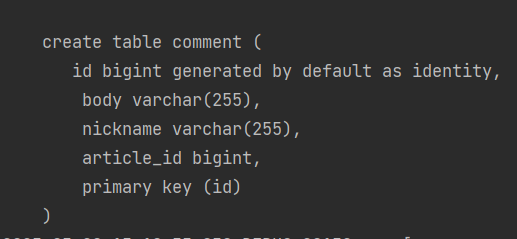
DB에서 확인 가능.
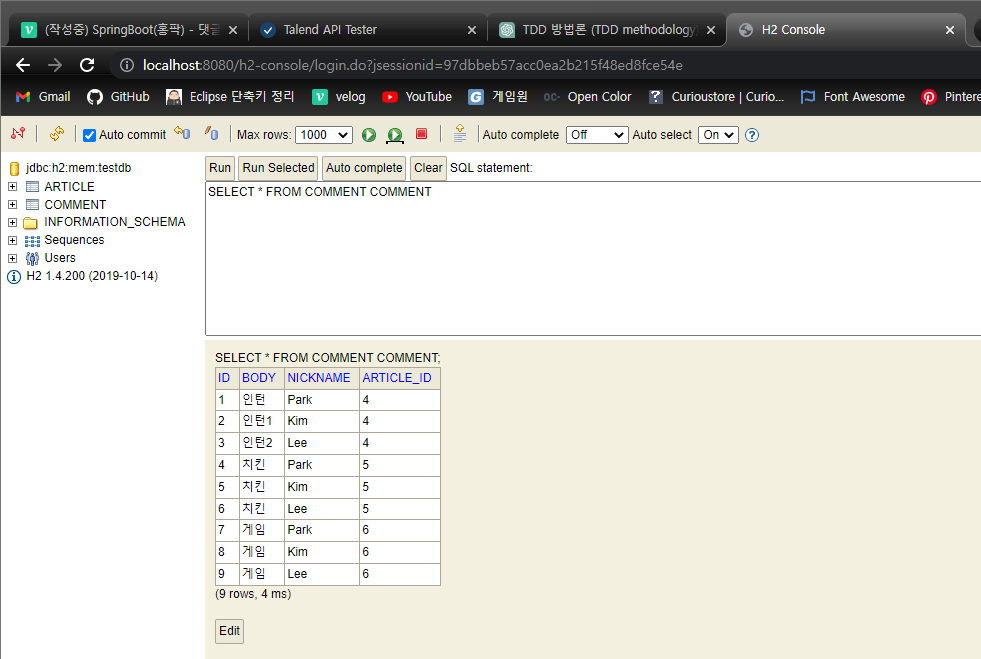
더미 데이터 추가하기.
data.sql에 댓글 데이터 추가.
INSERT INTO article(id, title, content) VALUES (1, '가가가가', '11111');
INSERT INTO article(id, title, content) VALUES (2, '22가가가가', '2211111');
INSERT INTO article(id, title, content) VALUES (3, '33가가가가', '3311111');

-- article 더미 데이터
INSERT INTO article(id, title, content) VALUES (4, '당신의 인생 영화는?', '댓글');
INSERT INTO article(id, title, content) VALUES (5, '당신의 소울 푸드는?', '댓글');
INSERT INTO article(id, title, content) VALUES (6, '당신의 취미는?', '댓글');

-- comment 더미 데이터
---- 4번 게시글의 댓글들
INSERT INTO comment(id, article_id, nickname, body) VALUES (1, 4, 'Park', '인턴');
INSERT INTO comment(id, article_id, nickname, body) VALUES (2, 4, 'Kim', '인턴1');
INSERT INTO comment(id, article_id, nickname, body) VALUES (3, 4, 'Lee', '인턴2');

---- 5번 게시글의 댓글들
INSERT INTO comment(id, article_id, nickname, body) VALUES (4, 5, 'Park', '치킨');
INSERT INTO comment(id, article_id, nickname, body) VALUES (5, 5, 'Kim', '치킨');
INSERT INTO comment(id, article_id, nickname, body) VALUES (6, 5, 'Lee', '치킨');

---- 6번 게시글의 댓글들
INSERT INTO comment(id, article_id, nickname, body) VALUES (7, 6, 'Park', '게임');
INSERT INTO comment(id, article_id, nickname, body) VALUES (8, 6, 'Kim', '게임');
INSERT INTO comment(id, article_id, nickname, body) VALUES (9, 6, 'Lee', '게임');
댓글 Repository
CommentRepository
extends를 CrudRepository말고 JpaRepository를 사용하고 특정 쿼리를 실행하는 메소드를 추가하자.
특정 쿼리를 실행하는 메소드를 작성하는 두가지 방법이 있다.
1. @Query(직접 쿼리문 작성)
2. XML 파일 이용
1.@Query
@Query : 특정 쿼리를 수행시키고 싶을때사용
nativeQuery = true : true로 해줘야 해당 SQL문이 실행된다.
package com.example.firstproject.repository;

public interface CommentRepository extends JpaRepository<Comment, Long> {

    // 특정 게시글의 모든 댓들 조회
    @Query(value =
            "SELECT * " +
            "FROM comment " +
            "WHERE article_id = :articleId",
            nativeQuery = true)
    List<Comment> findByArticleId(Long articleId);
}
2.네이티브 쿼리 XML
public interface CommentRepository extends JpaRepository<Comment, Long> {

  	// 1. @Query
    // 특정 게시글의 모든 댓들 조회
    @Query(value =
            "SELECT * " +
            "FROM comment " +
            "WHERE article_id = :articleId",
            nativeQuery = true)
    List<Comment> findByArticleId(Long articleId);

	// 2. XML
    // 특정 닉네임의 모든 댓글 조회
    List<Comment> findByNickname(String nickname);
}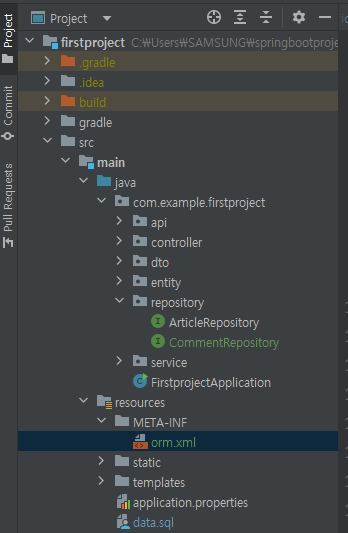
xml 파일 생성.
설정 내용 구글링: "orm natice query orm.xml example"
- <named-native-query
name="Comment.findByNickname" :
Comment안에 findByNickname 메소드가 아래 <query>를 실행하고
리턴타입은 result-class="com.example.firstproject.entity.Comment"> 즉 Comment 엔티티를 반환하겠다.라는 뜻
<?xml version="1.0" encoding="utf-8" ?>
<entity-mappings xmlns="https://jakarta.ee/xml/ns/persistence/orm"
                 xmlns:xsi="http://www.w3.org/2001/XMLSchema-instance"
                 xsi:schemaLocation="https://jakarta.ee/xml/ns/persistence/orm
                                     https://jakarta.ee/xml/ns/persistence/orm/orm_3_0.xsd"
                 version="3.0">
    <named-native-query
            name="Comment.findByNickname"
            result-class="com.example.firstproject.entity.Comment">
        <query>
            <![CDATA[
                SELECT
                    *
                FROM
                    comment
                WHERE
                    nickname = :nickname
            ]]>
        </query>
    </named-native-query>
</entity-mappings>
레퍼지토리 Test
package com.example.firstproject.repository;

@DataJpaTest // JPA와 연동한 테스트!!
class CommentRepositoryTest {

    @Autowired
    CommentRepository commentRepository;

    @Test
    @DisplayName("특정 게시글의 모든 댓글 조회") //void findByArticleId____특정_게시글의_모든_댓글_조회 : 이렇게 쓰지않고 @DisplayName("특정 게시글의 모든 댓글 조회") 를 사용
    void findByArticleId() {
        /* Case 1: 4번 게시글의 모든 댓글 조회*/
        {
            // 입력 데이터 준비
            Long articleId = 4L;
            // 실제 수행
            List<Comment> comments = commentRepository.findByArticleId(articleId);
            // 예상하기
            Article article = new Article(4L, "당신의 인생 영화는?", "댓글");

            Comment a = new Comment(1L, article, "Park", "인턴");
            Comment b = new Comment(2L, article, "Kim", "인턴1");
            Comment c = new Comment(3L, article, "Lee", "인턴2");

            List<Comment> expexted = Arrays.asList(a,b,c);
            // 검증
            assertEquals(expexted.toString(), comments.toString(), "4번 글의 모든 댓글을 출력!");
        }

        /* Case 2: 1번 게시글의 모든 댓글 조회*/
        {
            // 입력 데이터 준비
            Long articleId = 1L;
            // 실제 수행
            List<Comment> comments = commentRepository.findByArticleId(articleId);
            // 예상하기
            Article article = new Article(1L, "가가가가", "11111");

            List<Comment> expexted = Arrays.asList();
            // 검증
            assertEquals(expexted.toString(), comments.toString(), "1번 글은 댓글이 없음");
        }

        /* Case 3: 9번 게시글의 모든 댓글 조회*/
        {}
        /* Case 4: 9999번 게시글의 모든 댓글 조회*/
        {}
        /* Case 5: -1번 게시글의 모든 댓글 조회*/
    }

    @Test
    @DisplayName("특정 닉네임의 모든 댓글 조회")
    void findByNickname() {
        /* Case 1: "Park"의 모든 댓글 조회*/
        {
            // 입력 데이터 준비
            String nickname = "Park";

            // 실제 수행
            List<Comment> comments = commentRepository.findByNickname(nickname);

            // 예상하기
            Comment a = new Comment(1L, new Article(4L, "당신의 인생 영화는?", "댓글"), nickname, "인턴");
            Comment b = new Comment(4L, new Article(5L, "당신의 소울 푸드는?", "댓글"), nickname, "치킨");
            Comment c = new Comment(7L, new Article(6L, "당신의 취미는?", "댓글"), nickname, "게임");

            List<Comment> expexted = Arrays.asList(a,b,c);
            // 검증
            assertEquals(expexted.toString(), comments.toString(), "Park의 모든 댓글 출력!!");
        }
        /* Case 2: "kim"의 모든 댓글 조회*/
        {}
        /* Case 3: null의 모든 댓글 조회*/
        {}
        /* Case 4: ""의 모든 댓글 조회*/
        {}
        /* Case 5: "i"의 모든 댓글 조회*/
        {}
    }
}