Elasticsearch 세팅을 해본적이 없다면?????
AWS EC2에 Elasticsearch 설치하기을 참고해서 세팅하시면 됩니다.
Elasticsearch를 사용할 때는 일반적으로 Index → Type → Document 순으로 입력하여 사용하게 되는데, 실습과 병행할 때는 Index → Document → Type 방향으로 학습하는 것이 좋은 것 같습니다.
1. Index 가지고 놀기
1) Index 만들기
curl -XPUT http://[Elasticsearch Server IP]:9200/[INDEX NAME]?pretty
위와 같은 명령으로 INDEX를 만들수 있습니다.
아래와 같은 명령을 입력하여 sport라는 INDEX를 만들어보겠습니다.
curl -XPUT http://localhost:9200/sport?pretty

2) Index 조회하기
curl -XGET http://[Elasticsearch Server IP]:9200/[INDEX NAME]?pretty
위와 같은 명령으로 INDEX를 조회할 수 있습니다.
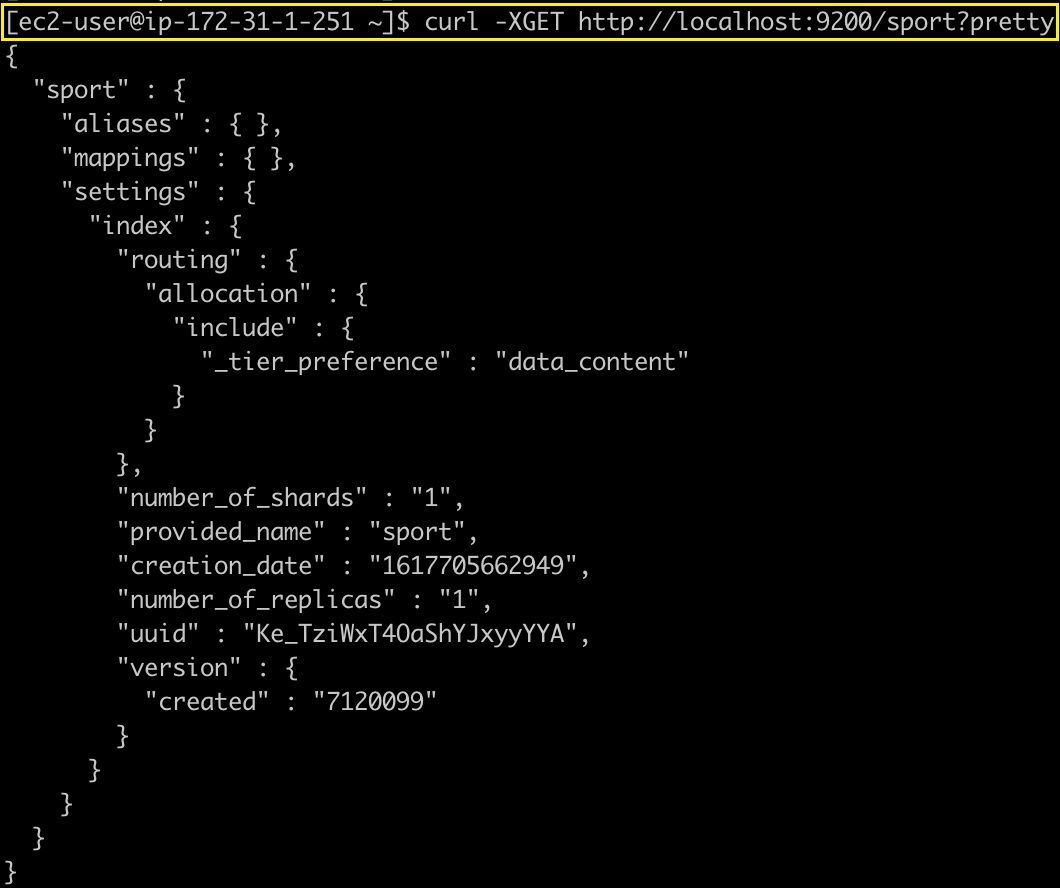
아래와 같은 명령을 입력하여 sport라는 INDEX를 조회해보겠습니다.
curl -XGET http://localhost:9200/sport?pretty
pretty는 결과를 출력할 때, json 포맷의 결과를 보기 좋게 만들어주는 옵션입니다.
3) Index 삭제하기
curl -XDELETE http://[Elasticsearch Server IP]:9200/[INDEX NAME]
위와 같은 명령으로 INDEX를 삭제할 수 있습니다.
아래와 같은 명령을 입력하여 sport라는 INDEX를 삭제해보겠습니다.
curl -XDELETE http://localhost:9200/sport

2. Document 가지고 놀기
1) Document 생성하기
(1) 데이터 직접 입력
※ Document는 Index와 Type이 생성되어 있지 않더라도 Document를 추가하는 시점에 지정한 Index와 Type이 생성할 수 있습니다.
curl -XPOST http://[Elasticsearch Server IP]:9200/[INDEX NAME]/[TYPE NAME]/[ID]/ -d [JSON DATA] -H 'Content-Type: application/json'
위와 같은 명령으로 Document를 지정한 Index의 Type에 추가할 수 있다.
아래와 같이 입력하여 직접 Document를 생성해보자.
curl -XPOST http://localhost:9200/sport/soccer/1/ -d '{"user": "jwpark", "score": 15}' -H 'Content-Type: application/json'

(2) JSON 파일을 입력
// single_data.json (데이터가 하나만 든 json 파일)
{"user": "messi", "score": 62}
curl -XPOST http://localhost:9200/sport/soccer/2 -d @single_data.json -H 'Content-Type: application/json'
 Q) 데이터가 여러개 든 json 파일을 동일한 명령으로 실행하면 어떻게 될까요?
// multi_data.json (여러개의 json 데이터가 들어있는 파일)
{"user": "park", "score": 12}
{"user": "kim", "score": 24}
{"user": "choi", "score": 36}
curl -XPOST http://localhost:9200/sport/soccer/3?pretty -d @multi_data.json -H 'Content-Type: application/json'
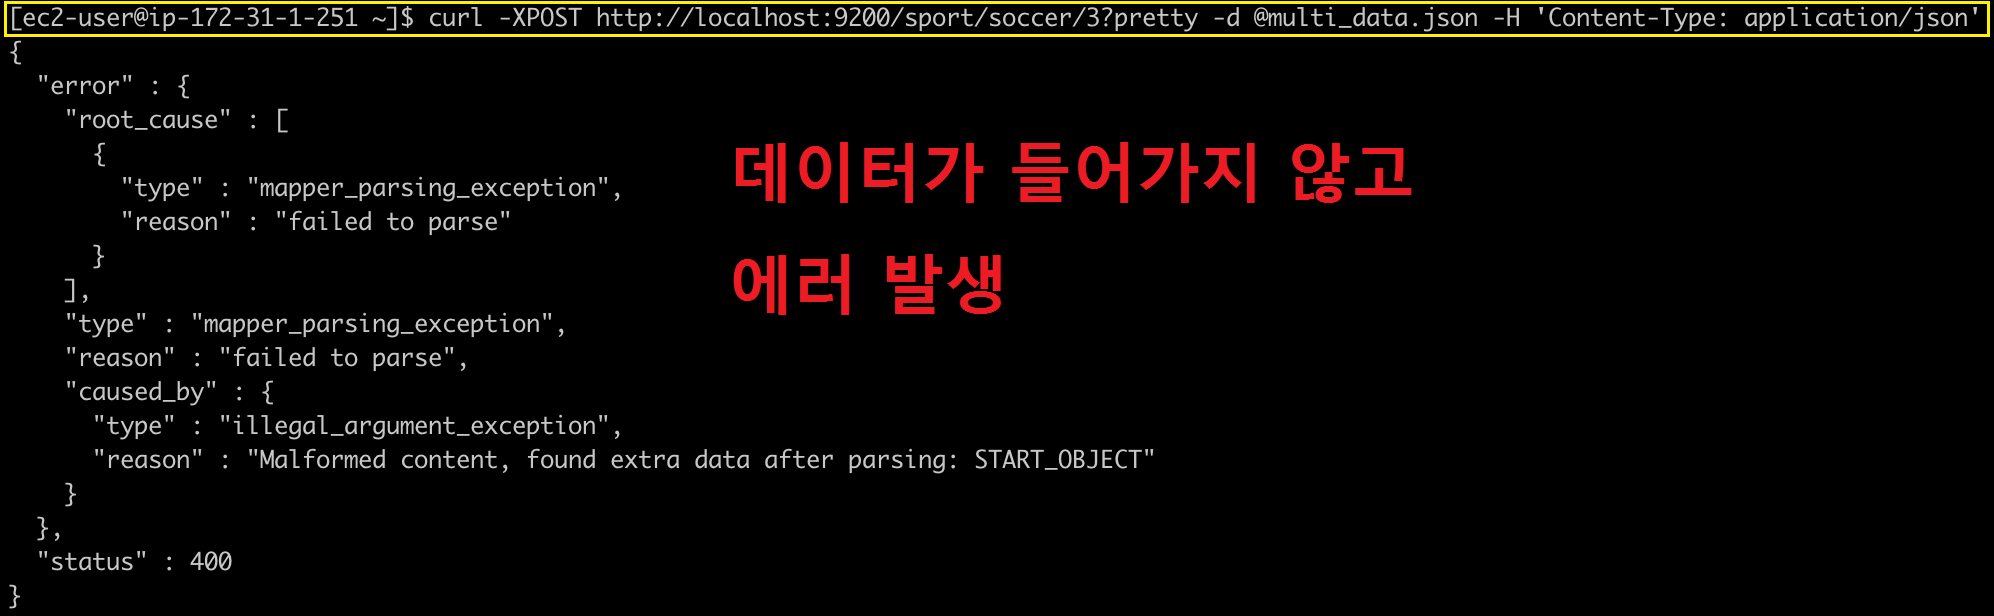
네 오류가 발생했네요. 원인으로는 parsing에 실패한 것 같습니다.
대량의 JSON 데이터를 한번에 입력하기 위한 방법을 BULK라고 합니다.
(3) BULK로 JSON 파일을 입력
먼저, 대량의 데이터를 넣을 때는 각각의 데이터가 INDEX, TYPE이 다를 수 있습니다.
파일의 양식을 아래와 같이 바꿔주도록 합니다.
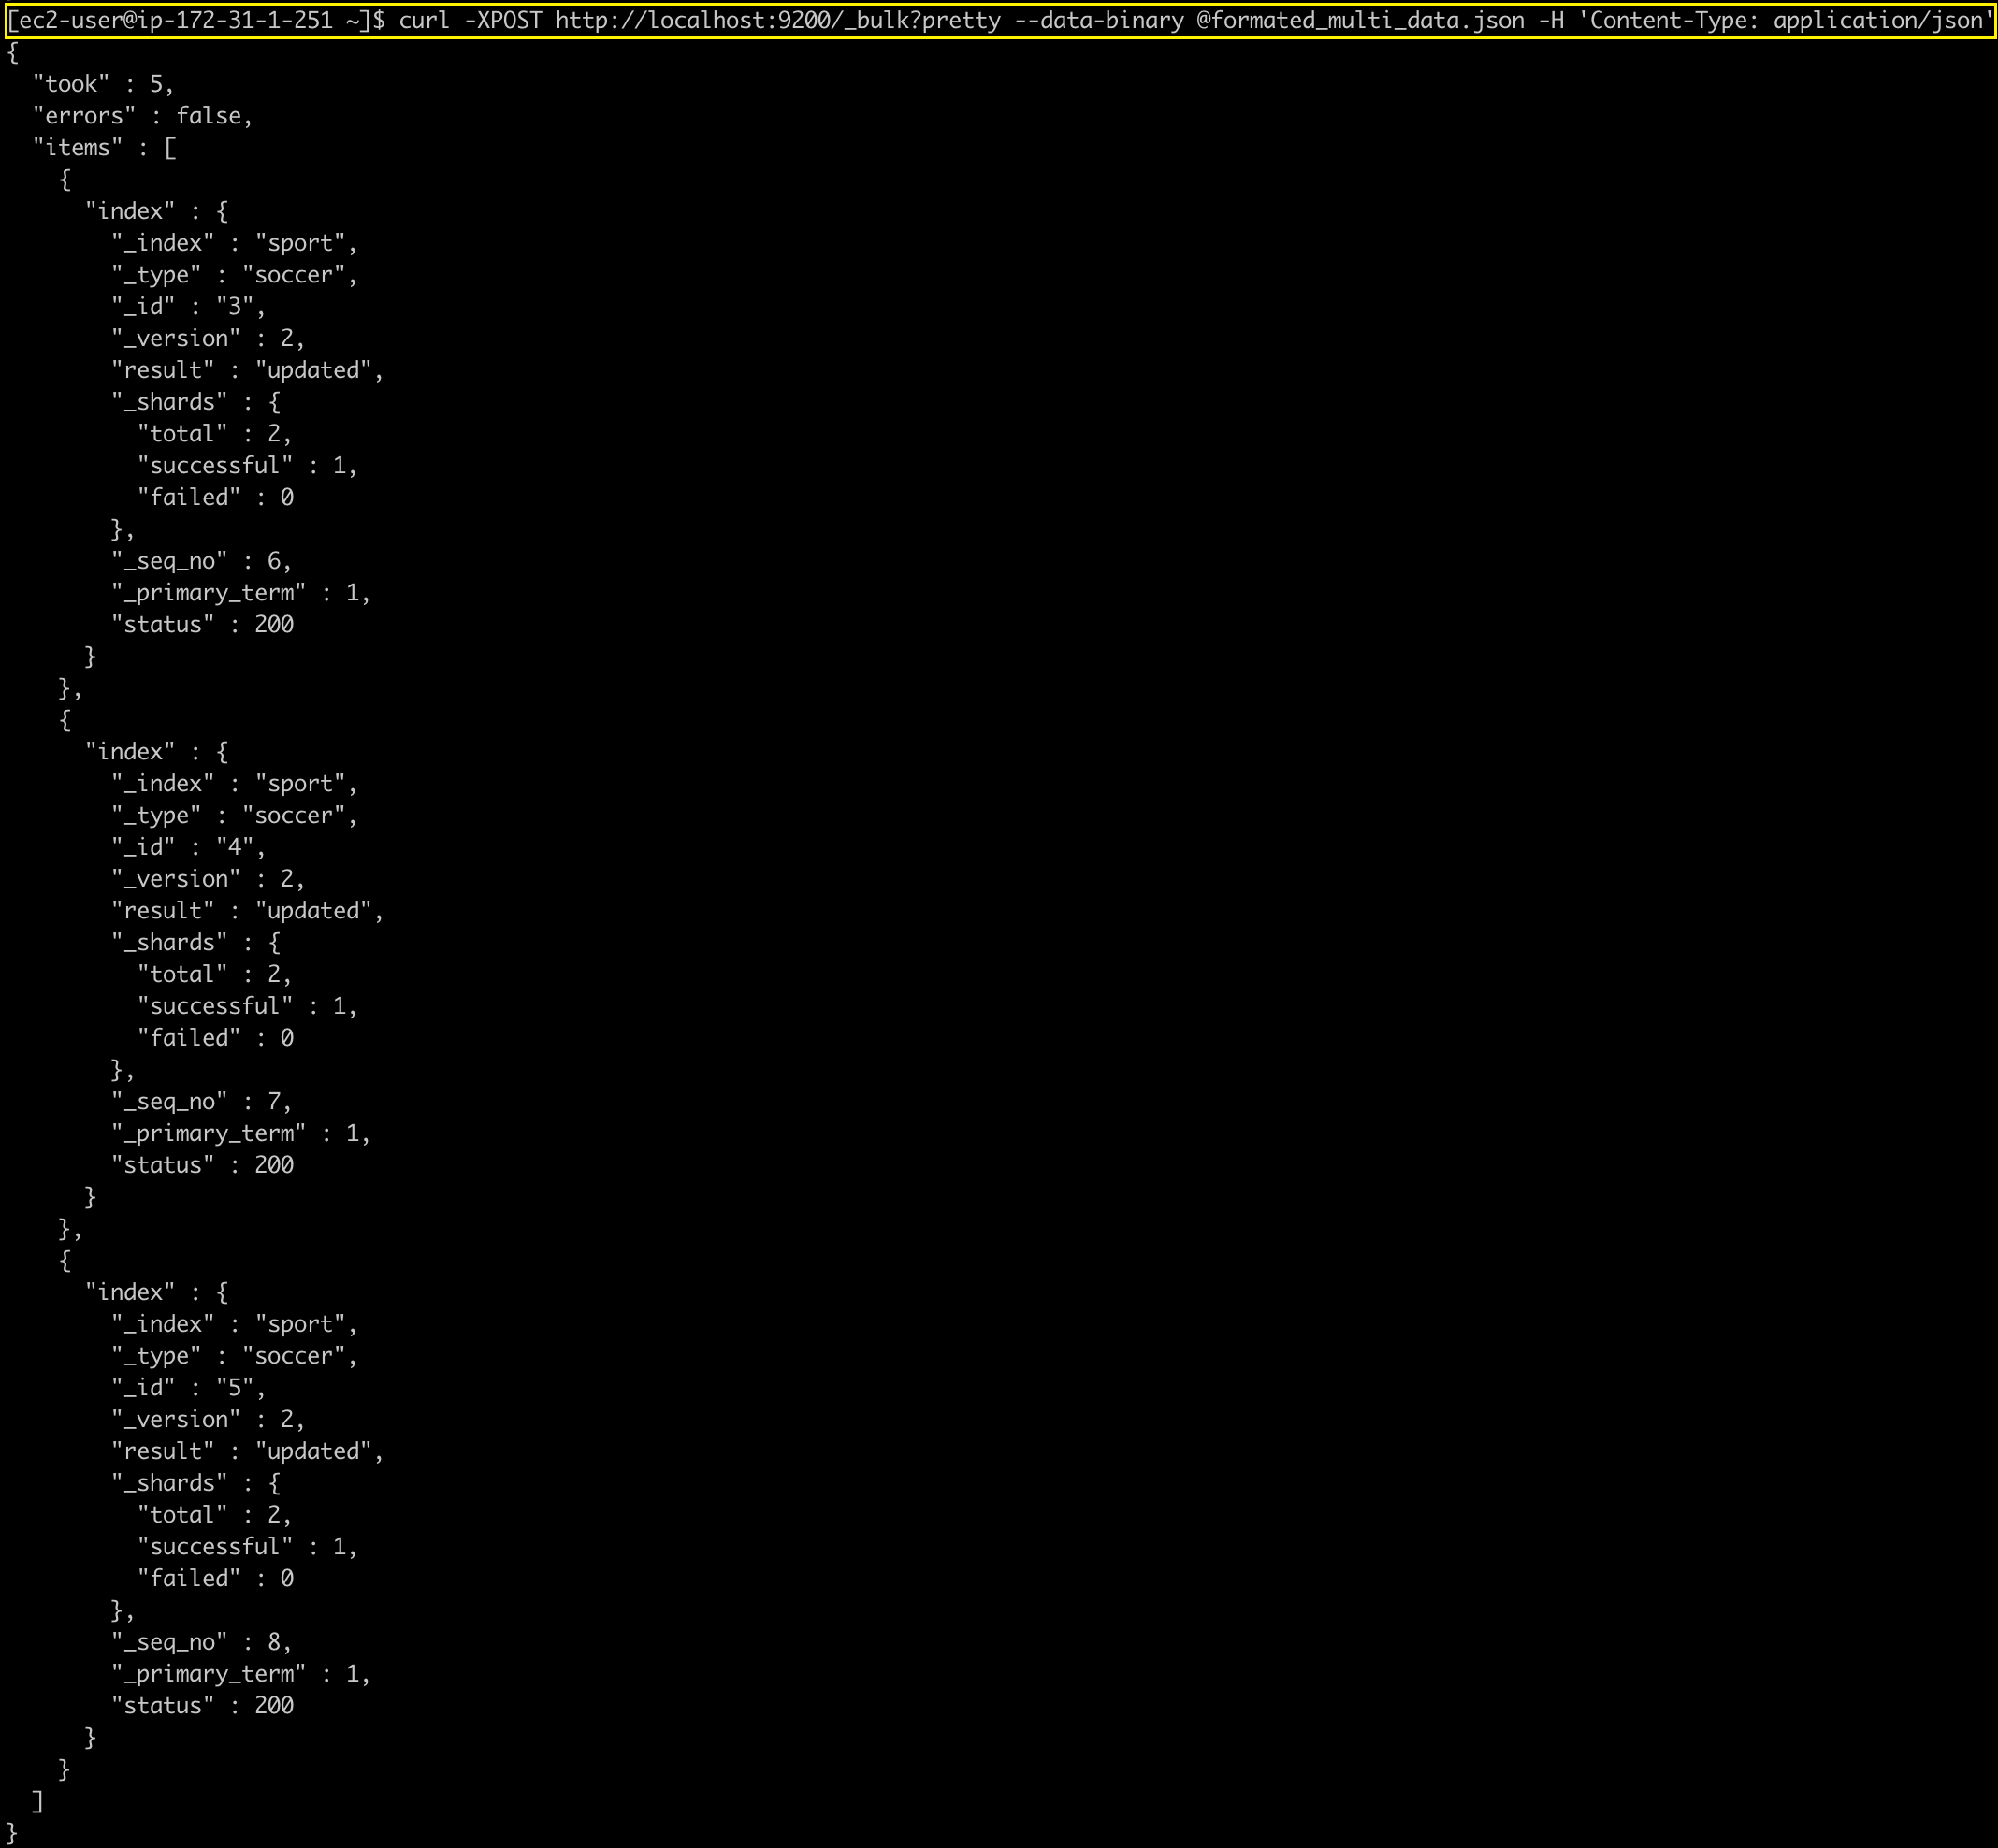
// formated_multi_data.json (여러개의 json 데이터가 각 index, type이 지정된채로 들어있는 파일)
{"index": { "_index": "sport", "_type": "soccer", "_id": 3 } }
{"user": "park", "score": 12}
{"index": { "_index": "sport", "_type": "soccer", "_id": 4 } }
{"user": "kim", "score": 24}
{"index": { "_index": "sport", "_type": "soccer", "_id": 5 } }
{"user": "choi", "score": 36}
curl -XPOST http://localhost:9200/_bulk?pretty --data-binary @formated_multi_data.json -H 'Content-Type: application/json'
위와 같은 명령으로 formated_multi_data.json 파일에 있는 대량의 JSON 데이터를 한번에 Elasticsearch로 넣을 수 있습니다.
이제 다음은 지금까지 넣은 Document들을 조회해보도록 하겠습니다.
2) Document 검색하기
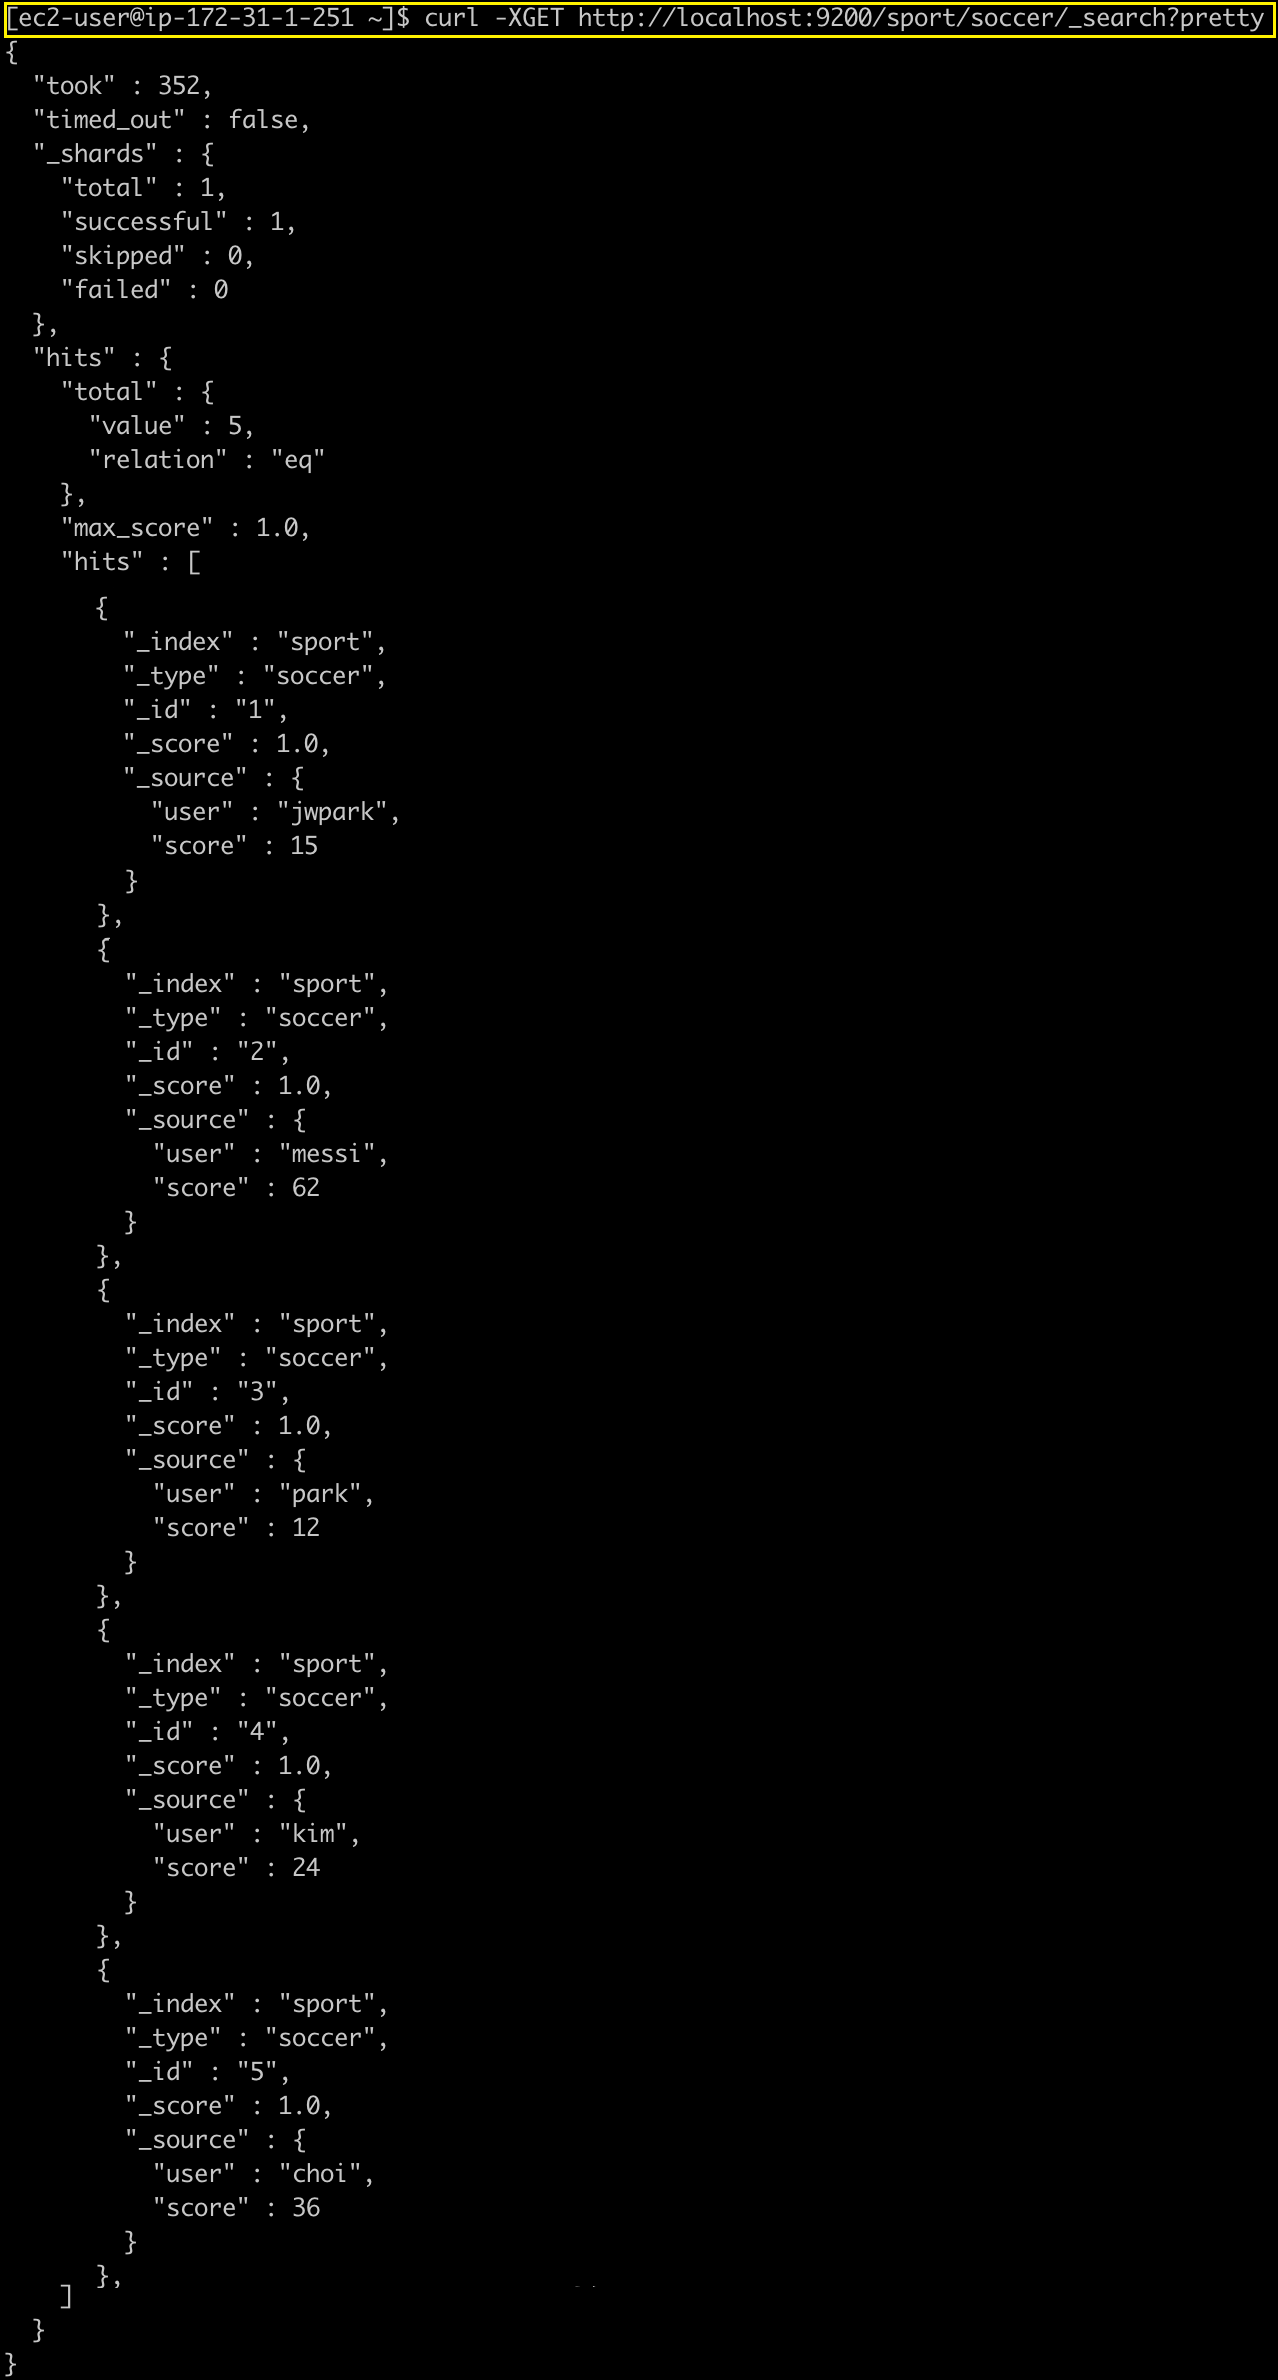
sport INDEX의 soccer TYPE의 전체 Document를 조회하는 명령은 아래와 같습니다.
curl -XGET http://localhost:9200/sport/soccer/_search?pretty
조회해보니 지금까지 넣은 5개의 Document가 정상적으로 들어있음을 확인할 수 있습니다.
Document를 검색하는 방식은 총 3가지가 있습니다.
(1) URI 방식
HTTP GET 요청을 사용해서 검색조건에 해당하는 파라미터를 Key:Value 형태로 추가하여 검색 하는 방식입니다.
그럼, 검색 조건을 추가해서 score가 24인 것을 조회해보겠습니다.
curl -XGET http://localhost:9200/sport/soccer/_search?q=score:24

(2) Request body 방식
명령어 본문에 JSON 형태로 검색 조건을 추가해서 검색을 하는 방식입니다.
Request body 방식은 사용할 수 있는 옵션이 많으니 링크를 참고해주세요.
curl -XGET http://localhost:9200/sport/soccer/_search -d '
{"query":
  {"term":
    {"score": 24}
  }
}' -H 'Content-Type: application/json'
(3) Query DSL 방식
JSON 구조를 기반으로 하여 제공합니다. 여러 개의 질의를 조합하거나 질의 결과에 대해 다시 검색을 수행하는 등의 강력한 검색이 가능합니다.
Query DSL에 대한 추가적인 설명과 사용법은 링크를 참고해주세요.
3) Document 수정하기
curl -XPOST http://localhost:9200/sport/soccer/1/_update -d '
{
  "score": 100
}' -H 'Content-Type: application/json'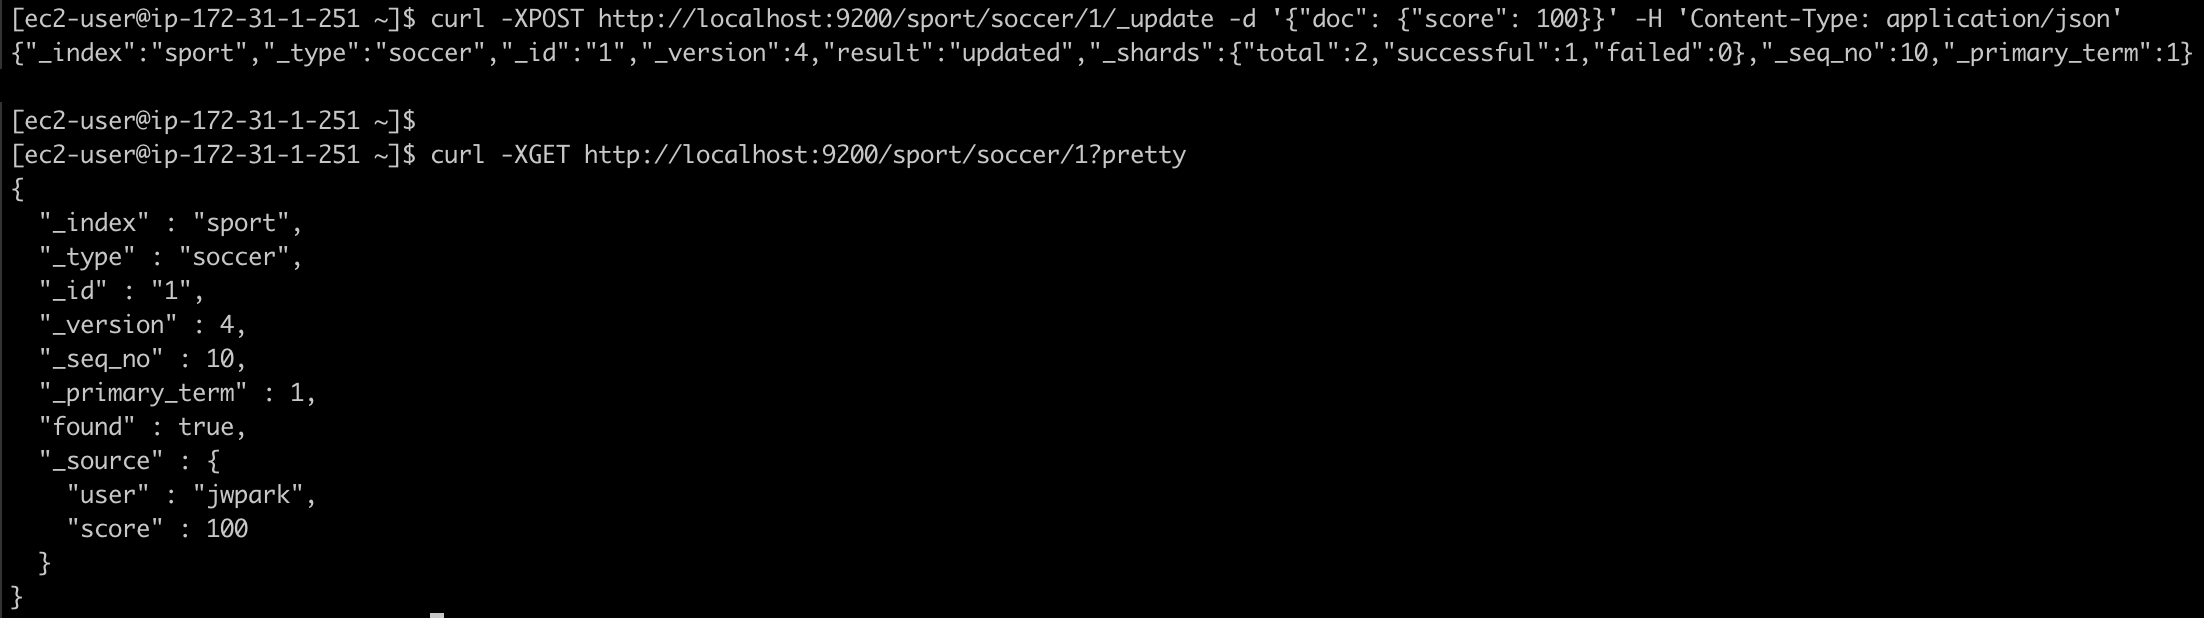
Document를 수정하고 조회한 결과 score가 100으로 제대로 변경되었음을 확인할 수 있다.
4) Document 삭제하기
curl -XDELETE http://localhost:9200/sport/soccer/1

Document를 삭제하고 조회한 결과 더이상 찾아지지 않아서 found: false로 나타난 것을 볼 수 있다.
3. Type 가지고 놀기
Elasticsearch 6.x 버전 이후로는 Multi Type이 지원되지 않습니다. Index:Type = 1:1
Elasticsearch의 Type은 RDBMS의 Schema와 비슷합니다.
들어오게 될 Document(data)의 형(type)을 정의하는 것이 Type입니다.
이러한 Type에 날짜 포맷을 가진 property를 정의하면 Kibana 또는 Grafana를 연계할 때 시간의 흐름에 따른 차트 데이터를 보기 용이합니다.
1) Type 생성하기
(1) JSON 파일을 사용
// soccer_mapping.json
{
  "soccer": {
    "properties": {
      "user": { "type": "text" },
      "score": { "type": "long" }
    }
  }
}
기존에 Document를 넣은 것들에 타입을 맞춰서 넣어줘야 합니다.
여기서 score.type=integer로 설정하는 경우 parse_exception이 발생해서 Type에 매핑이 정상적으로 이루어지지 않습니다.
curl -XPUT http://localhost:9200/sport/soccer/_mapping -d @soccer_mapping.json -H 'Content-Type: application/json'
위와 같은 명령으로 soccer Type에 mapping을 추가하였습니다.
soccer Type이 정상적으로 설정되었는지 확인해보겠습니다.
curl -XGET http://localhost:9200/sport/?pretty
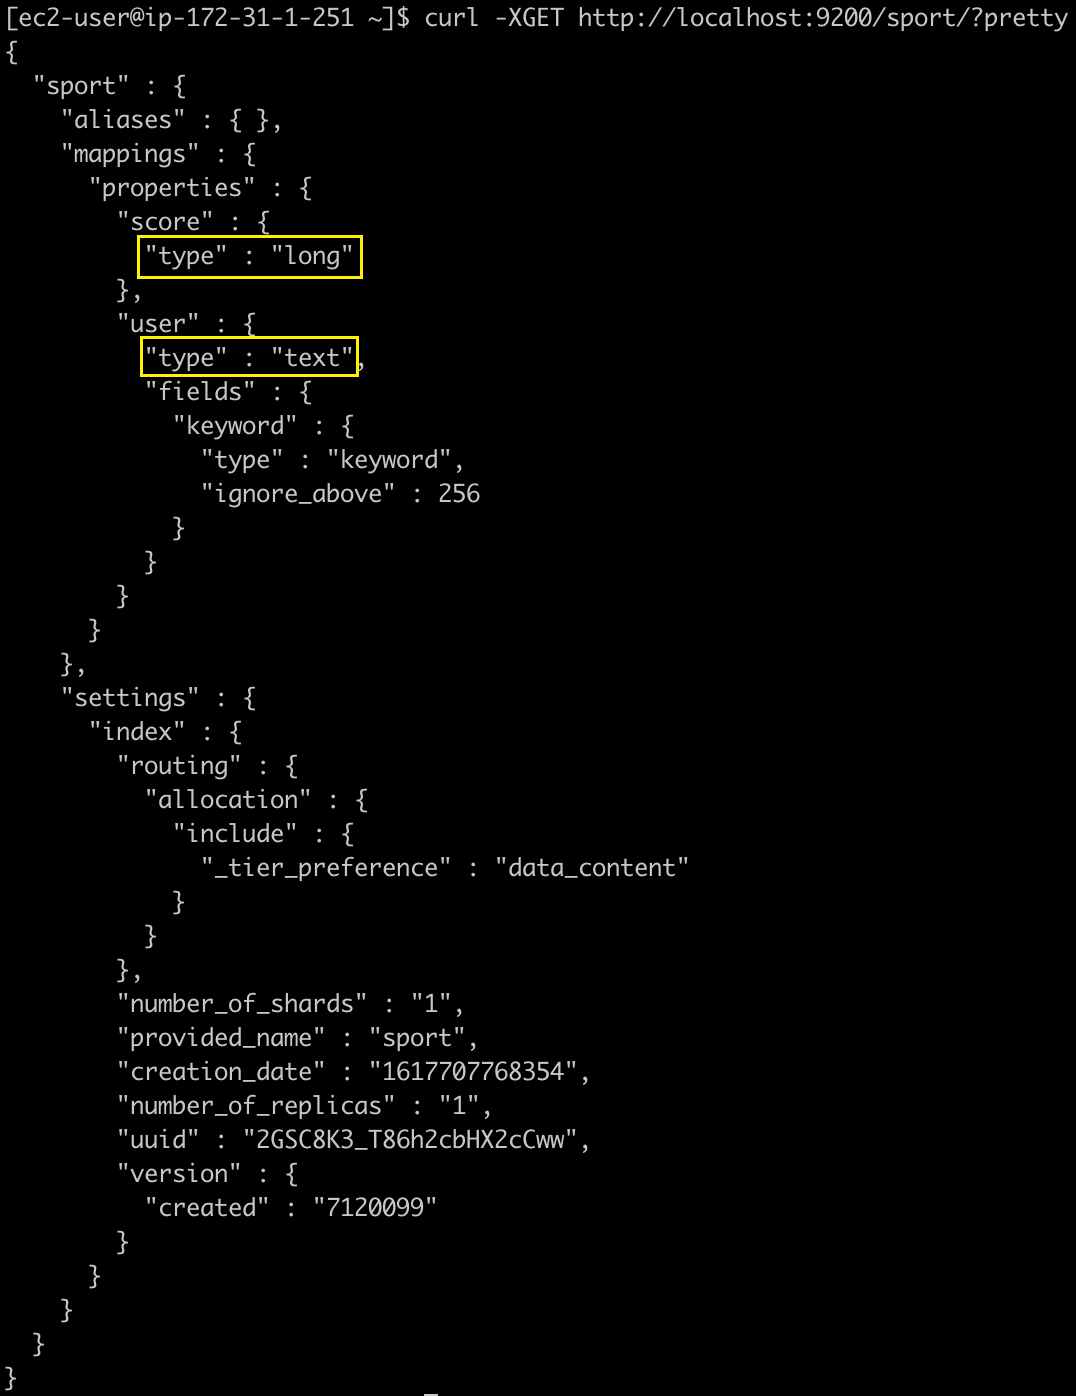 정상적으로 type이 설정되었습니다.
(2) 데이터 직접 생성
soccer_mapping.json 파일에 있는 내용을 그대로 입력합니다.
curl -XPUT http://localhost:9200/sport/soccer/_mapping -d '
{
  "soccer": {
    "properties": {
      "user": { "type": "text" },
      "score": { "type": "long" }
    }
  }
}' -H 'Content-Type: application/json'
참고 자료
https://www.inflearn.com/course/elk-%EC%8A%A4%ED%83%9D-%EB%8D%B0%EC%9D%B4%ED%84%B0-%EB%B6%84%EC%84%9D/dashboard
https://yhmane.tistory.com/166