게시물에 파일을 첨부해보자.
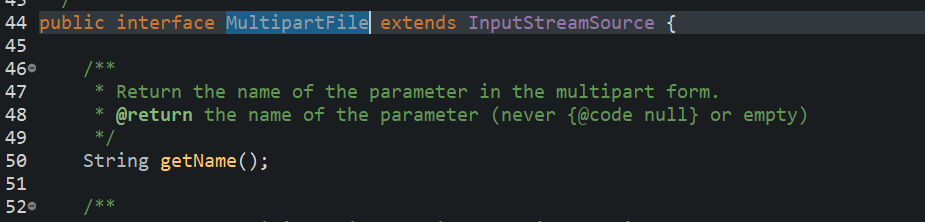
스프링은 MultipartFile 이라는 인터페이스로 멀티파트 파일을 매우 편리하게 지원한다.
MultipartFile 주요 메서드
- file.getOriginalFilename() : 업로드 파일 명
- file.transferTo(...) : 파일 저장

Post
@Entity
public class Post extends BaseTimeEntity {
	...

    @Column
    private String fileName;
PostDto.RequestDto
public class PostDto {

    @Getter
    @AllArgsConstructor
    @NoArgsConstructor
    @Builder
    @Setter
    public static class RequestDto{
    	...
        private String fileName;
        private MultipartFile file;

        /* Dto -> Entity */
        public Post toEntity(Member member, PostCategory category){
            Post post = Post.builder()
                    .id(id)
                    .title(title)
                    .content(content)
                    .fileName(fileName)
                    .viewCount(0)
                    .likeCount(0)
                    .member(member)
                    .category(category)
                    .build();
            return post;
        }

        /* 서버가 관리하는 파일명 추가 */
        public void addFileName(String storeFileName){
            this.fileName = storeFileName;
        };
    }
- 뷰에서 컨트롤러로 받는 Dto 객체에
MultipartFile형식의 요소를 추가한다. - DTO에서 엔티티로 변환할 때에는
addFileName메소드를 이용해 해당 파일에 대해 서버가 관리하는 파일명을 추가한 후 파일 자체가 아니라 파일명이 DB에 저장되도록 한다.
서비스와 컨트롤러단
PostController
글을 저장하고 해당 글이 저장된 카테고리 글 목록으로 리다이렉트되는 컨트롤러
PostService에서 파일을 처리한다.
    /** 글 저장 **/
    @PostMapping("/save")
    public String save(@Validated @ModelAttribute PostDto.RequestDto postDto,
                     @AuthenticationPrincipal UserAdapter user) throws IOException {

        log.info("/community/post/save 진입");
        Long memberId = user.getMember().getId();

        // 글 저장
        Long saveId = postService.save(postDto, memberId);

        // 저장한 글의 카테고리 반환
        String category_name = postService.getCategoryName(saveId);

        // 저장한 글이 존재하는 목록으로 리다이렉트
        return "redirect:/community/post/"+category_name;
}- 파일이 첨부된 DTO 객체를 @ModelAttribute 형식으로 받아온다
파일 저장
우선 파일을 저장할 경로를 application.yml에 설정해준다.
application.yml
file:
  dir:   C:\Users\juyoung\git\Helpring\src\main\resources\static\post_upload\
  lecture_dir: C:\Users\juyoung\git\Helpring\src\main\resources\static\lecture_upload\
  course_dir: C:\Users\juyoung\git\Helpring\src\main\resources\static\course_upload\
FileStore
파일 저장을 관여하는 객체를 생성한다.
@Component
public class FileStore {

    @Value("${file.dir}")
    private String fileDir;

    /** 전체 파일 경로 */
    public String getFullPath(String fileName){
        return fileDir + fileName;
    }

    /** 파일 저장 **/
    public UploadFile storeFile(MultipartFile multipartFile) throws IOException{
        if(multipartFile.isEmpty()) return null;

        String originalFileName = multipartFile.getOriginalFilename();

        /** 서버에 저장할 새로운 파일명 생성 **/
        String storeFileName = createStoreFileName(originalFileName);

        /** 새 파일명으로 파일 저장 **/
        multipartFile.transferTo(new File(getFullPath(storeFileName)));

        return new UploadFile(originalFileName, storeFileName);
    }


    /** 확장자명 추출 메서드 **/
    private String extractExtension(String originalFileName){
        int position = originalFileName.lastIndexOf("."); // 확장자명 위치
        String extension = originalFileName.substring(position + 1); // 확장자명 추출

        return extension;
    }

    /** 서버에 저장할 파일명 생성 **/
    private String createStoreFileName(String originalFileName){
        // 서버에 저장하는 파일명
        String uuid = UUID.randomUUID().toString();

        // 확장자를 붙여서 최종적으로 저장할 파일명 정의
        String extension = extractExtension(originalFileName);
        String storeFileName = uuid + "." + extension;

        return storeFileName;
    }
}
파일 경로를 생성하여 파일 저장
- application.yml 에서 설정한 file.dir 의 값을 주입한다.
실제로 스프링 컨테이너 내부에서는 빈들을 모두 등록할 때 @Value() 안의 내용에 맞는 값을 application.yml에서 찾아 넣어줌
    @Value("${file.dir}")
private String fileDir;MultipartFile인터페이스의getOriginalFilename의 메소드를 이용해 업로드한 파일의 원래 파일명을 가져온다
String originalFileName = multipartFile.getOriginalFilename();- 서버에 저장할 새로운 파일명을 생성한다.
- 서버 내부에서 관리하는 파일명은 유일한 이름을 생성하는 UUID 를 사용해서 충돌하지 않도록 한다. 또한 그 UUID에 jpg, png, mp4 등 확장자를 붙여서 최종적으로 서버에 저장할 파일명을 완성한다.
/** 서버에 저장할 새로운 파일명 생성 **/
String storeFileName = createStoreFileName(originalFileName)
/** 서버에 저장할 파일명 생성 **/
private String createStoreFileName(String originalFileName){
// 서버에 저장하는 파일명
String uuid = UUID.randomUUID().toString();
// 확장자를 붙여서 최종적으로 저장할 파일명 정의
String extension = extractExtension(originalFileName);
String storeFileName = uuid + "." + extension;
return storeFileName;
}
    /** 확장자명 추출 메서드 **/
    private String extractExtension(String originalFileName){
        int position = originalFileName.lastIndexOf("."); // 확장자명 위치
        String extension = originalFileName.substring(position + 1); // 확장자명 추출

        return extension;
}- 서버에 저장할 파일명과 파일이 존재하는 위치 경로를 더해 새 파일을 생성한 다음
MultipartFile인터페이스의transferTo(Path path)메소드를 이용해 파일 저장
    /** 전체 파일 경로 */
    public String getFullPath(String fileName){
        return fileDir + fileName;
    }
/** 새 파일명으로 파일 저장 **/
multipartFile.transferTo(new File(getFullPath(storeFileName)));UploadFile객체를 반들어 사용자가 저장한 파일명과 서버에 저장한 파일명을 저장
/** 고객이 업로드한 파일 정보 보관 **/
@Setter
@Getter
public class UploadFile {

    private String uploadFileName; // 고객이 업로드한 파일명
    private String storeFileName; // 서버가 관리하는 파일명

    public UploadFile(String uploadFileName, String storeFileName){
        this.uploadFileName = uploadFileName;
        this.storeFileName = storeFileName;
    }

}
PostService
파일이 존재할 때 지정한 파일 경로에 파일을 저장하고, 서버가 관리하는 파일명으로 파일명을 생성하여 DTO객체에 추가한 후 엔티티로 변환해 저장한다.
    /** create **/
    @Override
    public Long save(PostDto.RequestDto requestDto, Long member_id) throws IOException {

        // 파일이 존재한다면
        if(!requestDto.getFile().isEmpty()){

            /* 파일 저장 */
            MultipartFile post_file = requestDto.getFile();
            UploadFile uploadFile = fileStore.storeFile(post_file);

            /* 파일명 추가 */
            requestDto.addFileName(uploadFile.getStoreFileName());
        }

        /* Member 정보, category 정보 추가 */
        Long category_id = requestDto.getCategory_id();

        Member member = memberRepository.findById(member_id).orElseThrow(() ->
                                            new IllegalArgumentException("해당 사용자가 존재하지 않습니다."));
        PostCategory category = postCategoryRepository.findById(category_id).orElseThrow(() ->
                                            new IllegalArgumentException("해당 카테고리가 존재하지 않습니다."));


        /* RequestDto -> Entity */
        Post post = requestDto.toEntity(member, category);
        return postRepository.save(post).getId();
    }
- 서버에 저장할 새로운 파일명으로 파일을 저장하고, UploadFile 객체에 기존 파일명과 새로운 파일명을 각각 저장
- 컨트롤러단에서 넘어온 DTO 객체에 서버에 저장한 파일명 추가
- 서버에 저장한 파일명을 추가한 객체를 엔티티로 변환하여 DB에 저장
글 업로드 html
<!-- 글 업로드 모달 -->
<form action="/community/post/save" method="post" name="saveForm" onsubmit="return save()"
    enctype="multipart/form-data" th:object="${postDto}">
    <input type="hidden" th:name="_csrf" th:value="${_csrf.token}"/>
		...
  	<div class="card-body">
		<span th:each="category: ${categoryList}">
			<input type="radio" class="btn-check" th:value="${category.id}"
			th:name="category_id" th:id="${category.name}" autocomplete="off" checked required>
				<label class="btn btn-outline-primary" th:for="${category.name}"
					th:text="${category.viewName}"></label>
		</span>
	</div>
	...
	<div>
	<div style = "font-weight: bold" >작성자</div>
      <p sec:authentication="principal.memberDto.nickname"></p>
	</div>
	<div class="input-group input-group-outline my-3">
		<label class="form-label">제목</label>
		<input type="text" th:class="form-control" th:name="title" th:id = "title">
	</div>
	<div class="content input-group mb-4 input-group-static">
		<textarea type="text" th:class="form-control"
			th:name="content" th:id = "content" rows="10" placeholder="내용을 입력하세요."></textarea>
	</div>
	<div>
		<label for="postFile">업로드 사진 선택</label>
		<input th:class="file-selector-button" type="file" id="postFile" th:name="file">
   </div>
	<div class="input-container modal-footer">
		<button type="button" class="btn btn-outline-danger" data-bs dismiss="modal" aria-label="Close"> 작성취소</button>
		<input type="submit" class="btn bg-gradient-primary" value="글쓰기">
	</div>
</form>
enctype="multipart/form-data"
<form action="/community/post/save" method="post" name="saveForm" onsubmit="return save()"
enctype="multipart/form-data" th:object="${postDto}">- 파일을 업로드 하려면 파일은 문자가 아니라 바이너리 데이터를 전송해야 한다. 또한 보통 폼 데이터를 전달할 때 파일만 전달하는 게 아니라 문자 등 데이터도 전달한다. 즉, 문자와 바이너리를 동시에 전송하는
multipart/form-dataHTTP 전송 방식이 필요하다. - 이 방식을 사용하려면 Form 태그에 별도의
enctype="multipart/form-data"를 지정해야 한다. - 폼의 일반 데이터는 각 항목별로 문자가 전송되고, 파일의 경우 파일 이름과 Content-Type이 추가되면서 바이너리 데이터가 전송된다.
multipart/form-data 는 이렇게 각각의 항목을 구분해서, 한번에 전송하는 것이다.
즉, 다른 종류의 여러 파일과 폼의 내용 함께 전송할 수 있다.
출처
김영한의 스프링 MVC 2편
