과제
기존 구현 화면(teamInsert.html)
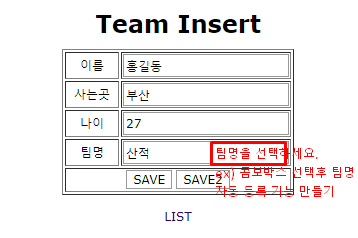
1. teamInsert html을 jsp파일로 만들어 붙여넣기
2. vector를 이용한 콤보박스 생성하기
3. 콤보박스의 해당 값을 눌렸을 시 input태그안에 값이 나오게 하고 선택을 안할시 직접입력할 수 있게 하기
DB(TeamMgr.java)
import java.sql.Connection;
import java.sql.PreparedStatement;
import java.sql.ResultSet;
import java.util.Vector;

import org.apache.catalina.ssi.SSICommand;
import org.w3c.dom.css.CSSValueList;

public class TeamMgr {
	private DBConnectionMgr pool;

	public TeamMgr() {
		pool = DBConnectionMgr.getInstance();
	}
	public Vector<String> teamList(){
		Connection con = null;
		PreparedStatement pstmt = null;
		ResultSet rs = null;
		String sql = null;
		Vector<String> vlist = new Vector<String>();
		try {
			con = pool.getConnection();
			sql = "select distinct team from tblTeam";
			pstmt = con.prepareStatement(sql);
			rs = pstmt.executeQuery();
			while(rs.next()) {
				vlist.addElement(rs.getString(1));
			}
			//System.out.println(vlist.size());
		} catch (Exception e) {
			e.printStackTrace();
		} finally {
			pool.freeConnection(con, pstmt, rs);
		}
		return vlist;
	}

	public static void main(String[] args) {
		TeamMgr mgr = new TeamMgr();
		mgr.teamList();
	}
 }
DB에 입력된 팀이름 리스트를 가져오기 위해 Mgr에 Vector로 TeamList()를 만들어 줌.
sql문은 "select distinct team from tblTeam"을 작성해줌.
println을 사용하여 출력함
(아래의 결과나옴 - DB에 3팀이 저장되어 있음)

jsp로 변경
jsp 선언
<%@page import="ch09.TeamMgr"%>
<%@page import="java.util.Vector"%>
<%@page contentType="text/html; charset=UTF-8"%>
<jsp:useBean id="mgr" class="ch09.TeamMgr"/>
//jsp 선언 - 추가
<%
	Vector<String> vlist = mgr.teamList();
%>
//여기까지
<!DOCTYPE html>
<html>
// 아래는 temaInsert.html에 같음
mgr에서 만들어둔 teamList()를 불러와 Vector의 vlist에 넣어줌.
테이블에 select 태그 추가
	<tr>
		<td align="center">팀명</td>
		<td>
			<input name="team" size="10">
			<select id="teamselect" onchange="selectTeam()">
			<%
				for(int i=0;i<vlist.size();i++){%>
				<option value="<%=vlist.get(i)%>"><%=vlist.get(i)%></option>
			<%}%>
			</select>
		</td>
	</tr>
selcet태그를 이용하여 id를 적어주고, onchange 이벤트 핸들러를 이용함.
("selectTeam()"함수는 밑에 만들어 둠.)
for문을 통해 jsp선언부분에 만들어준 vlist를 돌려줌.
function 만들기
	function selectTeam() {
    	// select의 name을 id로 변경
      	teamselect = document.getElementById("teamselect");
      	team = teamselect.options[teamselect.selectedIndex].value;
      	document.frm.team.value = team;
	}
id가 teamselect인 select태그를 불러오고 teamselect에 넣음.
teamselect의 index의 선택되어진 것의 값을 team에 넣음.
team을 document.frm.team.value 붙여 화면에 나오게 함.
function 다른 방법
	<tr>
		<td align="center">팀명</td>
		<td>
			<input name="team" size="10">
			<select id="teamselect" onchange="selectTeam(<!-- this.value -->)">
            // this.value를 해서 기본 값이 나타타게 함
			<%
				for(int i=0;i<vlist.size();i++){%>
				<option value="<%=vlist.get(i)%>"><%=vlist.get(i)%></option>
			<%}%>
			</select>
		</td>
	</tr>
    //함수 부분
    function selectTeam1() {
      	document.frm.team.value = team;
	}
코드
<%@page import="ch09.TeamMgr"%>
<%@page import="java.util.Vector"%>
<%@page contentType="text/html; charset=UTF-8"%>
<jsp:useBean id="mgr" class="ch09.TeamMgr"/>
<%
Vector<String> vlist = mgr.teamList();
%>
<!DOCTYPE html>
<html>
<head>
<meta charset="UTF-8">
<title>Team MGr</title>
<link href="style.css" rel="stylesheet" type="text/css">
<script type="text/javascript">
function check() {
f = document.frm;
if (f.name.value=="") {
alert("이름 입력");
f.name.focus();
return;
}
if (f.city.value=="") {
alert("사는곳 입력");
f.city.focus();
return;
}
if (f.age.value=="") {
alert("나이 입력");
f.age.focus();
return;
}
if (f.team.value=="") {
alert("팀명 입력");
f.team.focus();
return;
}
f.submit();//제출
}
function check2() {
document.frm.action = "teamInsertProc2.jsp";
document.frm.submit();
}
function selectTeam() {
// select의 name을 id로 변경
teamselect = document.getElementById("teamselect");
team = teamselect.options[teamselect.selectedIndex].value;
//alert(team);
document.frm.team.value = team;
}
/* function selectTeam1() {
document.frm.team.value = team;
} */
</script>
</head>
<body>
<div align="center">
<h1>Team Insert</h1>
<form name="frm" method="post" action="teamInsertProc.jsp">
<table border="1">
<tr>
<td width="50" align="center">이름</td>
<td width="150"><input name="name" value="홍길동"></td>
</tr>
<tr>
<td align="center">사는곳</td>
<td><input name="city" value="부산"></td>
</tr>
<tr>
<td align="center">나이</td>
<td ><input name="age" value="27"></td>
</tr>
<tr>
<td align="center">팀명</td>
<td>
<input name="team" size="10">
<select id="teamselect" onchange="selectTeam(<!-- this.value -->)">
<%
for(int i=0;i<vlist.size();i++){%>
<option value="<%=vlist.get(i)%>"><%=vlist.get(i)%></option>
<%}%>
</select>
</td>
</tr>
<tr>
<td align="center" colspan="2">
<input type="button" value="SAVE" onclick="check()">
<input type="button" value="SAVE2" onclick="check2()">
</td>
</tr>
</table>
</form><p>
<a href="teamList.jsp">List</a>
</div>
</body>
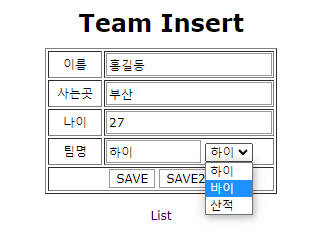
</html>결과 화면
Socpe
Socpe란?(jsp)
웹 서버에서 객체 또는 변수가 생성된 후 유효 할 수 있는 범위로 변수가 선언된 블럭이 그 변수의 사용범위
jsp에서 4가지 Scope
Application > Session > Request > Page
1. .Page Scope
-PageContext 추상 클래스를 사용
-JSP 페이지에서 pageContext라는 내장 객체로 사용 가능
-forward 될 경우 해당 Page scope에 지정된 변수는 사용할 수 없음.
-사용 방법은 다른 Scope와 같으나, 마치 지역변수처럼 사용된다는 것이 다른 Scope들과 다름
-page 내에서만 사용될 수 있는 변수기 때문에 지역 변수처럼 해당 JSP나 Servlet 실행되는 동안에만 정보를 유지하고자 할 때 사용
-JSP에서 pageScope에 값을 저장한 후 해당 값을 EL표기법 등에서 사용할 때 사용 가능
2. .Request Scope
-http 요청을 WAS가 받아 웹 브라우저에 응답할 때까지 변수값을 유지하고자 할 경우 사용
-HttpServletRequest 객체를 사용
-JSP에서는 request 내장 변수를 사용하고, Servlet에서는 HttpServletRequest 객체를 사용
-값을 저장할 때는 request 객체의 setAttribute()메소드를 사용
-값을 읽어 들일 때는 request 객체의 getAttribute()메소드를 사용
-forward 시 값을 유지하고자 사용
3. .Session Scope
-웹 브라우저별로 변수를 관리하고자 할 경우 사용
-웹 브라우저 탭 간에는 세션정보가 공유되기 때문에, 각각의 탭에서 같은 세션정보를 사용 가능
-HttpSession 인터페이스를 구현한 객체를 사용
-JSP에서는 session 내장 변수를 사용
-Servlet에서는 HttpServletRequest의 getSession()메소드를 이용하여 session 객체를 얻음
-값을 저장할 때는 session 객체의 setAttribute()메소드를 사용, 값을 읽어 들일 때는 session 객체의 getAttribute()메소드를 사용
-예를 들어, 쇼핑몰 장바구니, 구매목록, 결재내역, 로그인, 회원가입 등과 같이 개별 클라이언트의 정보를 유지할 필요가 있을 때 사용
4. .Application Scope
-웹 어플리케이션이 시작되고 종료될 때까지 변수를 사용 가능
-ServletContext 인터페이스를 구현한 객체를 사용
-jsp에서는 application 내장 객체를 이용
-Servlet에서는 getServletContext()메소드를 이용하여 application객체를 이용
-웹 어플리케이션 하나당 하나의 application객체가 사용
-값을 저장할 때는 application객체의 setAttribute()메소드를 사용, 값을 읽어 들일 때는 application객체의 getAttribute()메소드를 사용
-모든 클라이언트가 공통으로 사용해야 할 값들이 있을 때 사용
Scope의 공통 함수
- setAttribute(string key,object value) : key, value 형식으로 값을 할당한다.
- getAttribute(string key) : key값으로 value값을 리턴 받는다.
ScopeBean.java
package ch09;

public class ScopeBean {

	private int num;

	public int getNum() {
		return num;
	}

	public void setNum(int num) {
		this.num = num;
	}

}//source에 getter/setter 이용해 자동생성
ScopeBean.jsp
<%@page contentType="text/html; charset=UTF-8"%>
<jsp:useBean id="pBean" class="ch09.ScopeBean" scope="page"/>
<jsp:useBean id="sBean" class="ch09.ScopeBean" scope="session"/>
<!--
scope가 session이면 id가 동잃나 객체가 있는지 없는지 검색
-> 없으면 새롭게 생성을 하지만 있으면 그 객체를 재사용
-> 있으면 그 객체를 재사용
-> 그러나 세션이 종료 또는 제거가 되면 안에 있는 객체도 같이 없어짐.
-> scope="session" 밑에 코드가 많이 사용
-->
<% session.setAttribute("sBean", sBean); %>
<jsp:setProperty property="num" name="pBean" value="<%=pBean.getNum()+10%>"/>
<jsp:setProperty property="num" name="sBean" value="<%=sBean.getNum()+10%>"/>
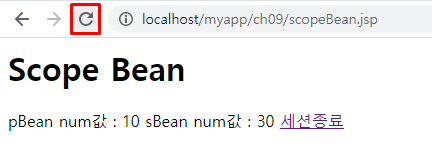
<h1>Scope Bean</h1>
pBean num값 : <jsp:getProperty property="num" name="pBean"/>
sBean num값 : <jsp:getProperty property="num" name="sBean"/>
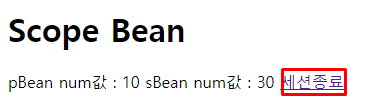
<a href="scopeBean2.jsp">세션종료</a>화면 출력
아래의 화면이 나옴.
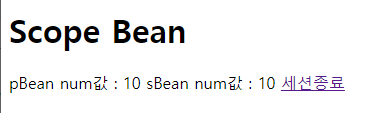
여기서 새로고침을 눌리면 +10씩 증가함.
ScopeBean2.jsp
a태그로 감싸진 '세션 종료'를 눌리면 ScopeBean2이 화면에 출력됨.
<%@page contentType="text/html; charset=UTF-8"%>
<%
	//세션에 특정한 값만 제거
	session.removeAttribute("pBean");
	//세션의 전체를 제거, 무효화, 초기화
	session.invalidate();//로그인 만들 때
	response.sendRedirect("scopeBean.jsp");
%>
화면 출력
세션 종료를 클릭하면
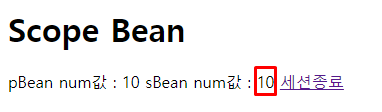
값이 원래대로 돌아옴.
Cookie
Cookie란?
- 상태가 없는 프로토콜을 위해 상태를 지속시키기 위한 방법
- 세션과는 달리 클라이언트 자신들에게 그 정보를 저장
- 쿠키를 읽어서 새로운 클라이언트인지 이전에 요청을 했던 클라이언트인지를 판단
- 클라이언트에 대한 정보가 과자 부스러기처럼 남는다고 해서 쿠키라 불림
cookCookie.jsp
<%@page contentType="text/html; charset=UTF-8"%>
<%
	String cookieName = "myCookie";
	//쿠키를 생성
	Cookie cookie = new Cookie(cookieName, "Apple");
	cookie.setMaxAge(60);//1분
	//쿠키의 값을 변경
	cookie.setValue("Melone");//session 값도
	//쿠키 생성은 JSP에서 했짐나 Client에 전송
	response.addCookie(cookie);
%>
쿠키를 만들었습니다.<br>
쿠키 내용은 <a href="tasterCookie.jsp">여기로</a>
화면 출력

tasterCookie.jsp
<%@page contentType="text/html; charset=UTF-8"%>
<%
	//응답된 쿠키의 정보는 request에 저장
	Cookie cookies[] = request.getCookies();
	if(cookies!=null){
		for(int i=0;i<cookies.length;i++){
	%>
		Cookie Name : <%=cookies[i].getName()%><br>
		Cookie Value : <%=cookies[i].getValue()%><br>
	<%
		}
	}
%>
<a href="cookCookie.jsp">쿠키요리~~</a>
화면 출력

여기로 클릭시
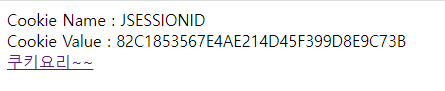
tasterCookie.jsp의 화면이 출력됨.
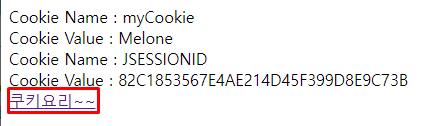
쿠키요리~~를 눌리게 되면 cookCookie.jsp로 넘어가서 출력됨.
간단한 login 구현
login.jsp
<%@page contentType="text/html; charset=UTF-8"%>
<%
String id = (String)session.getAttribute("idKey");//대소문자 구별되니까 확실하게..으아아아아 샤이니 키?
//에러는 아님 그렇다고
if(id!=null){
//로그인 상태
%>
<script>
alert("로그인 되었습니다.");
location.href = "loginOK.jsp";
</script>
<%
}
%>
<!DOCTYPE html>
<html>
<head>
<title>Simple LogIn</title>
<link href="style.css" rel="stylesheet" type="text/css">
</head>
<body bgcolor="#996600" topmargin="100">
<h2 align="center">Session 로그인</h2>
<table width="75%" border="1" align="center" bordercolor="#660000" bgcolor="#FFFF99">
<tr bordercolor="#FFFF99">
<td height="190" colspan="7">
<form method="post" action="loginProc.jsp">
<table width="50%" border="1" align="center" cellspacing="0" cellpadding="0">
<tr bordercolor="#FFFF66">
<td colspan="2"><div align="center">Log in</div></td>
</tr>
<tr >
<td width="47%"><div align="center">ID</div></td>
<td width="53%"><div align="center"><input name="id"></div></td>
</tr>
<tr>
<td><div align="center">PWD</div></td>
<td><div align="center"><input name="pwd"></div></td>
</tr>
<tr>
<td colspan="2">
<div align="center">
<input type="submit" value="login">
<input type="reset" value="reset">
</div>
</td>
</tr>
</table>
</form></td>
</tr>
</table>
</body>
</html>화면 출력
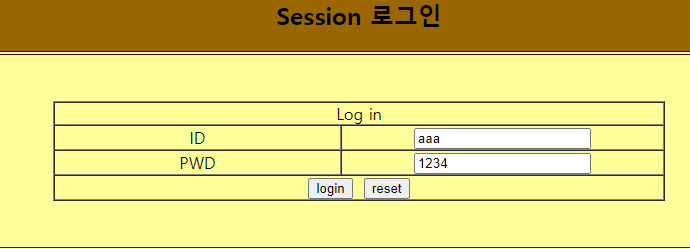
ID와 PWD에 텍스트 입력후 로그인 버튼을 누르면
로그인성공 창이 ID로 입력한 값이 뜨면서 아래 화면이 출력됨.
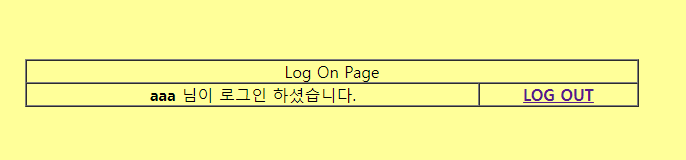
로그아웃을 클릭 시 첫 화면으로 돌아감.
로그인 되었을 때 jsp 코드 (loginOK.jsp)
<%@page contentType="text/html; charset=UTF-8"%>
<%
	String id = (String)session.getAttribute("idKey");
	if(id==null){
		response.sendRedirect("login.jsp");
		return;//_jspService 메서드 중간
	}
%>
<!DOCTYPE html>
<html>
<head>
<title>Simple LogIn</title>
<link href="style.css" rel="stylesheet" type="text/css">
</head>
<body bgcolor="#996600" topmargin="100">
<table width="75%" border="1" align="center" cellpadding="1" cellspacing="1" bordercolor="#660000" bgcolor="#FFFF99">
  <tr bordercolor="#FFFF99">
    <td height="190" colspan="7">
      <table width="50%" border="1" align="center" cellspacing="0" cellpadding="0">
        <tr bordercolor="#FFFF66">
          <td colspan="2"><div align="center">Log On Page</div></td>
        </tr>
        <tr >
          <td><div align="center">
           <strong><%=id%></strong>
			님이 로그인 하셨습니다.
            </div></td>
          <td><div align="center">
           <a href="logout.jsp"><strong>LOG OUT</strong></a>
            </div></td>
        </tr>
      </table>
     </td>
  </tr>
</table>
</body>
</html>
로그아웃을 클릭할 때 jsp 코드 (logout.jsp)
<%@page contentType="text/html; charset=UTF-8"%>
<%
	session.invalidate();
	response.sendRedirect("login.jsp");
%>
DB를 받았다고 가정한 코드 (loginProc.jsp)
<%@page contentType="text/html; charset=UTF-8"%>
<%
String id = request.getParameter("id");
String pwd = request.getParameter("pwd");
//DB에 왔다 갔다 가정하고~~ 응 알겠어^^
boolean result = true;
String msg = "로그인 실패하였습니다.";
//msg 가득 애미야 국이 짜다~~~
String url = "login.jsp";
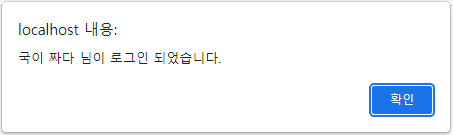
if(result){
msg = "국이 짜다 님이 로그인 되었습니다.";
url ="loginOK.jsp";
session.setAttribute("idKey", id);
}
%>
<!-- 요즘은 잘 안쓴다는데 왜 -->
<script>
alert("<%=msg%>");
location.href = "<%=url%>";
</script>guestbook 만들기(1)
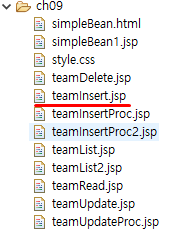
필요한 java, jsp 파일들
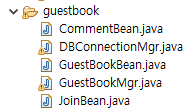
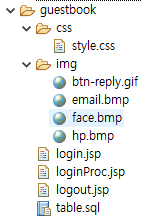
table.sql
guestbook폴더 안에 table.sql을 만듦.
create table tblJoin(
	id char(20) primary key,
	pwd char(20) not null,
	name char(20) not null,
	email char(30),
	hp char(40),
	grade char(2) default '0'
);

create table tblGuestBook(
	num int primary key auto_increment,
	id char(20) not null,
	contents text,
	ip char(15) not null,
	regdate date,
	regtime datetime,
	secret char(2) default '0'
);

create table tblComment(
 	cnum int primary key auto_increment,
 	num int not null,
 	cid char(20) not null,
 	comment text,
 	cip char(15) not null,
 	cregDate date
);
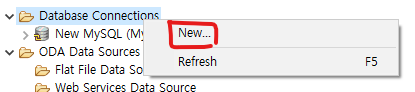
Data Source Explorer에서
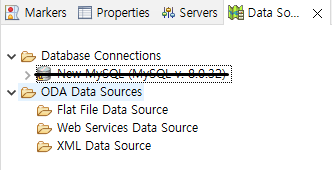
Database Connections 우클릭해서 new를 클릭
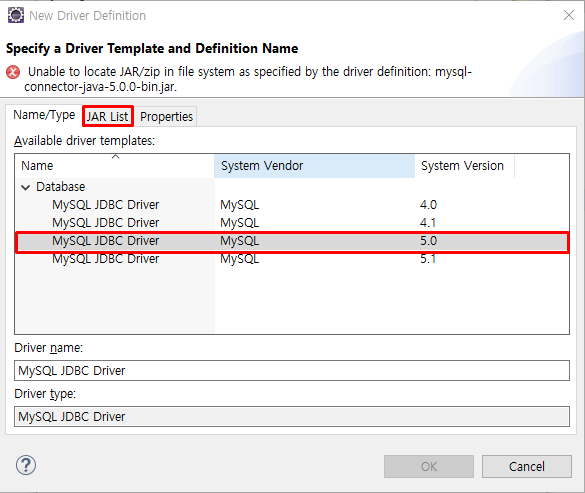
MySQL선택 후 next 클릭

5.0을 선택 후 JAR List로 넘어감
Add JAR/Zip을 선택
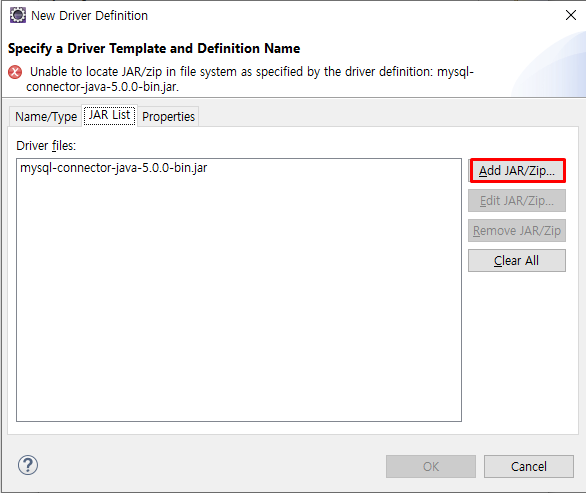
connector-j-8.0.32.jar을 선택

ok후 new를 눌러서 다시 실행
mydb2로 바꾸고, password는 1234로 함.(기존의 mydb2 데이터베이스가 만들어져있음)
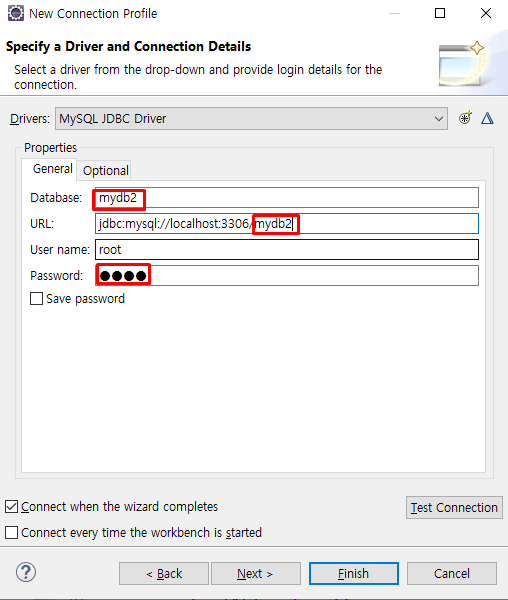
next후 finish!
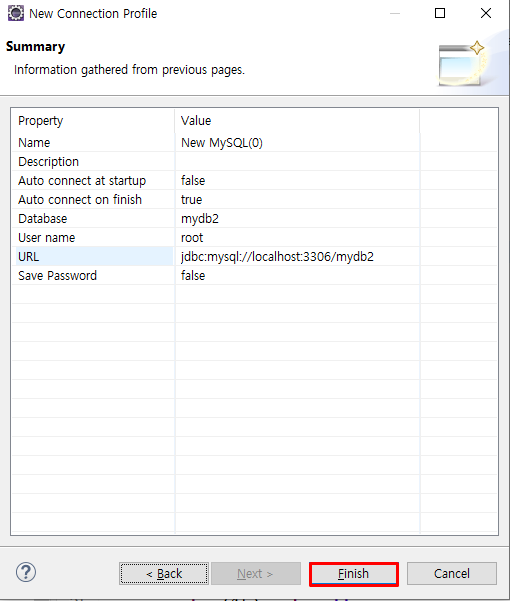
아래 화면처럼 되어있음
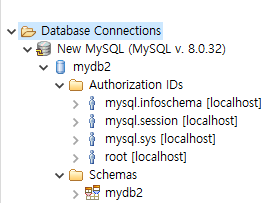
table.sql에서 똑같이 해줌

우클릭해서 excuteall을 눌러줌
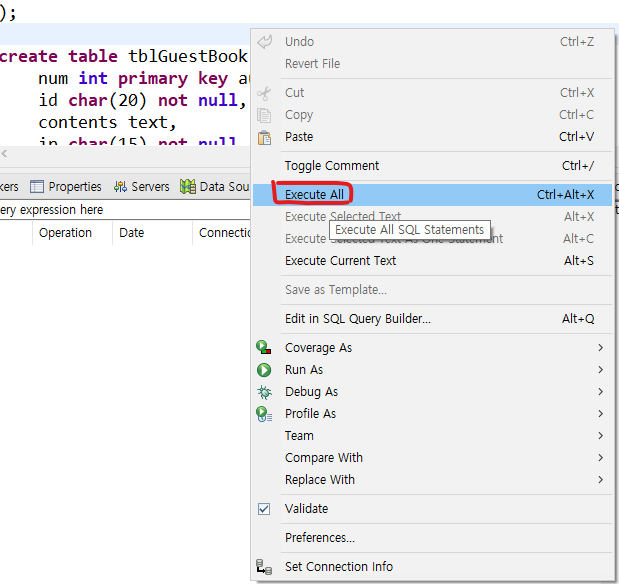
succese가 뜨면서
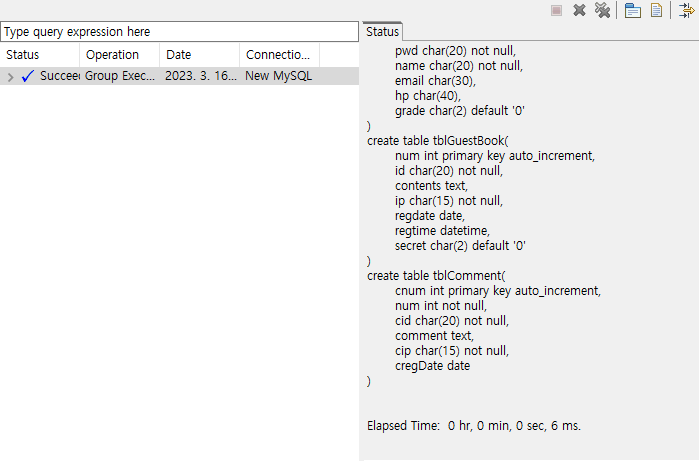
추가된 것을 확인할 수 있음

DB에 값 입력

DBConnectionMgr.java
링크 확인
DBConnectionMgr
Bean파일 만드는 양식
DB에 테이블 컬럼을 private 변수로 선언 후 getter setter 설정
아래 링크를 타고 들어가면 Bean파일들을 확인가능함
bean
login.jsp
<!-- guestbook/login.jsp -->
<%@page contentType="text/html;charset=UTF-8"%>
<jsp:useBean id="login" class="guestbook.JoinBean" scope="session"/>
<%
String id = (String)session.getAttribute("idKey");
//session에서 idKey라는 속성을 String id에 넣음.
String url = request.getParameter("url");
%>
<title>로그인</title>
<link href="css/style.css" rel="stylesheet" type="text/css">
<body bgcolor="#996600">
<br><br>
<div align="center">
<%
if(id != null){
%>
<b><%=login.getName()%></b>님 환영합니다.<br>
<a href="showGuestBook.jsp" >방명록 </a>
<a href="logout.jsp" >로그아웃</a>
<%
}else{
%>
<h2>GuestBook 로그인</h2>
<form method="post" action="loginProc.jsp">
<table border="1">
<tr>
<td>id</td>
<td> <input name="id" value="aaa">
</td>
</tr>
<tr>
<td>pwd</td>
<td><input name="pwd" value="1234"></td>
</tr>
<tr>
<td align="center" colspan="2">
<input type="hidden" name="url" value="<%=url%>">
<INPUT TYPE="submit" value="로그인">
</td>
</tr>
</table>
</form>
<%}%>
</div>
</body>화면 출력
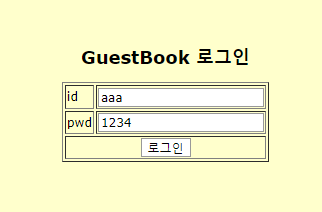
db에 저장되어 있는 id와 pw를 입력해 로그인 버트을 눌리면 로그인 성공이라는 팝업창이 뜸.
확인을 눌리면 아래와 같은 화면이 나옴.

로그아웃을 눌리게 되면(방명록은 다음에)

로그아웃 되었습니다라는 팝업창이 뜸.

그리고는 첫 화면으로 돌아감.
loginProc.jsp
<!-- guestbook/loginProc.jsp -->
<%@page contentType="text/html;charset=UTF-8"%>
<jsp:useBean id="mgr" class="guestbook.GuestBookMgr"/>
<jsp:useBean id="login" class="guestbook.JoinBean" scope="session"/>
<!-- login.jsp 요청한 id, pwd 저장 -->
<jsp:setProperty property="*" name="login"/>
<%
   String url = "login.jsp";
	if(request.getParameter("url")!=null&&
			!request.getParameter("url").equals("null")){
		url = request.getParameter("url");
	}

   boolean result = mgr.loginJoin(login.getId(), login.getPwd());
   //out.print(result);
   String msg = "로그인 실패";

   if(result){
      msg = "로그인 성공";
      login = mgr.getJoin(login.getId());
      session.setAttribute("idKey", login.getId());
      session.setAttribute("login", login);
   }
%>
<script>
   alert("<%=msg%>");
   location.href = "<%=url%>";
</script>
loginProc이 로그인 성공 또는 실패 시 팝업창 뜨게 하는 곳
logout.jsp
<!-- guestbook/logout.jsp -->
<%@page contentType="text/html;charset=UTF-8"%>
<%
    session.invalidate();
%>
<script>
   alert('로그아웃 되었습니다.');
   location.href="login.jsp";
</script>