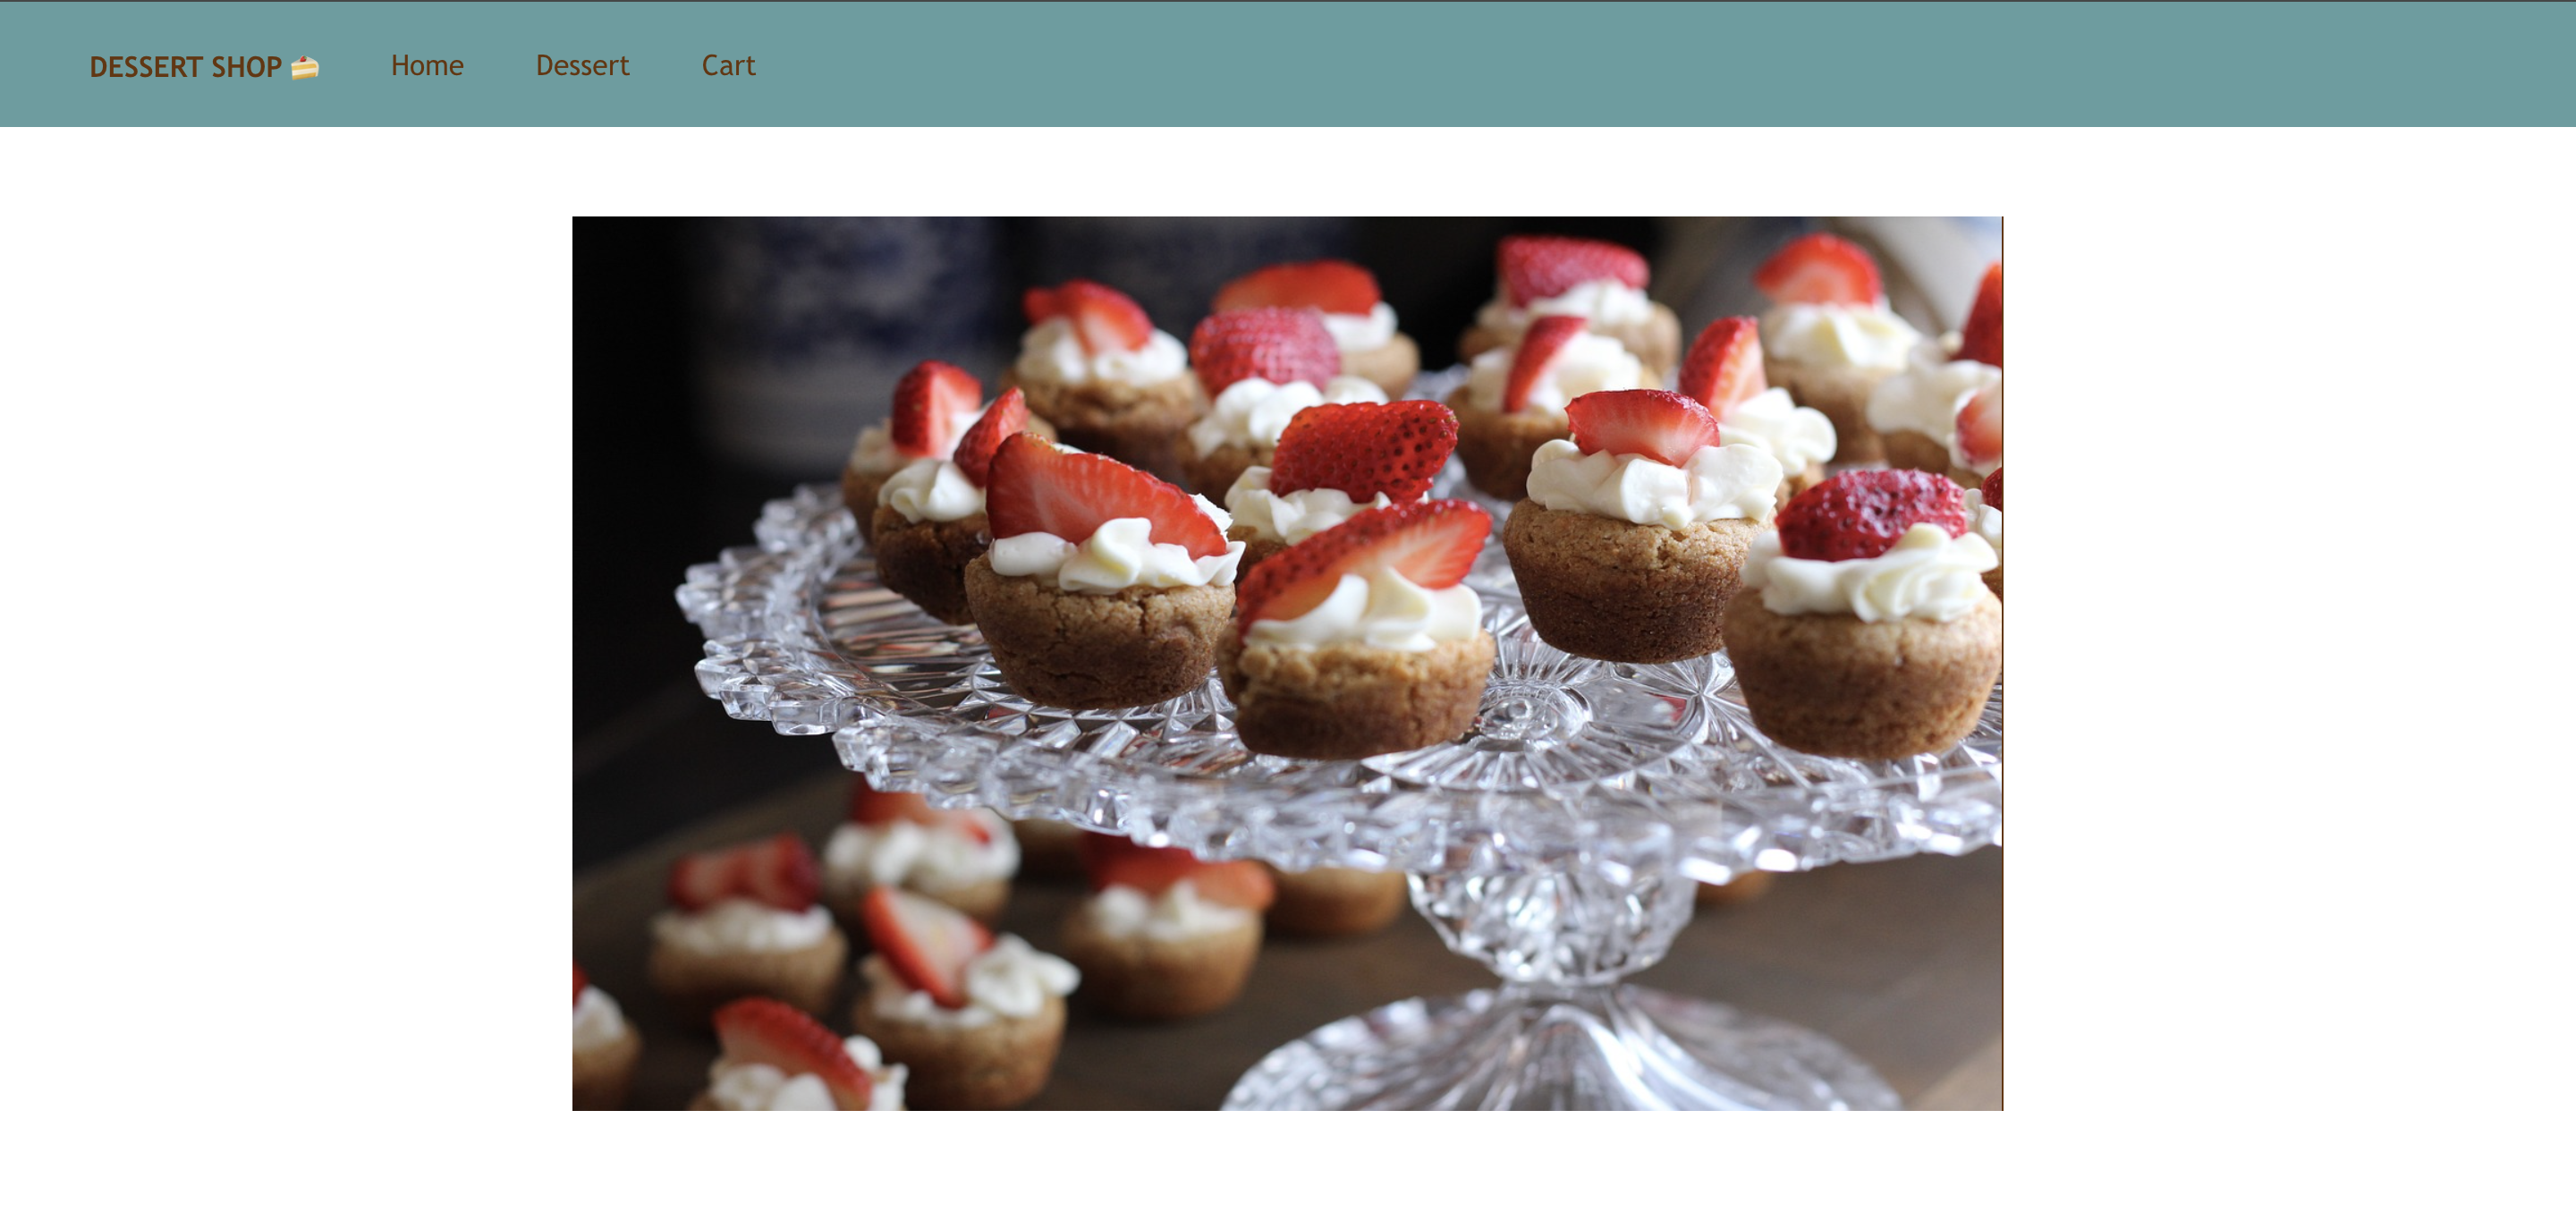
이번에는 저번 시간에 공부했던 이미지 삽입 방법을 사용해서 쇼핑몰 메인 이미지 & 상품 이미지 띄우기를 해보자.
- 나는 public 폴더에 하위 폴더인 img 폴더를 생성해서 그 안에 이미지들을 넣어놓은 뒤 꺼내 쓰는 방법을 선택했다. src 폴더에 있는 파일들은 나중에 빌드를 위해 압축되므로 정적 폴더인 public에 담아서 처리하는 게 나을 것 같다고 생각했기 때문이다.
/* App.js */
import logo from './logo.svg';
import './App.css';
import React, {useState} from 'react';
import Navbar from './Navbar';


function App() {

  const mainImagePath = process.env.PUBLIC_URL + '/img/dessert1.jpg'

  return (
    <div>
      <Navbar />
      <a href='#Home'>
        <div className='mainImage' >
          <img src={mainImagePath} alt='main-image' />
        </div>
      </a>


    </div>
  );
}
/* App.css */
.mainImage {
margin: 50px;
display: flex;
justify-content: center;
align-items: center;
}
.mainImage img {
width: 800px;
height: 500px;
}
이번에는 판매하는 상품의 이미지를 띄워보자.
먼저 나는, 상품 이미지들을 메인 이미지 밑에 3개의 영역에 정렬하고 싶기 때문에 먼저 각 상품이 공유하는 틀을 컴포넌트로 만든 뒤 이를 응용하여 나타내보았다.
/* App.js */
import logo from './logo.svg';
import './App.css';
import React, {useState} from 'react';
import Navbar from './Navbar';


function App() {

  const mainImagePath = process.env.PUBLIC_URL + '/img/dessert1.jpg'
  const [title, setTitle] = useState(['딸기 타르트', '미니 파이', '크림 브륄레']);


  return (
    <div>
      <Navbar />
      <a href='#Home'>
        <div className='mainImage' >
          <img src={mainImagePath} alt='main-image' />
        </div>
      </a>
      <Product title={title}></Product>

    </div>
  );
}

function Product(props) {
  const productImages = [
    process.env.PUBLIC_URL + '/img/col1.jpg',
    process.env.PUBLIC_URL + '/img/col2.jpg',
    process.env.PUBLIC_URL + '/img/col3.jpg',
  ]

  let price = ['20,000', '15,000', '10,000'];

  return (
    <div className='container'>

      {props.title.map((title, i) => (
        <div key={i}>
          <img src={productImages[i]} alt='상품 이미지' />
          <h3>{title}</h3>
          <h4>{price[i]}</h4>
        </div>
      ))}

    </div>
  )
}

export default App;
/* App.css*/
.container {
display: flex;
justify-content: space-between;
padding: 50px;
}
.container img {
width: 400px;
height: 250px;
border-radius: 4px;
display: flex;
float: left;
margin-bottom: 20px;
}
.container h3 h4 {
margin: 0;
}
.mainImage {
margin: 50px;
display: flex;
justify-content: center;
align-items: center;
}
.mainImage img {
width: 800px;
height: 500px;
border-radius: 4px;
}
.container div {
text-align: center;
}
.container h3, .container h4 {
margin: 0; /* 기본적인 마진 제거 */
margin-top: 10px;
}
.App {
text-align: center;
}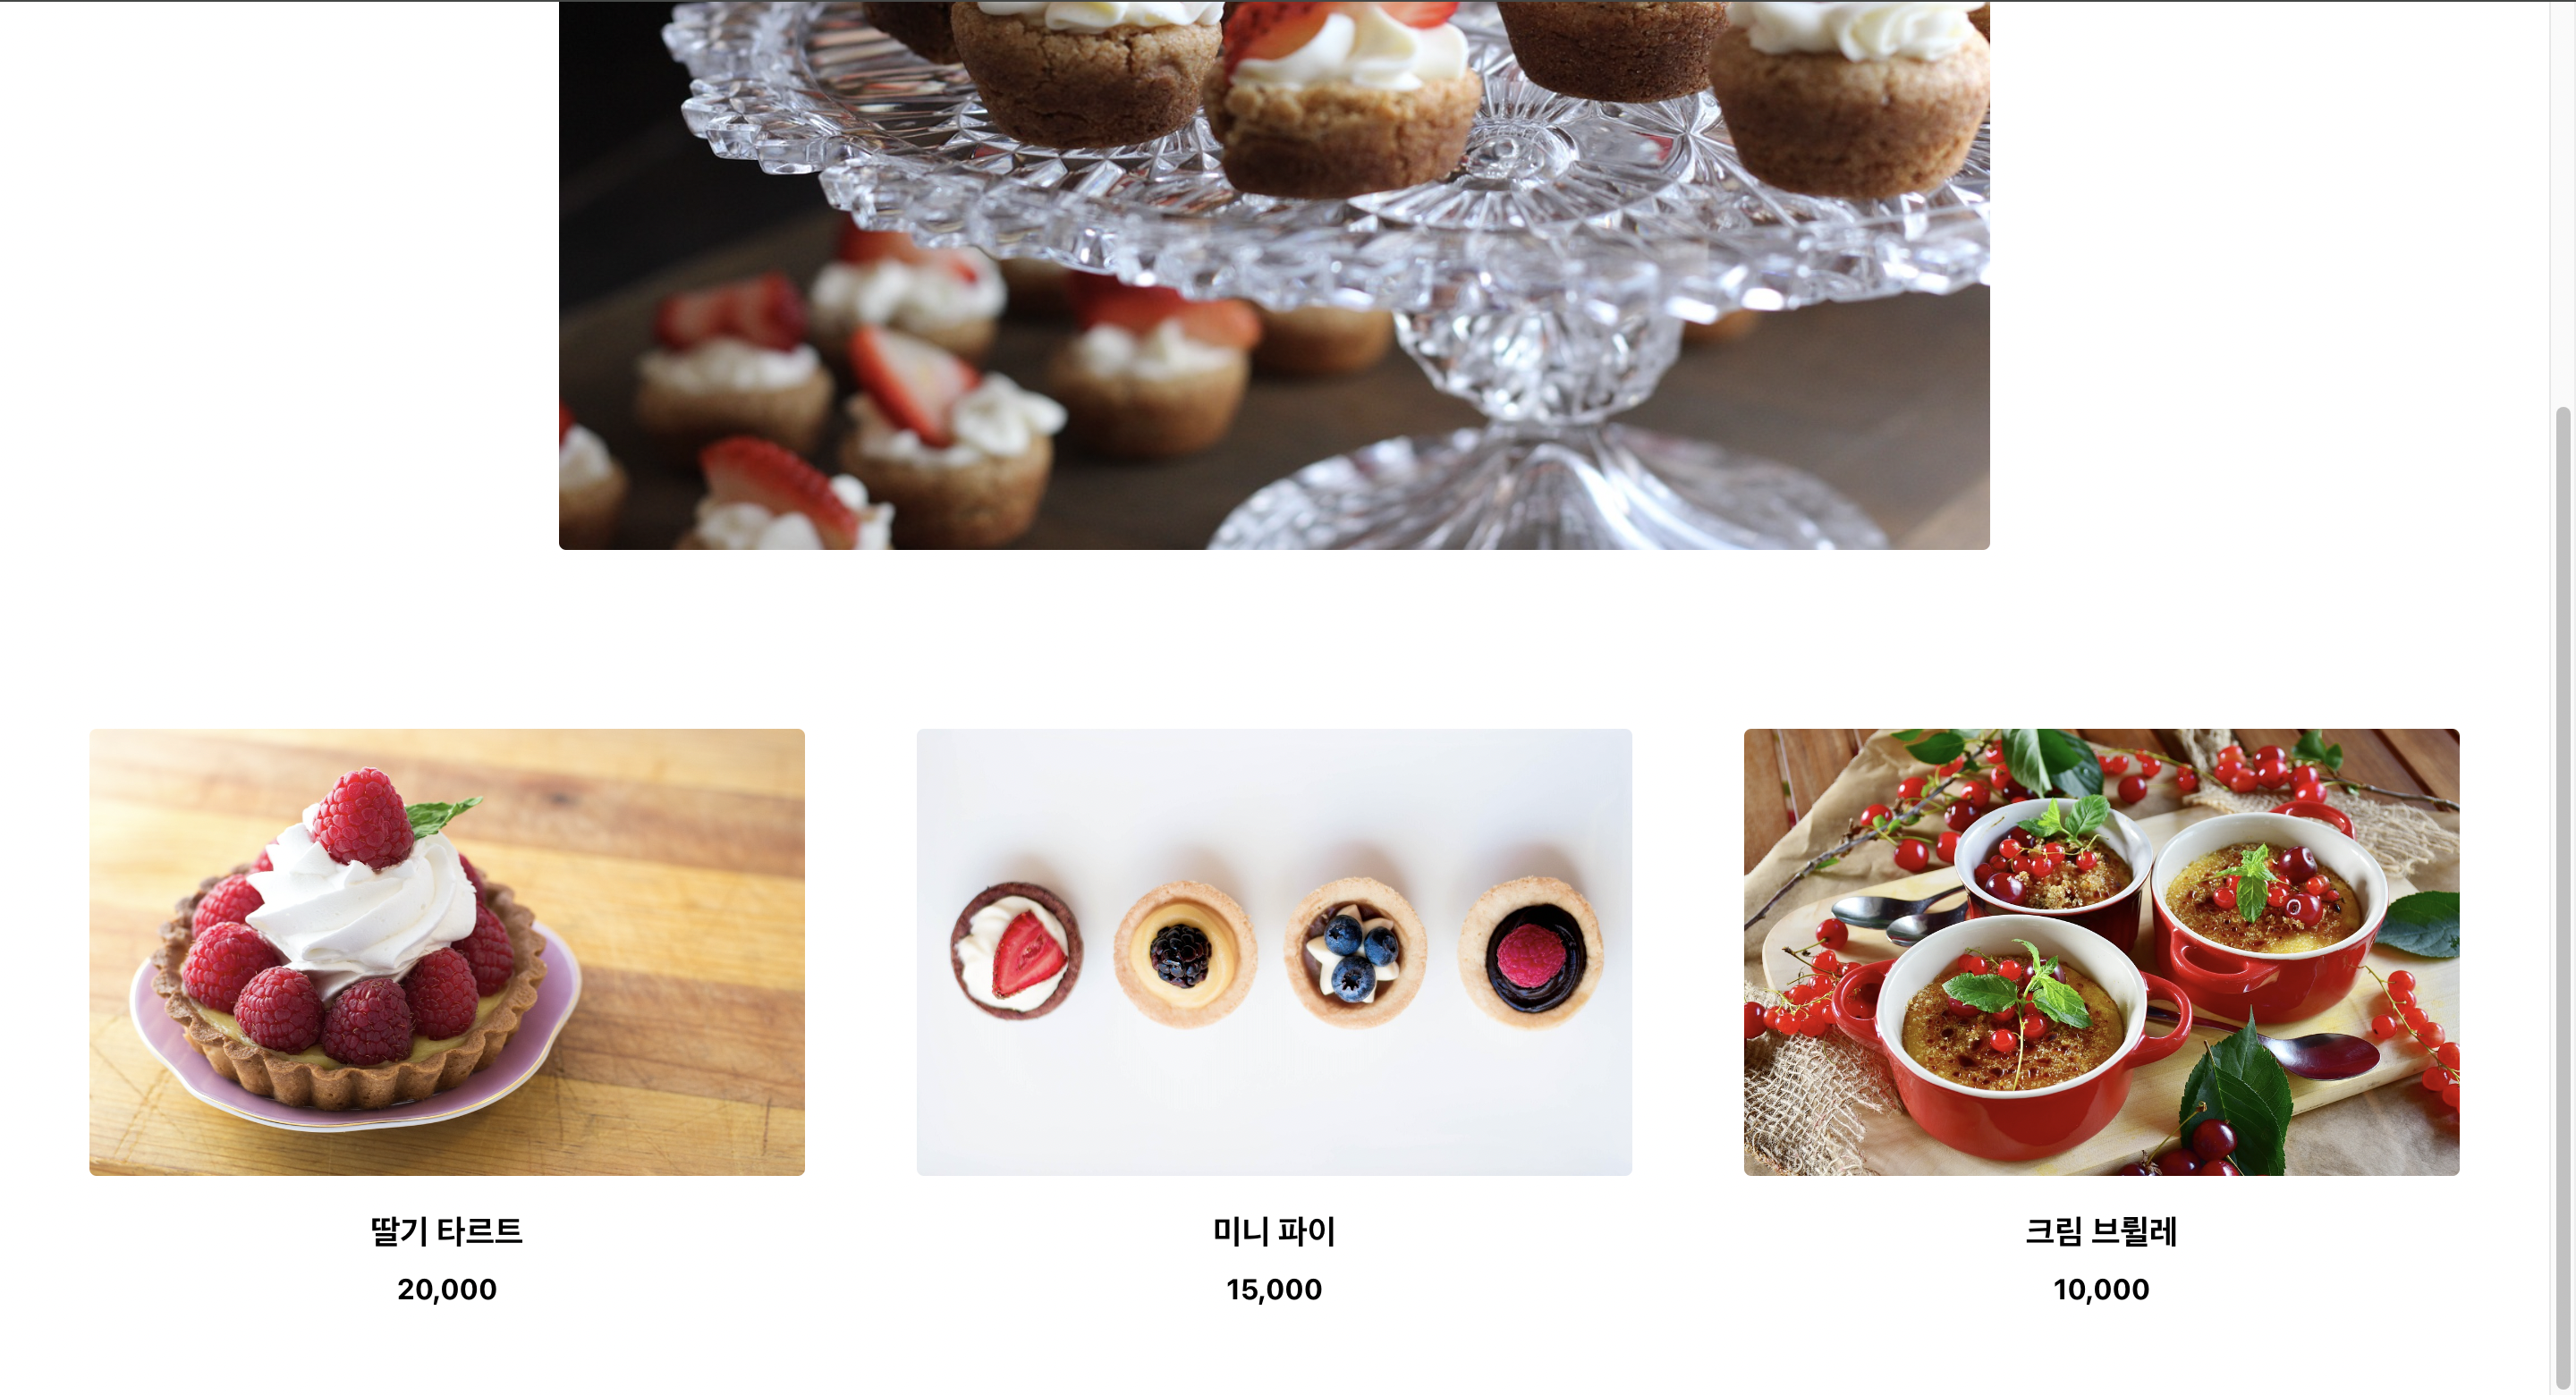
완성!

개발자연습생의 개발 일기