😒 프로젝트를 개선할 방법이 없을까?
🥺 고민을 하던중 사용자에게 알림을 주면 어떨까? 알림을 준다면 UX 적으로 사용자에게 좋은 경험을 주겠구나라는 생각이 들어서 시작을 하게되었다.
기존 flow
1. 관리자가 세미나를 등록함. 세미나가 서비스에 반영 및 노출.
2. 사용자에게 해당 세미나에 대한 내용이 등록되었다는거는 SMS 및 SNS 홍보
3. 사용자는 와서 세미나 정보를 확인- 기존 흐름을 보면, 문제가 있다.
SMS 를 수신거부 하였거나 SNS 를 하지 않는 사용자는 우리가 어떤 세미나를 하는지 알 수가 없다.
-> 사이트를 방문한 사용자에게 세미나가 등록이 되면 바로 알림을 주면 좋지 않을까?
개선 flow
1. 위와 동일
2. 관리자에서 사용자에게 push notification 전송
3. 사용자는 알림 확인 하여 정보를 확인-
여기서 부터 삽질의 시작😭☠️
해당 프로젝트는 vue.js(nuxt.js) 로 제작된 프로젝트다.
PWA(Progressive Web App)를 활용하여 위의 기능을 구현하기로 정한다.
PWA 를 위해 요구되는 핵심 요소는 servier worker 의 지원이다. -
PWA 란?
구글에서 구글 개발자 컨퍼런스인 I/O 2016 에 발표된 기술
모바일 웹에서 마치 네이티브 앱과 같은 동작을 가능하게 하는 기술
모바일 웹을 마치 앱처럼 홈 화면에 추가 및 푸시 알림도 가능하게 해준다. 그리고 캐싱이 되기 때문에 로딩 시간 단축 및 성능을 향상 시킬 수 있습니다. -
PWA 를 사용하기 위해서는 service worker API 가 지원이 되어야 한다.(https://caniuse.com/?search=service%20worker)
-
IE 에서 PWA 를 작업하려고 한다면? 지원을 안하니 시원하게 포기해주자!
npm i -S @nuxtjs/pwa- nuxt.js 에서 사용가능한 pwa 모듈이 존재하여 설치 및 설정(https://pwa.nuxtjs.org/)
// nuxt.config.js

modules: ["@nuxtjs/pwa"],
pwa: {
    icon: {
      source: '/icon.png',
    },
    manifest: {
      name: 'ㅇㅇㅇ',
      short_name: 'ㅇㅇㅇ',
      description: 'ㅇㅇㅇ',
      start_url: '/m',
      background_color: '#000',
      display: 'standalone',
      useWebmanifestExtension: false,
    },
    workbox: {
      offline: false,
      preCaching: [],
      cacheOptions: {
        cacheId: 'test-cache',
        directoryIndex: '/',
        revision: null,
      },
    },
  },
- @nuxtjs/pwa 모듈을 사용하면, nuxt.js 에서 손 쉽게 pwa 를 구성이 가능하다.
- workbox 는 PWA 의 캐싱 기능을 편하게 구현하게 해주는 라이브러리.
😵 그런데 문제가 발생했다.
- manifest 속성에 start_url 을 preCaching 을 해버리는 바람에 랜딩페이지에서 팝업이 띄워지고 나서 '오늘 하루 보지않음' 이 적용이 되지 않는다. (사전캐싱된 컨텐츠를 불러오기 때문)
- 사전 캐싱을 제거하는 옵션이 없을까하고 찾아봤지만, 제공이 되지 않았다. 사전 캐싱 문제로 로그인을 하였어도 마치 로그인이 안된 UI 가 출력이 되기도 하였다.
// @nuxt.js/pwa pwa.js
if (pwa.manifest && pwa.manifest.start_url) {
    options.preCaching.unshift(...normalizePreCaching(pwa.manifest.start_url));
}- options 에 preCaching 속성을 잘 살펴보자.(아래 sw.js 는 @nuxt/pwa 모듈에서 nuxt.confing.js 에서 pwa 속성을 읽어다 빌드할때 마다 생성을 해준다. 그래서 .gitigonore 에 추가를 해줘야 한다.)
// 생성되는 sw.js

const options = {
  workboxURL: 'https://cdn.jsdelivr.net/npm/workbox-cdn@5.1.4/workbox/workbox-sw.js',
  importScripts: [],
  config: { debug: false },
  cacheOptions: { cacheId: 'test-cache', directoryIndex: '/', revision: '3wLEA2N6I9n3' },
  clientsClaim: true,
  skipWaiting: true,
  cleanupOutdatedCaches: true,
  offlineAnalytics: false,
  preCaching: [{ revision: '3wLEA2N6I9n3', url: '/m' }],
  runtimeCaching: [{ urlPattern: '/_nuxt/', handler: 'CacheFirst', method: 'GET', strategyPlugins: [] }],
  offlinePage: null,
  pagesURLPattern: '/',
  offlineStrategy: 'NetworkFirst',
};

importScripts(...[options.workboxURL, ...options.importScripts]);

initWorkbox(workbox, options);
workboxExtensions(workbox, options);
precacheAssets(workbox, options);
cachingExtensions(workbox, options);
runtimeCaching(workbox, options);
offlinePage(workbox, options);
routingExtensions(workbox, options);

function getProp(obj, prop) {
  return prop.split('.').reduce((p, c) => p[c], obj);
}

function initWorkbox(workbox, options) {
  if (options.config) {
    // Set workbox config
    workbox.setConfig(options.config);
  }

  if (options.cacheNames) {
    // Set workbox cache names
    workbox.core.setCacheNameDetails(options.cacheNames);
  }

  if (options.clientsClaim) {
    // Start controlling any existing clients as soon as it activates
    workbox.core.clientsClaim();
  }

  if (options.skipWaiting) {
    workbox.core.skipWaiting();
  }

  if (options.cleanupOutdatedCaches) {
    workbox.precaching.cleanupOutdatedCaches();
  }

  if (options.offlineAnalytics) {
    // Enable offline Google Analytics tracking
    workbox.googleAnalytics.initialize();
  }
}

function precacheAssets(workbox, options) {
  if (options.preCaching.length) {
    workbox.precaching.precacheAndRoute(options.preCaching, options.cacheOptions);
  }
}

function runtimeCaching(workbox, options) {
  const requestInterceptor = {
    requestWillFetch({ request }) {
      if (request.cache === 'only-if-cached' && request.mode === 'no-cors') {
        return new Request(request.url, { ...request, cache: 'default', mode: 'no-cors' });
      }
      return request;
    },
    fetchDidFail(ctx) {
      ctx.error.message = '[workbox] Network request for ' + ctx.request.url + ' threw an error: ' + ctx.error.message;
      console.error(ctx.error, 'Details:', ctx);
    },
    handlerDidError(ctx) {
      ctx.error.message = `[workbox] Network handler threw an error: ` + ctx.error.message;
      console.error(ctx.error, 'Details:', ctx);
      return null;
    },
  };

  for (const entry of options.runtimeCaching) {
    const urlPattern = new RegExp(entry.urlPattern);
    const method = entry.method || 'GET';

    const plugins = (entry.strategyPlugins || []).map(p => new (getProp(workbox, p.use))(...p.config));

    plugins.unshift(requestInterceptor);

    const strategyOptions = { ...entry.strategyOptions, plugins };

    const strategy = new workbox.strategies[entry.handler](strategyOptions);

    workbox.routing.registerRoute(urlPattern, strategy, method);
  }
}

function offlinePage(workbox, options) {
  if (options.offlinePage) {
    // Register router handler for offlinePage
    workbox.routing.registerRoute(new RegExp(options.pagesURLPattern), ({ request, event }) => {
      const strategy = new workbox.strategies[options.offlineStrategy]();
      return strategy.handle({ request, event }).catch(() => caches.match(options.offlinePage));
    });
  }
}

function workboxExtensions(workbox, options) {}

function cachingExtensions(workbox, options) {}

function routingExtensions(workbox, options) {}
😨 하;; 이렇게 하루를 날려먹는다 -_-;; 그래서 고민을 하다가 직접 코드를 작성하여 진행하기로 하였다.
🔥 설치를 위해, manifest.json 작성 및 sw.js 작성
{
  "manifest_version" : 1,
  "version" : "0.1",
  "name": "이름",
  "short_name": "짧은 이름",
  "description": "설명",
  "icons": [
    {
      "src": "/icon.png",
      "type": "image/png",
      "sizes": "512x512"
    }
  ],
  "start_url": "/m",
  "display": "standalone",
  "background_color": "#000"
}
- manifest.json 은 앱에 대한 정보를 담고 있는 JSON 파일(홈 화면에 추가할때 아이콘은 무엇인지, 앱 이름, 스플래시 배경 색상, 웹앱 실행시 시작되는 URL 등)
self.addEventListener('install', function(e) {
  self.skipWaiting();
});

self.addEventListener('active', function(e) {
  self.clients.claim();
});

self.addEventListener('fetch', function(e) {

});
-
sw.js 는 홈 화면에 앱 추가를 위해 작성되었다.(PWA 가 되기 위해선 조건을 충족해야 한다)
-
파이어베이스 프로젝트를 생성하였다.(Firebase SDK snippet 을 잘 확인하자)
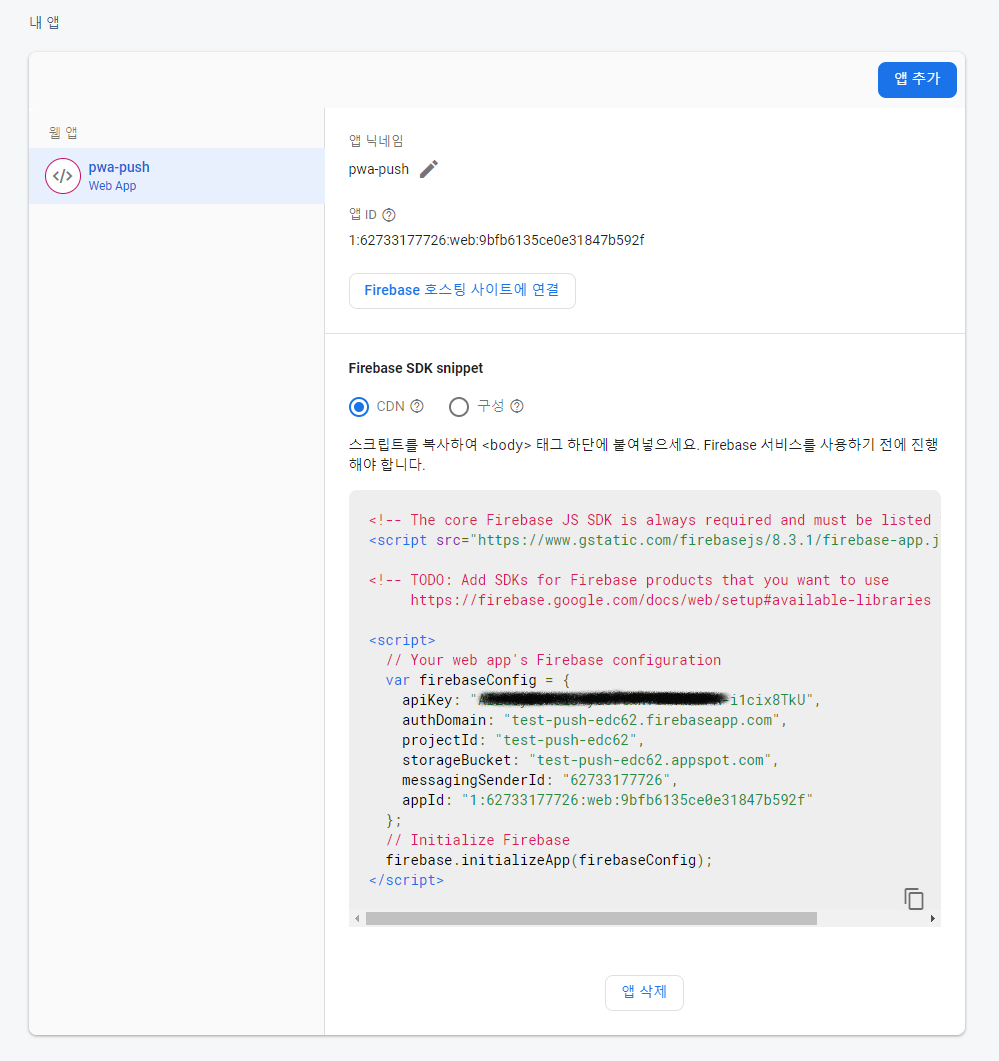
-
프로젝트 설정에서 일반탭에서 생성한 앱에대한 정보를 확인이 가능하며, FCM 은 클라우드 메시징 탭에서 확인 가능하다.
-
FCM 을 연동해주자!(https://firebase.google.com/docs/cloud-messaging/js/client?hl=ko)
메시징 서비스에 firebase-messaging-sw.js 파일이 필요합니다.
firebase-messaging-sw.js 파일이 아직 없다면 토큰을 검색하기 전에 이 이름으로 빈 파일을 만들어 도메인의 루트에 저장- firebase-messaging-sw.js 파일은 service worker 파일이다. 처음에는 이걸 직접 serviceWorker.register() 를 해주면 되는줄 알았는데 아니었다. 파일은 생성만 해주면 되고, firebase CDN 스크립트에서 자동으로 서비스 워커를 등록해준다.
// nuxt.config.js
{ src: 'https://www.gstatic.com/firebasejs/8.3.1/firebase-app.js' },
{ src: 'https://www.gstatic.com/firebasejs/8.3.1/firebase-messaging.js' },
// ...- 🤗 파이어베이스를 사용하려면 파이어베이스 SDK 추가 및 초기화를 진행을 해야한다.(CDN에서 추가하는 방식으로 진행)
(참조 : https://firebase.google.com/docs/web/setup?hl=ko)
😤 FCM 은 foreground, background 상태에서 notification 을 수신하는 기능을 제공한다. 이러한 기능을 사용하기 위해서는 파이어베이스를 초기화 해준 후, 메시징 객체를 생성하여야 한다.
const firebaseConfig = {
    apiKey: '',
    authDomain: 'test-push-edc62.firebaseapp.com',
    projectId: 'test-push-edc62',
    storageBucket: 'test-push-edc62.appspot.com',
    messagingSenderId: '62733177726',
    appId: '1:62733177726:web:9bfb6135ce0e31847b592f',
  };
  firebase.initializeApp(firebaseConfig);
  const messaging = firebase.messaging();
  messaging.usePublicVapidKey(); // web push key(생성한 키쌍)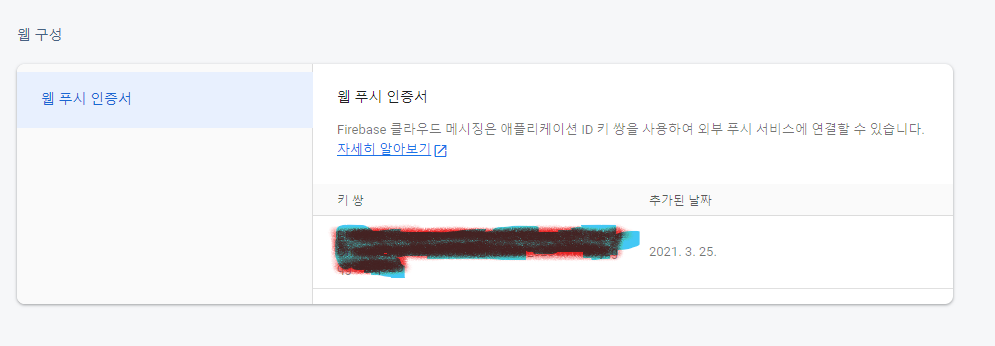
usePublicVapidKey() 에는 클라우드 메시징 탭을 확인해보면, 웹 푸시 인증서 키를 생성한걸 넣어주면 된다.
messaging.getToken({vapidKey: "BKagO....moL0"}); 아니라면 토큰을 조회해올때 이런식으로도 사용이 가능하다.
🧐 토큰값이 있어야, 메세지를 전송할때 특정 토큰을 지니고 있는 사람에게 전송이 가능하다. 이 문제는 메세지를 보낼 모든 토큰정보를 알아야한다는건데 이를 위해서 주제(topic)로 메세지를 전송하는 방법도 제공이 되고 있다.
messaging.getToken().then(token =>{
    console.log(token)
});
messaging.getToken() 으로 해당 토큰을 가진 기기 또는 서비스에게 메세지를 보내보자.
HTTP / POST
https://fcm.googleapis.com/fcm/send

header
Authorization : key={FCM Server Key}

request body

{
    "data": {
        "notification": {
            "title": "알림",
            "body": "알림내용",
            "icon": "/favicons/favicon-120.png",
            "click_action": "/"
        }
    },
    "to": "token value"
}
POST 요청을 보내주는데, header 에 Authorization:key=FCM server key 정보를 추가해줘야 하며, reqeust body to 속성에는 토큰값을 넣어줘야 한다.
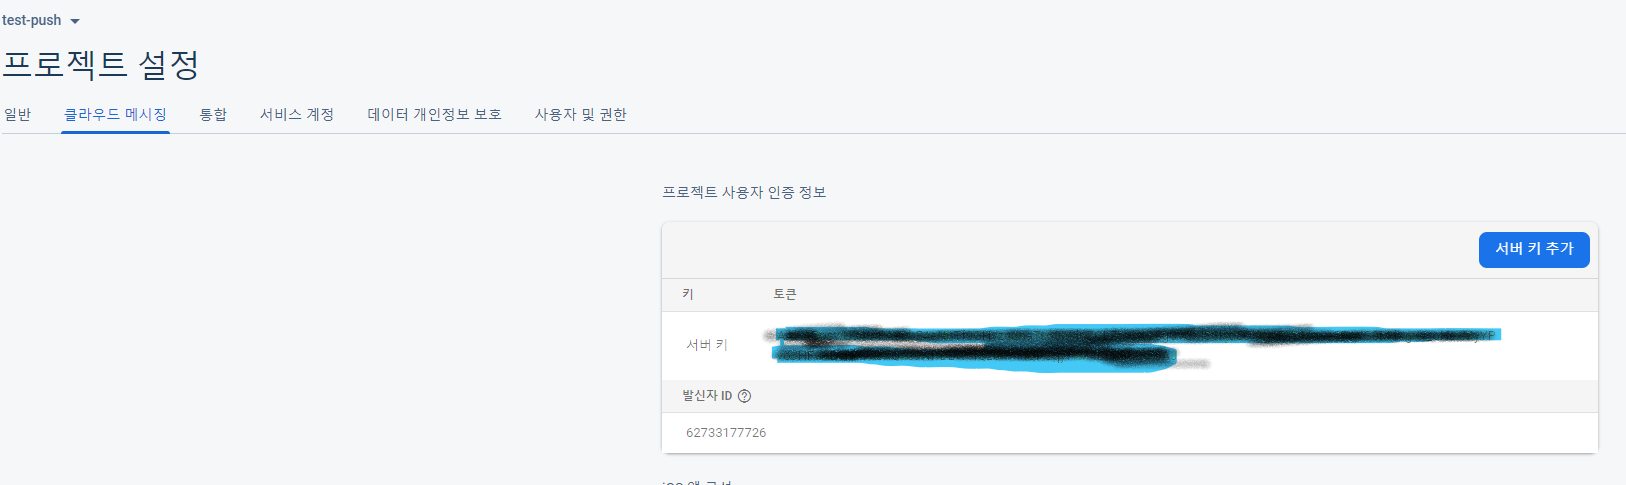
서버 키는 클라우드 메시징 탭에서 바로 확인이 가능하다.
🤖 그러면 주제로 메세지를 보내려면 어떻게 해야하지??
- 파이어베이스 admin sdk 를 통해서, 서버에서 구현이 가능하나 나는 다른방법을 발견했다. 현재는 클라이언트단에서 토큰을 직접 주제에 등록해주는 API 는 제공되지 않고있다. 하지만 아래와 같이 구 API 코드를 사용하면 굳이 admin sdk 를 사용하지 않아도 토큰을 주제에 등록을 할 수 있다. 해당 API 를 사용하려면 메세지를 보내느거와 마찬가지고 header 에 FCM Server Key 를 추가해줘야한다.
function subscribeTokenToTopic(token, topic = 'noti') {
  fetch(`https://iid.googleapis.com/iid/v1/${token}/rel/topics/${topic}`, {
    method: 'POST',
    headers: new Headers({
      Authorization: `key=${FCM_SERVER_KEY}`,
    }),
  }).then((response) => {
    if(response.status < 200 || response.status >= 400) {
      console.log(response.status, response);
    }
    console.log(`${topic} is subscribed(fcm push topic)`);
  }).catch((error) => {
    console.error(error.result);
  });
}
😱 특정 주제에 메세지를 보낼라면? 기존 request body 에서 to 속성 값을 조금만 변경하면 된다. 기존에는 토큰을 보냈다면 /topics/주제명 을 넣어주면 된다.
{
    "data": {
        "notification": {
            "title": "알림",
            "body": "알림내용",
            "icon": "/favicons/favicon-120.png",
            "click_action": "/"
        }
    },
    "to": "/topics/noti"
}
..😷 이제는 notification 을 감지하고 알림을 뛰워주는 코드를 작성해야한다.
문서를 살펴보면, 메시징 객체에서 제공해주는 onBackgroundMessage, onMessage 속성을 사용하면 된다라고 설명이 되어있다.
onBackgroundMessage 는 sw 에서 구현이 되어야한다. 안그러면, 아래와 같은 에러가 발생을 할거다.
Messaging: This method is available in a service worker context. (messaging/only-available-in-sw).
onMessage 같은 경우는 sw 에서 구현을 하면 아래와 같은 에러가 발생을 한다.
Messaging: This method is available in a Window context. (messaging/only-available-in-window).
그리고 알림을 받으려면 브라우저에서 알림 허용이 되어야한다. window 객체에 Notification 속성을 활용하여 알림여부를 물어보는 코드 작성이 가능하다.(모바일에서는 알림허용을 하였어도, 모바일 크롬 자체에서 막아두었다면 알림이 뜨지 않는다)
- Notification.requestPermission() 를 사용하여 사용자에게 권한을 요청(promise 기반)
if ('Notification' in window) {
	Notification.requestPermission().then(function (permission) {
      if (permission === 'granted') {
        console.log('Notification permission granted.');
      } else {
        console.log('Unable to get permission to notify.');
      }
    });
}
window 객체 속성에서 Notification 이 지원되는지 확인 후, 코드를 작성하였다.
권한은 default, granted, denied 3가지 문자열로 반환을 해주며
Notification.permission 을 통해서도 확인이 가능하다.
😎 나는 위 속성을 따르지 않고, self.addEventListener('push', function (e) {}); 를 사용하여 메세지를 감지하도록 하였다. (좋은점은 백그라운드, 포어그라운드 둘다 감지가 된다는 점이었다.) 그리고 알림 클릭 시 이벤트는 self.addEventListener('notificationclick', function (event) {}); 으로 구현을 하였다. JSON 문자열로 오기 때문에 이를 JSON 으로 파싱하는 작업을 해줘야한다.
알림은 self.registration.showNotification(notificationTitle, notificationOptions); showNotification() 메서드를 이용하면 된다.(https://developer.mozilla.org/en-US/docs/Web/API/ServiceWorkerRegistration/showNotification)
// firebase-messaging-sw.js

importScripts('https://www.gstatic.com/firebasejs/8.3.1/firebase-app.js');
importScripts('https://www.gstatic.com/firebasejs/8.3.1/firebase-messaging.js');

const firebaseConfig = {
  apiKey: '',
  authDomain: 'test-push-edc62.firebaseapp.com',
  projectId: 'test-push-edc62',
  storageBucket: 'test-push-edc62.appspot.com',
  messagingSenderId: '62733177726',
  appId: '1:62733177726:web:9bfb6135ce0e31847b592f',
};
firebase.initializeApp(firebaseConfig);
const messaging = firebase.messaging();
messaging.usePublicVapidKey('');

self.addEventListener('install', function (e) {
  console.log('fcm sw install..');
  self.skipWaiting();
});

self.addEventListener('activate', function (e) {
  console.log('fcm sw activate..');
});

self.addEventListener('push', function (e) {
  console.log(e.data.json());

  const resultData = JSON.parse(e.data.json().data.notification);
  const notificationTitle = resultData.title;
  const notificationOptions = {
    body: resultData.body,
    icon: resultData.icon,
  };

  self.registration.showNotification(notificationTitle, notificationOptions);
});

self.addEventListener('notificationclick', function (event) {
  const url = '/';
  event.notification.close();
  event.waitUntil(clients.openWindow(url));
});
click_action 을 notificationclick 으로 전달하는것도 가능하다.
importScripts는 해당 서비스워커 글로벌에 속하게할 스크립트를 불러온다.
서비스 워커에서 firebase 객체를 사용해야 하기 때문에 필요하며, 서비스워커는 기본적으로 다른 쓰레드에서 동작을 하고있기 때문에 DOM 접근이 불가능하다. (서로 다른 context 에서 실행이 되고있기 때문)
정리
- 결론적으로 상용에 적용하지는 못했다.
- push notification 도 알림이기 때문에, 고객 동의 및 약관을 변경해야함
- 회원에게만 push notification 을 보내고 싶은 경우는?
다행스럽게, 기획자는 고생했다면서 격려를 해줬지만 적용을 하지 못한게 조금은 아쉬웠다.
(다음에 한다면 저런 부분도 더 생각해서 만들어야겠다)
-
FCM 에서 삽질을 많이 했다. 실제 문서를 살펴봤을때 context 관련 에러에 대한 내용은 없었고 FCM 푸쉬 메시지 구현을 하셨던 다른분들 글들을 보면 다 코드가 다르다. 어떤분은
PushManager로 구현하신분도 계시고 메시징 객체에서 제공되어지는 onMessage 를 구현해서 하신분도 계시고 @nuxtjs/pwa 모듈을 활용하여 구현하신분도 계신다. -
IOS 에서는 동작하지 않으며, 테스트를 위해서는 https 가 기본인데 localhost 는 예외다. 이부분도 어떻게 보면 개발하는데 진입장벽을 높이는거라고 생각이 들었다.
-
메세징 객체에서 지원해주는 메서드 목록 https://firebase.google.com/docs/reference/js/firebase.messaging.Messaging