spring boot + graphql 구성해보기
- 최근에 JS만 공부하다가 갑자기 spring 도 REST 방식이 아닌 graphql 방식으로 API 를 제공이 되지 않을까? 라는 의문이 들면서 해보자고 해서 진행을 하게 되었다.
프로젝트 생성
- 사용툴 : Intellij IDEA 2020.1
- java SDK : JDK 1.8.0_221
- Maven Project
- Spring Boot Version : 2.5.3
Selected Dependency
Lombok
Spring Web
Spring Data JPA
Mybatis Framework
MySQL Driver- 위와 같이 프로젝트를 생성하였다. 이제 graphql 관련한 dependency 를 pom.xml 에 추가를 해주자
	<dependency>
            <groupId>com.graphql-java</groupId>
            <artifactId>graphql-spring-boot-starter</artifactId>
            <version>5.0.2</version>
        </dependency>
        <dependency>
            <groupId>com.graphql-java</groupId>
            <artifactId>graphql-java-tools</artifactId>
            <version>5.2.4</version>
        </dependency>
        <dependency>
            <groupId>com.graphql-java-kickstart</groupId>
            <artifactId>playground-spring-boot-starter</artifactId>
            <version>5.10.0</version>
        </dependency>
- 프로젝트가 정상실행이 될려면
application.properties에 기본적인 설정을 작성해줘야한다.
spring.datasource.url=jdbc:mysql://localhost/test
spring.datasource.username=root
spring.datasource.password=1234
spring.datasource.driver-class-name=com.mysql.cj.jdbc.Driver
# spring.datasource.driver-class-name=com.mysql.jdbc.Driver

# JPA 설정
# Dialect 설정
spring.jpa.properties.hibernate.dialect=org.hibernate.dialect.MySQL5InnoDBDialect
# 하이버네이트가 실행하는 모든 SQL문을 콘솔로 출력해 준다.
spring.jpa.properties.hibernate.show_sql=true
# 콘솔에 출력되는 JPA 실행 쿼리를 가독성있게 표현한다.
spring.jpa.properties.hibernate.format_sql=true
# 디버깅이 용이하도록 SQL문 이외에 추가적인 정보를 출력해 준다.
spring.jpa.properties.hibernate.use_sql_comments=true

spring.jpa.hibernate.ddl-auto=create-drop
spring.jpa.generate-ddl=true
spring.jpa.show-sql=true

# graphql config
# graphql 서블릿을 생성하고 노출해야 하는지 여부를 설정(default : true)
graphql.servlet.enabled=true
# graphql 요청을 받을 endpoint 설정
graphql.servlet.mapping=/graphql
graphql.tools.schema-location-pattern=**/*.graphqls

graphql.playground.mapping=/playground
graphql.playground.enabled=true
graphql.playground.page-title=graphql playground
graphql.playground.settings.editor.font-size=13
- graphql 은 따로 컨트롤러가 필요가 없다.
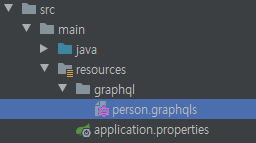
/src/main/resources경로에*.graphqls파일을 작성하자.

schema {
    query: Query,
    mutation: Mutation,
}

type Person {
    idx: Int,
    name: String,
    address: String,
    gender: String,
}

type Query {
    getPersons: [Person],
    getPersonByIdx(idx: Int): Person
}

type Mutation {
    createPersons(defaultPersonInput: DefaultPersonInput): Person,
    deletePersonByIdx(idx: Int): String
}

input DefaultPersonInput {
    name: String = "",
    address: String = "",
    gender: String = "",
}GraphQLQueryResolver및GraphQLMutationResolver작성
package com.example.demo.component;

import com.coxautodev.graphql.tools.GraphQLQueryResolver;
import com.example.demo.domain.Person;
import com.example.demo.service.PersonService;
import org.springframework.beans.factory.annotation.Autowired;
import org.springframework.stereotype.Component;

import java.util.List;


// GraphQL Java Tools를 사용하기 위해서는 Root Resolver 를 설정 해야 한다. Root Resolver 란 Query, Mutation, Subscription 같은 GraphQL 기본 객체들을 의미

@Component
public class PersonQuery implements GraphQLQueryResolver {

    @Autowired
    private PersonService personService;

    public List<Person> getPersons() {
        List<Person> personList = personService.getPersons();
        return personList;
    }

    public Person getPersonByIdx(final int idx) {
        Person person = personService.getPersonByIdx(idx);
        return person;
    }

}
package com.example.demo.component;
import com.coxautodev.graphql.tools.GraphQLMutationResolver;
import com.example.demo.domain.Person;
import com.example.demo.dto.PersonDTO;
import com.example.demo.service.PersonService;
import org.springframework.beans.factory.annotation.Autowired;
import org.springframework.stereotype.Component;
@Component
public class PersonMutation implements GraphQLMutationResolver {
@Autowired
private PersonService personService;
/**
* create : person 을 생성
*
* @param personDTO
* @return Person
*/
/*
mutation {
createPersons(defaultPersonInput: { name: "test", address: "강남", gender: "" }) {
idx,
name,
address,
gender,
}
}
*/
public Person createPersons(PersonDTO personDTO) {
Person person = personService.createPersons(personDTO.getName(), personDTO.getAddress(), personDTO.getGender());
if (person == null) return null;
return person;
}
/**
* delete : idx 에 해당하는 person 을 삭제
*
* @param idx
* @return message
*/
/*
mutation {
deletePersonByIdx(idx: 1)
}
*/
public String deletePersonByIdx(final int idx) {
try {
personService.deletePersonByIdx(idx);
} catch (Exception e) {
return e.getMessage();
}
return "delete success";
}
}
- service 와 repository 작성부분은 생략하도록 하겠다.(이 부분은 spring JPA 를 다룰줄알면 금방 작성가능)
- graphql-spring-boot-starter 는 스키마 파일을 자동으로 탐색하고, 이를 graphql 을 담당하는 스프링 빈(bean)에게 명시된 스키마 구조를 주입시켜 줍니다.
- graphql schema 에서 작성한 Query, Mutation 함수들은 Resolver 에서 매핑되어 실행이 된다.
-
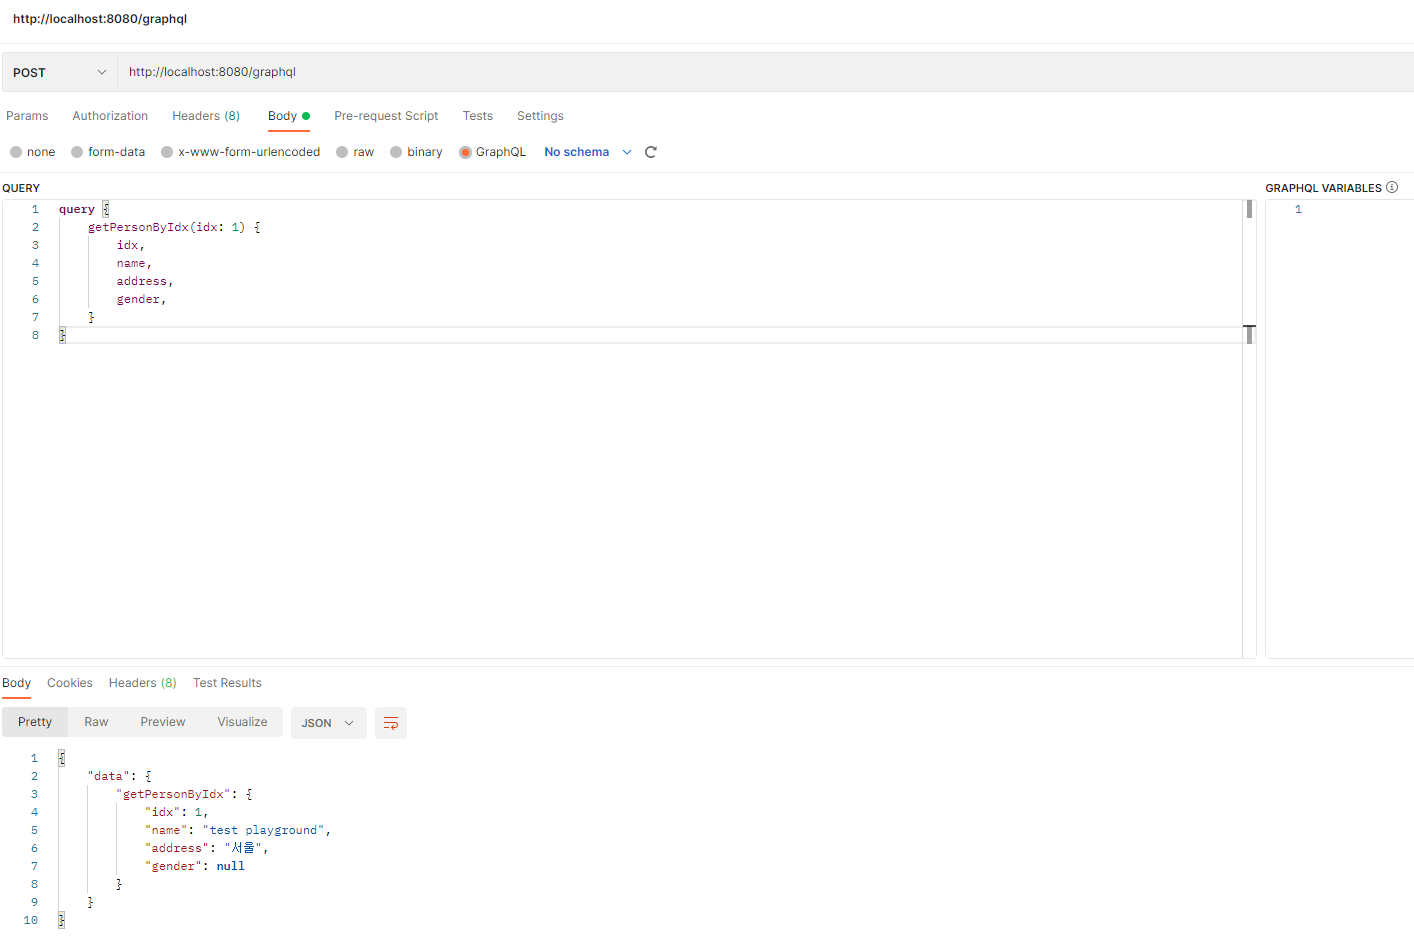
postman

-
playground


