
Local Notification
Local Notification이란?
우리가 휴대폰에 있는 앱을 사용할 때 알림이 오는 경우가 많다.
이런 알림들이 Notification이고, Local에서 일어나는 notification을 Local Notification이라고 한다.
Local Notification 작동 과정
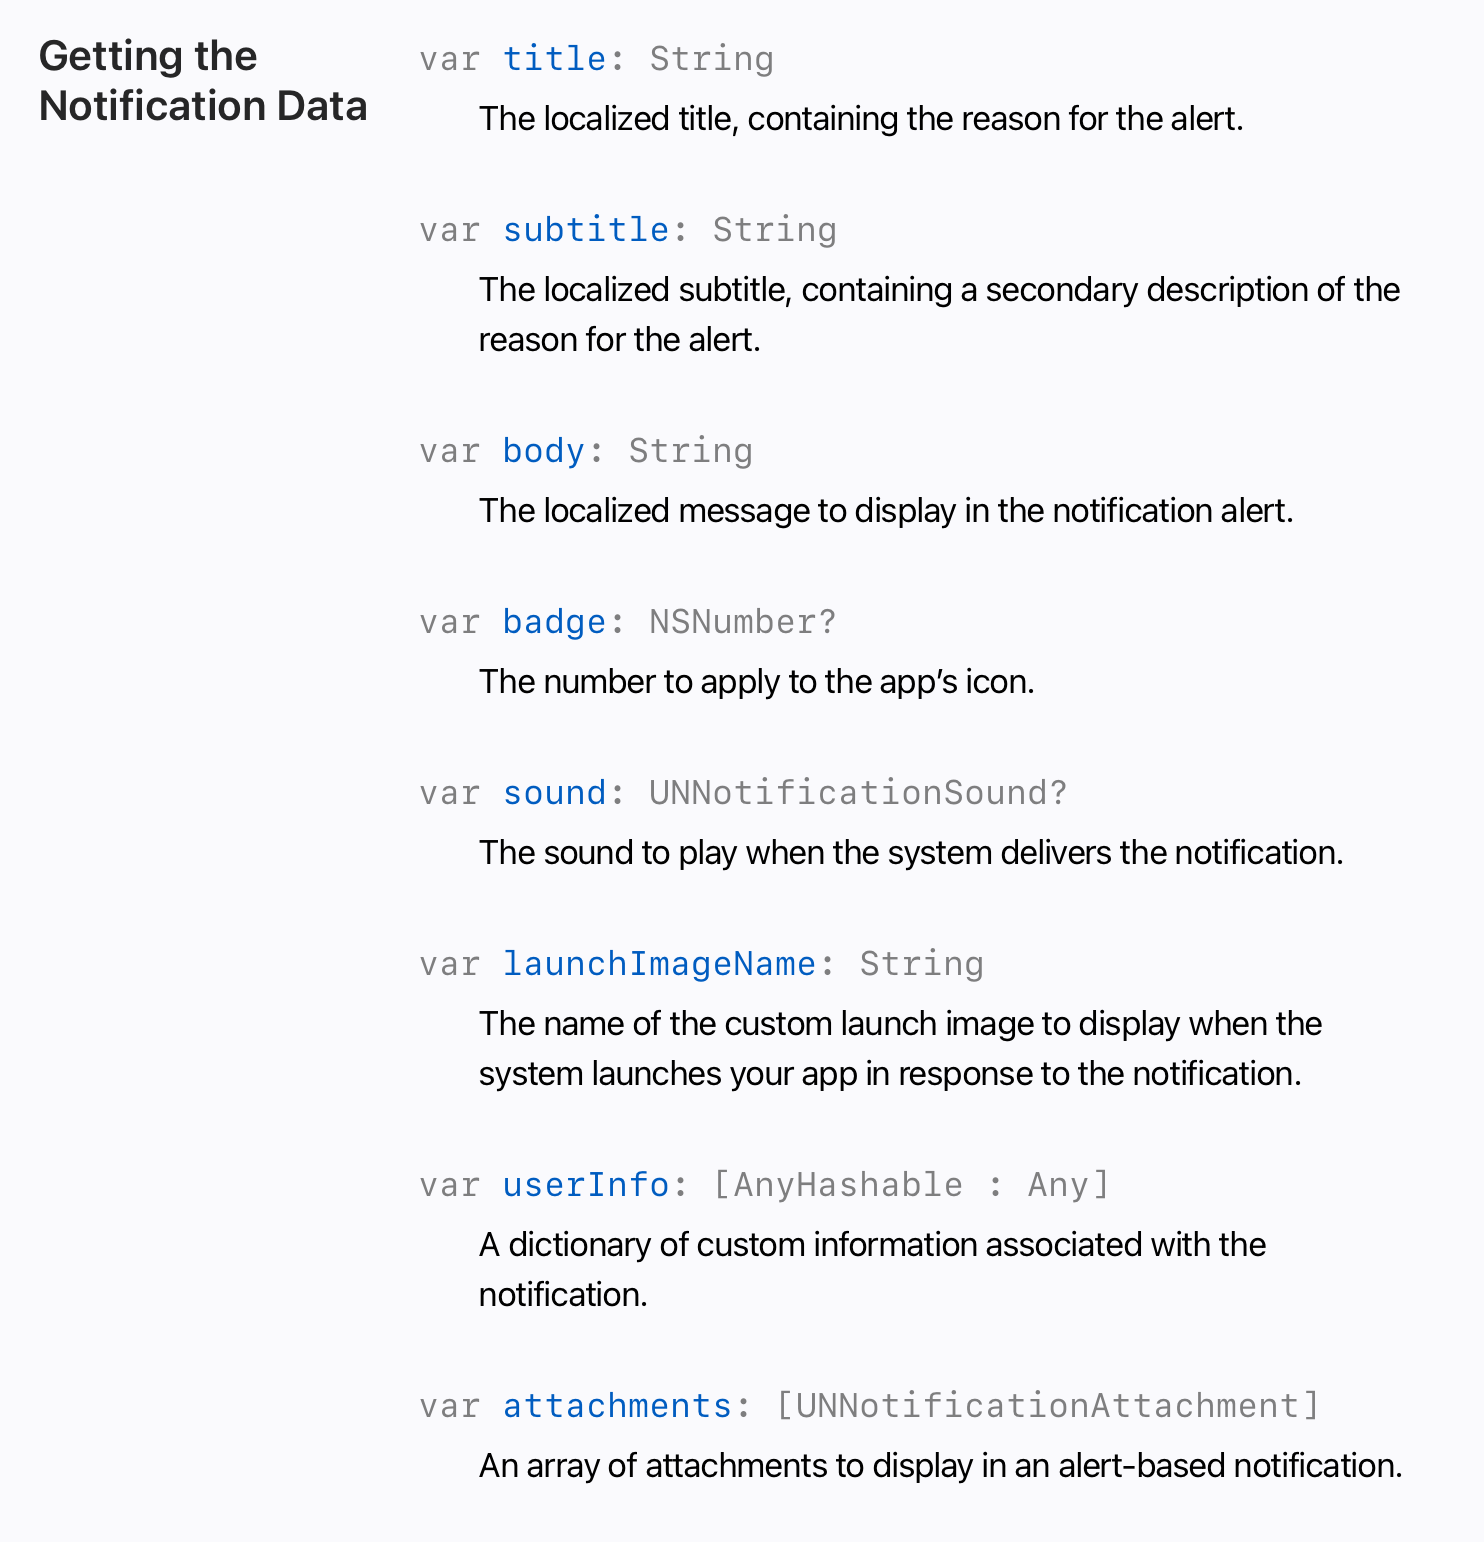
UNMutableNotificationContent
- UNMutableNotificationContent를 통해 content(badge, body, title, sound등)를 생성해준다.
UNNotificationTrigger
- UNNotificationTrigger를 통해 특정 시간, 시간 간격, 위치 기반으로 트리거를 설정한다.
종류
- UNTimeIntervalNotificationTrigger
- UNCalendarNotificationTrigger
- UNLocationNotificationTrigger
- UNPushNotificationTrigger
UNNotificationRequest
- id, content(UNMutableNotificationContent), trigger를 담고있다.
- 위의 과정을 수행한 후 위의 정보들로 알림을 요청하기 위해
UNNotificationRequest클래스를 이용한다.
NotificationCenter
- 알림을 특정할 수 있는 id를 설정하고, 위에서 만든 content와 trigger를 담아서
UNUserNotificationCenter에 보낸다.
UNUserNotificationCenter.current().add(request, withCompletionHandler: nil)
사용해보기
UNUserNotificationCenter
import UserNotifications

extension UNUserNotificationCenter {
    func addNotificationRequest(by alert: Alert) {
        let content = UNMutableNotificationContent()
        content.title = "물 마실 시간이예요💦"
        content.body = "세계보건기구(WHO)가 권장하는 하루 물 섭취량은 1.5~2ℓ입니다."
        content.sound = .default
        content.badge = 1

        let component = Calendar.current.dateComponents([.hour, .minute], from: alert.date)
        let trigger = UNCalendarNotificationTrigger(dateMatching: component, repeats: alert.isOn)
        let request = UNNotificationRequest(identifier: alert.id, content: content, trigger: trigger)

        self.add(request, withCompletionHandler: nil)
    }
}
UNUserNotificationCenter에 우리가 원하는 함수를 작성하기 위해 extension을 해서 contents와 trigger를 설정해주고, request에 담은 뒤 notificationcenter에 추가해주었다.
AlertListCell
class AlertListCell: UITableViewCell {
    let userNotificationCenter = UNUserNotificationCenter.current()

    @IBOutlet weak var timeLabel: UILabel!
    @IBOutlet weak var meridiemLabel: UILabel!
    @IBOutlet weak var alertSwitch: UISwitch!

    @IBAction func alertSwitchValueChanged(_ sender: UISwitch) {
        guard let data = UserDefaults.standard.value(forKey: "alerts") as? Data,
              var alerts = try? PropertyListDecoder().decode([Alert].self, from: data) else { return }
        alerts[sender.tag].isOn = sender.isOn
        UserDefaults.standard.set(try? PropertyListEncoder().encode(alerts), forKey: "alerts")

        if sender.isOn {
            userNotificationCenter.addNotificationRequest(by: alerts[sender.tag])
        } else {
            userNotificationCenter.removePendingNotificationRequests(withIdentifiers: [alerts[sender.tag].id])
        }
    }
}
위의 알림들을 나열해서 보여주기 위한 각각의 셀을 보여주는 AlertListCell을 만들고, switch가 켜지게 되면 sender의 tag를 통해 notificationcenter에 추가하고, 꺼지게 되면 삭제한다.
기본적으로 알람들은 앱이 종료되어도 값을 잃어버리면 안되기 때문에 UserDefaults를 사용해서 저장해주었다.
AlertListViewController
    func alertList() -> [Alert] {
        guard let data = UserDefaults.standard.value(forKey: "alerts") as? Data,
              let alerts = try? PropertyListDecoder().decode([Alert].self, from: data) else { return [] }
        return alerts
    }
userdefaults에 저장된 알람들을 Alert의 배열형태로 반환해주는 함수를 작성했다.
    @IBAction func addAlertButtonAction(_ sender: UIBarButtonItem) {
        guard let addAlertViewController = storyboard?.instantiateViewController(withIdentifier: "AddAlertViewController") as? AddAlertViewController else { return }

        addAlertViewController.datePicked = {[weak self] date in
            guard let self = self else { return }
            var alertList = self.alertList()
            let newAlert = Alert(date: date, isOn: true)

            alertList.append(newAlert)
            alertList.sort { $0.date < $1.date }
            self.alerts = alertList

            UserDefaults.standard.set(try? PropertyListEncoder().encode(self.alerts), forKey: "alerts")

            self.userNotificationCenter.addNotificationRequest(by: newAlert)

            self.tableView.reloadData()
        }

        self.present(addAlertViewController, animated: true, completion: nil)
    }
알람 추가 버튼이 눌리게 되면 alertList()를 통해 알람들을 받아오고, 새 알람을 리스트에 추가해준 뒤 날짜로 정렬하고, userDefaults에 저장해주고, tableView가 reloadDate()를 실행하도록 했다.
    override func tableView(_ tableView: UITableView, commit editingStyle: UITableViewCell.EditingStyle, forRowAt indexPath: IndexPath) {
        switch editingStyle {
        case .delete:
            userNotificationCenter.removePendingNotificationRequests(withIdentifiers: [alerts[indexPath.row].id])
            self.alerts.remove(at: indexPath.row)
            UserDefaults.standard.set(try? PropertyListEncoder().encode(self.alerts), forKey: "alerts")
            tableView.reloadData()
        default:
            break
        }
    }
tableview의 cell을 스와이프해서 지울 경우 위와 동일하게 UserNotificationCenter에 있는 해당 알람을 지우고, UserDefaults에 있는 알람 정보 또한 지워질 수 있도록 했다.