
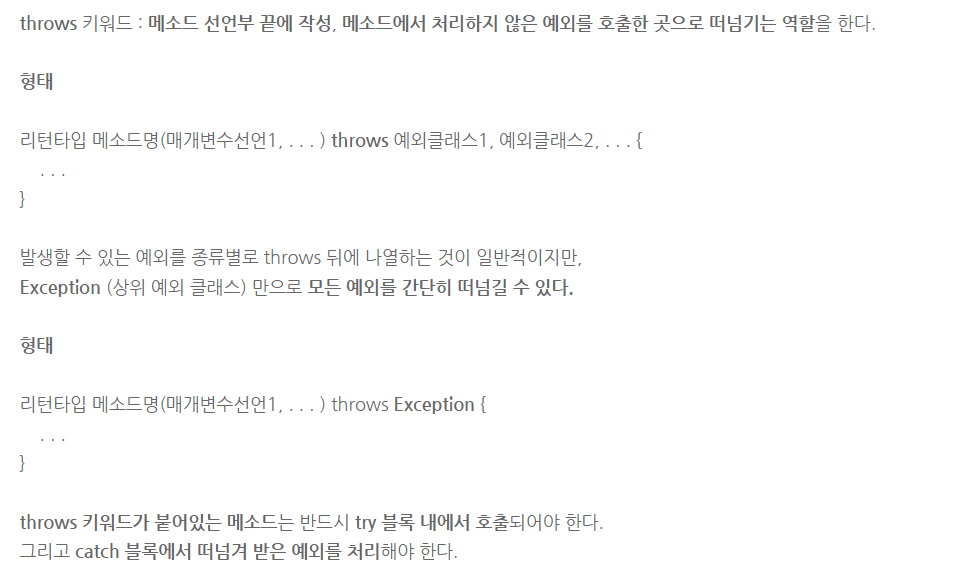
1. throws 에 대하여 설명하시오.
public static void md2() throws IOException {...}메소드 내에서 문장을 실행하는 과정에서 해당 에러가 발생할 수 있다는 의미
- 만약 함수에서 예외 상황의 문제가 생기게 되면,
throws Exception을 자기자신을 호출한 함수한테 던진다. (예외 처리를 떠넘긴다.) - 계속 호출 한 곳으로 던져서 결국 try catch의 catch에서 Exception 에서 받게 된다.
- try catch가 없는 경우 메인 메소드까지 넘어가서 메인 메소드가 최종적으로 JVM으로 넘기는 것도 가능
(하지만 그 전에 try catch로 예외 처리를 직접 하는 것이 좋다.)
둘 이상의 예외를 넘길 때는 ,(콤마)로 구분한다.
public void simpleWrite() throws IOException, IndexOutofBoundsException {
	....
}
2.checked 와 unckecked Excetpion 을 설명하시오.
Exception의 subclass인 unchecked Exception은(= RuntimeException) 예외 처리를 해야 한다고 강제하지 않는다. (런타임에 체크)
하지만 Exception의 subclass인 checked Exception은 반드시 프로그래머가 예외 처리를 해야 한다. (컴파일 타임에 체크) 예외 처리를 하지 않으면 프로그램 작성중에 이미 빨간줄로 에러 표시가 떠서 진행할 수가 없게 된다.
3. 아래가 컴파일 에러가 나는 이유에 대하여 설명하시오.
try {
		int num = 6 / 0;
} catch (Exception e) {
		e.printStackTrace();
} catch (InputMismatchException e) {
		e.printStackTrace();
}
Exception이 InputMismatchException보다 상위 클래스에 위치하고 있으므로 모든 예외 상황을 체크할 수 있다.
그래서 여기에서 모든 예외가 처리 되기 때문에 세부 체크를 하는 InputMismatchException이나 ArithmeticException 등이 그 아래 catch로 온다면 사실상 그 문장을 통과할 일이 없기 때문에 불필요한 코드임을 알려주기 위해 에러가 난다.
👉!!! Polymorphism이 핵심 !!!👈
4. try - catch - finally 에 대하여 설명하시오.
📌try - catch - finally
try블록에서 일어난 일과 관계없이 finally안의 구문을 실행
try - catch - finally를 모두 사용할 필요없이, try - finally로 사용할 수 있다.
하지만 try하나만 사용은 불가능
즉, try문법에서 catch와 finally는 둘 중 하나는 생략이 가능하지만, 둘 다 생략은 불가능하다.
try {
} catch(Exception e) {
} finally {
}
5. 다음을 프로그래밍 하시오.
- 소스
Fruit fAry[] = {new Grape(), new Apple(), new Pear());
for(Fruit f : fAry)
f.print();

- 결과
나는 포도이다.
나는 사과이다.
나는 배이다.
abstract class Fruit {
abstract void print();
}
class Grape extends Fruit {
@Override
public void print() {
System.out.println("나는 포도이다.");
}
}
class Apple extends Fruit {
@Override
public void print() {
System.out.println("나는 사과이다.");
}
}
class Pear extends Fruit {
@Override
public void print() {
System.out.println("나는 배이다.");
}
}
public class Fruittttt{
public static void main(String[] args) {
Fruit fAry[] = {new Grape(), new Apple(), new Pear() };
for(Fruit f : fAry)
f.print();
}
}6. 다음은 도형 구성을 묘사하는 인터페이스이다.
interface Shape {
	final double PI = 3.14; // 상수
	void draw(); // 도형을 그리는 추상 메소드

	double getArea(); // 도형의 면적을 리턴하는 추상 메소드
	default public void redraw() { // 디폴트 메소드
		System.out.print("--- 다시 그립니다.");
		draw();
	}
}
다음 main() 메소드와 실행 결과를 참고하여,
인터페이스 Shape을 구현한 클래스 Circle를 작성하고 전체 프로그램을 완성하라.
public class ShapeMain {
	public static void main(String[] args) {
		Shape donut = new Circle(10); // 반지름이 10인 원 객체
		donut.redraw();
		System.out.println("면적은 "+ donut.getArea());
	}
}
interface Shape {
final double PI = 3.14; // 상수
void draw(); // 도형을 그리는 추상 메소드
double getArea(); // 도형의 면적을 리턴하는 추상 메소드
default public void redraw() { // 디폴트 메소드
System.out.print("--- 다시 그립니다.");
draw();
}
}
class Circle implements Shape {
int r;
public Circle(int r) {
this.r = r;
}
@Override
public void draw() {
System.out.println("원 그리기");
}
@Override
public double getArea() {
return r * r * PI;
}
}
public class ShapeMain {
public static void main(String[] args) {
Shape donut = new Circle(10); // 반지름이 10인 원 객체
donut.redraw();
System.out.println("면적은 "+ donut.getArea());
}
}7. 다음 main() 메소드와 실행 결과를 참고하여, 문제 6의 Shape 인터페이스를 구현한 클래스 Oval, Rect를 추가 작성하고 전체 프로그램을 완성하라.
public static void main(String[] args) {
	Shape[] list = new Shape[3]; // Shape을 상속받은 클래스 객체의 레퍼런스 배열
	list[0] = new Circle(10); // 반지름이 10인 원 객체
	list[1] = new Oval(20, 30); // 20x30 사각형에 내접하는 타원
	list[2] = new Rect(10, 40); // 10x40 크기의 사각형
	for(int i=0; i<list.length; i++) list[i].redraw();
	for(int i=0; i<list.length; i++) System.out.println("면적은 "+ list[i].getArea());
}

/*
--- 다시 그립니다.반지름이 10인 원입니다.
--- 다시 그립니다.20x30에 내접하는 타원입니다.
--- 다시 그립니다.10x40크기의 사각형 입니다.
면적은 314.0
면적은 1884.0000000000002
면적은 400.0
*/
interface Shape {
final double PI = 3.14; // 상수
void draw(); // 도형을 그리는 추상 메소드
double getArea(); // 도형의 면적을 리턴하는 추상 메소드
default public void redraw() { // 디폴트 메소드
System.out.print("--- 다시 그립니다.");
draw();
}
}
class Circle implements Shape {
double r;
public Circle(double r) {
this.r = r;
}
public double getR() {
return r;
}
public void setR(int r) {
this.r = r;
}
@Override
public void draw() {
System.out.println("원 그리기");
}
@Override
public double getArea() {
return r * r * PI;
}
}
class Oval extends Circle {
double r2;
Oval(double r , double r2) {
super(r);
this.r2 = r2;
}
@Override
public void draw() {
System.out.println("타원형 그리기");
}
@Override
public double getArea() {
return super.getR()* r2 * PI;
}
}
class Rect implements Shape {
private double weight, height;
Rect(double weight, double height) {
this.weight = weight;
this.height = height;
}
@Override
public void draw() {
System.out.println("사각형 그리기");
}
@Override
public double getArea() {
return weight * height;
}
}
8. 래퍼 클래스(Wrapper class)란 무엇인가?
📌래퍼 클래스(Wrapper class)
프로그램에 따라 기본 타입의 데이터를 객체로 취급해야 하는 경우가 있다.
예를 들어, 메소드의 인수로 객체 타입만이 요구되면, 기본 타입의 데이터를 그대로 사용할 수는 없다.
이때, 기본 타입의 데이터를 먼저 객체로 변환한 후 작업을 수행해야 한다.
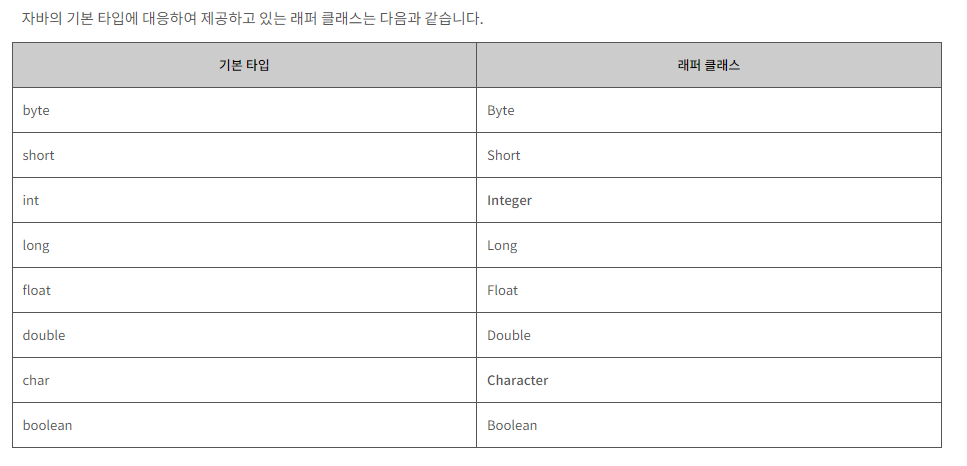
이렇게 8개의 기본 타입에 해당하는 데이터를 객체로 포장해 주는 클래스를
래퍼 클래스(Wrapper class)라고 한다.
래퍼 클래스는 각각의 타입에 해당하는 데이터를 인수로 전달받아, 해당 값을 가지는 객체로 만들어준다.
이러한 래퍼 클래스는 모두 java.lang 패키지에 포함되어 제공.
9. auto unboxing
📌autoBoxing이란?
원시 타입의 값을 해당하는 wrapper 클래스의 객체로 바꾸는 과정을 의미
자바 컴파일러는 원시 타입이 아래 두 가지 경우에 해당될 때 autoBoxing을 적용한다.
-
원시타입이 Wrapper 클래스의 타입의 파라미터를 받는 메서드를 통과할 때
-
원시 타입이 Wrapper 클래스의 변수로 할당될 때
return 하는 text의 타입은 원시 타입이지만 해당 메서드의 리턴 타입은 Integer이다.
(Wrapper 클래스 타입)
public class Test {
private int text;

public Integer getText() {
    return text;
}
해당 결과를 실행하면 컴파일 오류가 발생하지 않는다.
왜일까?
자바 컴파일러가 자동으로 Integer 값으로 바꾸어주기 때문이다.
원래는 아래와 같은 과정이 숨어있다.
public class Test {
private int text;

public Integer getText() {
    return Integer.valueOf(text);
}
10. BigInteger 클래스의 용도는?