Installation
sudo gem install cocoapodspod setup --verboseHow to Install a Pod to your Project
- Navigate to the directory where your project is.
ex.
cd /Users/kevinkim/Desktop/iOS_Development/Flash-Chat-iOS13Optional: type in "ls" in terminal to see what files are in the currenty directory
2. type in pod init once you are in the project folder (directory)
pod init→ This will initialize a new pod file
3. Open the newly create Podfile with Xcode.
note: A podfile is written in Ruby
4. We now need to add the Pod we are interested in.
ex. adding CLTypingLabel Pod
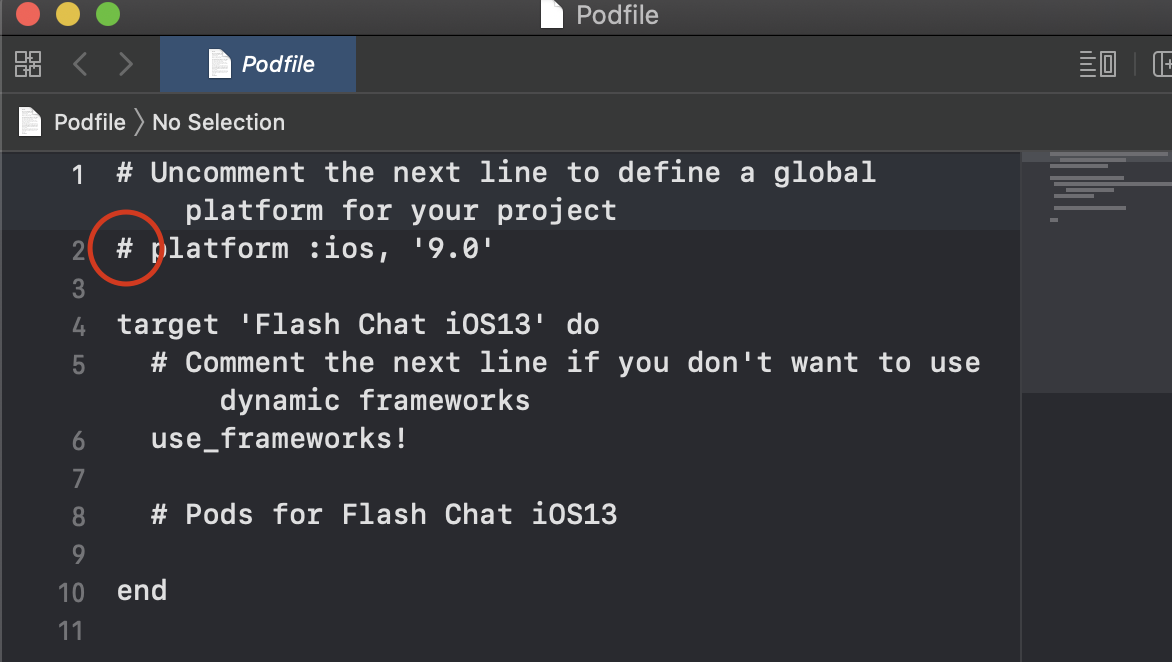
→ Before we go on, we need to "uncomment" the 2nd line. This line defines the minimum iOS version that your app is going to support
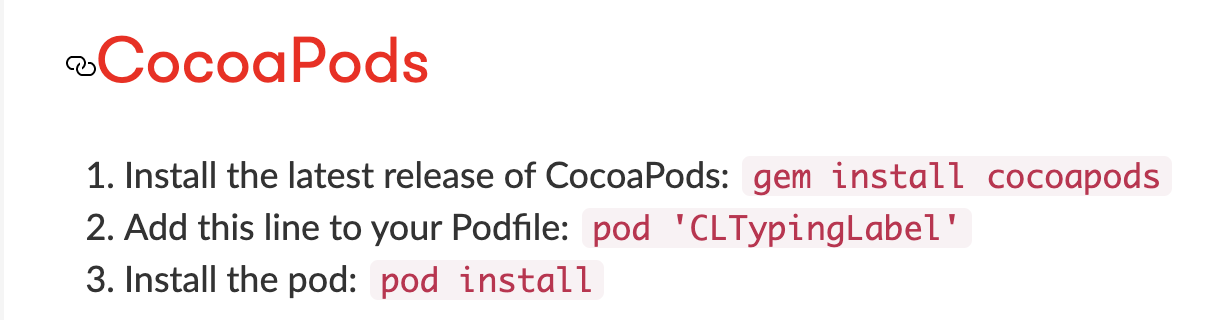
→ Go to cocoapods.org and inspect the Pod you would like to add. In the page, it will say which line you would have to include in the Podfile.
ex. pod 'CLTypingLabel'
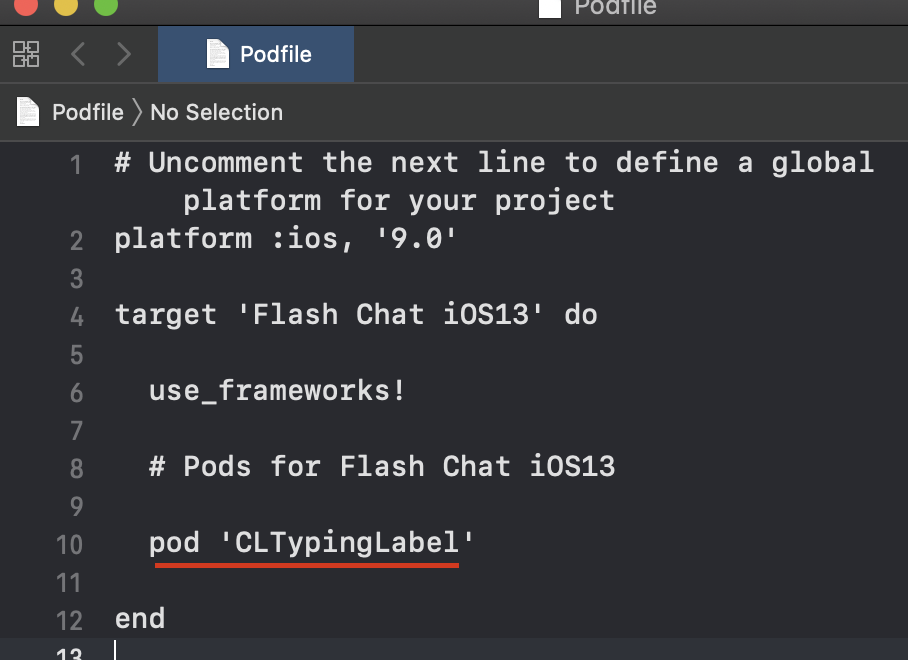
→ include the pod you would like yo add between "#Pods for Flash Chat iOS13" and "end"
- write "pod install" in Terminal
pod installnote: As long as there are no errors, terminal will say something like this: "Please close any current Xcode sessions and use Flash Chat iOS13.xcworkspace for this project from now on."
→ You would need to open your app project via the xcworkspace file instead of xcodeprojc
Potential Problems with Pod Installation
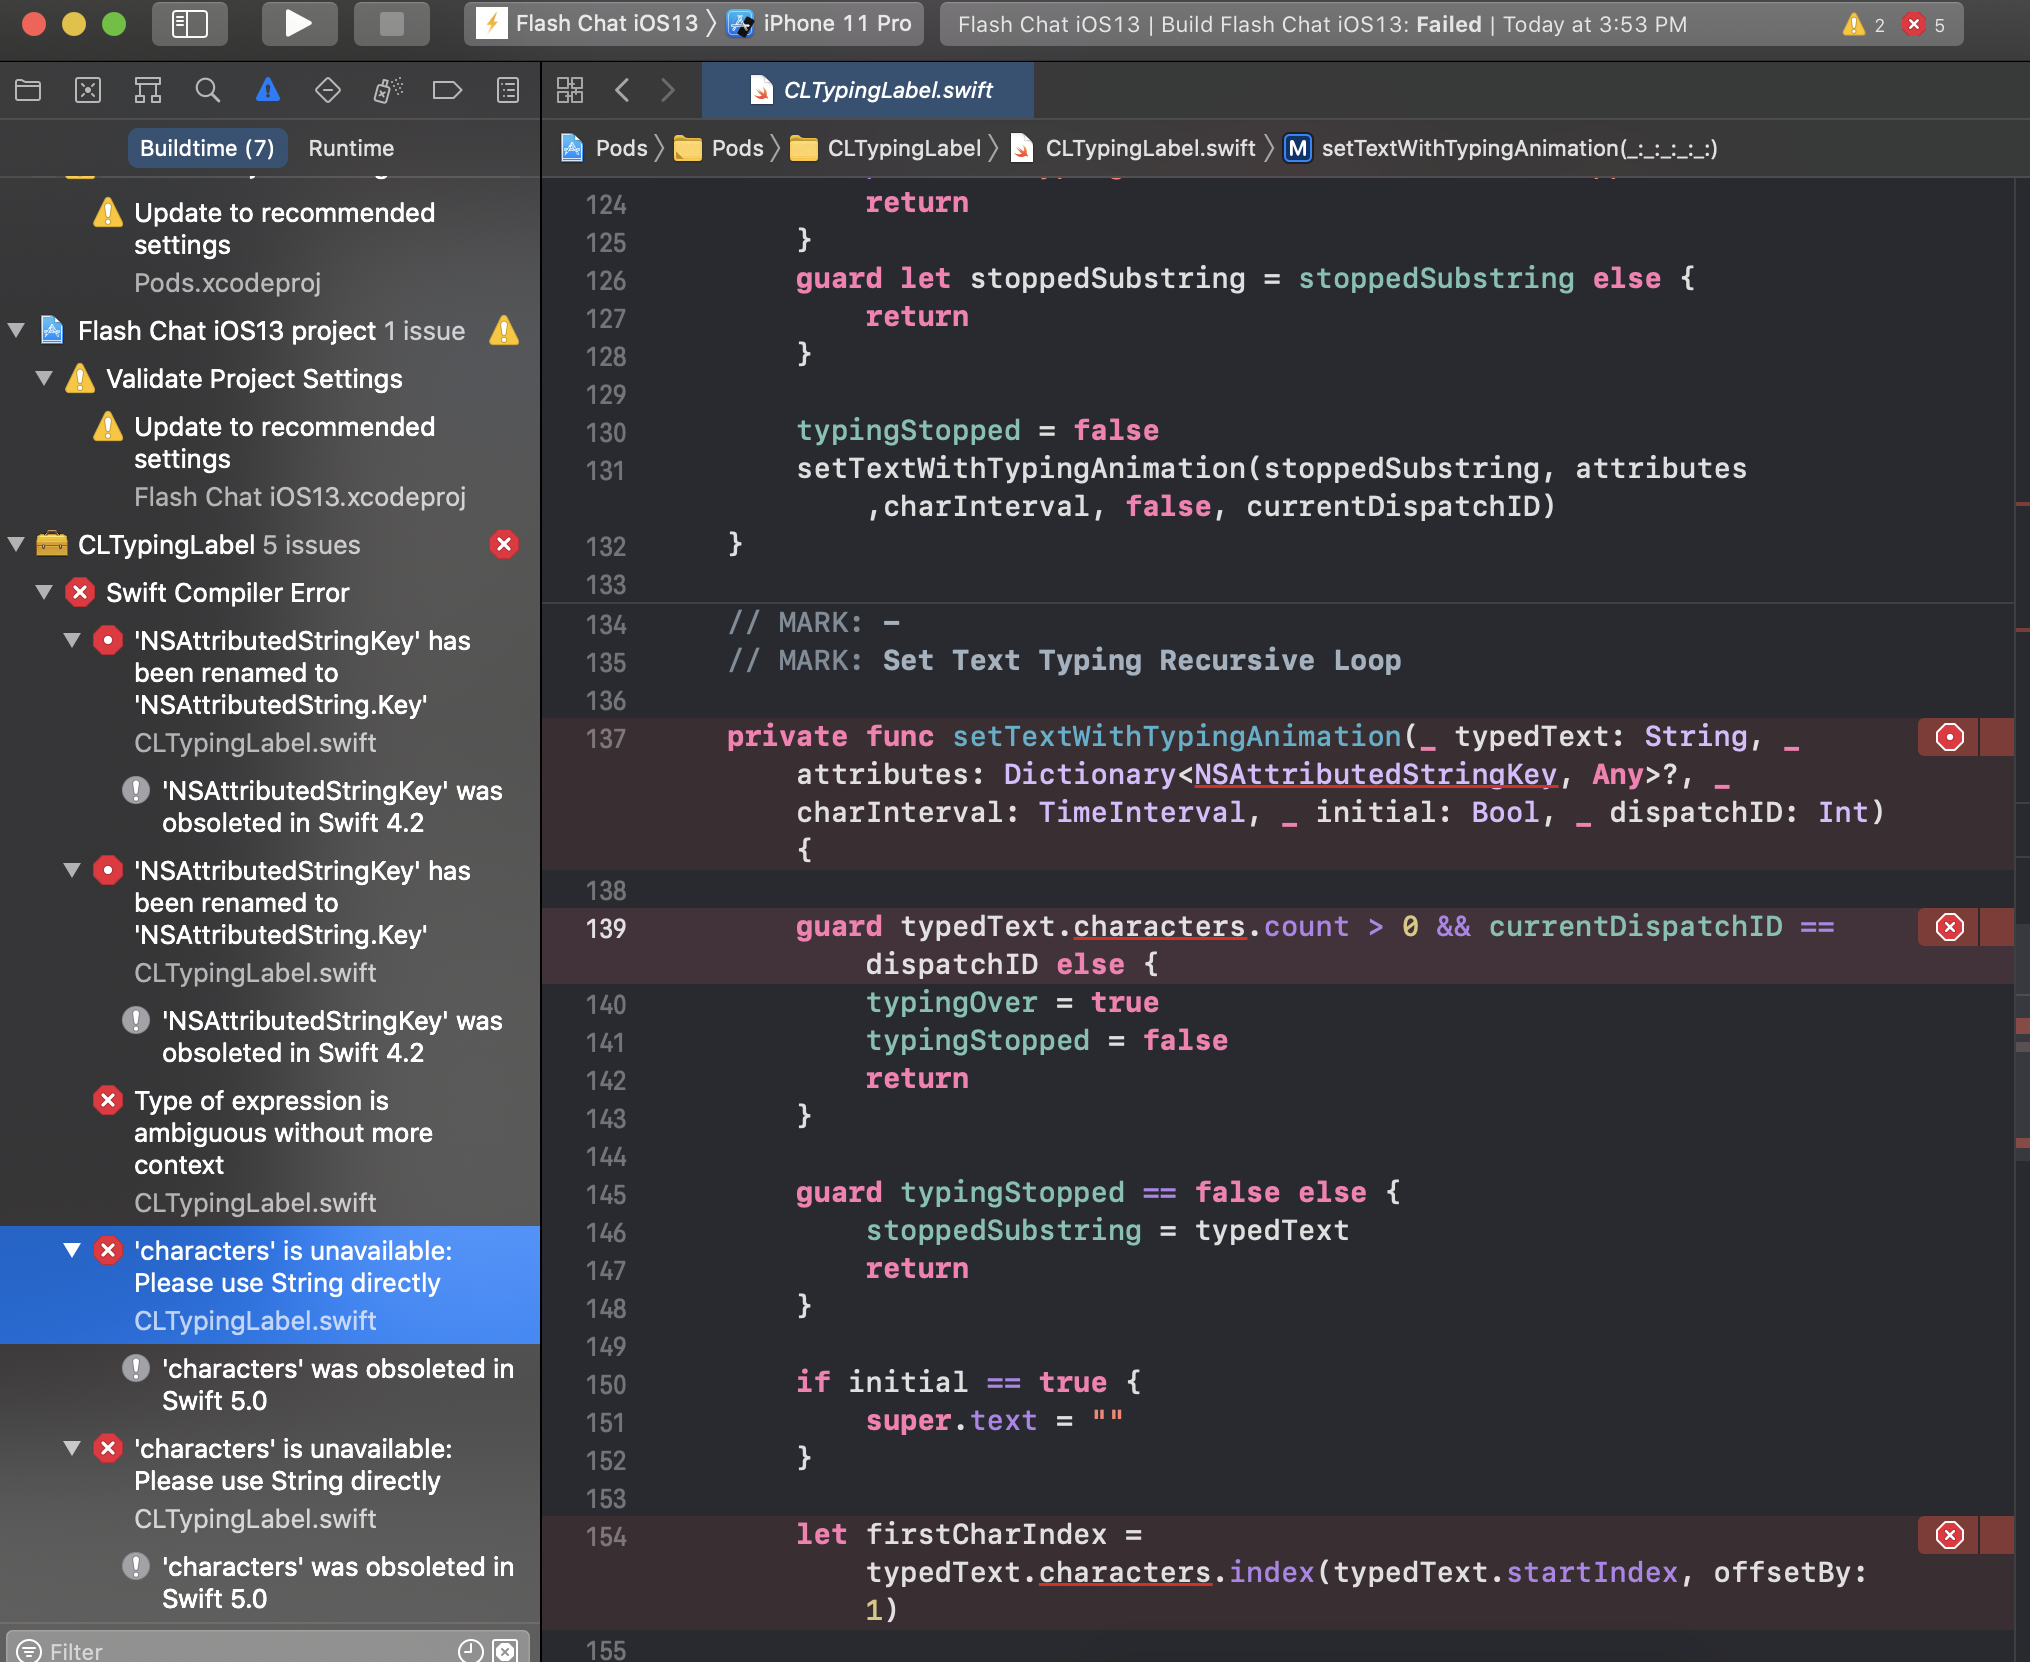
CMD+B (Build) and you might see a bunch of errors. This is because there might be some updates to Swift that is incompatible with the Pod you are using for your project.
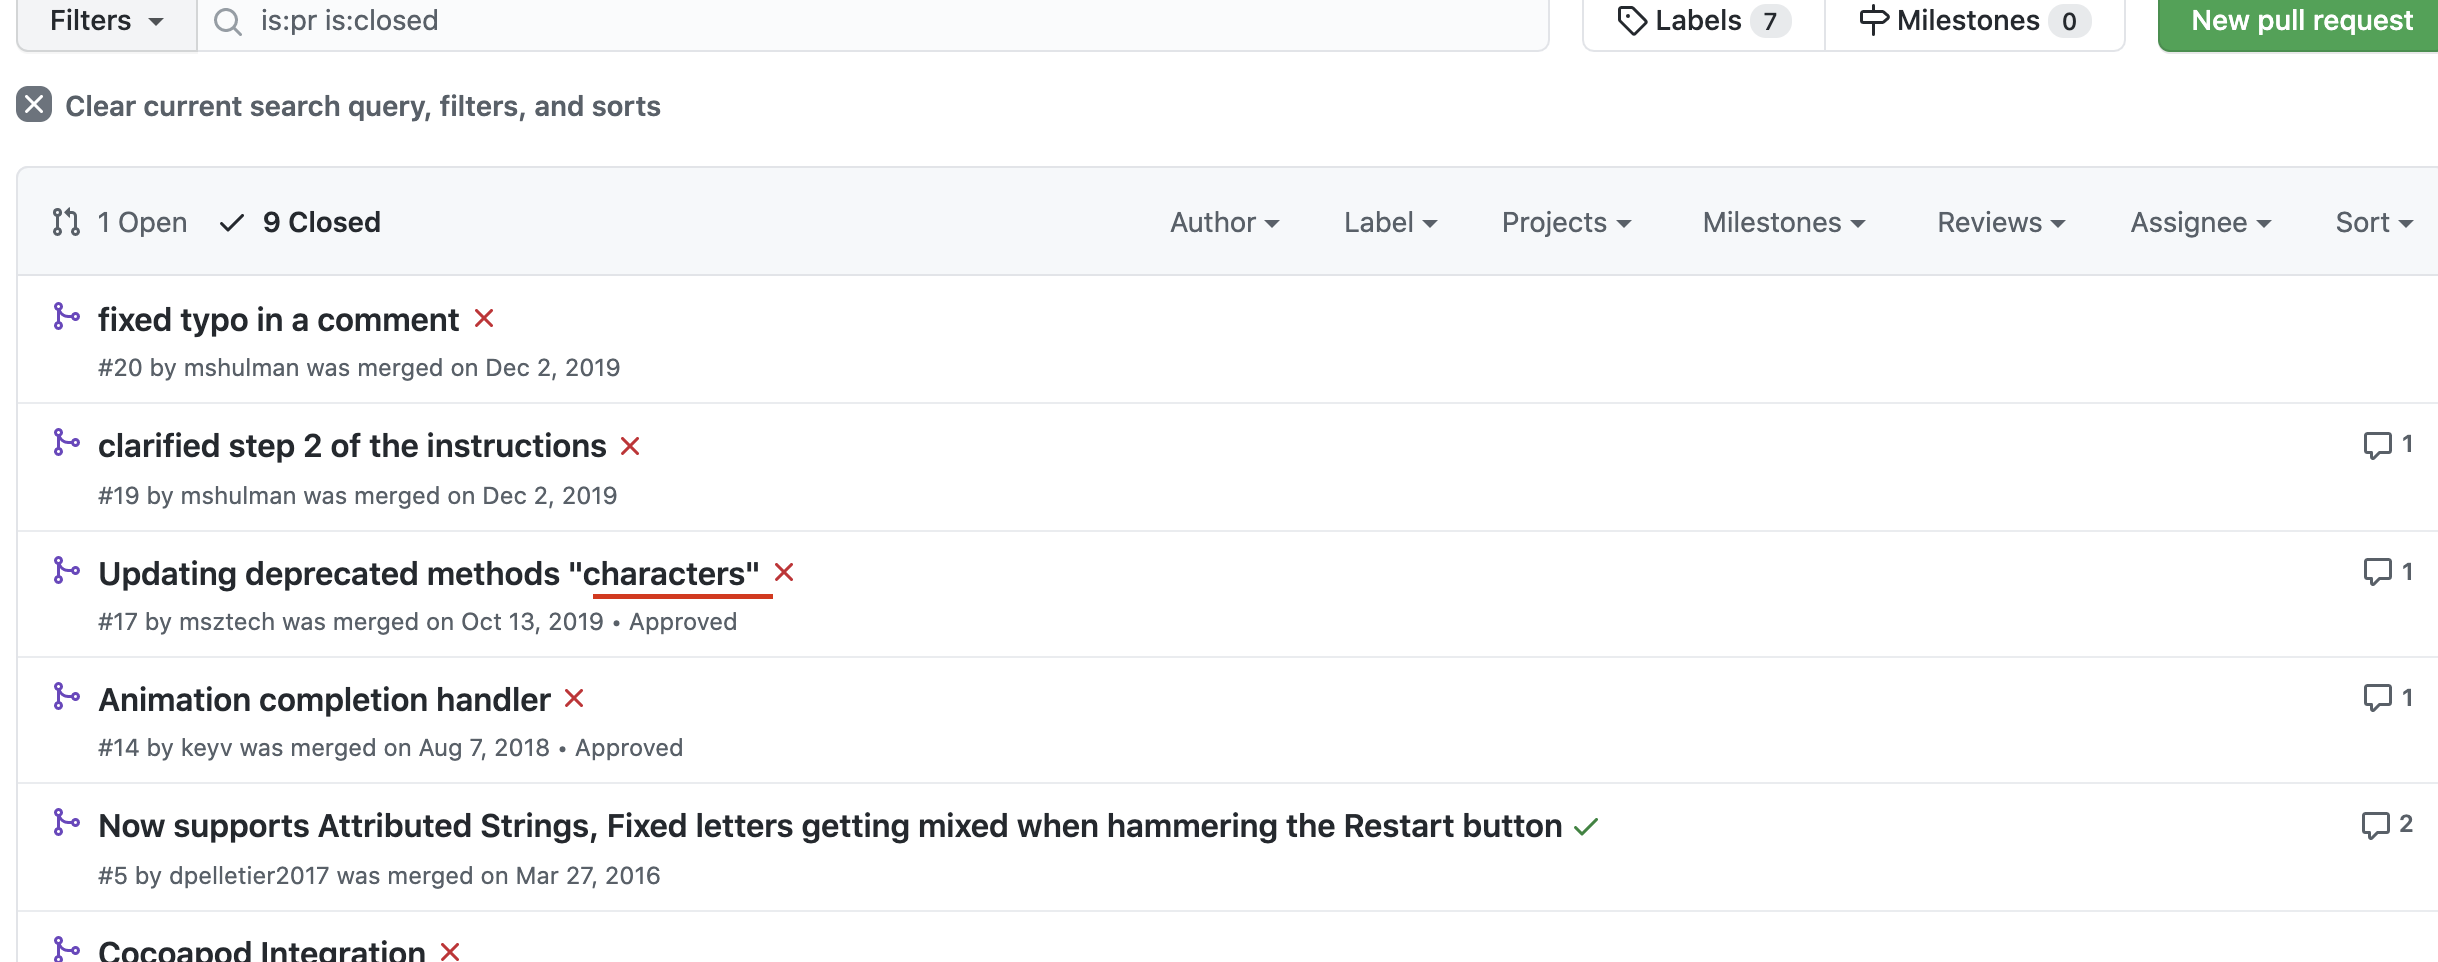
Go take a look at the Github for the particular Pod you are using. Go to "pull requests" and see the Closed requests.

You will be able to see the same errors that are appearing in Xcode.
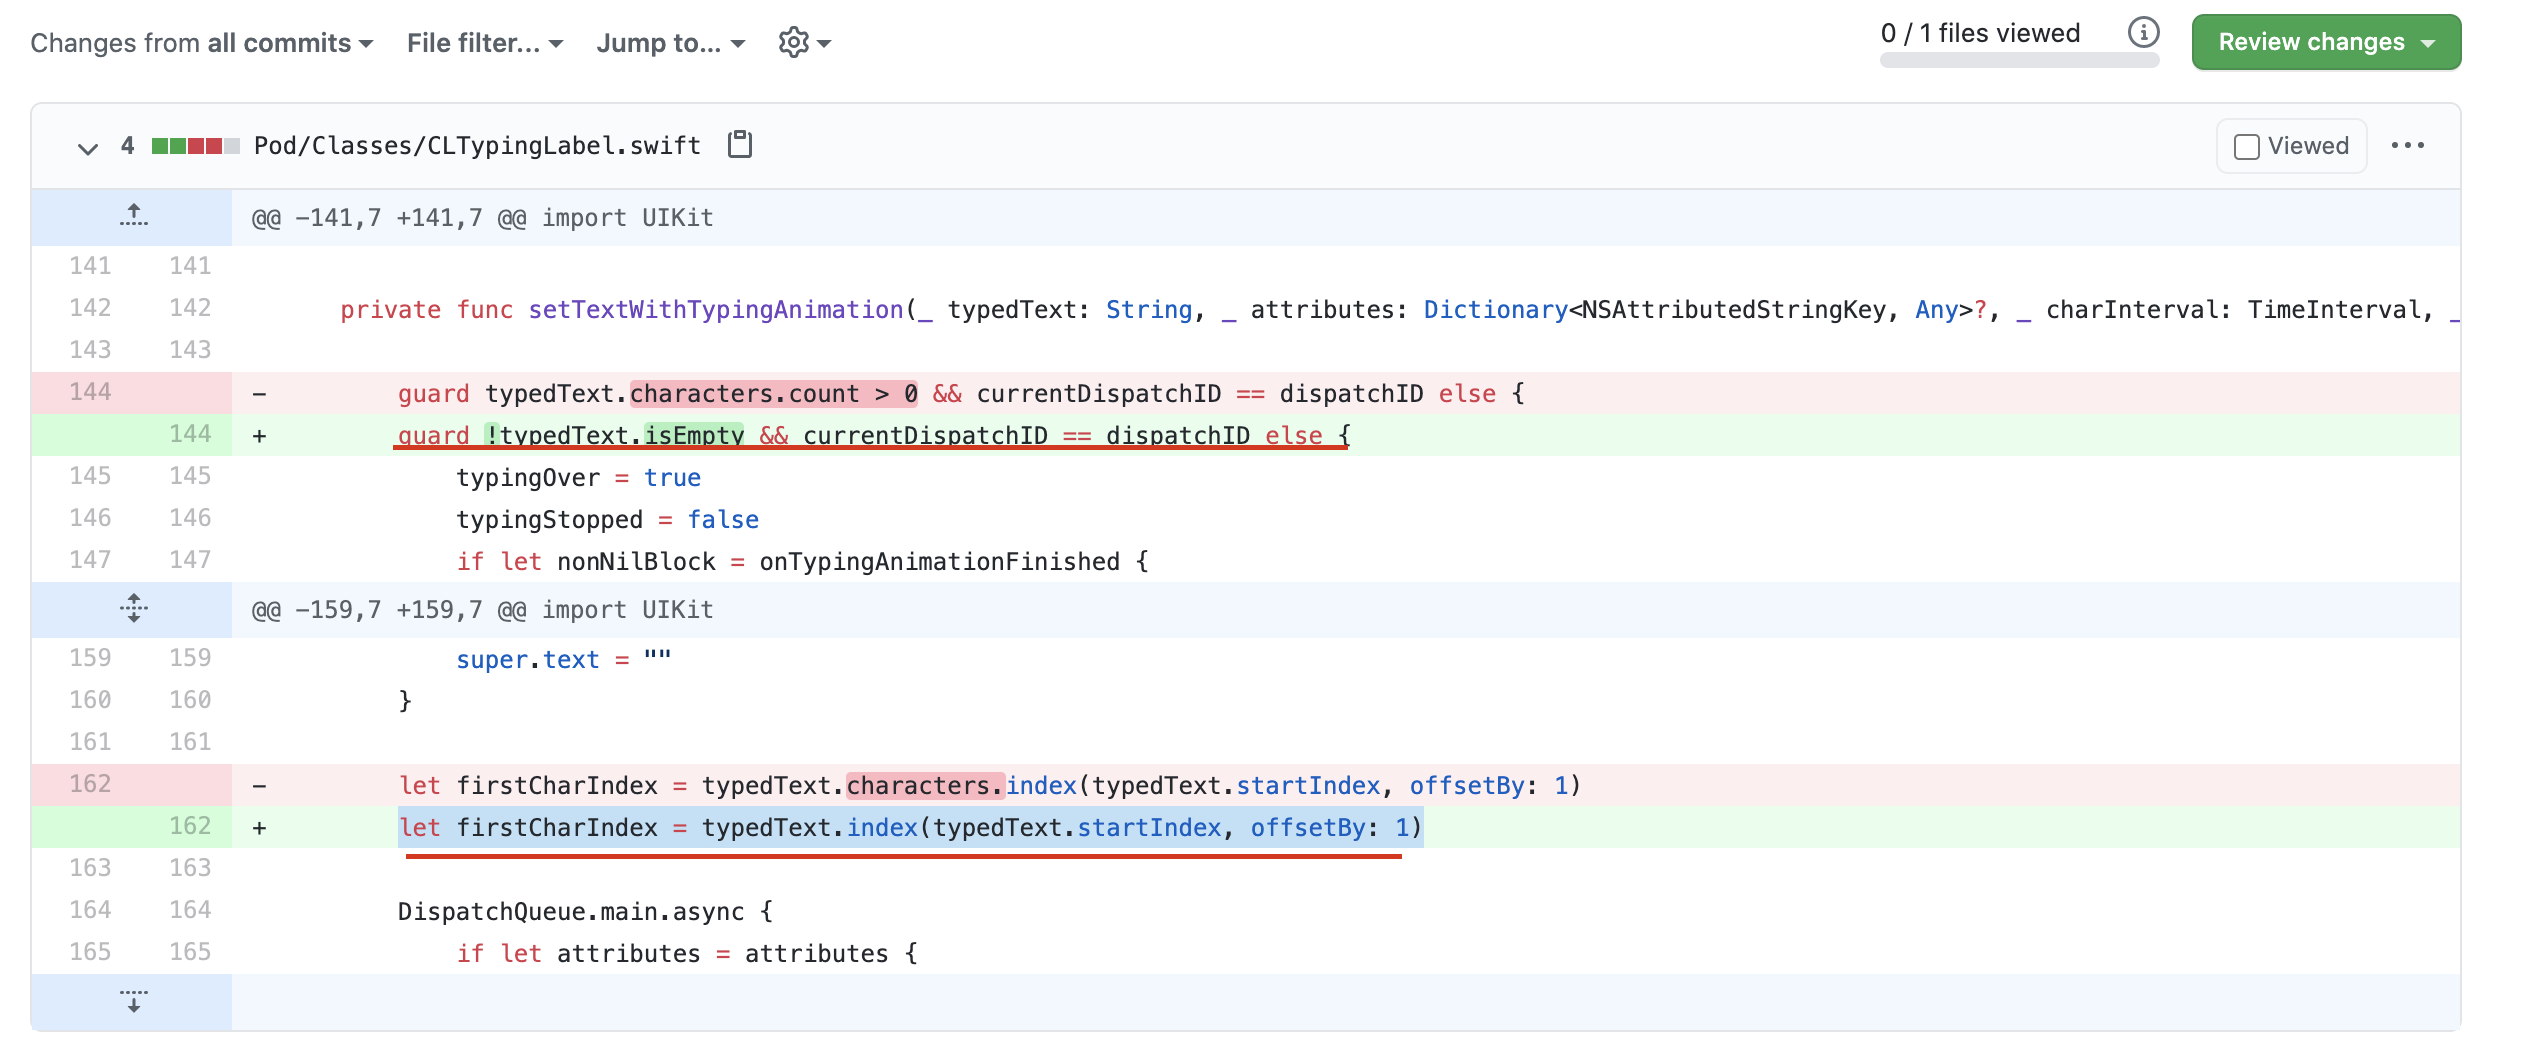
- Check the updated codes, and copy & paste it to your Xcode project.
- CMD + B (Build) to see if the previous errors are gone.
Additional Potential Errors
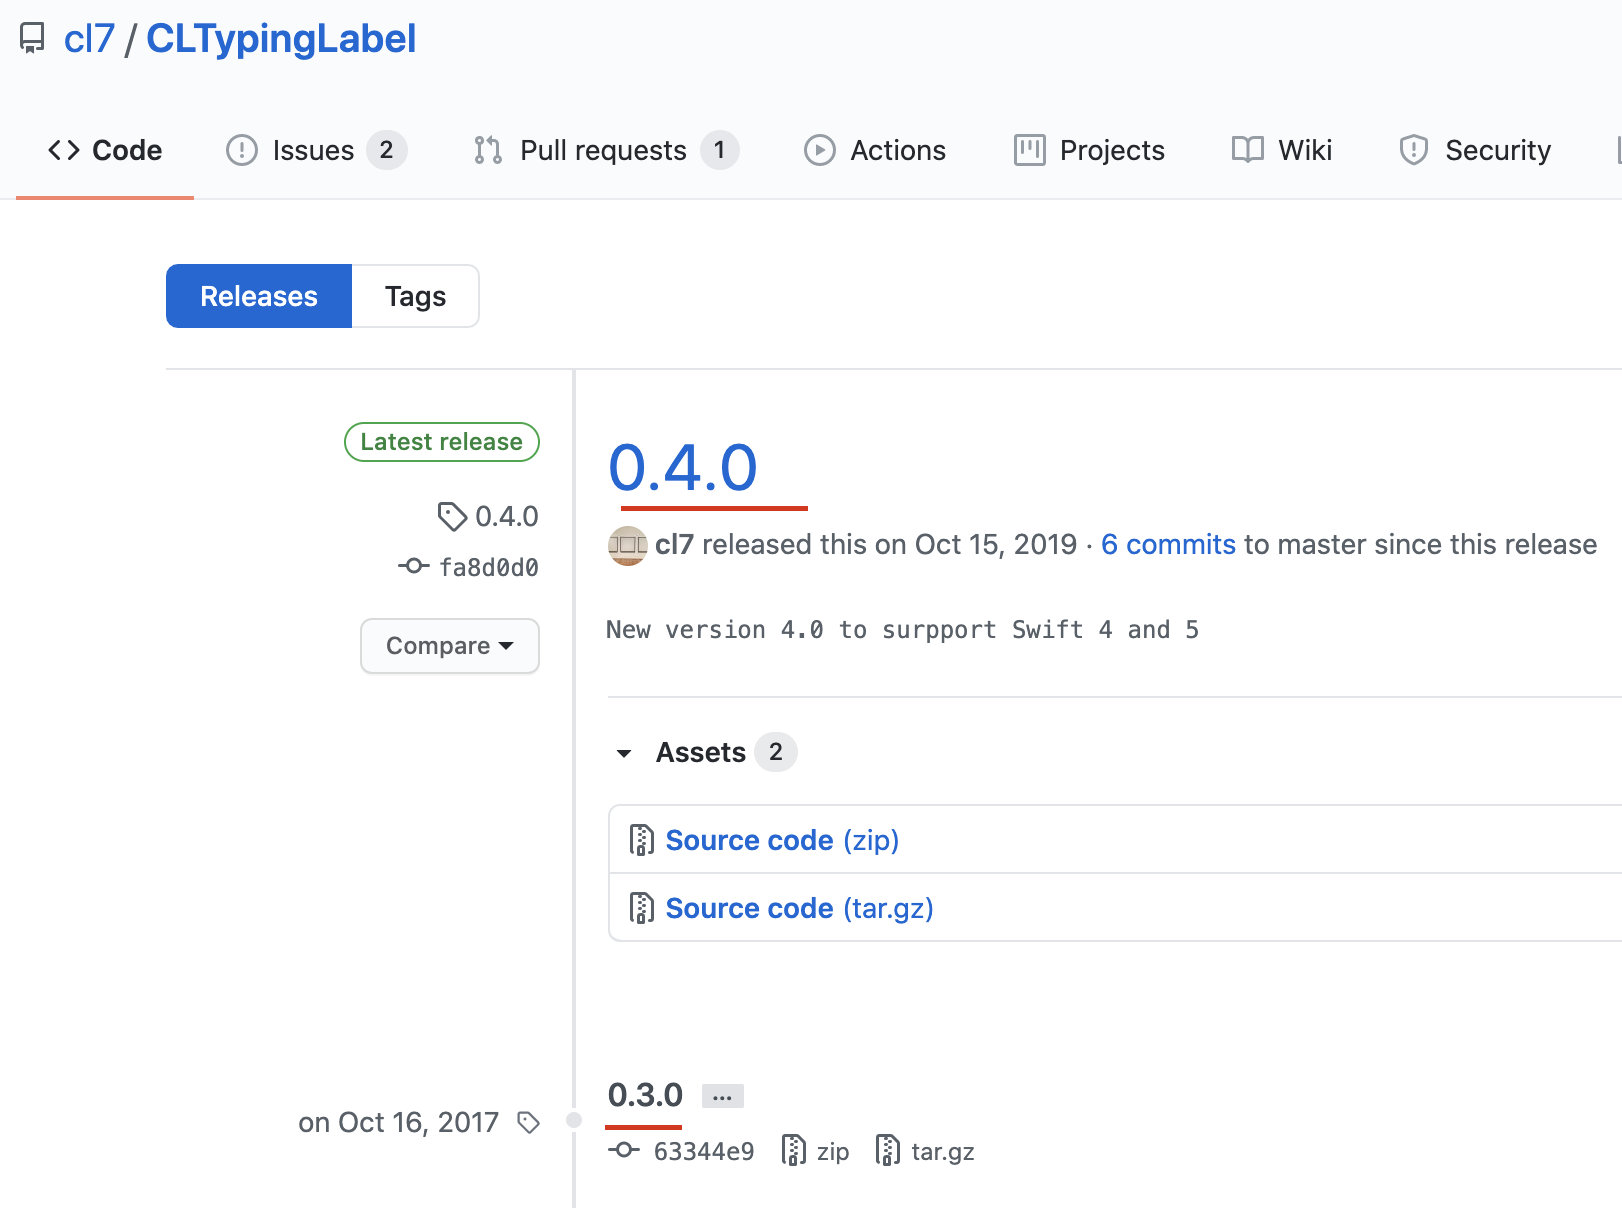
- In Github, check the latest releases for the Pod you are using. For CLTypingLabel, it is using 0.4.0
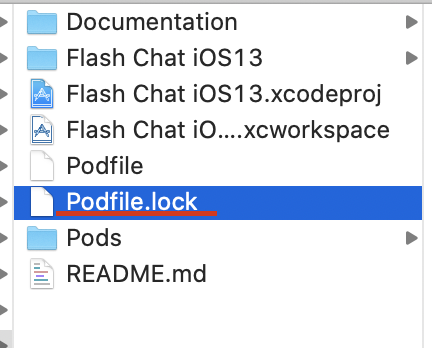
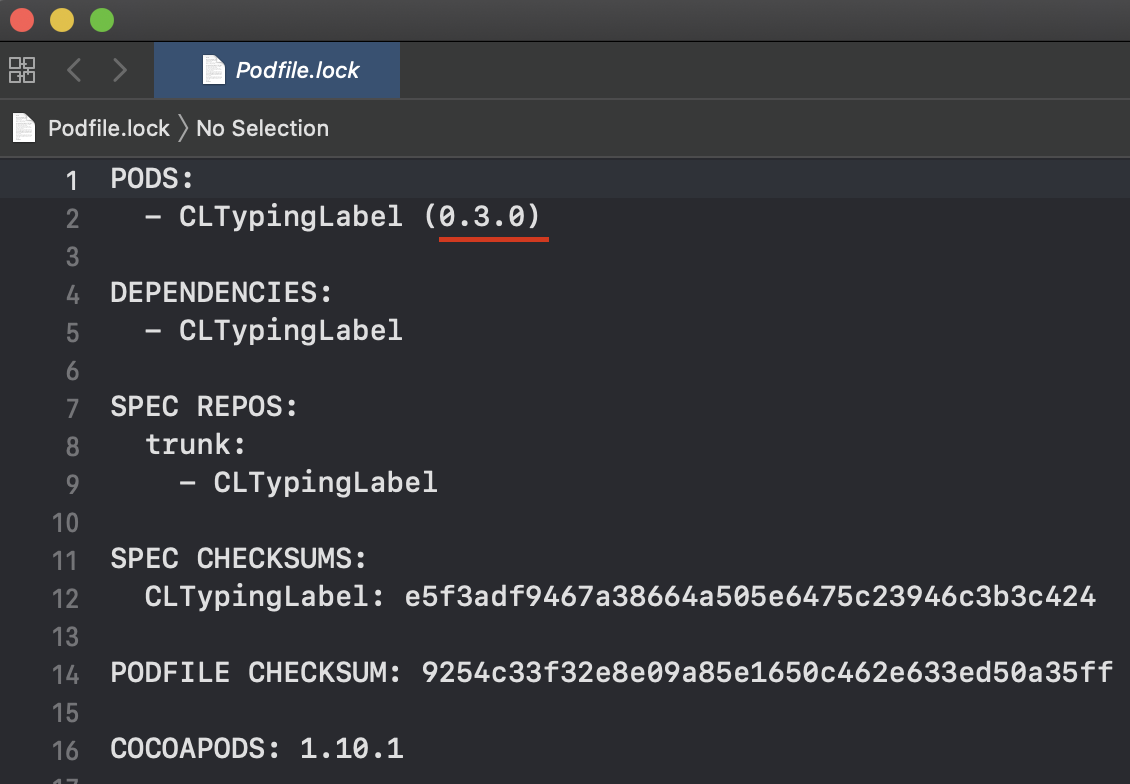
→ But if we go into Podfile.lock (not Podfile) and open it, the version is 0.3.0.
→ This suggests that we have to edit the Podfile (not the Podfile.lock file).
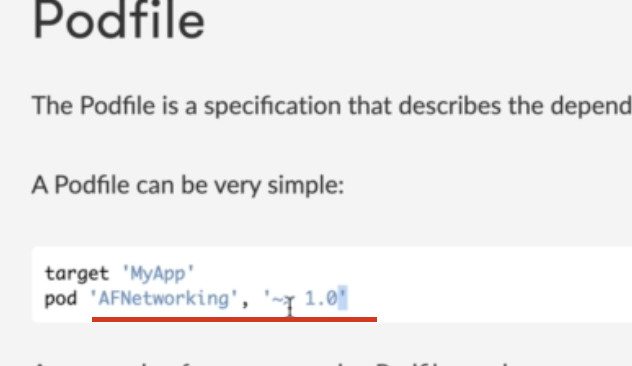
(Link: https://guides.cocoapods.org/syntax/podfile.html)
- If we look at the Cocoapod Podfile syntax guideline, we can see how versions of the Pod can be specified.
-
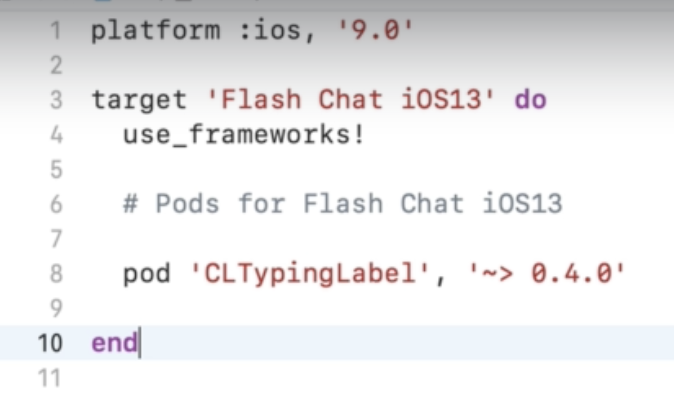
We can specify the version accordingly in the Podfile
-
Next, we type in "pod install" in terminal
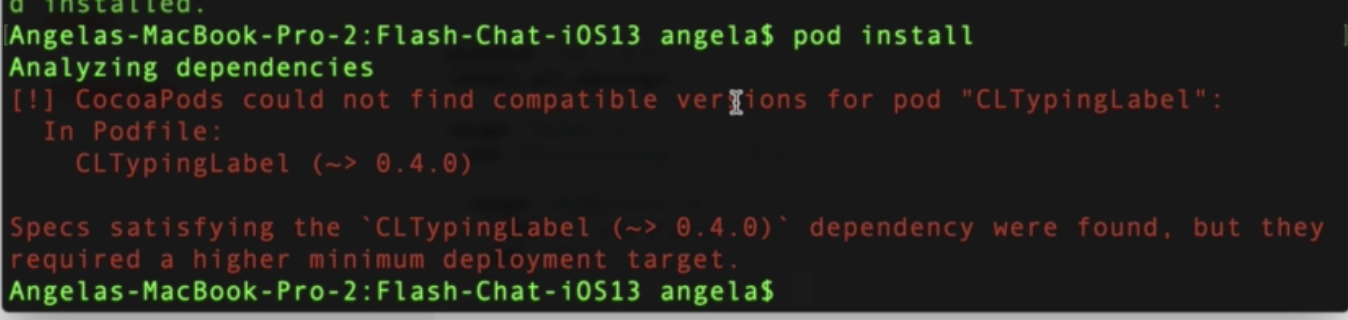
→ But as you see, there is an error. It says the version 0.4.0 was found, but it requires a higher minimum deployment target.
→ This means the minimum version for the supported iOS version needs to be edited as well.
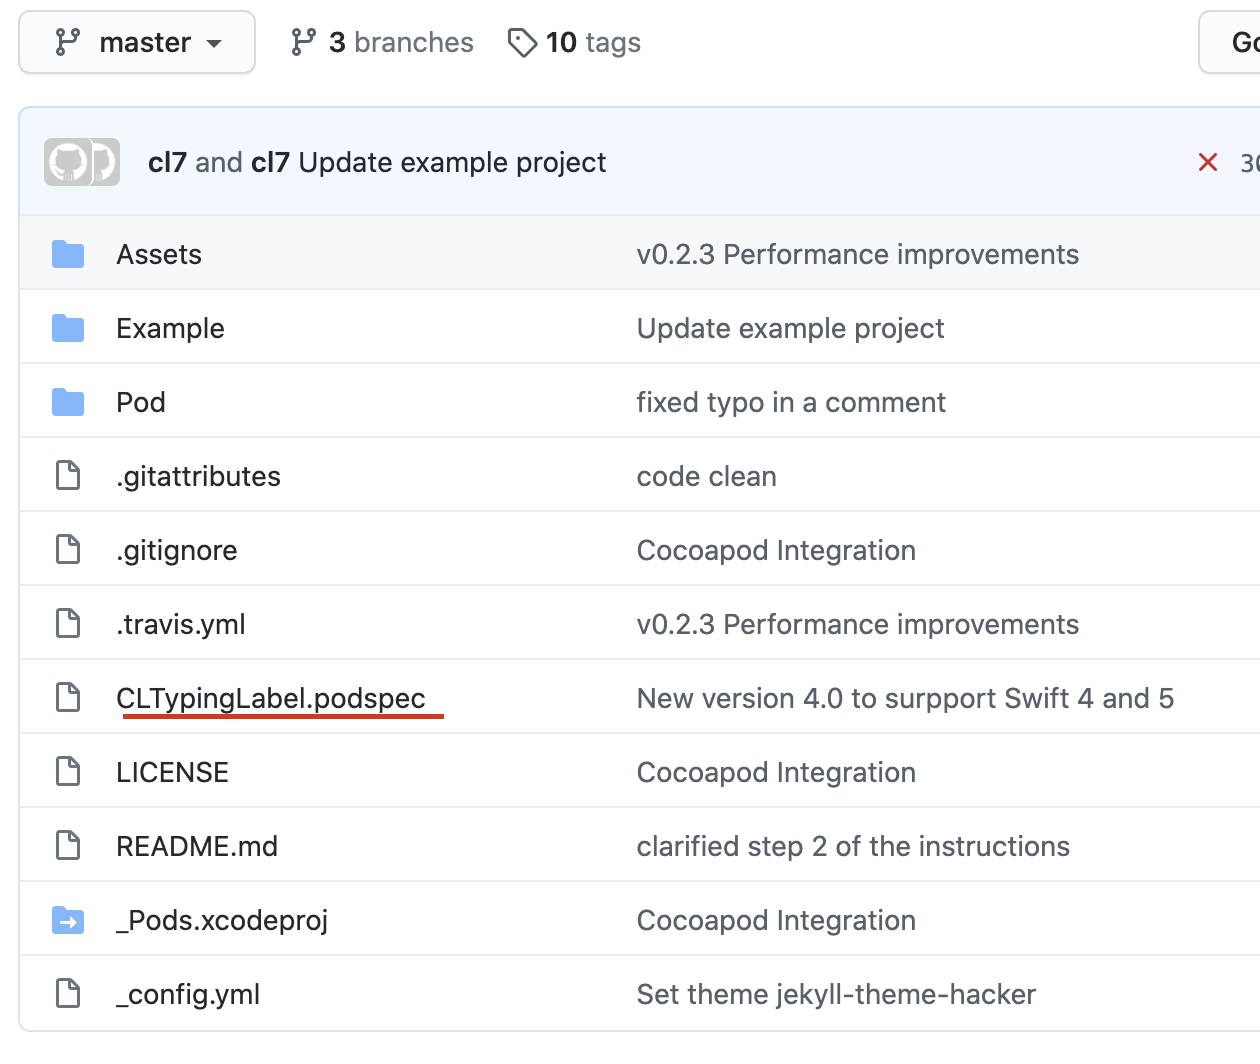
- To solve this, head to the .podspec file in the Github page.

-
Here, you can see that the minimum supported iOS version should be 10.0. So, you must change your Podfile accordingly.
-
Then if you type in "pod install" again in terminal, it will work
→ Remember, you must be in your project's directory to make this work
** Normally, you wouldn't have to go through all this fuss. Usually, you would just have to include the pod you would like to use in the Podfile, and type in "pod install" in terminal.