Today
1. 아웃소싱 프로젝트
진행사항
- 모달창 구현
모달관련 라이브러리가 많지만 직접 어떤식으로 구현하는 지도 알아볼 겸css,상태 변경을 통해서 구현
코드
// 모달을 열고 닫는 상태를 관리
const [modalStates, setModalStates] = useState({});

// 모달을 열고 닫는 함수 : id를 가지고 해당 id의 모달 상태를 열고 닫음
const toggleModal = (shopId) => {
  setModalStates((prevStates) => ({
    ...prevStates,
    [shopId]: !prevStates[shopId]
  }));
};

// 상위 컴포넌트 => 하위 컴포넌트 이벤트 전파를 막는 함수
const stopBubble = (e) => {
  e.stopPropagation();
  e.preventDefault();
};

// 조건부 렌더링
{modalStates[shop.id] && (
  <ModalOverlay onClick={() => toggleModal(shop.id)}>
    <ModalContent onClick={stopBubble}>
      <CloseButton type="button" onClick={() => toggleModal(shop.id)}>
        X
      </CloseButton>
      <Detail shop={shop} />
    </ModalContent>
  </ModalOverlay>
)}- supabase 연동 완료
supabase 공식문서를 바탕으로 해야 함.
사실 다 알려줌
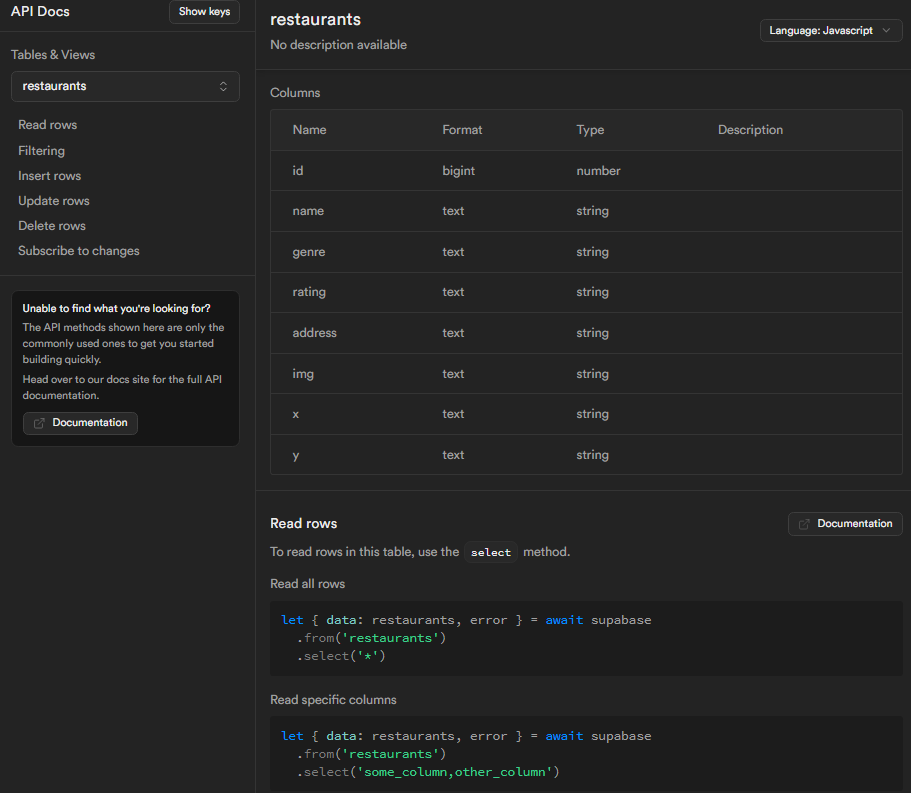
// 데이터 베이스에서 비동기적으로 api를 불러옴
// restaurants 테이블에서 전부(*) 가져오는데 평점(rating) 순 내림차순(ascending: false)으로 불러오기
const fetchRestaurants = async () => {
  const { data } = await supabase.from('restaurants').select('*').order(`rating`, { ascending: false });
  return data;
};
Learn
조건부 렌더링
이번 프로젝트 간 알아두면 유용하고 실무에서도 자주 쓰일 법한 조건부 렌더링에 대해서
구글링해서 찾아보고 구현을 해봤다.
&& 연산자 : 논리 AND 연산자
- React에서 조건부 렌더링을 구현할 때 자주 사용
- 첫 번째 조건이 참일 때 두 번째 조건 평가, 두 번째 조건이 참이라면 해당 요소 렌더링
구현 코드
// modalStates[shop.id]의 상태에 따라 조건부 렌더링
{modalStates[shop.id] && (
  <ModalOverlay onClick={() => toggleModal(shop.id)}>
    <ModalContent onClick={stopBubble}>
      <CloseButton type="button" onClick={() => toggleModal(shop.id)}>
        X
      </CloseButton>
      <Detail shop={shop} />
    </ModalContent>
  </ModalOverlay>
)}
동작 과정
1. 조건 확인 : modalStates[shop.id]가 true
2. 평가 및 렌더링
- modalStates[shop.id]가 true이면 && 연산자 뒤의 JSX 코드가 평가되고, 모달이 렌더링
- modalStates[shop.id]가 false이면 && 연산자 뒤의 JSX 코드는 평가되지 않으며, 아무것도 렌더링되지 않음
정리
- && 연산자는 조건부 렌더링을 위해 사용되며, 왼쪽 조건이 true일 때만 오른쪽의 JSX 코드가 평가되고 렌더링
- 이를 통해 특정 조건에 따라 컴포넌트의 렌더링을 제어할 수 있음
주절주절
할게 많다..!

커피는 콜드브루