혼자 공부하는 자바스크립트 - 6주차
- 혼공학습단 마지막주 6주차 입니다!
- 이번주 미션은 아래와 같습니다.

- 각 챕터별로 공부하면서 정리는 깃허브 내에 마크다운으로 정리하였습니다.
https://github.com/kho903/HongongJS
07. 문서 객체 모델 DOM
- 문서 객체 조작시 DOMContentLoaded를 사용합니다.
- addEventListener() 내에
document.addEventeListener('DOMContentLoaded', () => {})는 "document 라는 문서 객체의 DOMContentLoaded 이벤트가 발생했을 때, 매개변수로 지정한 콜백 함수를 실행해라"라는 의미입니다. document.body, document.head, document.title과 같이 문서 객체를 가져올 수 있고,document.querySelector(선택자), document.querySelectorAll(선택자)로 우리가 만든 다른 요소들에 접근이 가능합니다.- 문서객체.textContent, 문서객체.innterHTML 을 통해 글자를 조작할 수 있습니다. textContent가 최신 기능이므로, 사용을 더 권장합니다.
- 문서객체.setAttribute(속성이름, 값), 문서객체.getAttribute(속성이름)로 속성을 조작할 수 있습니다.
- style 속성으로 문서 객체의 스타일을 조작할 수 있습니다.
div.style.height = `10px`
div.style.color = `black`- 문서 객체를 생성하고 싶을 때
document.createElement()를 사용할 수 있고,부모_객체.appendChild()메서드를 통해 부모 객체 아래에 자식 객체를 추가 가능합니다. - 만들었던 문서 객체를
부모_객체.removeChild(자식_객체)로 제거할 수 있으며, appendChild() 등으로 부모 객체와 이미 연결이 완료된 문서 객체의 경우 parentNode 속성으로 부모 객체에 접근하여문서_객체.parentNode.removeChild(문서_객체)로 제거할 수 있습니다. - document.addEventListener(이벤트이름, 콜백함수) : 모든 문서 객체 생성, 클릭 등의 행위를 이벤트가 발생했다고 합니다. 이 이벤트가 발생할 때 실행할 함수는 addEventListener() 를 사용합니다.
- 이벤트를 연결하는 방법을 이벤트 모델이라 부릅니다. addEventListener() 가 현재 표준으로, 표준 이벤트 모델이라 부릅니다.
- 키보드 이벤트는 keydown, keypress, keyup 3가지가 있으며, 아시아권 문자를 제대로 처리하지 못하는 문제로, 일반적으로 keyup을 사용합니다.
- 이벤트 리스너를 외부로 분리할 경우 이벤트를 발생시킨 객체에 접근하는 방법은 2가지가 있습니다.
- event.currentTarget 속성.
- this 키워드
const listener = (event) => {
  const length = event.currentTarget.value.length
  h1.textContent = `글자 수: ${length}`
}

document.addEventListener('DOMContentLoaded', () => {
  const textarea = document.querySelector('textarea')
  const h1 = document.querySelector('h1')
  textarea.addEventListener('keyup', listener)
})
const listener = function (event) {
const length = this.value.length
h1.textContent = `글자 수: ${length}`
}
document.addEventListener('DOMContentLoaded', () => {
const textarea = document.querySelector('textarea')
const h1 = document.querySelector('h1')
textarea.addEventListener('keyup', listener)
})08. 예외 처리
- 오류의 종류는 크게 2가지가 있습니다.
- 프로그램 실행 전에 발생하는 오류 : 구문 오류
- 프로그램 실행 중에 발생하는 오류 : 예외 또는 런타임 오류
- 구문 오류가 있으면 웹 브라우저가 코드를 분석조차 못해 실행되지 않습니다.
- 예외 또는 런타임 오류는 일단 코드는 실행됩니다. 즉, 실행 중에 발생합니다. js에서는 SyntaxError 라고 출력되는 오류 이외의 모든 오류(TypeError, ReferenceError, RangeError)가 예외로 분류됩니다.
- 조건문을 사용해서 예외가 발생하지 않게 만드는 것을 기본 예외 처리라고 부릅니다.
- 예외를 조금 더 쉽게 잡을 수 있는 기능으로 try catch finally 구문이 존재하는데, 이를 고급 예외 처리라고 부릅니다.
try {
    // 예외가 발생할 가능성이 있는 코드
} catch () {
    // 예외가 발생했을 때 실행할 코드
} finally {
    // 무조건 실행할 코드 (필요한 경우에만 사용)
}- try 안에서 예외를 발생하면 이를 catch 구문에서 처리합니다. try 구문 안에서 예외 발생시, 더 이상 try를 진행하지 않고, catch 구문을 실행합니다.
- finally 구문은 무조건 실행되는 코드로, 서버 개발시 안전하게 코드를 작성할 수 있게 도와줍니다.
- try catch 구문 시 catch 괄호 안에 입력하는 식별자를 예외 객체라 합니다. 예외 객체에는 name이라는 예외 이름과 message라는 예외 메시지 속성을 가지고 있습니다.
- throw 구문으로 상황에 따라 예외를 강제로 발생시킬 수 있습니다.
// 단순하게 예외를 발생시킴.
throw 문자열

// 조금 더 자세하게 예외를 발생시킴.
throw new Error(문자열)- 예외를 강제로 발생시키는 이유는 일반적으로 라이브러리처럼 다양한 기능을 가진 유틸리티 함수를 만들고, 다른 사람이 그러한 라이브러리의 함수를 활용하는 경우가 많은데, 만든 사람의 의도와 다른 형태로 코드를 사용할 수 있습니다. 이럴 때 예외를 강제로 발생시켜 사용자에게 주의를 줄 수 있으며, 의도한 대로 처리하게 유도할 수 있습니다.
기본 미션
- 속성 조작하기 코드. 고양이 이미지 캡처
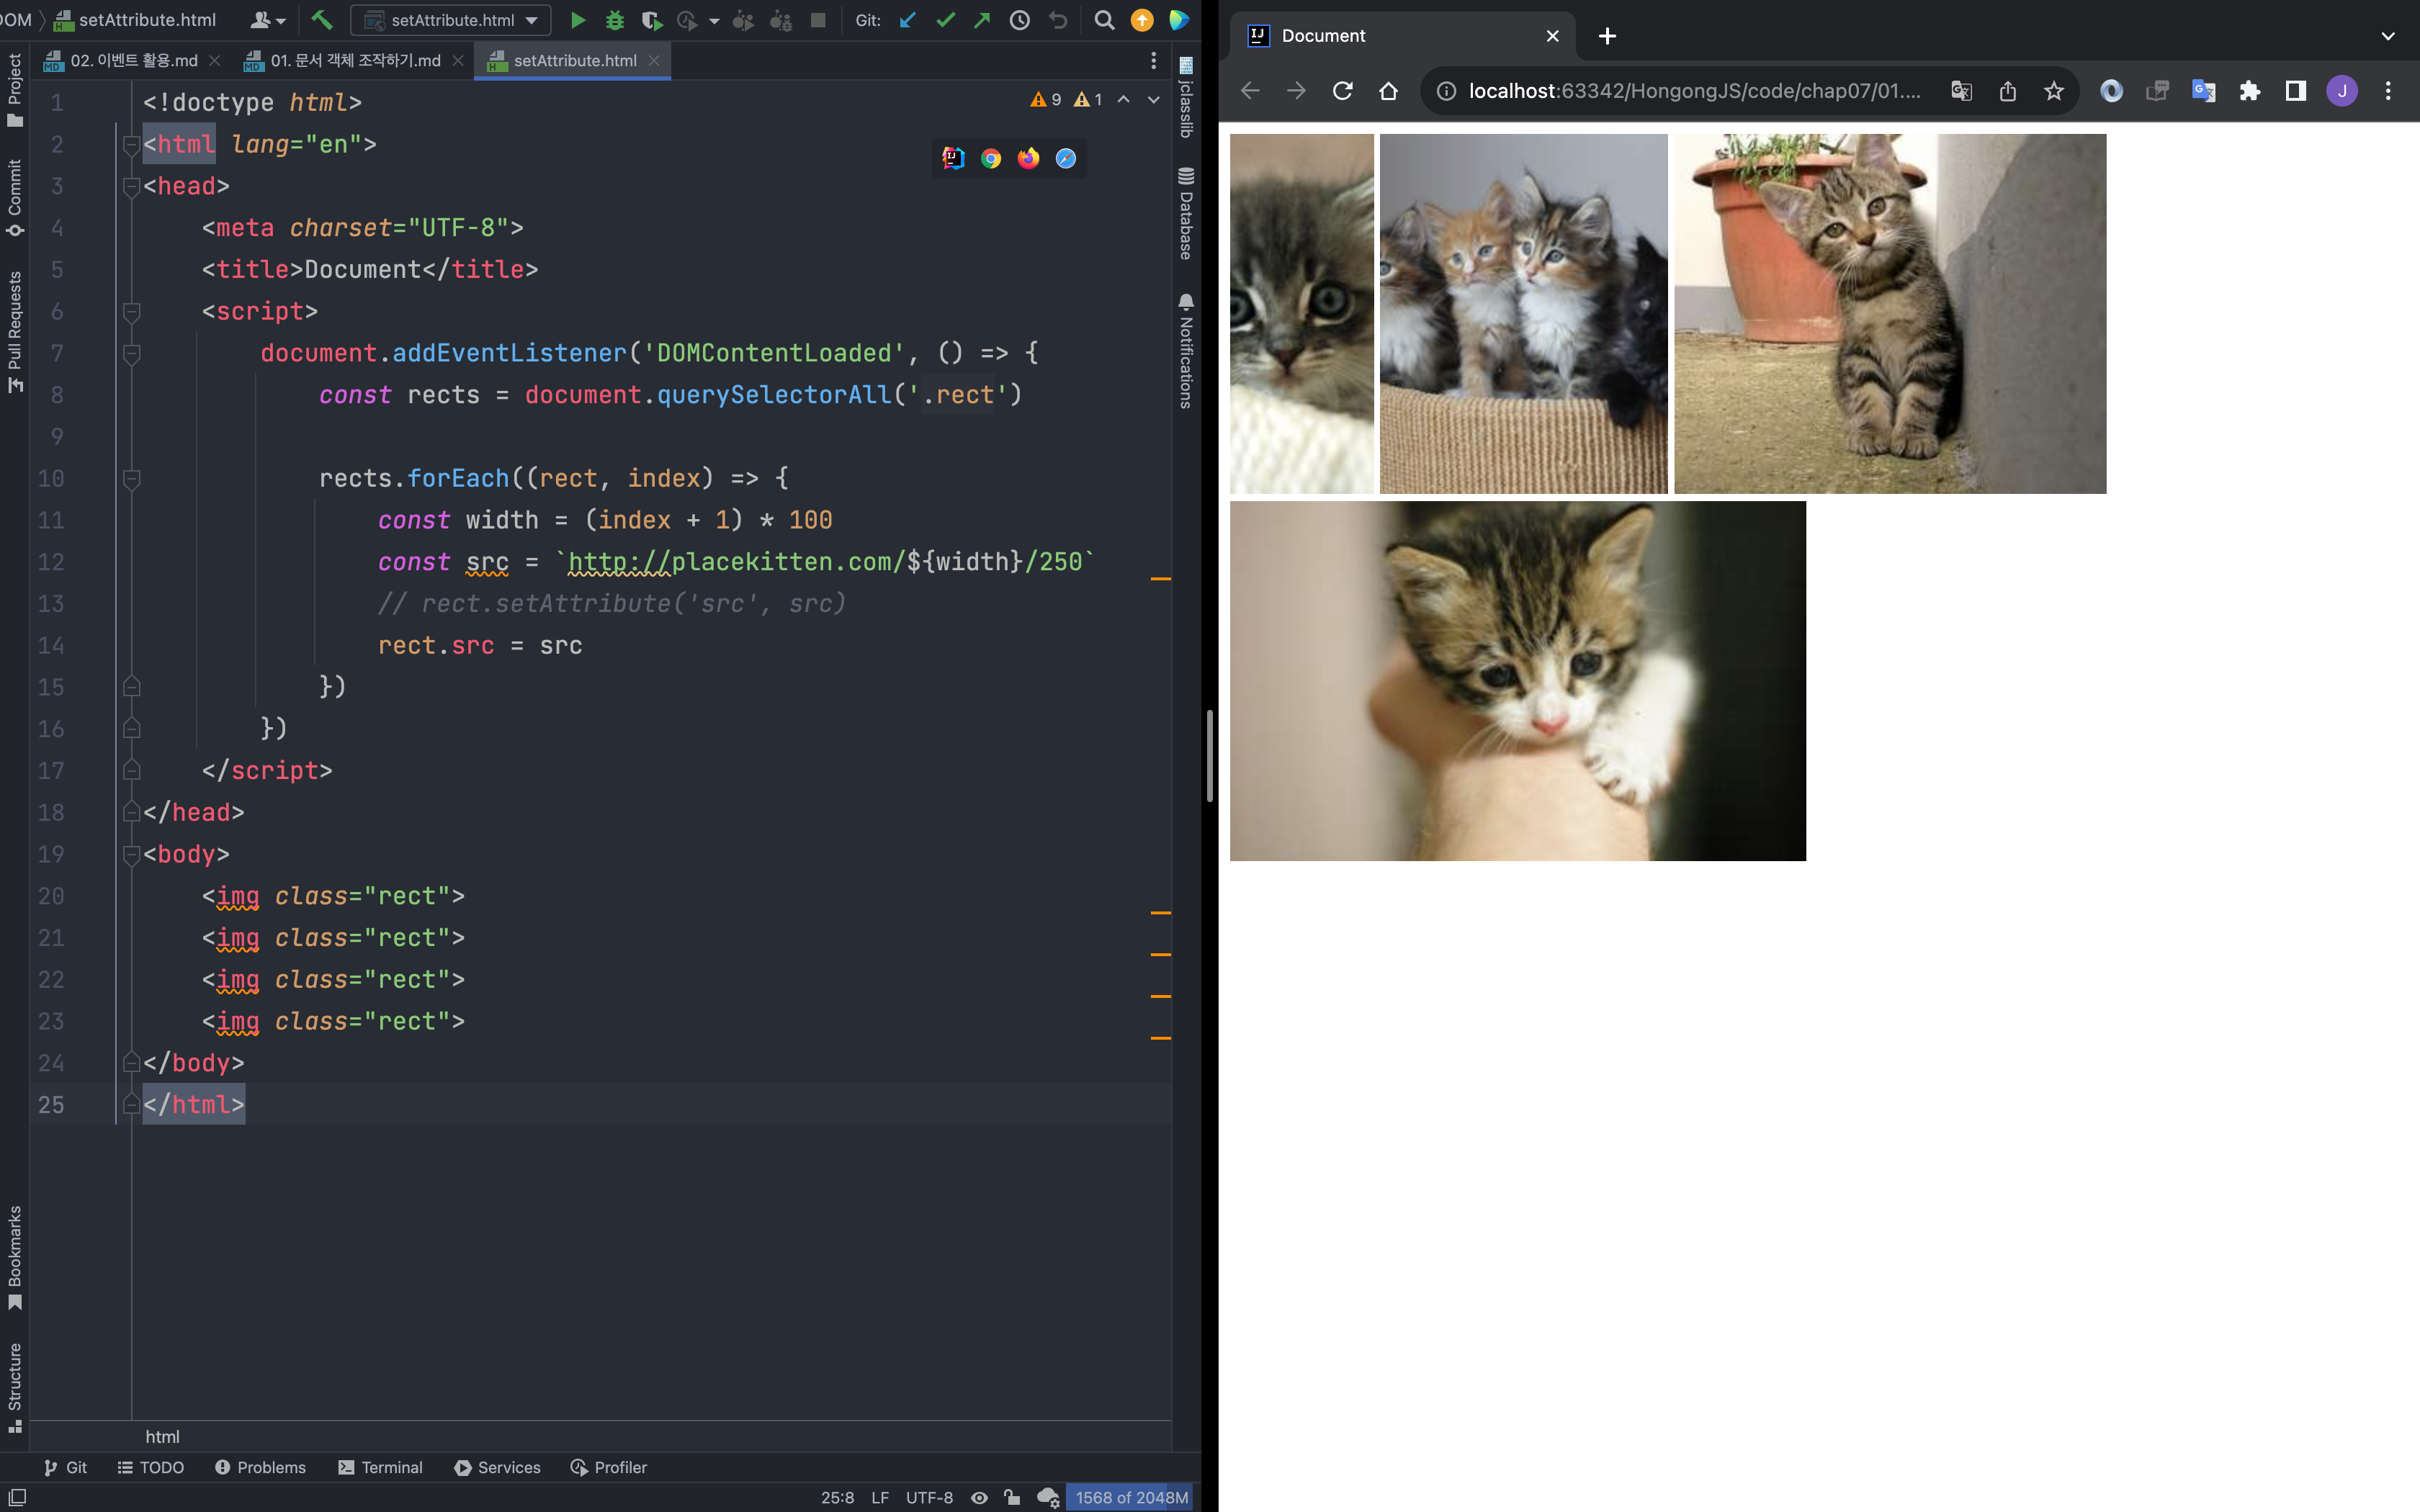
<!doctype html>
<html lang="en">
<head>
    <meta charset="UTF-8">
    <title>Document</title>
    <script>
        document.addEventListener('DOMContentLoaded', () => {
            const rects = document.querySelectorAll('.rect')

            rects.forEach((rect, index) => {
                const width = (index + 1) * 100
                const src = `http://placekitten.com/${width}/250`
                // rect.setAttribute('src', src)
                rect.src = src
            })
        })
    </script>
</head>
<body>
    <img class="rect">
    <img class="rect">
    <img class="rect">
    <img class="rect">
</body>
</html>
선택 미션
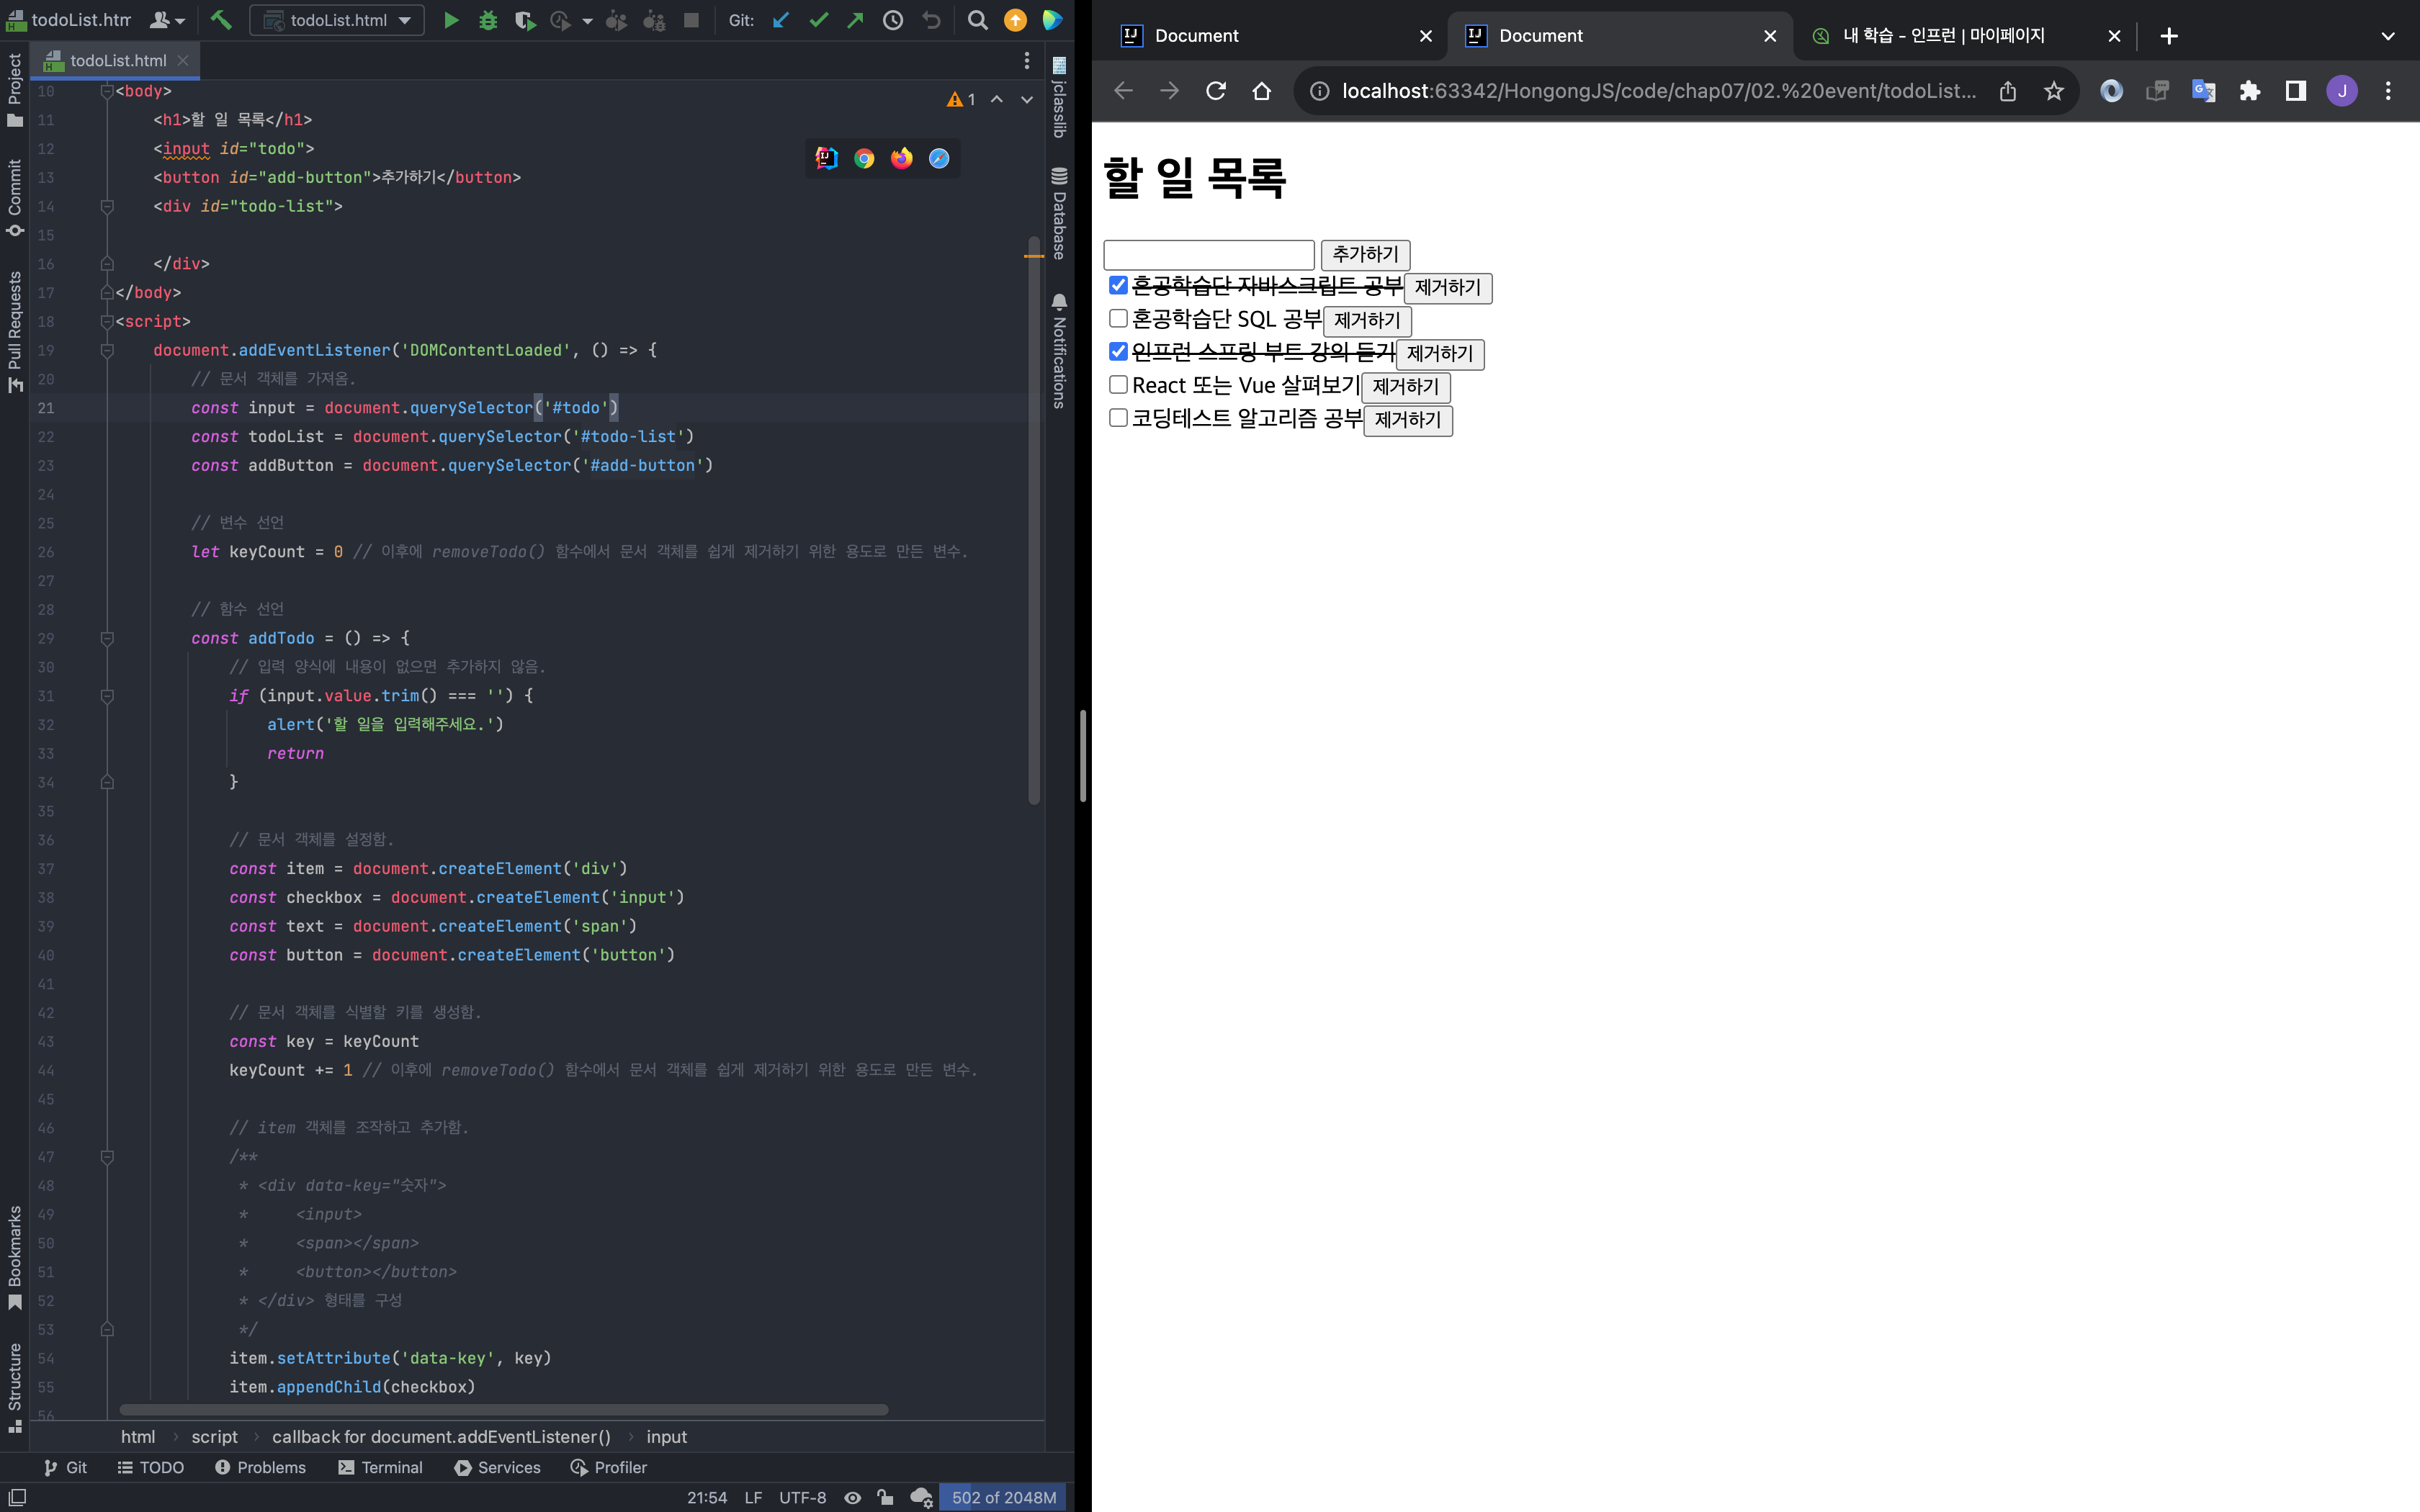
- 할일 목록 (TodoList)
<!doctype html>
<html lang="en">
<head>
<meta charset="UTF-8">
<meta name="viewport"
content="width=device-width, user-scalable=no, initial-scale=1.0, maximum-scale=1.0, minimum-scale=1.0">
<meta http-equiv="X-UA-Compatible" content="ie=edge">
<title>Document</title>
</head>
<body>
<h1>할 일 목록</h1>
<input id="todo">
<button id="add-button">추가하기</button>
<div id="todo-list">
</div>
</body>
<script>
document.addEventListener('DOMContentLoaded', () => {
// 문서 객체를 가져옴.
const input = document.querySelector('#todo')
const todoList = document.querySelector('#todo-list')
const addButton = document.querySelector('#add-button')
// 변수 선언
let keyCount = 0 // 이후에 removeTodo() 함수에서 문서 객체를 쉽게 제거하기 위한 용도로 만든 변수.
// 함수 선언
const addTodo = () => {
// 입력 양식에 내용이 없으면 추가하지 않음.
if (input.value.trim() === '') {
alert('할 일을 입력해주세요.')
return
}
// 문서 객체를 설정함.
const item = document.createElement('div')
const checkbox = document.createElement('input')
const text = document.createElement('span')
const button = document.createElement('button')
// 문서 객체를 식별할 키를 생성함.
const key = keyCount
keyCount += 1 // 이후에 removeTodo() 함수에서 문서 객체를 쉽게 제거하기 위한 용도로 만든 변수.
// item 객체를 조작하고 추가함.
/**
* <div data-key="숫자">
* <input>
* <span></span>
* <button></button>
* </div> 형태를 구성
*/
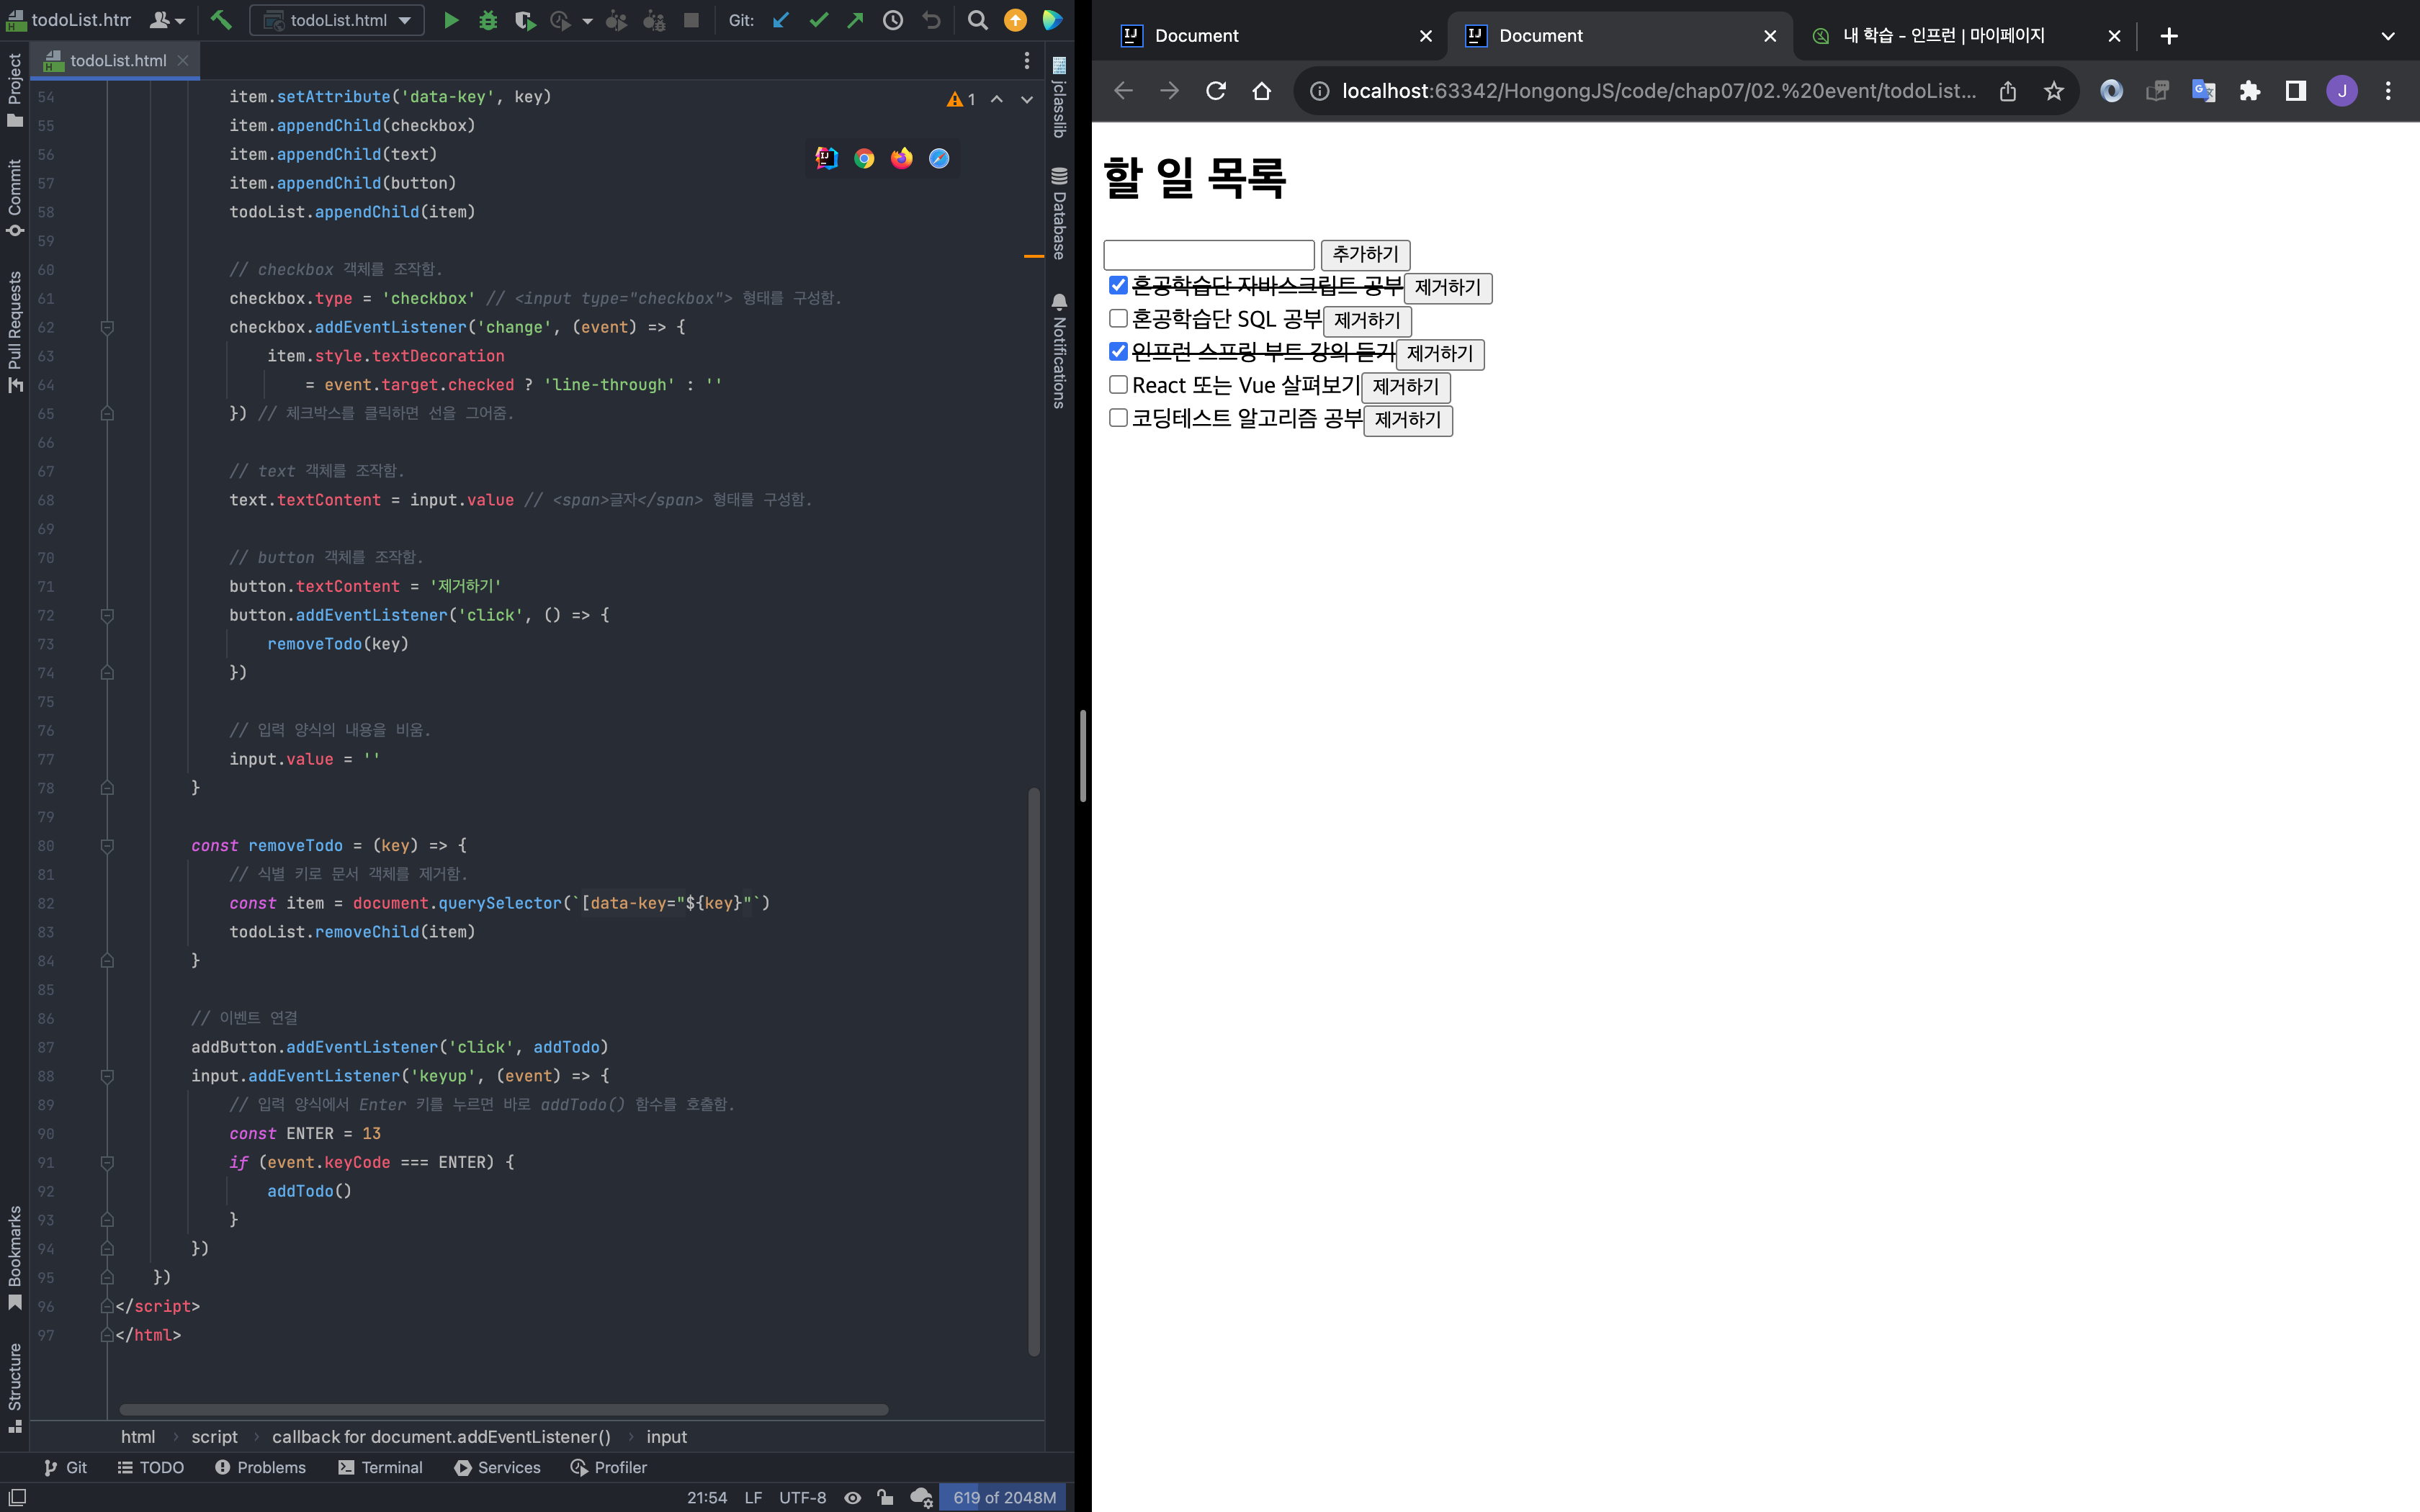
item.setAttribute('data-key', key)
item.appendChild(checkbox)
item.appendChild(text)
item.appendChild(button)
todoList.appendChild(item)
// checkbox 객체를 조작함.
checkbox.type = 'checkbox' // <input type="checkbox"> 형태를 구성함.
checkbox.addEventListener('change', (event) => {
item.style.textDecoration
= event.target.checked ? 'line-through' : ''
}) // 체크박스를 클릭하면 선을 그어줌.
// text 객체를 조작함.
text.textContent = input.value // <span>글자</span> 형태를 구성함.
// button 객체를 조작함.
button.textContent = '제거하기'
button.addEventListener('click', () => {
removeTodo(key)
})
// 입력 양식의 내용을 비움.
input.value = ''
}
const removeTodo = (key) => {
// 식별 키로 문서 객체를 제거함.
const item = document.querySelector(`[data-key="${key}"`)
todoList.removeChild(item)
}
// 이벤트 연결
addButton.addEventListener('click', addTodo)
input.addEventListener('keyup', (event) => {
// 입력 양식에서 Enter 키를 누르면 바로 addTodo() 함수를 호출함.
const ENTER = 13
if (event.keyCode === ENTER) {
addTodo()
}
})
})
</script>
</html>
backend studying
좋은 글 감사합니다. 자주 방문할게요 :)