tensor
pytorch의 tensor는 numpy의 ndarry와 비슷한 구조를 가진다. 실제로 numpy와 tensor간의 변환이 가능하며 둘이 메모리를 공유하기 때문에 어느 한쪽을 수정하면 같이 변하는 특징이 있으며 GPU에서 실행할 수 있다는 특징이 있다.
tensor 생성
- tensor
import torch

input = [[1, 2],[3, 4]]
input_data = torch.tensor(input)

print(input_data)
- random or constant
import torch

print('random 생성')
print(torch.rand(2,2))

print('정규분포를 따르는 tensor')
print(torch.randn(2,2))

print('0 tensor')
print(torch.zeros(2,2))

print('1 tensor')
print(torch.ones(2,2))
tensor 데이터타입 설정
import torch

input = [[1, 2],[3, 4]]
## 32bit
input_data = torch.tensor(input, dtype=torch.float)
print(input_data)

input_data = torch.tensor(input, dtype=torch.double)
print(input_data)

input_data = torch.tensor(input, dtype=torch.long)
print(input_data)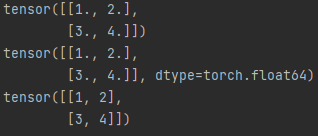
다른 tensor로부터 생성
import torch

x = torch.rand(2,2)
print(f'x : {x}\n')

y = torch.ones_like(x)
print(f'y : {y}\n')

z = torch.zeros_like(y)
print(f'z : {z}\n')

t = torch.rand_like(z)
print(f't : {t}')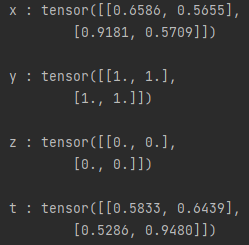
tensor의 크기
import torch

x = torch.rand(2,6)
print(x,'\n')
print(x.size())
print(x.shape)
operation
- 덧셈(add)
import torch

x = torch.rand(2,6)
y = torch.rand(2,6)

#1
print(f"{x + y}\n")

#2
print(f"{torch.add(x,y)}\n")

#3
print(f"{x.add(y)}\n")

#4 ( 결과를 out으로 내보낼 수 있다. )
result = torch.empty_like(x)
torch.add(x, y, out=result)

print(f"{result}\n")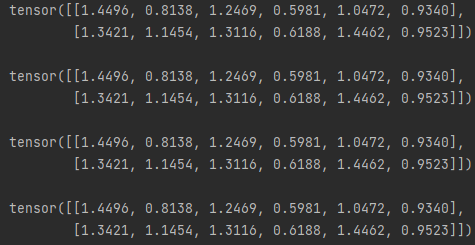
- 뺄셈 (sub)
import torch

x = torch.rand(2,6)
y = torch.rand(2,6)
print(f'{x}\n{y}\n')
#1
print(f"{x - y}\n")

#2
print(f"{torch.sub(x,y)}\n")

#3
print(f"{x.sub(y)}\n")

#4 ( 결과를 out으로 내보낼 수 있다. )
result = torch.empty_like(x)
torch.sub(x, y, out=result)
print(f"{result}\n")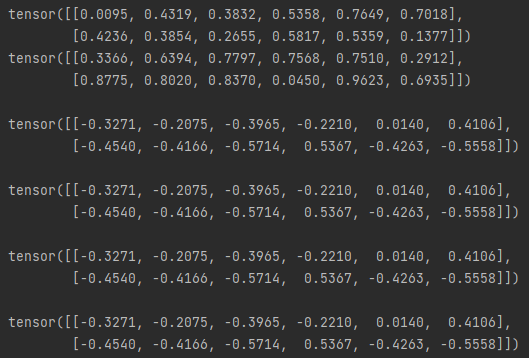
- 나눗셈(div)
import torch

x = torch.rand(2,6)
y = torch.rand(2,6)
print(f'{x}\n{y}\n')
#1
print(f"{x / y}\n")

#2
print(f"{torch.div(x,y)}\n")

#3
print(f"{x.div(y)}\n")

#4 ( 결과를 out으로 내보낼 수 있다. )
result = torch.empty_like(x)
torch.div(x, y, out=result)
print(f"{result}\n")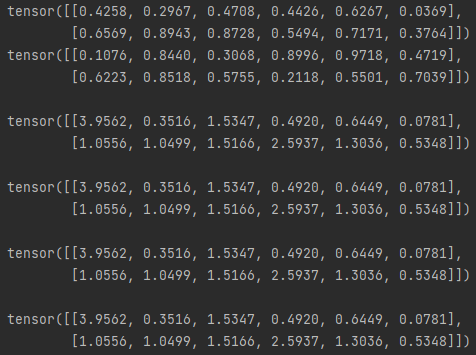
- 곱셈(mul)
import torch

x = torch.rand(2,6)
y = torch.rand(2,6)
print(f'{x}\n{y}\n')
#1
print(f"{x * y}\n")

#2
print(f"{torch.mul(x,y)}\n")

#3
print(f"{x.mul(y)}\n")

#4 ( 결과를 out으로 내보낼 수 있다. )
result = torch.empty_like(x)
torch.mul(x, y, out=result)
print(f"{result}\n")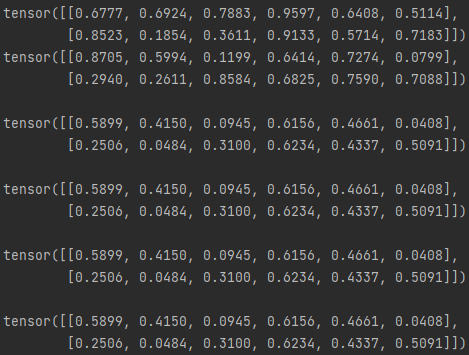
- 행렬곱(mm - matrix multiplication)
import torch

x = torch.rand(2,3)
y = torch.rand(3,2)
print(f'{x}\n{y}\n')
#1
print(f"{torch.mm(x,y)}\n")

#2
print(f"{torch.matmul(y)}\n")

#3 ( 결과를 out으로 내보낼 수 있다. )
result = torch.empty(2,2)
torch.mm(x, y, out=result)
print(f"{result}\n")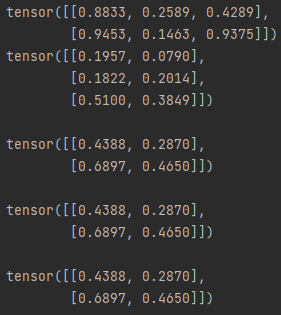
- tensor 집계 ( aggregate )
import torch

x = torch.rand(2,2)
print(f"x : {x}\n")

print(x.sum())

print(f"axis=0 : {x.sum(axis=0)}")
print(f"axis=1 : {x.sum(axis=1)}")

print(f"선두에 있는 차원부터 계산 : {x.sum(axis=(0, 1))}")
print(f"item()으로 python 숫자로 변환 : {x.sum().item()}")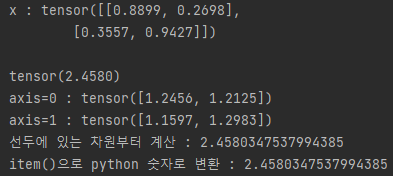
in-place (바꿔치기)
x.add_()와 같이 연산결과를 피연산자에 저장한다. _를 사용하는 것에 주의한다.
import torch


x = torch.rand(2,2)
print(x)

x.add_(2)
print(x)

x.div_(2)
print(x)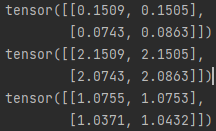
tensor manipulations
tensor 인덱싱 ( numpy를 다루는것과 같다. )
import torch

x = torch.randn(2,2)

print(x)

print('첫번째 행 : ',x[0])
print('첫번째 열 : ',x[:,0])
print('첫번째 열 : ',x[...,0])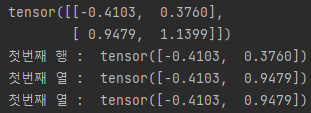
view
numpy에서의 reshape의 기능, -1로 자동 조정기능도 똑같이 존재한다.
import torch

x = torch.randn(2,2)
print(f"x\n{x}\nx size\n{x.shape}\n")

y = x.view(4)
print(f"y\n{y}\ny size\n{y.shape}\n")

z = y.view(2,-1)

print(f"z\n{z}\nz size\n{z.shape}")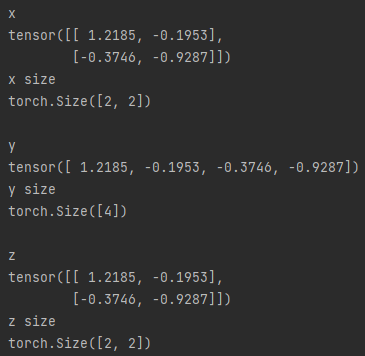
차원 다루기
- 차원축소 ( squeeze )
import torch

x = torch.randn(3,2,1,3)
print(x.shape)

y = x.squeeze()
print(y.shape)
차원의 크기가 1인 부분을 축소시켜준다.
- 차원증가,생성 ( unsqueeze )
import torch

z = torch.rand(2,2)
print(z)

y = z.unsqueeze(dim=1)
print(y.shape)

x = z.unsqueeze(dim=0)
print(x.shape)
-
tensor간의 결합
-
stack
import torch

x = torch.ones(2,2)
y = torch.zeros(2,2)
z = torch.rand(2,2)

result = torch.stack([x, y, z])
print(result)
print(result.shape)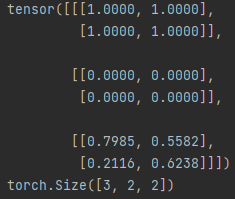
- cat (stack과 유사하지만 쌓을 차원이 존재해야함)
    import torch

    x = torch.ones(2,2)
    y = torch.zeros(2,2)

    result1 = torch.stack([x, y])
    result2 = torch.cat([x,y])

    print(result1.shape)
    print(result2.shape)
stack과 같은 결과를 보여주기 위해선 차원을 증가하고 수행해야한다.
    import torch

    x = torch.ones(2,2)
    y = torch.zeros(2,2)

    x = x.unsqueeze(dim=0)
    y = y.unsquuuze(dim=0)

    result = torch.cat([x, y], dim=0)
    print('cat : ', result.shape)
tensor의 분리
- chunk ( chunk의 숫자는 텐서를 몇개로 나눌 것인가? )
import torch

x = torch.rand(2,6)
print(x)

y,z = torch.chunk(x, 2, dim=1)
print(y)
print(z)
- split ( split의 숫자는 분리할 텐서 하나의 크기가 몇이냐 ? )
   import torch

   x = =torch.rand(2,6)

   y,z = torch.split(x, 3, dim=1)
   print(y)
   print(z)
torch <-> numpy
tensor가 cpu상에 있다면, numpy와 메모리를 공유하기 때문에 한쪽이 변하면 다른쪽도 변한다.
numpy()
import torch
import numpy as np

x = torch.ones(2,2)
y = x.numpy()
print(x)
print(y)

x.add_(1)
print(x)
print(y)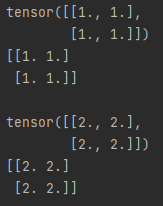
from_numpy()
import torch
import numpy as np

x = np.ones([2, 2])
y = torch.from_numpy(x)
print(x)
print(y)

np.add(x, 1, out=x)
print(x)
print(y)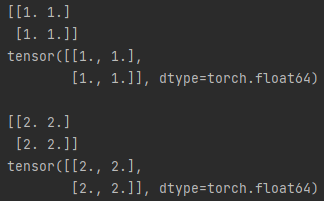
CUDA tensor
.to
.to 메소드를 사용해 cpu,gpu등 장치로 옮길 수 있다.
import torch

device = torch.device("cuda" if torch.cuda.is_available() else "cpu")
print(device)

x = torch.rand(1)
y = x.to(device)
print(y.device)

z = torch.rand(3)
print(z.to("cpu",dtype=torch.double))
torch neural network
| 대표적인 구성요소 | 설명 |
|---|---|
| torch | 텐서를 생성 |
| torch.autograd | 자동미분을 제공하는 라이브러리 |
| torch.nn | 신경망 생성 |
| torch.multiprocessing | 병렬처리 기능 제공 라이브러리 |
| torch.utils | 데이터 조작 등 다양한 유틸리티 제공 |
| torch.onnx | Open Neural Network Exchange, 다른 프레임워크간 모델 공유 |
AUTOGRAD
신경망 학습시, 역전파(backpropagarion)를 통해 매개변수(가중치)는 손실함수의 변화도(gradient)에 따라 조정된다. 변화도를 계산하기 위해 pytorch에는 자동미분엔진이 내장되어 있다.
-
data : tensor형태의 데이터
-
grad : data가 거쳐온 layer에 대한 미분값 저장
-
grad_fn : 미분값을 계산한 함수에 대한 정보 저장
-
requires_grad : True설정시 연산을 추적할 수 있음
-
.backward() : 자동으로 gradient를 계산하며 .grad에 저장된다.
-
.detach() : 연산기록으로부터 분리
-
with torch.no_grad(): : gradient를 업데이트 하지 않는다. 평가할때 사용한다.
-
Function클래스 : Autograd 구현에 중요한 클래스
import torch

x = torch.zeros(2, 2, requires_grad=True)
print(x)

y = x + 2
print(y)

z = y * 3
print(z)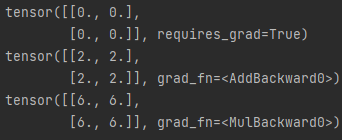
import torch

x = torch.zeros(2,2)
print(x.requires_grad)

#in-place방식
x.requires_grad_(True)
print(x.requires_grad)
- out이 스칼라일 때
import torch

data = torch.ones(2, 2, requires_grad = True)
w = torch.randn(2, 3)
b = torch.randn(3)

z = torch.mm(data, w) + b
out = z.sum()
print(out)
print(data.grad)

out.backward()
print(data.grad)- out이 벡터일 때
import torch

data = torch.ones(2, 2, requires_grad=True)
w = torch.randn(2, 3)
b = torch.randn(3)

z = torch.mm(data, w) + b
out = torch.sum(z,axis=0)
print(out)

#스칼라 값이 아니면 오류가 나는데, 해결방법으로 벡터를 지정할 수 있다.
v = torch.tensor([0.1,0.5,0.01])
out.backward(v)

print(data.grad)
- with torch.no_grad():
gradient의 업데이트를 하지 않는다.
import torch

data = torch.ones(2, 2, requires_grad=True)

print((data + 1).requires_grad)
with torch.no_grad():
    print((data + 1).requires_grad)
- detach()
연산기록으로 분리하여 내용물은 같지만, require_grad가 다른 tensor
import torch

data = torch.ones(2, 2, requires_grad=True)
print(data.requires_grad)
x = data.detach()
print(x.requires_grad)

print(data.eq(x).all())
nn & nn.funcional
두 패키지가 제공하는 기능은 비슷하지만 사용하는 방법에 차이가 있다.
nn패키지는 가중치(weight), 편향(bias) 값들이 내부에서 자동 생성되는 layer,
따라서 직접 선언해주지 않는다.
nn.functional은 weight나 bias를 직접 선언하여 외부에서 만든 값을 사용한다.
nn이 제공하는 기능
- Parameters
- Containers
- Conv Layers
- Pooling Layers
- Padding Layers
- Non-linear Activation
- Normalization Layers
- Recuurent Layers
- Linear Layers
- Dropout Layers
- Sparse Layers
- Distance Functions
- Loss
- ...
nn.functional이 제공하는 기능
- Conv functions
- Pooling functions
- None-linear activation functions
- Normalization functions
- Linear functions
- Dropout functions
- Sparse functions
- Distance functions
- Loss functions
- ...
Convolution layers로 차이점 알아보기
nn 패키지
import torch
import torch.nn

##layer.weight로 값을 확인할 수 있으며 실행때마다 달라진다.
layer1 = nn.Conv2d(in_channels=3, out_channels=10, kernel_size=3, stride=2, padding=0, dilation=1)
layer2 = nn.Conv2d(in_channels=3, out_channels=10, kernel_size(3,5), stride(2,1), padding=(2,1))

input = torch.randn((100,3,28,28))
output1 = layer1(input)
output2 = layer2(input)

print(output1.size())
print(output2.size())
nn.functionals
import torch
import torch.nn.functional as F


filter_ = torch.randn(10,3,5,5)
input = torch.randn((100,3,28,28))

conv = F.conv2d(input,filter_,padding=1)
print(conv.shape)
dataset과 dataloader
torch에는 데이터를 처리하기 위해 torch.utils.data.DataLoder와 torch.utils.data.Dataset의 두가지 요소를 제공한다. dataset은 미리 준비된 데이터셋을 불러 올 수 있으며, 가지고 있는 데이터와 라벨을 저장하고, dataloader는 dataset을 데이터에 쉽게 접근할 수 있도록 iterable(반복가능객체)로 만든다.
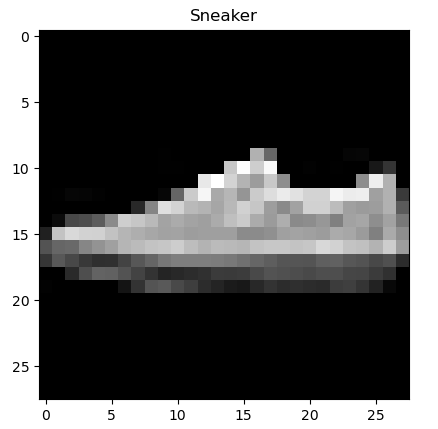
fashion-MNIST로 연습
- root는 데이터가 저장되는 경로
- train으로 학습,테스트 데이터셋 선택
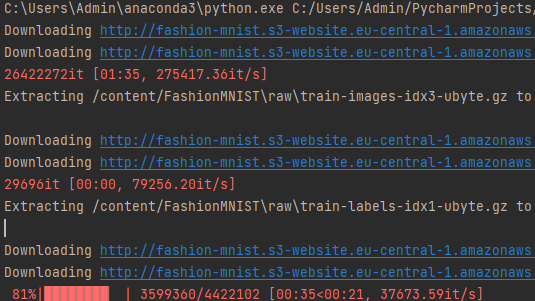
- download로 root에 데이터가 없으면 다운로드 진행
- transform으로 전처리를 진행할 인자를 제공한다.
from torchvision import datasets
import torchvision.transforms as transforms

# dataloader의 인자로 들어갈 transform을 미리 정의함
# Compose 를 통해 리스트안에 순서대로 전처리 진행
# 대표적으로, torchvision은 PIL형태로만 입력을 받기 때문에, tensor로 변환해야함(totensor)
transform = transforms.Compose([transforms.ToTensor(),
                                transforms.Normalize(mean=(0.5,),std=(0.5,))])
train_data = datasets.FashionMNIST(
    root="/content/",
    train=True,
    download=True,
    transform=transform
)

test_data = datasets.FashionMNIST(
    root="/content/",
    train=False,
    download=True,
    transform=transform
)
from torch.utils.data import DataLoader

#데이터를 불러올 때 batch, 셔플여부, num_workers(데이터 불러올때 몇개의 코어로 할것인지)
train_loader = DataLoader(train_data, batch_size=8, shuffle=True )
test_loader = DataLoader(test_data, batch_size=8, shuffle=False)

#필요에 따라 데이터셋을 배치사이즈만큼 반복할 수 있다.
data_iter = iter(train_loader)
images, labels = data_iter.next()
print(images.shape, labels.shape)
import matplotlib.pyplot as plt
import torch

torch_image = torch.squeeze(images[0])
print(torch.shape)

image = torch_image.numpy()
print(image.shape)

label = labels[0].numpy()
print(label)

labels_map = {
    0: "T-shirt",
    1: "Trouser",
    2: "Pullover",
    3: "Dress",
    4: "Coat",
    5: "Sandal",
    6: "Shirt",
    7: "Sneaker",
    8: "Bag",
    9: "Ankle Boot"
}

plt.title(labels_map[int(label)])
plt.imshow(image,"gray")
plt.show()
신경망 생성
torch.nn패키지를 사용하여 신경망을 생성하는데, nn.Module을 상속받아 해당 모듈의 계층들과 output을 반환하는 forward메소드를 포함한다.
import torch.nn as nn

class MyNet(nn.Module):
    def __init__(self):
        super(MyNet,self).__init__()
CNN연습
import torch
import torch.nn as nn


#cuda를 사용할 수 있는지 확인
device = "cuda" if torch.cuda.is_available() else "cpu"
print(f"device is {device}")

#conv로 연습
class MyNet(nn.Module):
    def __init__(self):
        super(MyNet,self).__init__()

        #input = (1,1,28,28)
        self.conv1 = torch.nn.Sequential(
            nn.Conv2d(in_channels=1,out_channels=10, kernel_size=3, stride=1),
            torch.nn.ReLU(),
            torch.nn.MaxPool2d(kernel_size=2, stride=2))

        self.conv2 = torch.nn.Sequential(
            nn.Conv2d(in_channels=10,out_channels=15,kernel_size=3,stride=1),
            torch.nn.ReLU(),
            torch.nn.MaxPool2d(kernel_size=2,stride=2))

        self.fc1 = nn.Linear(15 * 7 * 7, out_features=100,bias=True)
        torch.nn.init.xavier_uniform_(self.fc1.weight)
        self.fc2 = nn.Linear(100, out_features=64,bias=True)
        torch.nn.init.xavier_uniform_(self.fc2.weight)
        self.fc3 = nn.Linear(64, out_features=10,bias=True)
        torch.nn.init.xavier_uniform_(self.fc1.weight)


    def forward(self,x):

        out = self.conv1(x)
        out = self.conv2(out)
        #첫번째 차원은 그대로두고 나머지를 알아서
        out = out.view(out.size(0),-1)
        out = self.fc1(out)
        out = self.fc2(out)
        out = self.fc3(out)

        return out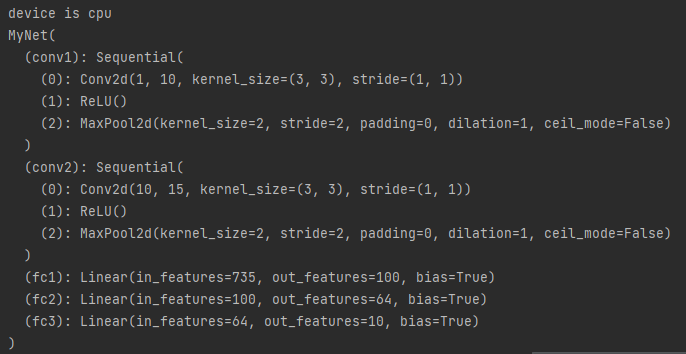
net = MyNet().to(device)


batch_size = 100
epoch_num = 15
learning_rate = 0.005

loss_f = torch.nn.CrossEntropyLoss().to(device)
optimizer = torch.optim.Adam(net.parameters(),lr=0.05)

data = torchvision.datasets(root='/m_data/',
                  train=True,
                  transfrom= transforms.ToTensor(),
                  download=True)

data_loader = DataLoader(dataset=data,
                         batch_size=batch_size,
                         shuffle=True,
                         )

for epoch in range(epoch_num):
    avg_cost = 0

    for x,y in data_loader:
        x = x.to(device)
        y = y.to(device)

        #모델 매개변수의 변화도를 재설정한다. 기본적으로 변화도는 더해지기 때문에
        #중복계산을 막기위해 0으로 설정
        optimizer.zero_grad()
        hypo = net(x)
        cost = loss_f(hypo,y)
        cost.backward()
        optimizer.step()

        avg_cost += cost / total_batch