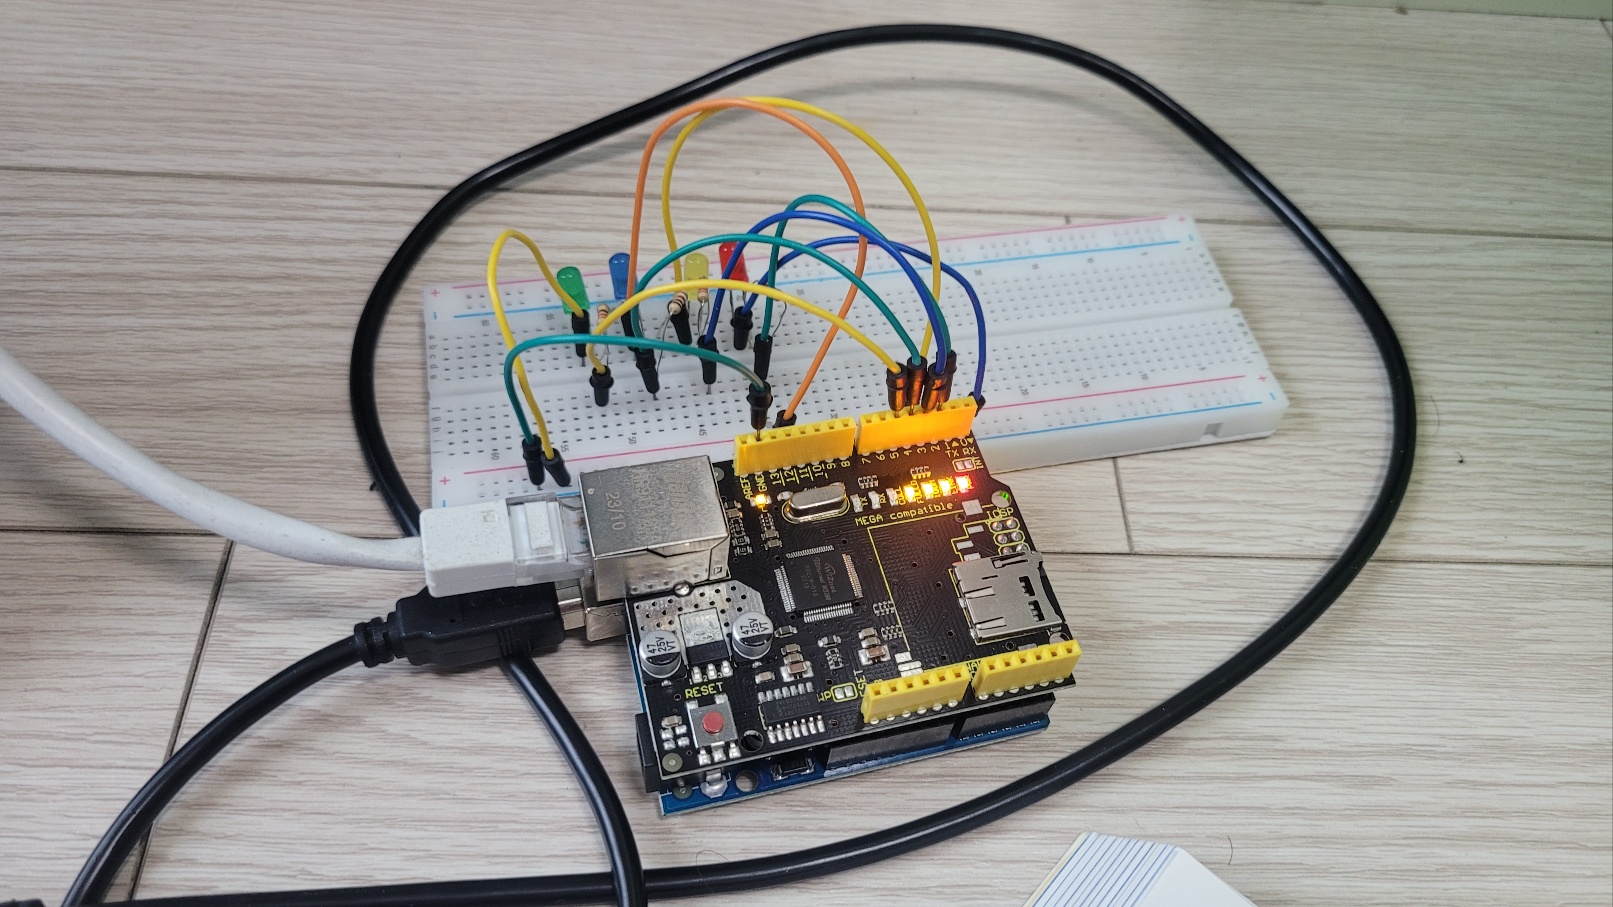
이 예제는 아두이노 핀 2~5에 LED를 연결하여 제어한다.
Arduino를 서버로 사용하면 특정 URL로 이동하여 간단히 제어할 수 있다.
Ethernet Shield는 자체적으로 디지털 핀 10,11,12 및 13을 사용하므로
이들은 그대로 두고 다른 용도로는 사용하지 않는 것이 좋다.
회로설계
스케치 12-1 웹서버를 이용한 LED 제어 실험
#include <SPI.h>
#include <Ethernet.h>
boolean reading = false;
byte mac[] = { 0xDE, 0xAD, 0xBE, 0xEF, 0xFE, 0xED };
IPAddress ip(192,168,219,134);
EthernetServer server(80); //port 80
///////////////////////////////////////////////////
void setup(){
Serial.begin(9600);
//Pins 10,11,12 & 13 are used by the ethernet shield
pinMode(2, OUTPUT);
pinMode(3, OUTPUT);
pinMode(4, OUTPUT);
pinMode(5, OUTPUT);
// Open serial communications and wait for port to open:
while (!Serial) {
; // wait for serial port to connect. Needed for native USB port only
}
Serial.println("Ethernet WebServer Example");
// start the Ethernet connection and the server:
Ethernet.begin(mac, ip);
// Check for Ethernet hardware present
if (Ethernet.hardwareStatus() == EthernetNoHardware) {
Serial.println("Ethernet shield was not found. ");
while (true) {
delay(1); // do nothing, no point running without Ethernet hardware
}
}
if (Ethernet.linkStatus() == LinkOFF) {
Serial.println("Ethernet cable is not connected.");
}
// start the server
server.begin();
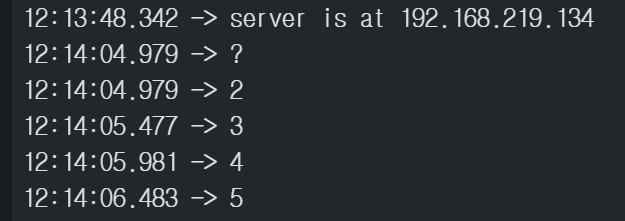
Serial.print("server is at ");
Serial.println(Ethernet.localIP());
}
void loop(){
// listen for incoming clients, and process qequest.
checkForClient();
}
void checkForClient(){
EthernetClient client = server.available();
if (client) {
// an http request ends with a blank line
boolean currentLineIsBlank = true;
boolean sentHeader = false;
while (client.connected()) {
if (client.available()) {
if(!sentHeader){
// send a standard http response header
client.println("HTTP/1.1 200 OK");
client.println("Content-Type: text/html");
client.println();
sentHeader = true;
}
char c = client.read();
if(reading && c == ' ') reading = false;
if(c == '?') reading = true; //found the ?, begin reading the info
if(reading){
Serial.println(c);
switch (c) {
case '2':
//add code here to trigger on 2
triggerPin(2, client);
break;
case '3':
//add code here to trigger on 3
triggerPin(3, client);
break;
case '4':
//add code here to trigger on 4
triggerPin(4, client);
break;
case '5':
//add code here to trigger on 5
triggerPin(5, client);
break;
}
}
if (c == '\n' && currentLineIsBlank) break;
if (c == '\n') {
currentLineIsBlank = true;
}else if (c != '\r') {
currentLineIsBlank = false;
}
}
}
delay(1); // give the web browser time to receive the data
client.stop(); // close the connection:
}
}
void triggerPin(int pin, EthernetClient client){
//blink a pin – Client needed just for HTML output purposes.
client.print("Turning on pin ");
client.print(pin);
client.print("\n");
digitalWrite(pin, HIGH);
delay(250);
digitalWrite(pin, LOW);
delay(250);
}
스케치 12-1 분석
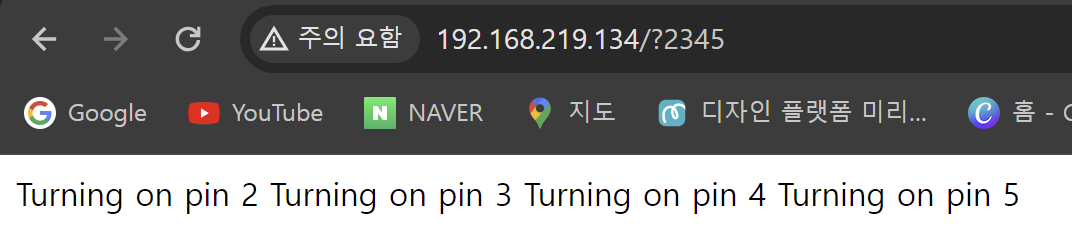
이 코드 역시 중간에 자신의 웹서버 IP 주소를 넣어야하고 프로그램을 업로딩한 후
인터넷 익스플로저 주소창에 자신의 IP 주소에/?2345를 붙여야 한다.
그러면 인터넷 익스플로저 창에는"Turnning on pin"과 함께 입력된 핀 보호가 나타난다. 그리고 아두이노 쉴드에 연결된 LED는 250ms 간격으로 ON 된다.
ON/OFF 간격은delay()함수를 이용하여 사용자가 조절할 수 있다.
스케치 12-1 실행결과

Shine like a star, Just like a star