*플러그인
=> 컴퓨터에 추가 프로그램을 설치하여 특정 기능을 수행할 수 있도록 하는 소프트웨어
=> 필요한 기능을 만들어 다른 사람이 사용할 수 있도록 제작함
=> 플러그인들이 모인 것이 라이브러리
*플러그인에 대하여
=> 반드시 공식문서 참고
=> 지정된 클래스 및 아이디 등 선택자는 변경 불가, 또는 범위가 어느정도인지 인지하고 사용할 것
=> 무분별하게 사용하면 사이트(앱) 최적화 문제 등 사이트(앱)가 무거워지거나 충돌이 일어남
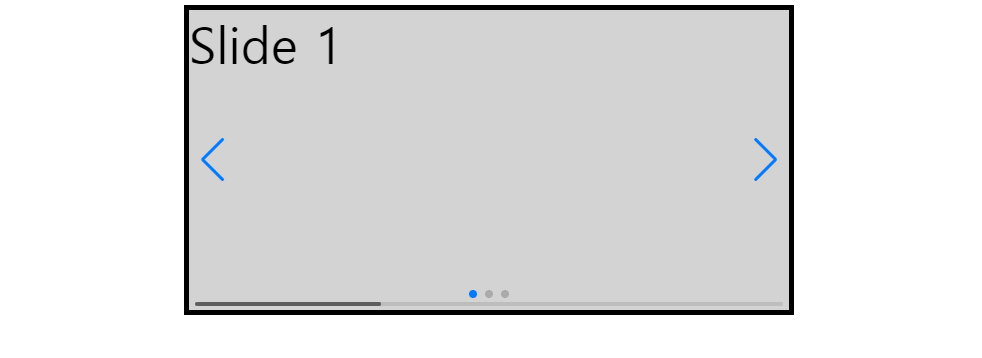
*스와이퍼(swiper)
=> 슬라이드를 간편하게 만들 수 있게 도와줌
=> 스와이퍼 홈페이지에서 공식 문서 참고
=> https://velog.io/@leejpsd/Swiper-옵션-정리 ←스와이퍼 옵션을 잘 정리해주셔서 많은 도움이 되었음!!
전체코드
<!DOCTYPE html>
<html lang="ko">
<head>
    <meta charset="UTF-8">
    <meta name="viewport" content="width=device-width, initial-scale=1.0">
    <title>스와이퍼</title>
    <link
    rel="stylesheet"
    href="https://cdn.jsdelivr.net/npm/swiper@10/swiper-bundle.min.css"
    />

    <style>

        /* .swiper {
        width: 600px;
        height: 300px;
        border: 5px solid black;
        } */

        .wrap {
        width: 600px;
        height: 300px;
        border: 5px solid black;
        }

        .con{
            background-color: lightgray;
            font-size: 50px;
        }

    </style>

    <script src="https://cdn.jsdelivr.net/npm/swiper@10/swiper-bundle.min.js"></script>

</head>
<body>

    <!-- Slider main container -->
    <div class="swiper wrap">
        <!-- Additional required wrapper -->
        <div class="swiper-wrapper">
            <!-- Slides -->
            <div class="swiper-slide con">Slide 1</div>
            <div class="swiper-slide con">Slide 2</div>
            <div class="swiper-slide con">Slide 3</div>
        </div>
        <!-- If we need pagination(쪽매김) -->
        <div class="swiper-pagination"></div>

        <!-- If we need navigation buttons(좌, 우 화살표 버튼)) -->
        <div class="swiper-button-prev"></div>
        <div class="swiper-button-next"></div>

        <!-- If we need scrollbar(스크롤 바) -->
        <div class="swiper-scrollbar"></div>
    </div>

    <script>

        const swiper = new Swiper('.swiper', {
            // Optional parameters
            // direction: 'vertical',   //세로방향
            loop: true, // 반복!! loop를 false로 변경 시, 제일 처음과 마지막의 화살표 색상 옅어짐
            speed: 1000,    //넘어가는 속도
            spaceBetween: 50,   //엘리먼트 사이의 간격

            autoplay:{
                delay: 1000     //자동재생
            },

            // effect: "cards",

            // If we need pagination
            pagination: {
                el: '.swiper-pagination',
            },

            // Navigation arrows
            navigation: {
                nextEl: '.swiper-button-next',
                prevEl: '.swiper-button-prev',
            },

            // And if we need scrollbar
            scrollbar: {
                el: '.swiper-scrollbar',
            },
        });

    </script>

</body>
</html>
=> head 내부에 있는 link태그와 script 위치 확인! 꼭 넣어줘야함..!
*AOS
=> 나타나고 사라지는 효과를 쉽게 구현할 수 있도록 해줌
=> 공식문서 참고

전체코드
<!DOCTYPE html>
<html lang="ko">
  <head>
    <meta charset="UTF-8" />
    <meta name="viewport" content="width=device-width, initial-scale=1.0" />
    <title>aos</title>
    <link href="https://unpkg.com/aos@2.3.1/dist/aos.css" rel="stylesheet" />
    <script src="https://unpkg.com/aos@2.3.1/dist/aos.js"></script>
    <style>
      * {
        margin: 0;
        padding: 0;
        box-sizing: border-box;
      }

      header {
        width: 100%;
        height: 80px;
        background-color: gray;
        border-bottom: 1px solid #eee;
        position: fixed;
        top: 0;
        left: 0;
      }

      section {
        font-size: 50px;
        display: flex;
        justify-content: center;
        align-items: center;
      }

      .section_1 {
        height: 80vh;
        background-color: lightgray;
      }

      .section_2 {
        padding: 200px 20%;
        display: flex;
        justify-content: space-between;
      }

      .con {
        width: 30%;
        height: 450px;
        background-color: lightgray;
      }

      .section_3 {
        height: 500px;
        background-color: lightgray;
      }
    </style>
  </head>
  <body>
    <div class="wrap">
      <header>
        <div class="progress">
          <div class="gage"></div>
        </div>
      </header>

      <section class="section_1">
        <h3>첫 번째 섹션</h3>
      </section>

      <section class="section_2">
        <div class="con" data-aos="fade-up"></div>
        <div class="con" data-aos="flip-left" data-aos-delay="200"></div>
        <div class="con" data-aos="fade-up" data-aos-delay="400"></div>
      </section>

      <section class="section_3">
        <h3>세 번재 섹션</h3>
      </section>
    </div>

    <script>
      AOS.init();
    </script>
  </body>
</html>
*Numberal
=> 천 단위 콤마나 통화 표시 등 숫자 형식을 지정할 때 유용함
=> 공식문서 참고하여 다운로드

전체코드
<!DOCTYPE html>
<html lang="ko">
<head>
    <meta charset="UTF-8">
    <meta name="viewport" content="width=device-width, initial-scale=1.0">
    <title>Numberal</title>
    <script src="https://cdnjs.cloudflare.com/ajax/libs/numeral.js/2.0.6/numeral.min.js"></script>

</head>
<body>

    <script>

        const numberResult = numeral(100000000).format('0,0');
        document.write("조회수" + numberResult + "뷰");

    </script>

</body>
</html>
10분의 정리로 10시간을 아낄 수 있다는 마음으로 글을 작성하고 있습니다💕