Train, Test, Validation Split
각 class 별로 train:test:validation을 0.8:0.1:0,1 비율로 나누었다.
아래 코드를 돌리면 데이터셋이 담긴 garbage 폴더의 이미지 및 annotation text file이 output 폴더 안 test, train, val 폴더로 비율에 맞게 복사된다.
splitfolders.ratio('./garbage/', "./output/", seed=77, ratio=(.8, 0.1, 0.1), group_prefix=2)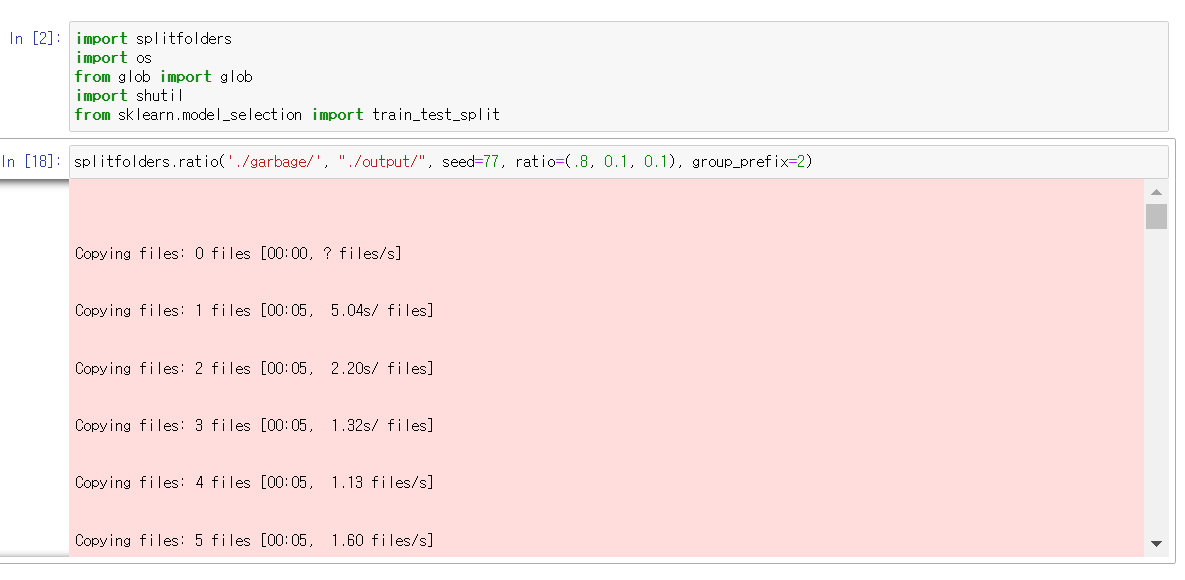
돌린 후 output 폴더 구성은 다음과 같다.
trash_classifier
├─ test
│ ├─ cardboard
│ └─ glass
│ └─ metal
│ └─ paper
│ └─ plastic
│ └─ trash
├─ train
│ ├─ cardboard
│ └─ glass
│ └─ metal
│ └─ paper
│ └─ plastic
│ └─ trash
├─ validation
│ ├─ cardboard
│ └─ glass
│ └─ metal
│ └─ paper
│ └─ plastic
│ └─ trash
test 폴더 안에 class 6개별로 전체 데이터셋의 80%가 들어가 있고, train과 val 폴더 안에는 class 6개별로 전체 데이터셋의 10%씩이 들어가 있다. 모든 폴더 안에는 jpg 파일과 annotation text file이 짝을 이루면서 같이 들어가 있다.
Images, Labels 구분
다음에는 test, train, val 폴더 안에 있는 class 구분을 없애고 단순히 이미지와 annotation text file을 나누는 작업을 진행하였다.
images 파일 안에는 이미지 데이터셋(jpg file)을 넣었고, labels 파일 안에는 annotation text file을 넣었다.
완성된 데이터셋의 구성은 다음과 같다.
trash_classifier
├─ test
│ ├─ images
│ └─ labels
├─ train
│ ├─ images
│ └─ labels
├─ validation
│ ├─ images
│ └─ labels
Google Colab으로 돌릴 준비
이제까지 작업한 전체 yolo 파일을 구글 드라이브로 옮겨보자.
Google Drive에 올려서 mount 시키는 과정은 생략한다.
옮긴 후 trash_classifier(위에서 작업하던 데이터셋 폴더) 아래 추가로 2개의 파일을 생성할 예정이다.
Yaml file
custom_datasets.yaml 이라는 파일 생성 후 아래와 같은 내용으로 적는다.
(path 부분은 trash_classifier(데이터셋 폴더)의 절대경로를 넣어주면 되고, 아래 적힌 주소는 예시임)
train : /content/drive/MyDrive/yolov5/trash_classifier/train
val : /content/drive/MyDrive/yolov5/trash_classifier/val
test : /content/drive/MyDrive/yolov5/trash_classifier/test
nc: 6 #클래스 개수
names: ['cardboard','glass','metal','paper','plastic','trash'] #클래스 이름
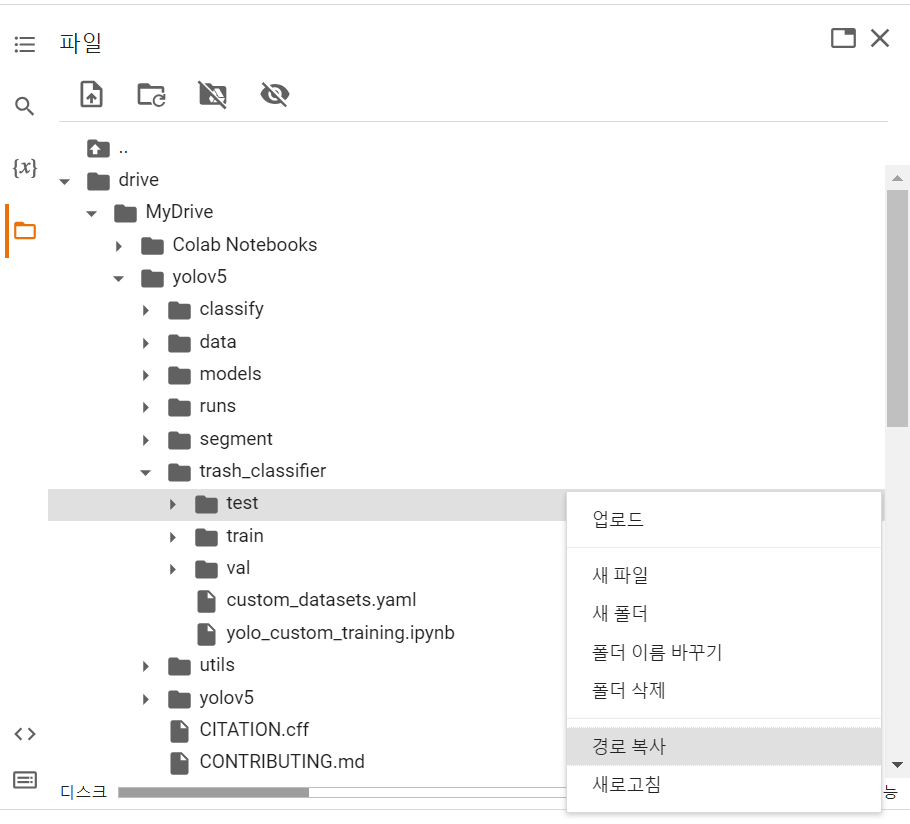
만약 경로가 헷갈린다면 아래와 같이 경로 복사도 가능하다.
모델 학습을 진행하기 위한 ipynb file
실제 모델 학습 전 필요한 명령어들은 아래와 같다.
GPU 사용 설정
Google Colab은 클라우드 컴퓨팅이어서 개인 PC의 영향을 받지 않는다.
이 과정 없이 혼자 학습하다 시간이 너무 오래 걸려서 헤맨 기억이 있는데 이 글을 보는 사람들은 그런 일 없기를 바라면서...
import torch
if torch.cuda.is_available():
device = torch.device("cuda") # 현재 CUDA 장치를 가져옴
print("GPU 메모리 사용 가능")
print("GPU 이름:", torch.cuda.get_device_name(device))
print("현재 GPU 메모리 사용량:", torch.cuda.memory_allocated(device) / (1024 * 1024), "MB")
print("전체 GPU 메모리 크기:", torch.cuda.max_memory_allocated(device) / (1024 * 1024), "MB")
else:
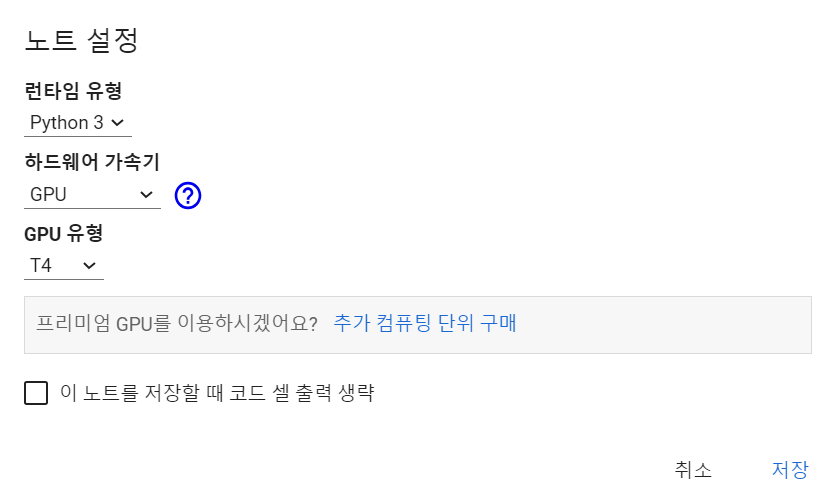
print("GPU 사용 불가능")GPU 사용 불가능이라고 출력되면
수정 > 노트 설정을 아래와 같이 설정을 바꾸면 된다.
yolo 학습 모델이 있는 폴더로 이동
%cd /content/drive/My Drive/yolov5
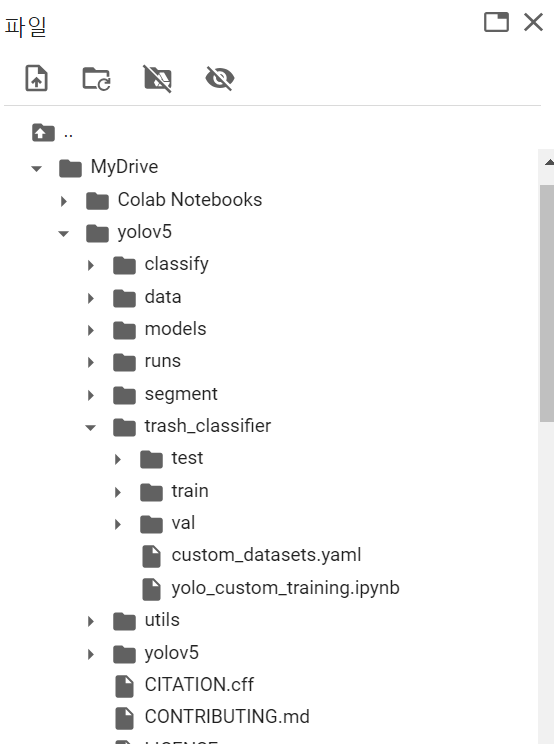
!pwd #현재 경로 확인두 파일을 모두 생성한 후 최종적인 폴더 구성은 다음과 같다.
실제 모델 학습
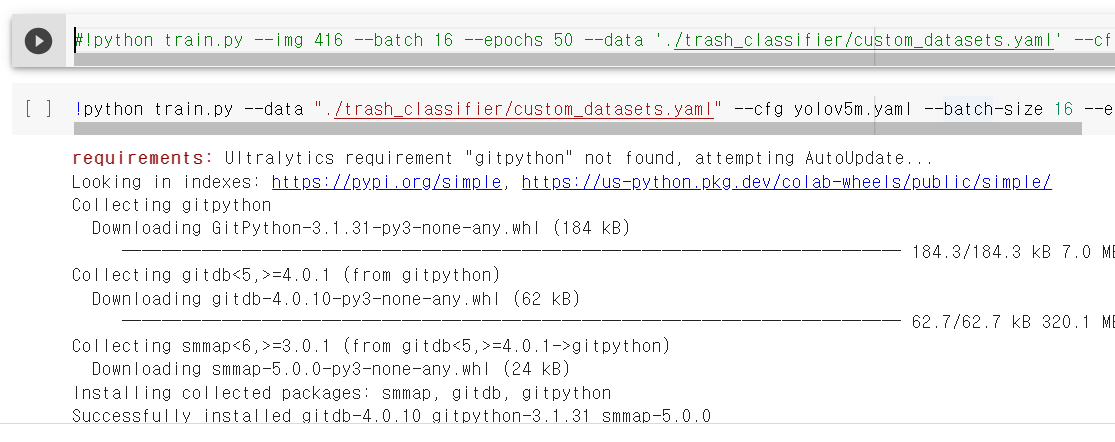
#학습을 시작할 때
!python train.py --img 416 --batch 16 --epochs 50 --data './trash_classifier/custom_datasets.yaml' --cfg ./models/yolov5s.yaml --weights ''

#중단된 학습을 재개할 때
!python train.py --data "./trash_classifier/custom_datasets.yaml" --cfg yolov5m.yaml --batch-size 16 --epochs 100 --resume ./runs/train/exp4/weights/last.pt --optimizer SGD
중단된 학습을 재개할 때 코드 유의사항:
--resume 뒤 경로는 마지막으로 저장된 학습 경로가 어디인지 확인해야 한다.

port 6006 is in use by another program. either identify and stop that program, or start the server with a different port.
위 에러를 만난다면 당황하지 말고 다음과 같이 실행하자.
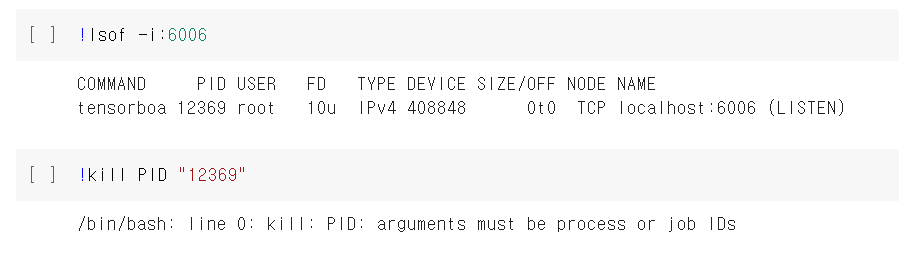
!kill PID 뒤에는 첫 번째 코드 라인을 실행하였을 때 PID로 나오는 숫자를 넣어라.
