
요약
최근에 NFT시장에 대해서 알아보고, 개발하다보니 제너레이티브 아트에 대해서도 자연스럽게 알게되었습니다.
제너레이티브 아트는 간단하게 시스템에 의해서 작품이 만들어지는것을 의미합니다. 여기서 우리는 작품이 만들어질 수 있는 시스템, 환경을 만들어주는 것입니다.
(레이어를 구분해 하나로 겹쳐 이미지를 만드는 제너레이티브 아트도 있지만 제외하겠습니다.)
유명한 제너레이티브 아트
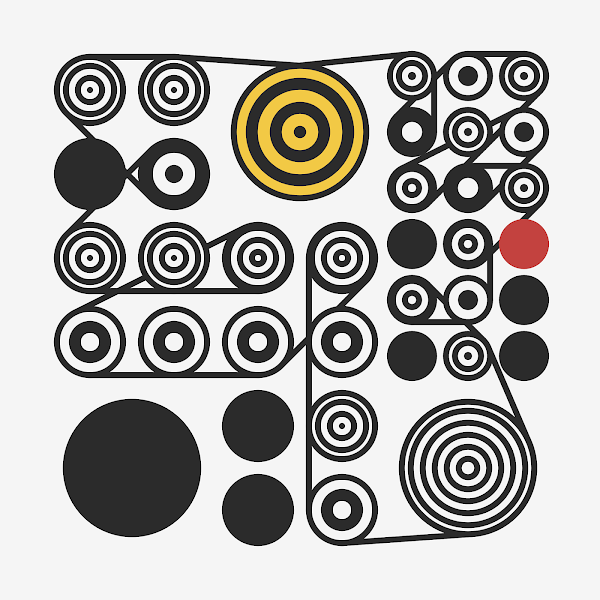
위 작품은 Dmitri Cherniak의 Ringers라는 작품입니다. 마지막 거래 가격으로 2,100ETH에 거래가 되었습니다.
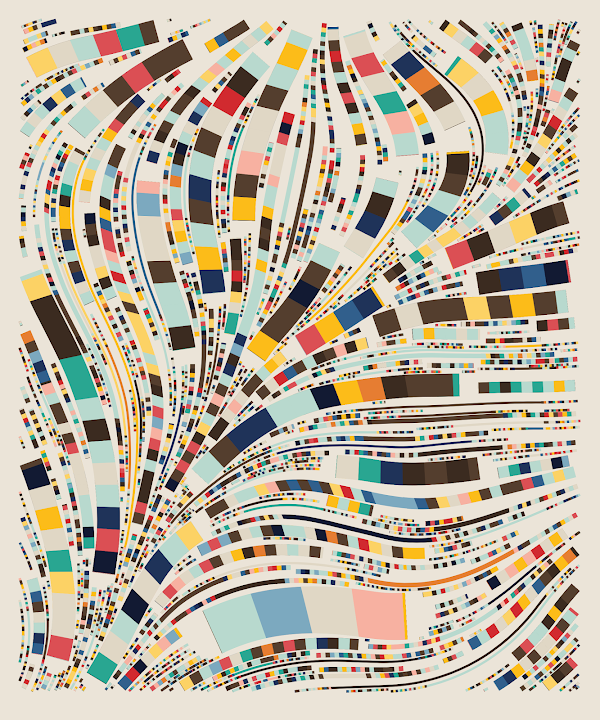
위 작품은 Tyler Hobbs의 Fidenza라는 작품입니다. 마지막 거래 가격으로 1,000ETH에 거래가 되었습니다.
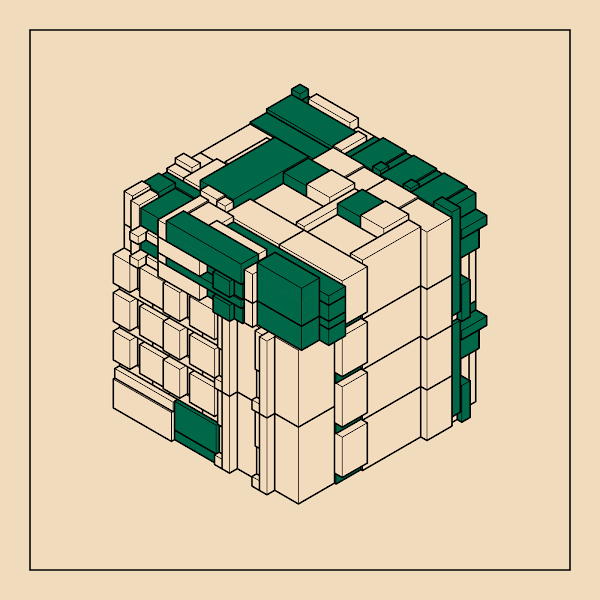
위 작품은 Kjetil Golid의 Archetype라는 작품입니다. 마지막 거래 가격으로 420ETH에 거래가 되었습니다.
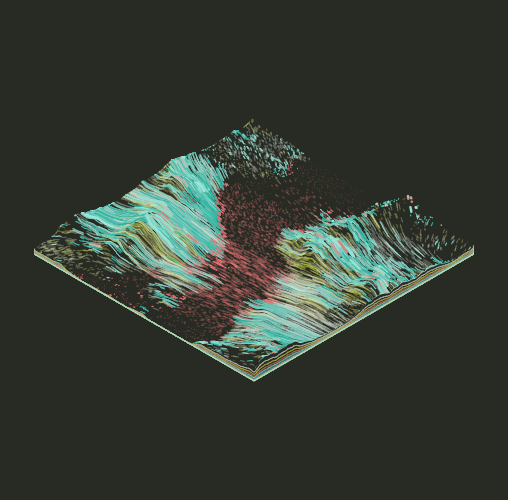
위 작품은 Matt DesLauriers의 Subscapes라는 작품입니다. 마지막 거래 가격으로 175ETH에 거래가 되었습니다.
위 작품들은 Art Block이라는 제너레이티브 아트를 호스팅, 민팅, 매니징해주는 서비스위에서 만들어진것입니다. 독특한 점은 제너레이티브 아트의 소스코드를 블록체인에 기록하여 관리합니다.
직접 만들어 보기
직접 제너레이티브 아트를 만들어보면서 아티스트가 되어봅시다. 먼저 만들기전에 몇가지 규칙이 있습니다.
- 어느 해상도에서도 동일하게 보여야합니다.
- 랜덤하지 않아야합니다. (즉 어떠한 시드를 통해 제너레이트된 아트는 이후 제너레이트하여도 같은 작품이여야합니다.)
🗒 작품 이름 정하기
작품의 이름을 정하는것은 제일 재미있는 부분이라고 생각합니다. 작품의 정체성과 비주얼을 미리 상상하면서 이름을 정해봅시다.
저는 Scatter (흩어지게하다)라고 정하겠습니다.
🌩 개발환경 구성하기
저는 vitejs의 vanilla-ts환경에서 시작하겠습니다.
index.html에 아래 css를 넣어주세요
* {
  margin: 0;
  padding: 0;
}

html, body {
  width: 100%;
  height: 100%;
}

body {
  display: flex;
  justify-content: center;
  align-items: center;
}

canvas {
  vertical-align: middle;
}
🔥 코드 작성하기
// App.ts
export class App {
  private static instance: App;

  public static getInstance() {
    if (!this.instance) {
      throw new Error("App is not initialized");
    }

    return this.instance;
  }

  canvas: HTMLCanvasElement;
  context: CanvasRenderingContext2D;

  scale: number;
  fixedDelta: number = 1 / 60;

  constructor() {
    this.canvas = document.createElement('canvas');
    const context = this.canvas.getContext('2d');
    if (!context) {
      throw new Error('Could not get canvas rendering context 2d');
    }

    this.context = context;

    this.resize = this.resize.bind(this);
    this.render = this.render.bind(this);
    this.resize();
    window.addEventListener('resize', this.resize);
    window.requestAnimationFrame(this.render);
    document.body.appendChild(this.canvas);
    App.instance = this;
  }

  render() {
    window.requestAnimationFrame(this.render);
  }

  resize() {
    const side = Math.min(
      window.innerWidth,
      window.innerHeight,
    );

    this.scale = side / 1000;

    this.canvas.width = side;
    this.canvas.height = side;
  }
}
// main.ts
import { App } from "./App";
window.addEventListener('load', () => {
new App();
});여기까지 작성하시고 http://localhost:3000 접속 해보시면
canvas가 화면에 맞게 1:1 비율로 리사이즈 되는것을 확인할 수 있습니다.
싱글톤 패턴으로 App Class를 작성했습니다. 캔버스는 1000을 기준으로 scale값을 만들었습니다.
scale값을 렌더링하는 위치에 모두 곱해주셔야합니다.
requestAnimationFrame은 모니터의 주사율마다 호출되는 속도가 달라지므로 고정 시간 미분 값을 사용하여 연산합니다.
나중에 requestAnimationFrame Function Call이 고정 FPS로 작동할 수 있도록 변경 해주셔야합니다.
이제 베이스 Entity를 만들고 이를 상속받아 다른 객체를 만들어봅시다.
// Entity.ts
export class Entity {
  addEntity(entity: Entity) {

  }

  removeEntity(entity: Entity) {

  }

  start() {

  }

  update(delta: number) {

  }

  render(context: CanvasRenderingContext2D, scale: number) {

  }
}addEntity, removeEntity에서 App Instance를 가져와 다른 Entity를 추가하거나 삭제하고 또는 본인도 삭제할 수 있습니다.
update에서는 엔티티의 값들을 업데이트하고 render에서는 엔티티의 값을 이용해 렌더링 합니다.
다시 App으로 이동하여 이어서 Frame Loop를 구현해 봅시다.
// App.ts
import { Entity } from "./Entity";

export class App {
  private static instance: App;

  public static getInstance() {
    if (!this.instance) {
      throw new Error("App is not initialized");
    }

    return this.instance;
  }

  canvas: HTMLCanvasElement;
  context: CanvasRenderingContext2D;
  entities: Array<Entity> = [];

  scale: number;
  fixedDelta: number = 1 / 60;

  constructor() {
    this.canvas = document.createElement('canvas');
    const context = this.canvas.getContext('2d');
    if (!context) {
      throw new Error('Could not get canvas rendering context 2d');
    }

    this.context = context;

    this.resize = this.resize.bind(this);
    this.render = this.render.bind(this);
    this.resize();
    window.addEventListener('resize', this.resize);
    window.requestAnimationFrame(this.render);
    document.body.appendChild(this.canvas);
    App.instance = this;
  }

  addEntity(entity: Entity) {
    this.entities.push(entity);
    entity.start();
  }

  removeEntity(entity: Entity) {
    const index = this.entities.indexOf(entity);
    if (index !== -1) {
      this.entities.splice(index, 1);
    }
  }

  render() {
    window.requestAnimationFrame(this.render);

    for (let i = 0; i < this.entities.length; i++) {
      const entity = this.entities[i];
      entity.update(this.fixedDelta);
      entity.render(this.context, this.scale);
    }
  }

  resize() {
    const side = Math.min(
      window.innerWidth,
      window.innerHeight,
    );

    this.scale = side / 1000;

    this.canvas.width = side;
    this.canvas.height = side;
  }
}addEntity, removeEntity, render 함수 부분이 추가되고 바뀌었습니다.
이제 다시 Entity로 돌아가서 addEntity, removeEntity함수를 이어서 작성해봅시다.
// Entity.ts
import { App } from "./App";

export class Entity {
  addEntity(entity: Entity) {
    App.getInstance().addEntity(entity);
  }

  removeEntity(entity: Entity) {
    App.getInstance().removeEntity(entity);
  }

  start() {

  }

  update(delta: number) {

  }

  render(context: CanvasRenderingContext2D, scale: number) {

  }
}
이제 Entity 를 상속받아 사용할 수 있습니다.
// BallSpawner.ts
import { Entity } from "./Entity";

export class BallSpawner extends Entity {
  start() {
    console.log('start ball spawner');
  }
}BallSpawner를 만들고 App에서 start를 호출해줄 수 있도록 이전에 만들어둔 addEntity라는 함수를 통해 들어오도록 해야합니다.
// App.ts

// ... 생략
  start() {
    this.addEntity(new BallSpawner());
  }
// ...start함수를 추가하고 BallSpawner를 addEntity를 생성해 주었습니다. 이제 main.ts에서 App의 start를 호출 해주어야 합니다.
// main.ts
import { App } from "./App";

window.addEventListener('load', () => {
  const app = new App();
  app.start();
});
여기까지 작성하시면 콘솔에 "start ball spawner"라는 메세지가 나오게됩니다.
이제 BallSpanwer에서 생성할 Ball을 만들어봅시다.
// Ball.ts
import { Entity } from "./Entity";

export class Ball extends Entity {
  x: number;
  y: number;
  radius: number;

  constructor(x: number, y: number, radius: number) {
    super();

    this.x = x;
    this.y = y;
    this.radius = radius;
  }

  render(context: CanvasRenderingContext2D, scale: number) {
    context.beginPath();
    context.arc(this.x * scale, this.y * scale, this.radius * scale, 0, 2 * Math.PI);
    context.fill();
  }
}
기본적으로 원을 그리는 Ball Class 입니다. 이걸 이제 BallSpanwer에서 생성해봅시다.
// BallSpawner.ts
import { Entity } from "./Entity";
import { Ball } from "./Ball";

export class BallSpawner extends Entity {
  start() {
    this.spawn();
  }

  spawn() {
    this.addEntity(new Ball(100, 100, 10));
  }
}
이렇게 나오게 됩니다. 이제 움직이게 해보도록 하겠습니다.
// PRNG.ts
const MAX_INTEGER = 2147483647;

export class PRNG {
  seed: number;

  constructor(seed: number) {
    this.seed = seed % MAX_INTEGER;
    if (this.seed <= 0) {
      this.seed += MAX_INTEGER - 1;
    }
  }

  private next() {
    this.seed = this.seed * 16807 % MAX_INTEGER;
  }

  double() {
    this.next();
    return this.seed / MAX_INTEGER;
  }
}
의사 난수 생성기를 만들고
// Utils.ts
import { PRNG } from "./PRNG";

export class Utils {
  static random = new PRNG(0);
}
유틸리티 클래스를 작성해줍니다.
// Ball.ts
import { Entity } from "./Entity";
import { Utils } from "./Utils";

export class Ball extends Entity {
  x: number;
  y: number;
  speed: number;
  angle: number;
  radius: number;

  constructor() {
    super();

    this.x = Utils.random.double() * 1000;
    this.y = Utils.random.double() * 1000;
    this.speed = Utils.random.double() * 200 + 50;
    this.angle = Utils.random.double() * Math.PI * 2;
    this.radius = Utils.random.double() * 2 + 2;
  }

  update(delta: number) {
    const speed = this.speed * delta;

    this.x += Math.cos(this.angle) * speed;
    this.y += Math.sin(this.angle) * speed;
  }

  render(context: CanvasRenderingContext2D, scale: number) {
    context.beginPath();
    context.arc(this.x * scale, this.y * scale, this.radius * scale, 0, 2 * Math.PI);
    context.fill();
  }
}
아까 만들어둔 난수 생성기를 이용해서 모든 프로퍼티를 랜덤으로 생성해주었습니다.
// BallSpawner.ts
import { Entity } from "./Entity";
import { Ball } from "./Ball";

export class BallSpawner extends Entity {
  start() {
    this.spawn();
  }

  spawn() {
    for (let i = 0; i < 100; i++) {
      this.addEntity(new Ball());
    }
  }
}
100개를 랜덤으로 생성했습니다.

이런식으로 나오는것을 확인할 수 있습니다. 이제 색상을 추가해봅시다.
// PRNG.ts

// ... 생략
  color() {
    return `rgb(${this.double() * 255}, ${this.double() * 255}, ${this.double() * 255})`;
  }
// ...
// Ball.ts
import { Entity } from "./Entity";
import { Utils } from "./Utils";
export class Ball extends Entity {
x: number;
y: number;
speed: number;
angle: number;
radius: number;
color: string;
constructor() {
super();
this.x = Utils.random.double() * 1000;
this.y = Utils.random.double() * 1000;
this.speed = Utils.random.double() * 200 + 50;
this.angle = Utils.random.double() * Math.PI * 2;
this.radius = Utils.random.double() * 2 + 2;
this.color = Utils.random.color();
}
update(delta: number) {
const speed = this.speed * delta;
this.x += Math.cos(this.angle) * speed;
this.y += Math.sin(this.angle) * speed;
}
render(context: CanvasRenderingContext2D, scale: number) {
context.beginPath();
context.fillStyle = this.color;
context.arc(this.x * scale, this.y * scale, this.radius * scale, 0, 2 * Math.PI);
context.fill();
}
}색상을 랜덤하게 만드는 함수를 추가하고 Ball 클래스에 색상 프로퍼티를 추가하고 렌더 함수에서 사용해주었습니다.
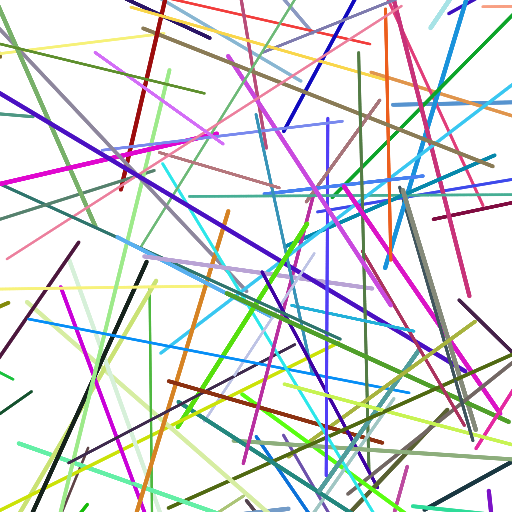
이제 회전하도록 코드를 추가해보겠습니다.
// Ball.ts
// ...생략
update(delta: number) {
const speed = this.speed * delta;
this.x += Math.cos(this.angle) * speed;
this.y += Math.sin(this.angle) * speed;
this.angle += Utils.random.double() * 100.0 * delta;
}
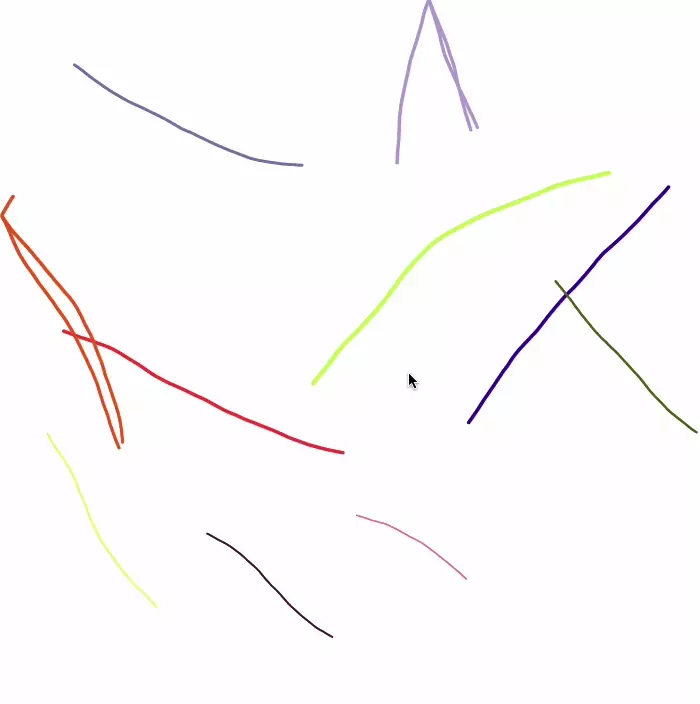
// ...Ball 클래스의 update함수를 수정했습니다.
이런식으로 그려지는것을 확인 할 수 있습니다.
PRNG 클래스를 생성할때 seed값을 다르게 주면 새로운 작품이 나오는것을 확인하실 수 있습니다.
🐼 응용해보기
// Ball.ts
import { Entity } from "./Entity";
import { Utils } from "./Utils";

export class Ball extends Entity {
  x: number;
  y: number;
  speed: number;
  angle: number;
  radius: number;
  color: string;
  depth: number = 0;

  constructor() {
    super();

    this.radius = Utils.random.double() * 2 + 1;
    this.x = this.radius + Utils.random.double() * (1000 - this.radius);
    this.y = this.radius + Utils.random.double() * (1000 - this.radius);
    this.speed = Utils.random.double() * 200 + 100;
    this.angle = Utils.random.double() * Math.PI * 2;
    this.color = Utils.random.color();
  }

  update(delta: number) {
    let speed = this.speed * delta;
    if (speed > this.radius) {
      speed = this.radius;
    }

    this.x += Math.cos(this.angle) * speed;
    this.y += Math.sin(this.angle) * speed;

    const isEnteredLeft = this.x <= this.radius;
    const isEnteredRight = this.x + this.radius >= 1000;
    const isEnteredBottom = this.y + this.radius >= 1000;
    const isEnteredTop = this.y <= this.radius;

    const isEnteredHorizontal = isEnteredLeft || isEnteredRight;
    const isEnteredVertical = isEnteredTop || isEnteredBottom;

    if (isEnteredLeft) {
      this.x = this.radius;
    } else if (isEnteredRight) {
      this.x = 1000 - this.radius;
    }

    if (isEnteredTop) {
      this.y = this.radius;
    } else if (isEnteredBottom) {
      this.y = 1000 - this.radius;
    }

    if (this.depth > 0) {
      this.radius -= delta * 0.1;
      if (this.radius <= 0) {
        this.radius = 0;
        this.removeEntity(this);
      }
    }

    if (isEnteredHorizontal || isEnteredVertical) {
      this.removeEntity(this);

      if (this.depth < 2) {
        const childSize = (this.depth + 1) * 2;
        const childAngle = isEnteredHorizontal ? Math.PI - this.angle : Math.PI * 2.0 - this.angle;

        for (let i = 0; i < childSize; i++) {
          const ball = new Ball();
          ball.x = this.x;
          ball.y = this.y;
          ball.color = this.color;
          ball.speed = this.speed * 0.9;
          ball.angle = childAngle;
          ball.radius = this.radius;
          ball.depth = this.depth + 1;
          this.addEntity(ball);
        }
      }
    }

    this.angle += (Utils.random.double() - 0.5) * 5.0 * delta;
  }

  render(context: CanvasRenderingContext2D, scale: number) {
    context.save();
    context.beginPath();
    context.fillStyle = this.color;
    context.arc(this.x * scale, this.y * scale, this.radius * scale, 0, 2 * Math.PI);
    context.fill();
    context.restore();
  }
}
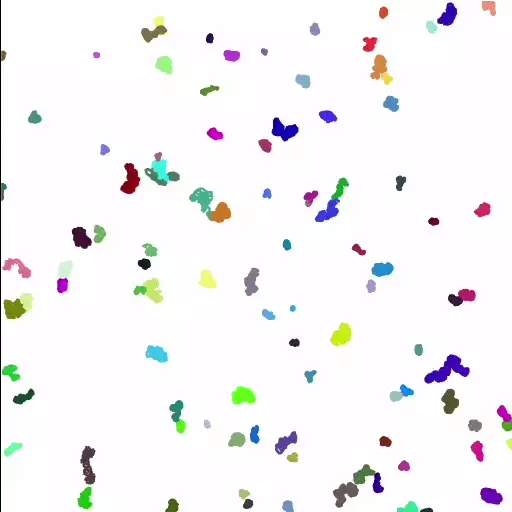
간단하게 수정하여 Scatter효과를 추가하였습니다.
이번 글에서 간단하게 제너레이티브를 구현해보았습니다. 다음 글에서 조금더 작품성있는 제너레이티브 아트를 만들어봅니다.
소스코드
WE-AR에서 채용을 진행하고있습니다.
관심 있으신분들은 한번씩 봐주시면 감사하겠습니다. 채용공고는 여기에 있습니다.

코드를 다 이해하긴 어려웠지만 구현과정을 배워보고 제너레이티브 아트에 대해 조금 더 알 수 있던것 같습니다.
좋은글 감사합니다~!