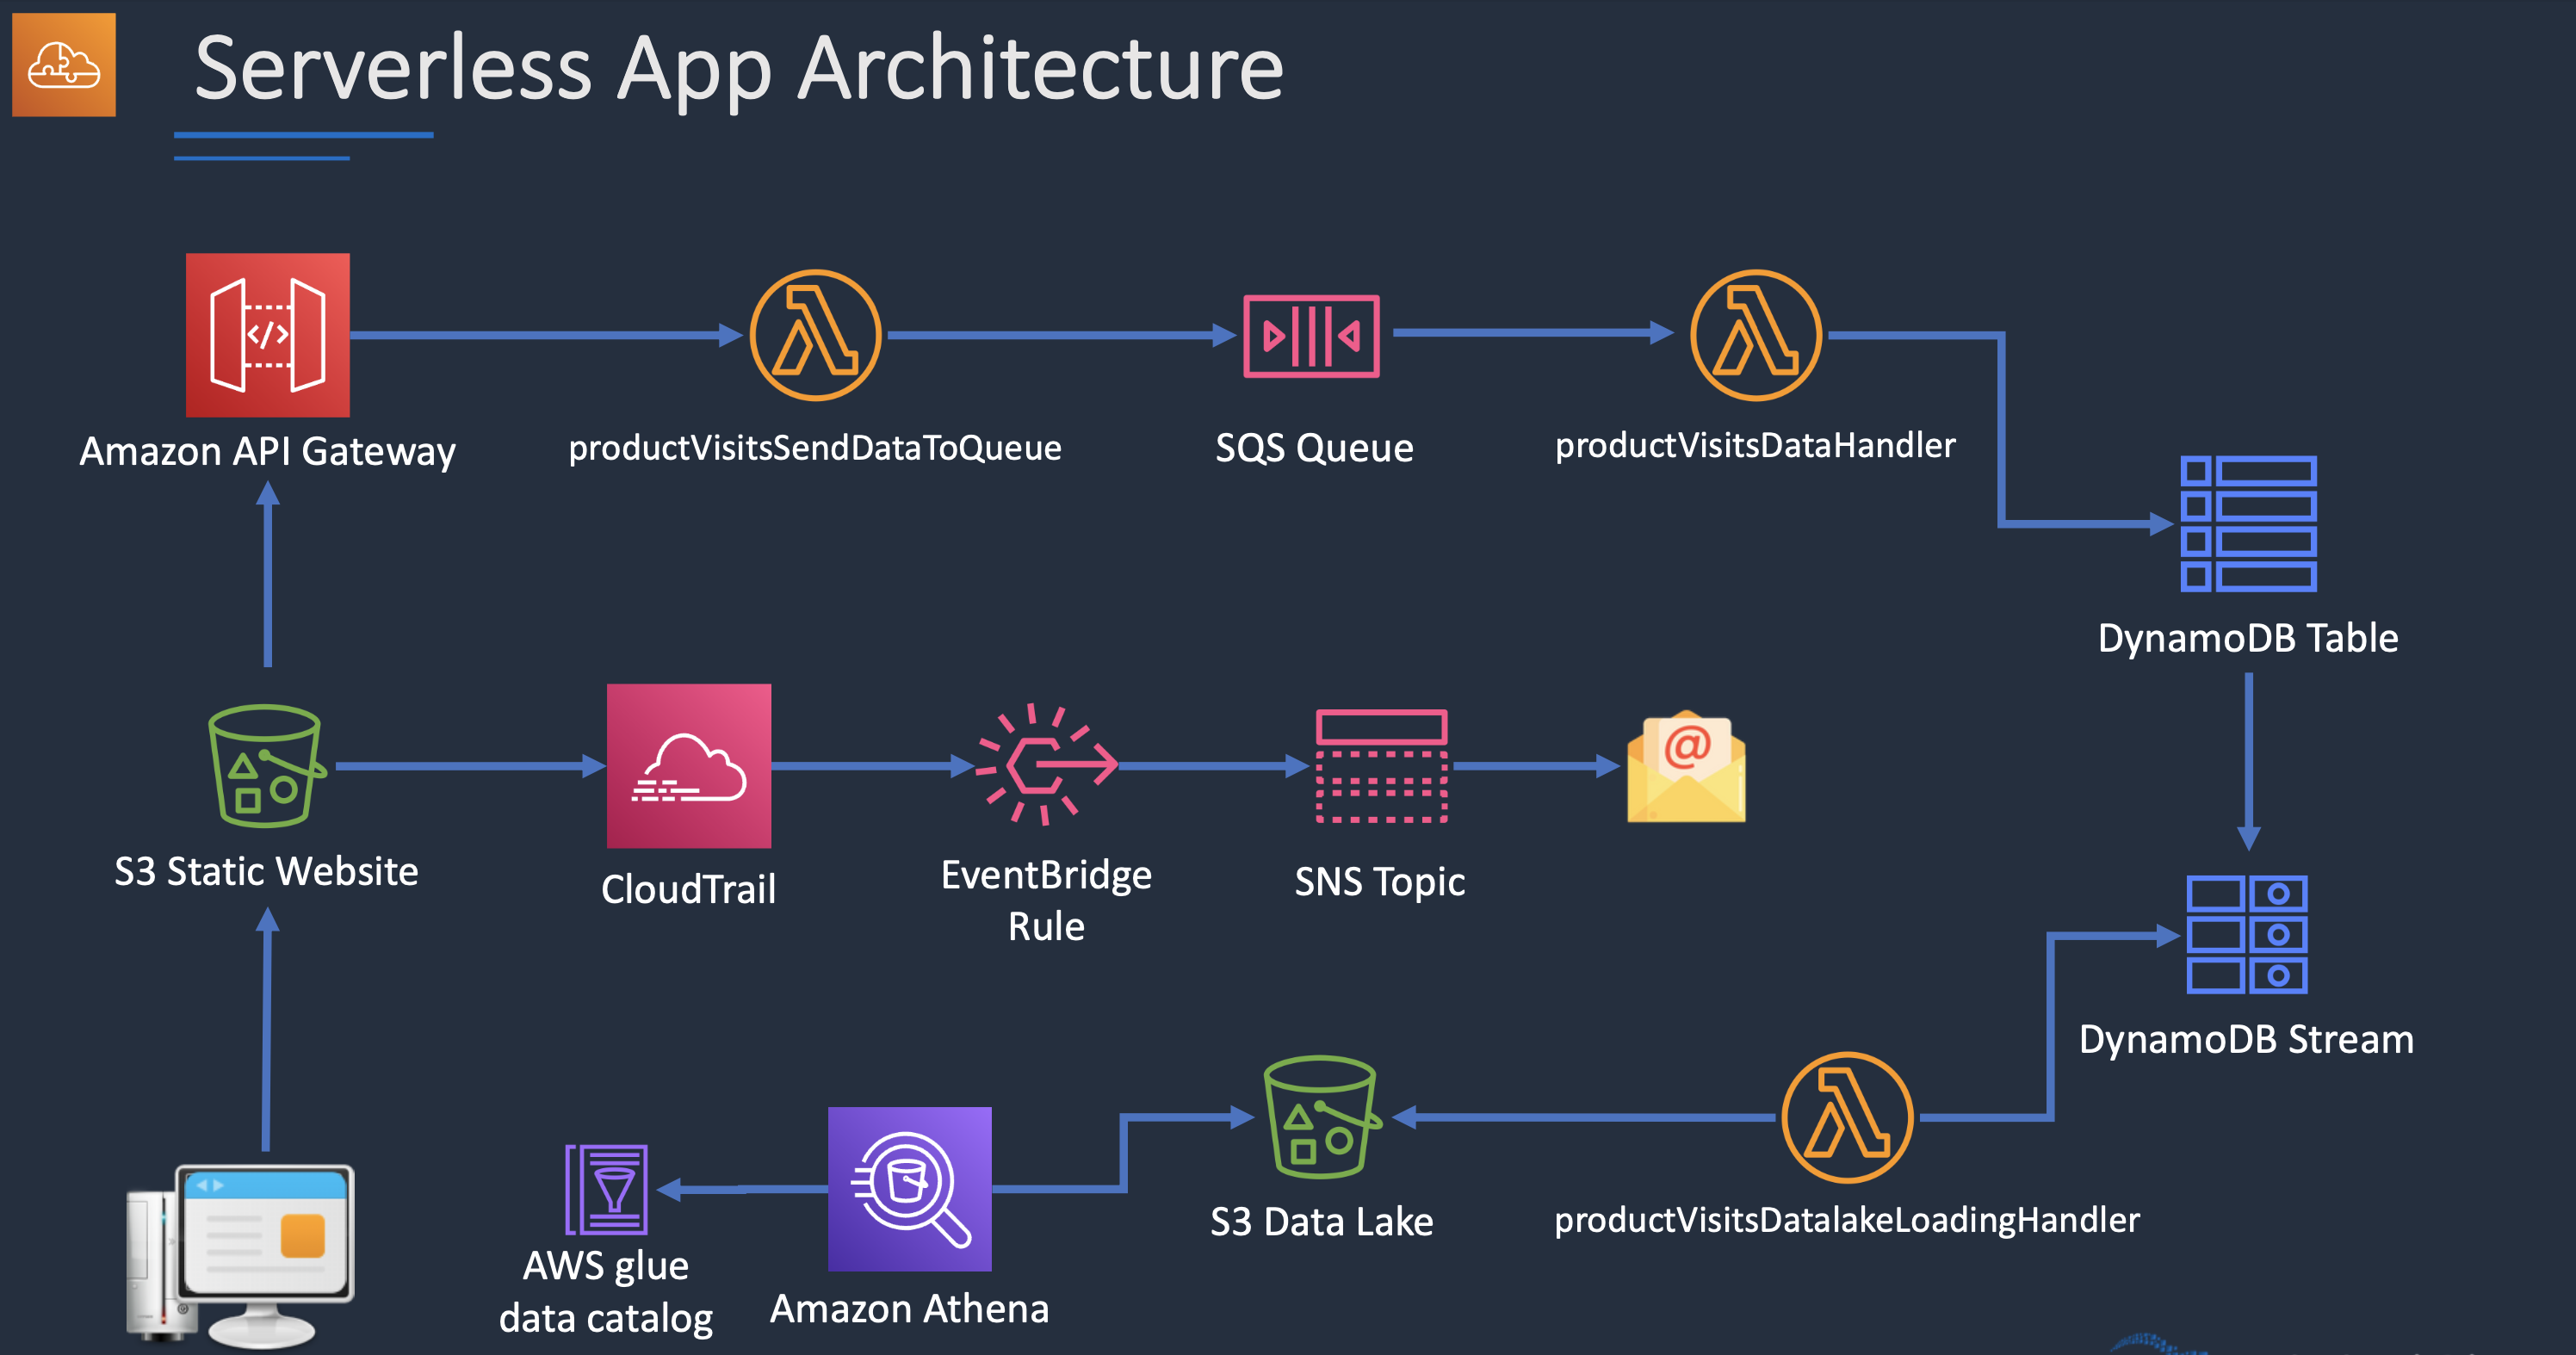
1. SQS 메시징 후 DynamoDB 쓰기
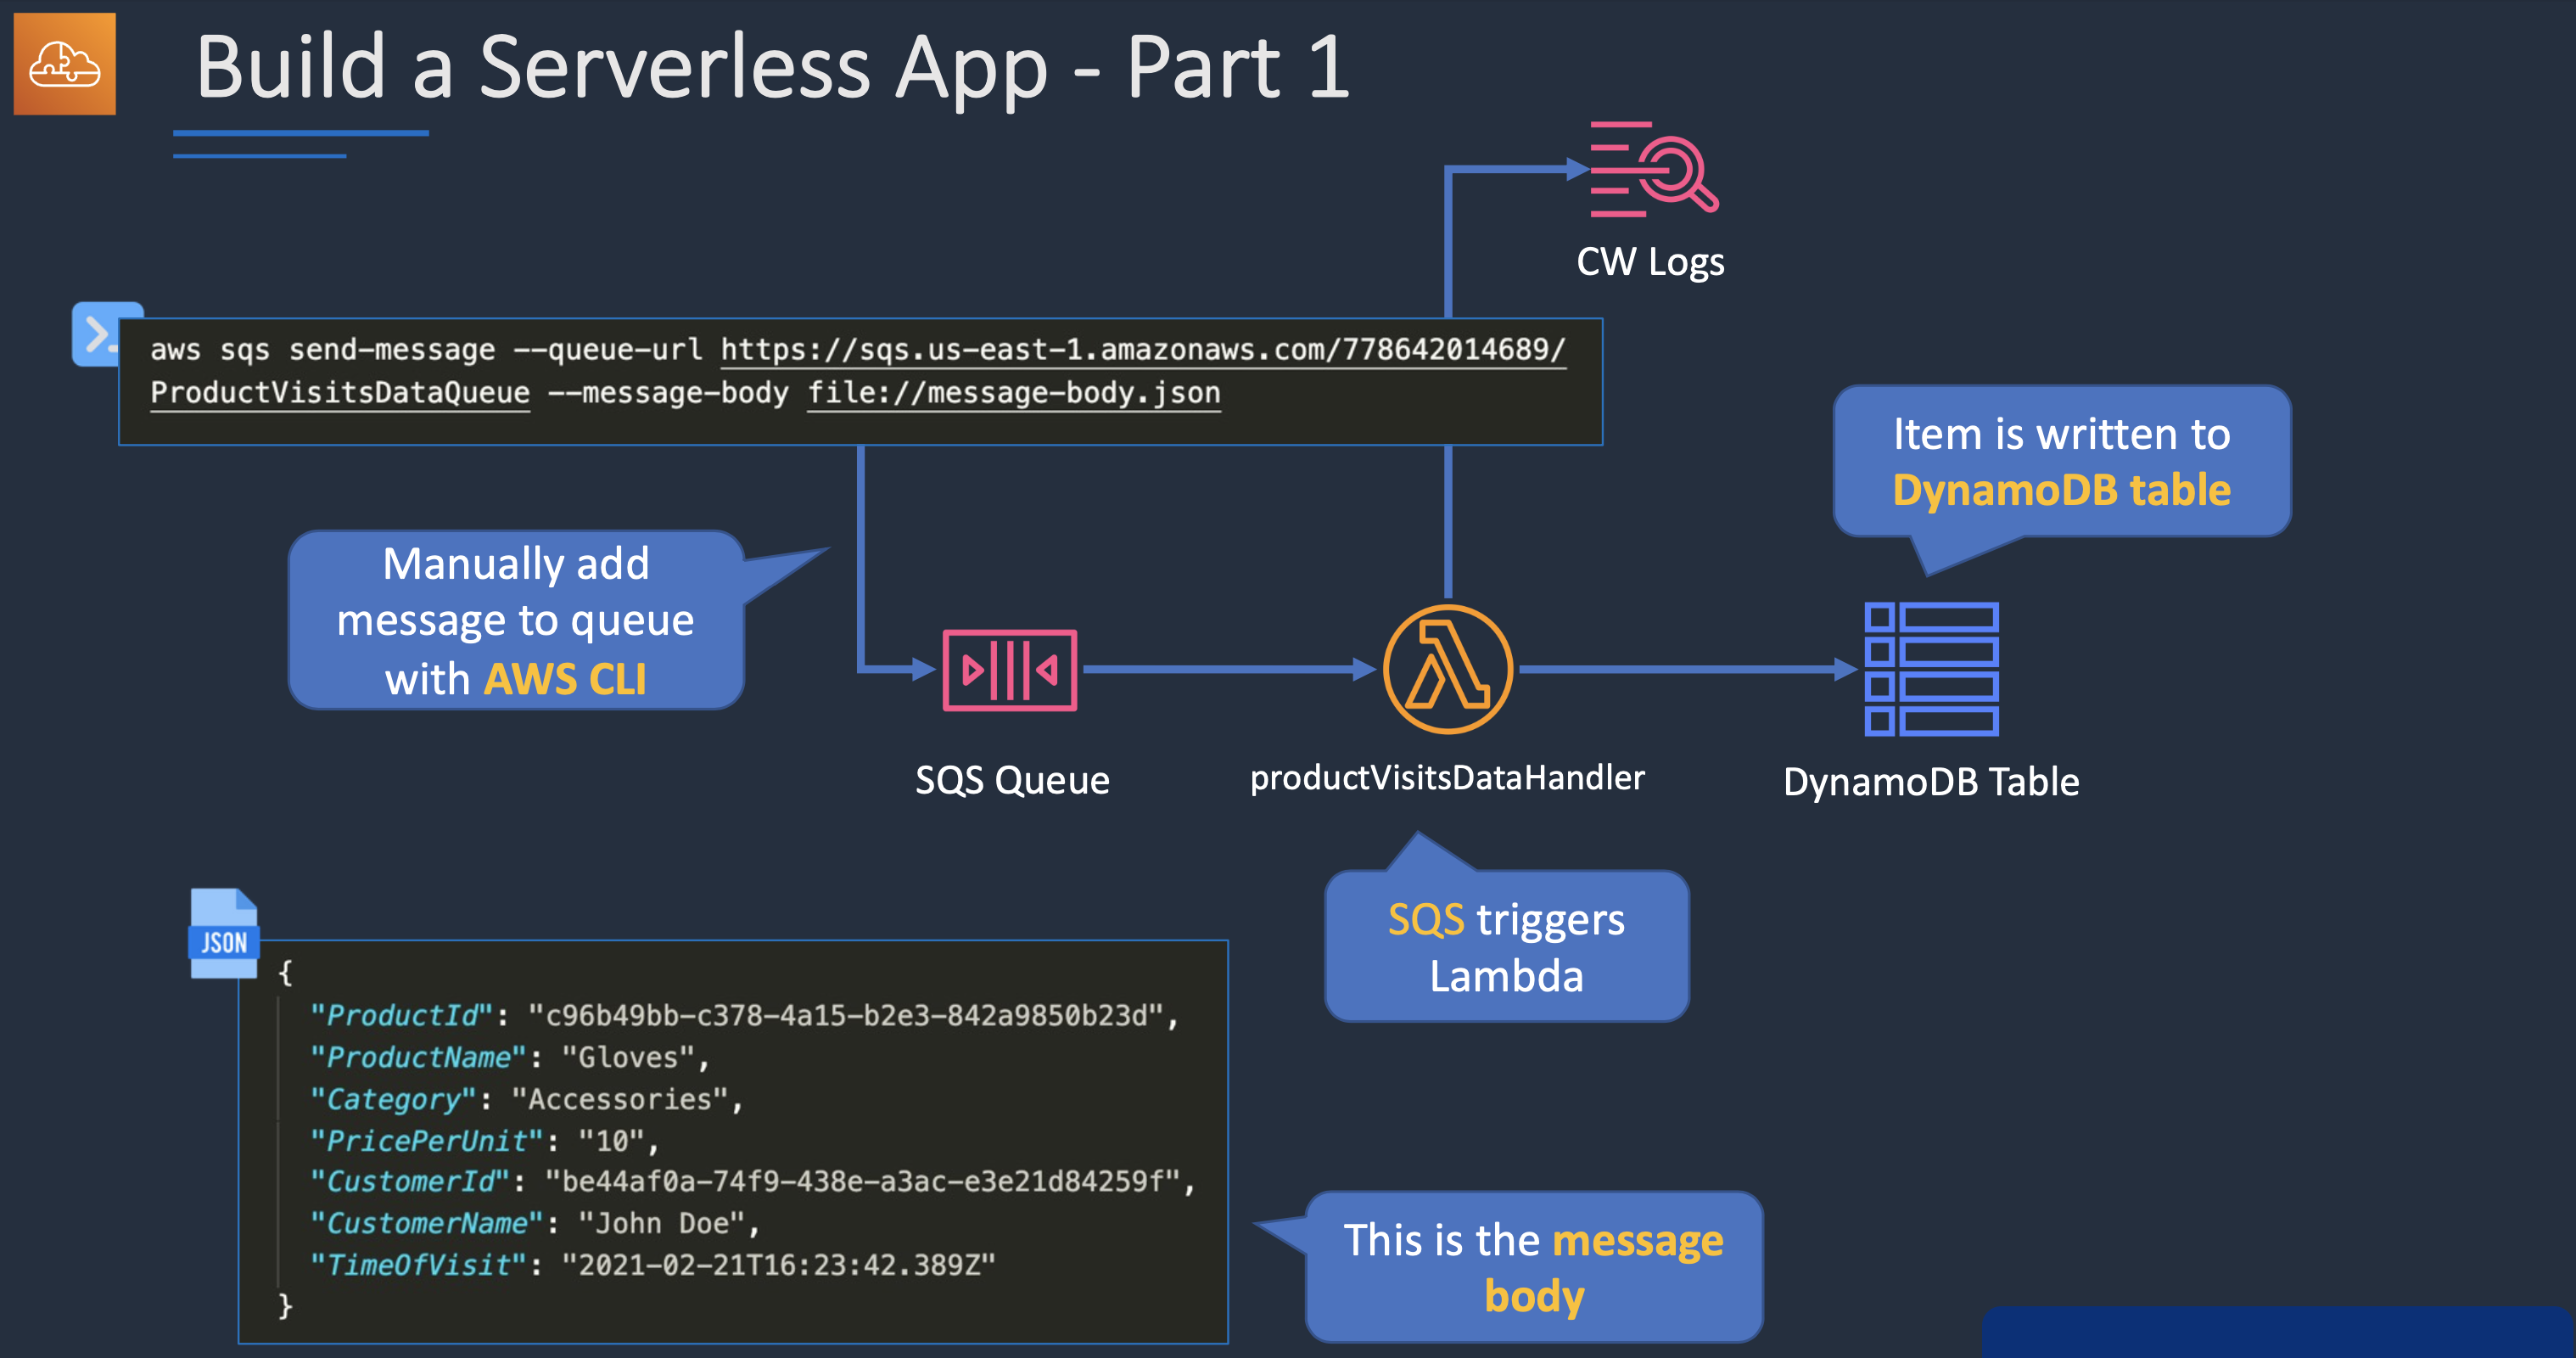
- 수동으로 SQS 메세징 후, SQS를 트리거한 람다 함수를 통해 DynamoDB에 데이터 기록
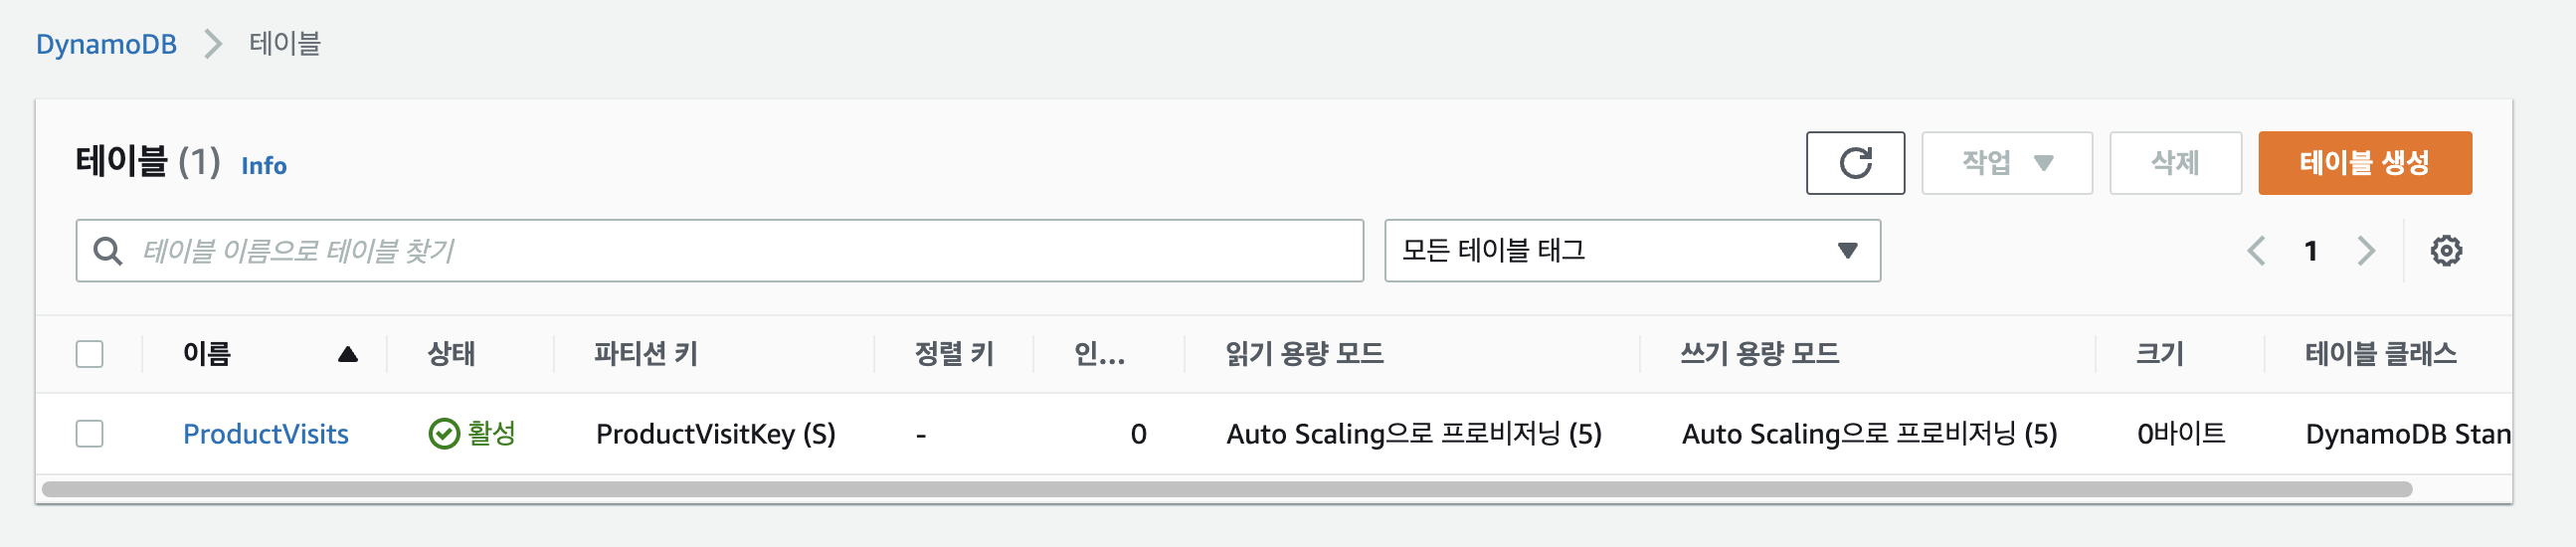
1) DynamoDB 생성
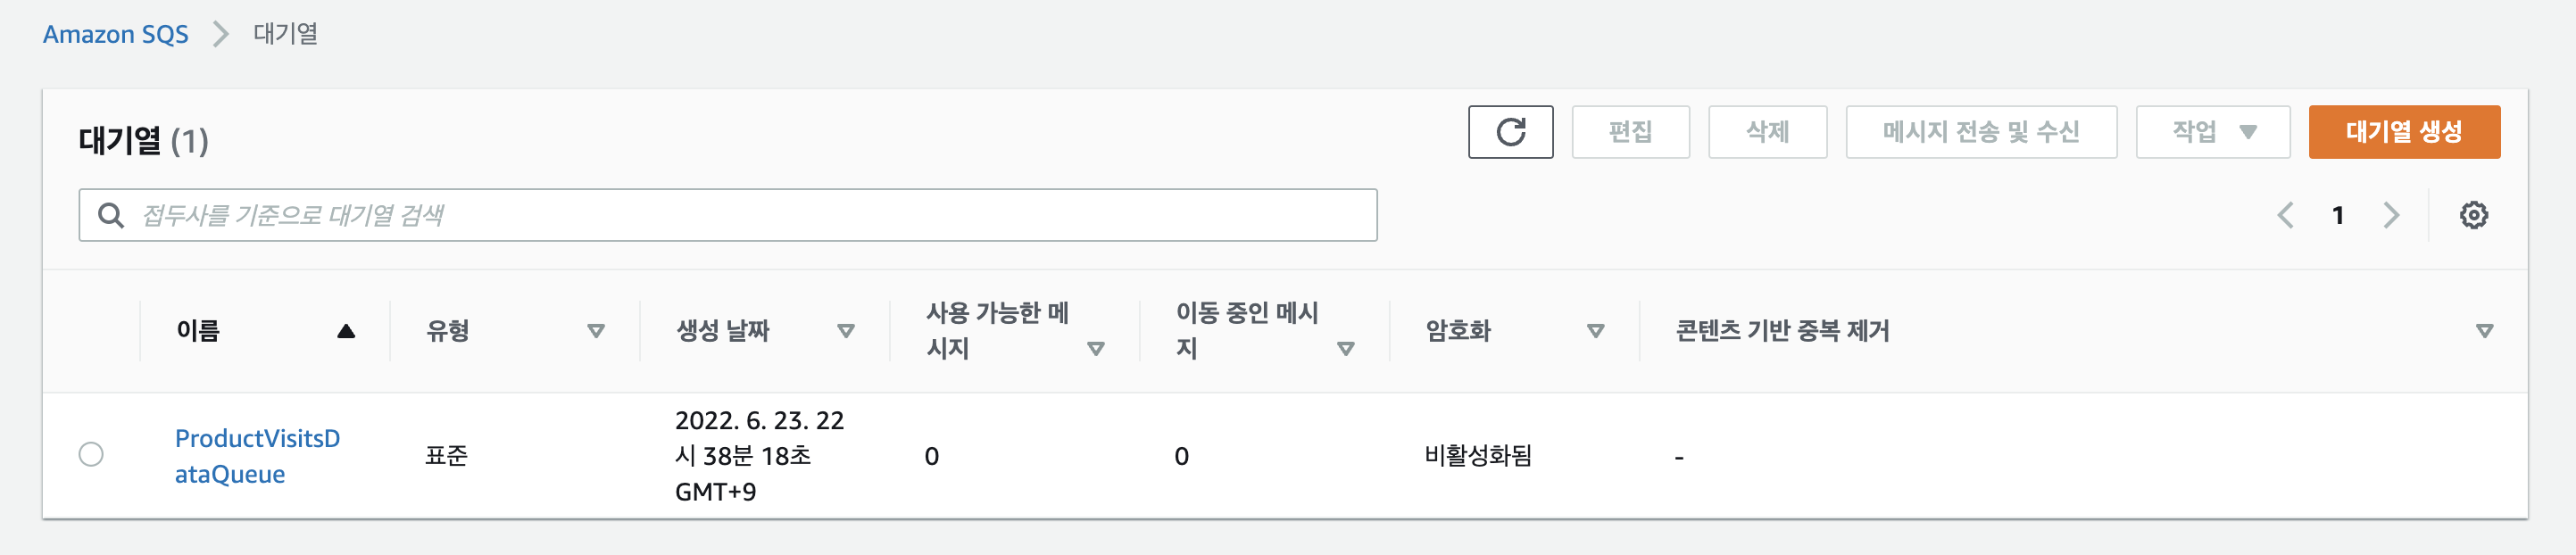
2) SQS 생성
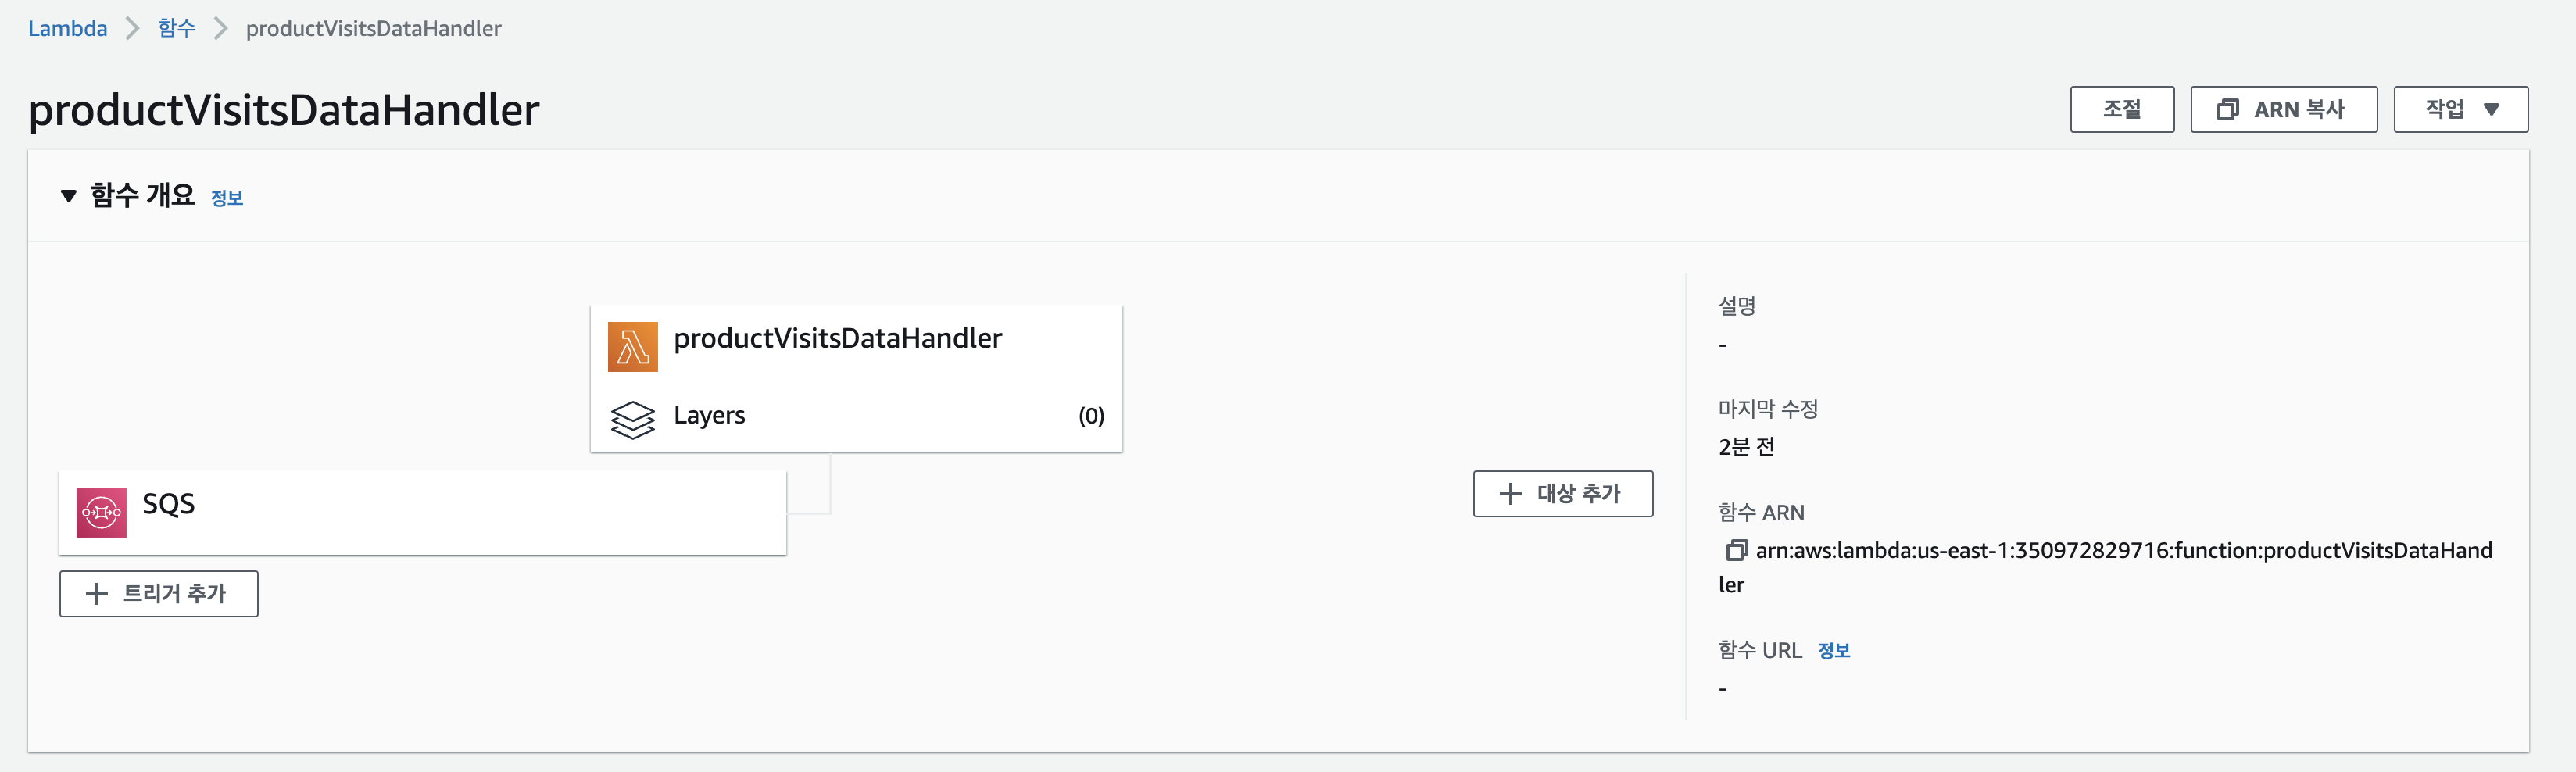
3) Lambda function 생성
(1) 역할 생성
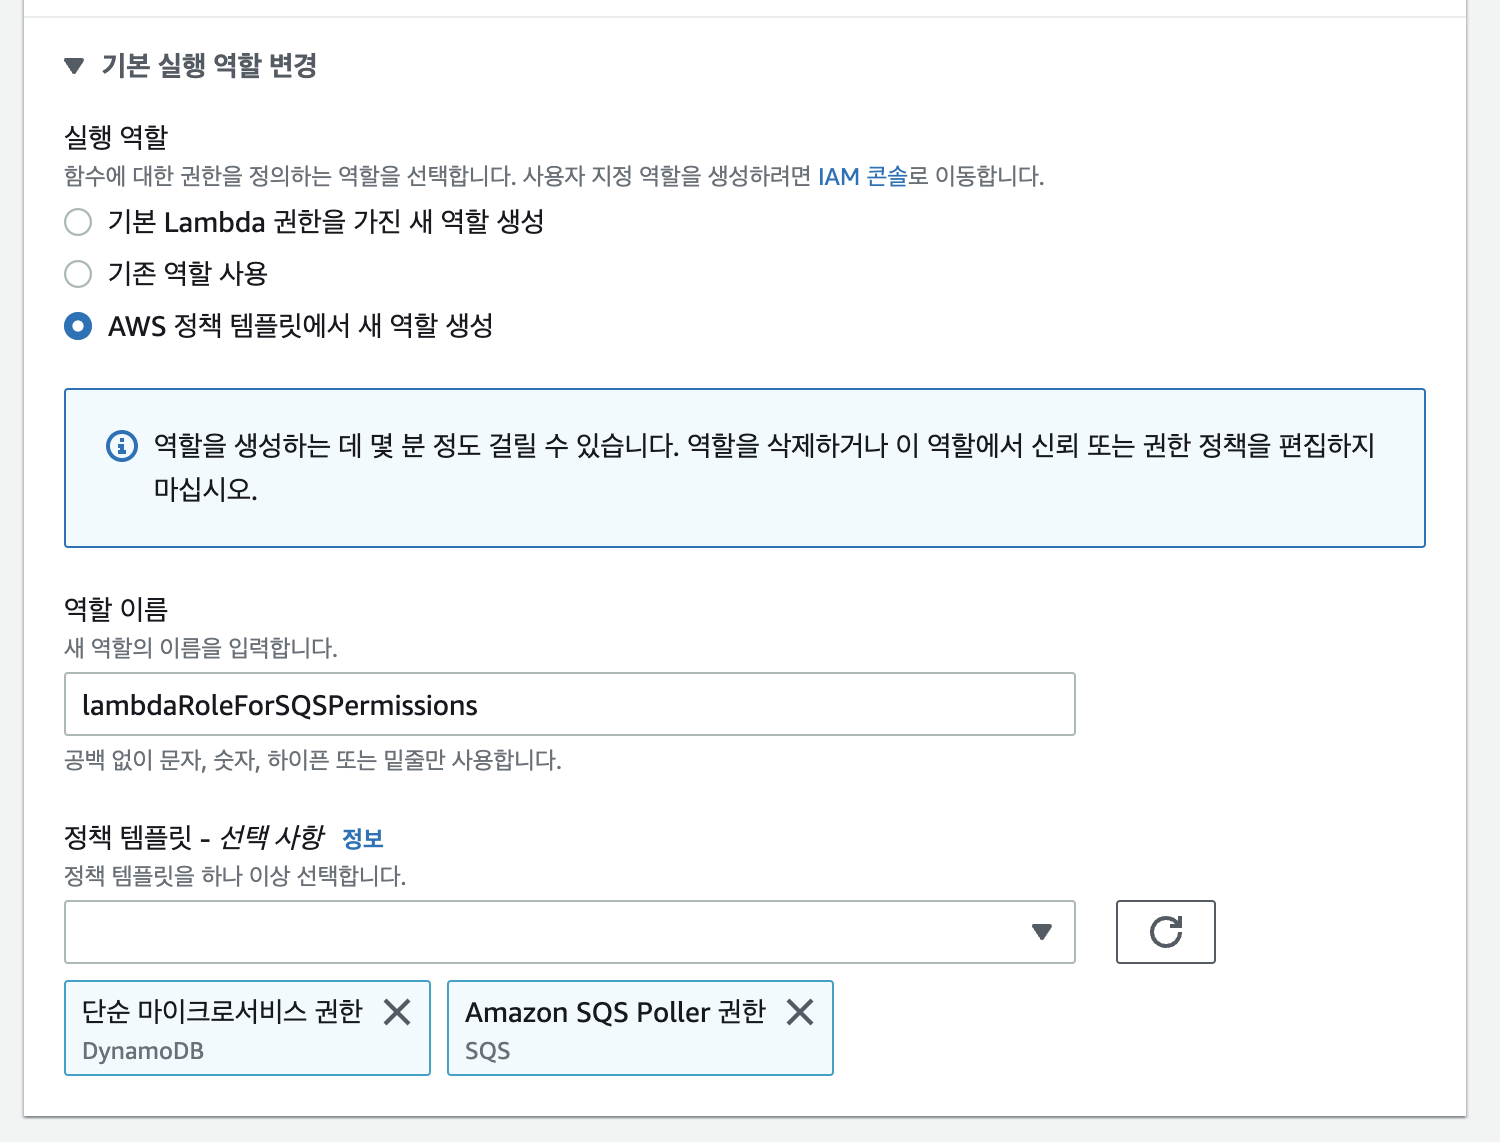
- Simple microservice - 다이나모 DB Write 권한
- SQS Poller - SQS Poll 권한
(2) 트리거 설정
(3) DynamoDB 쓰기 코드
'use strict'

const AWS = require('aws-sdk')
const uuidv4 = require('uuid/v4')

AWS.config.update({ region: process.env.Region, apiVersion: '2012-08-10' })

const docClient = new AWS.DynamoDB.DocumentClient()

module.exports.handler = async (event) => {

    console.log('Received event:', JSON.stringify(event, null, 2));

    const allPromises = event.Records.map(async (record) => {
        let { body } = record;

        console.log(body);

        body = JSON.parse(body);

        try {

            const { ProductId, ProductName, Category, PricePerUnit, CustomerId, CustomerName, TimeOfVisit } = body;

            if (!ProductId || !ProductName || !Category || !PricePerUnit || !CustomerId || !CustomerName || !TimeOfVisit) {
                console.log('Please provide values for product, category, customer and time of visit.');
            }

            body.ProductVisitKey = uuidv4();

            console.log(`${body.ProductVisitKey} ${ProductId} ${ProductName} ${Category} ${PricePerUnit} ${CustomerId} ${CustomerName} ${TimeOfVisit}`);

            const params = {
                TableName: 'ProductVisits',
                Item: body
            }
            await docClient.put(params).promise();

            console.log('Product Visit record is successfully created.');

        } catch (err) {
            console.error(err.message);
            console.error(err);
        }

    });

    await Promise.all(allPromises);

    return {}
}
4) 수동 테스트
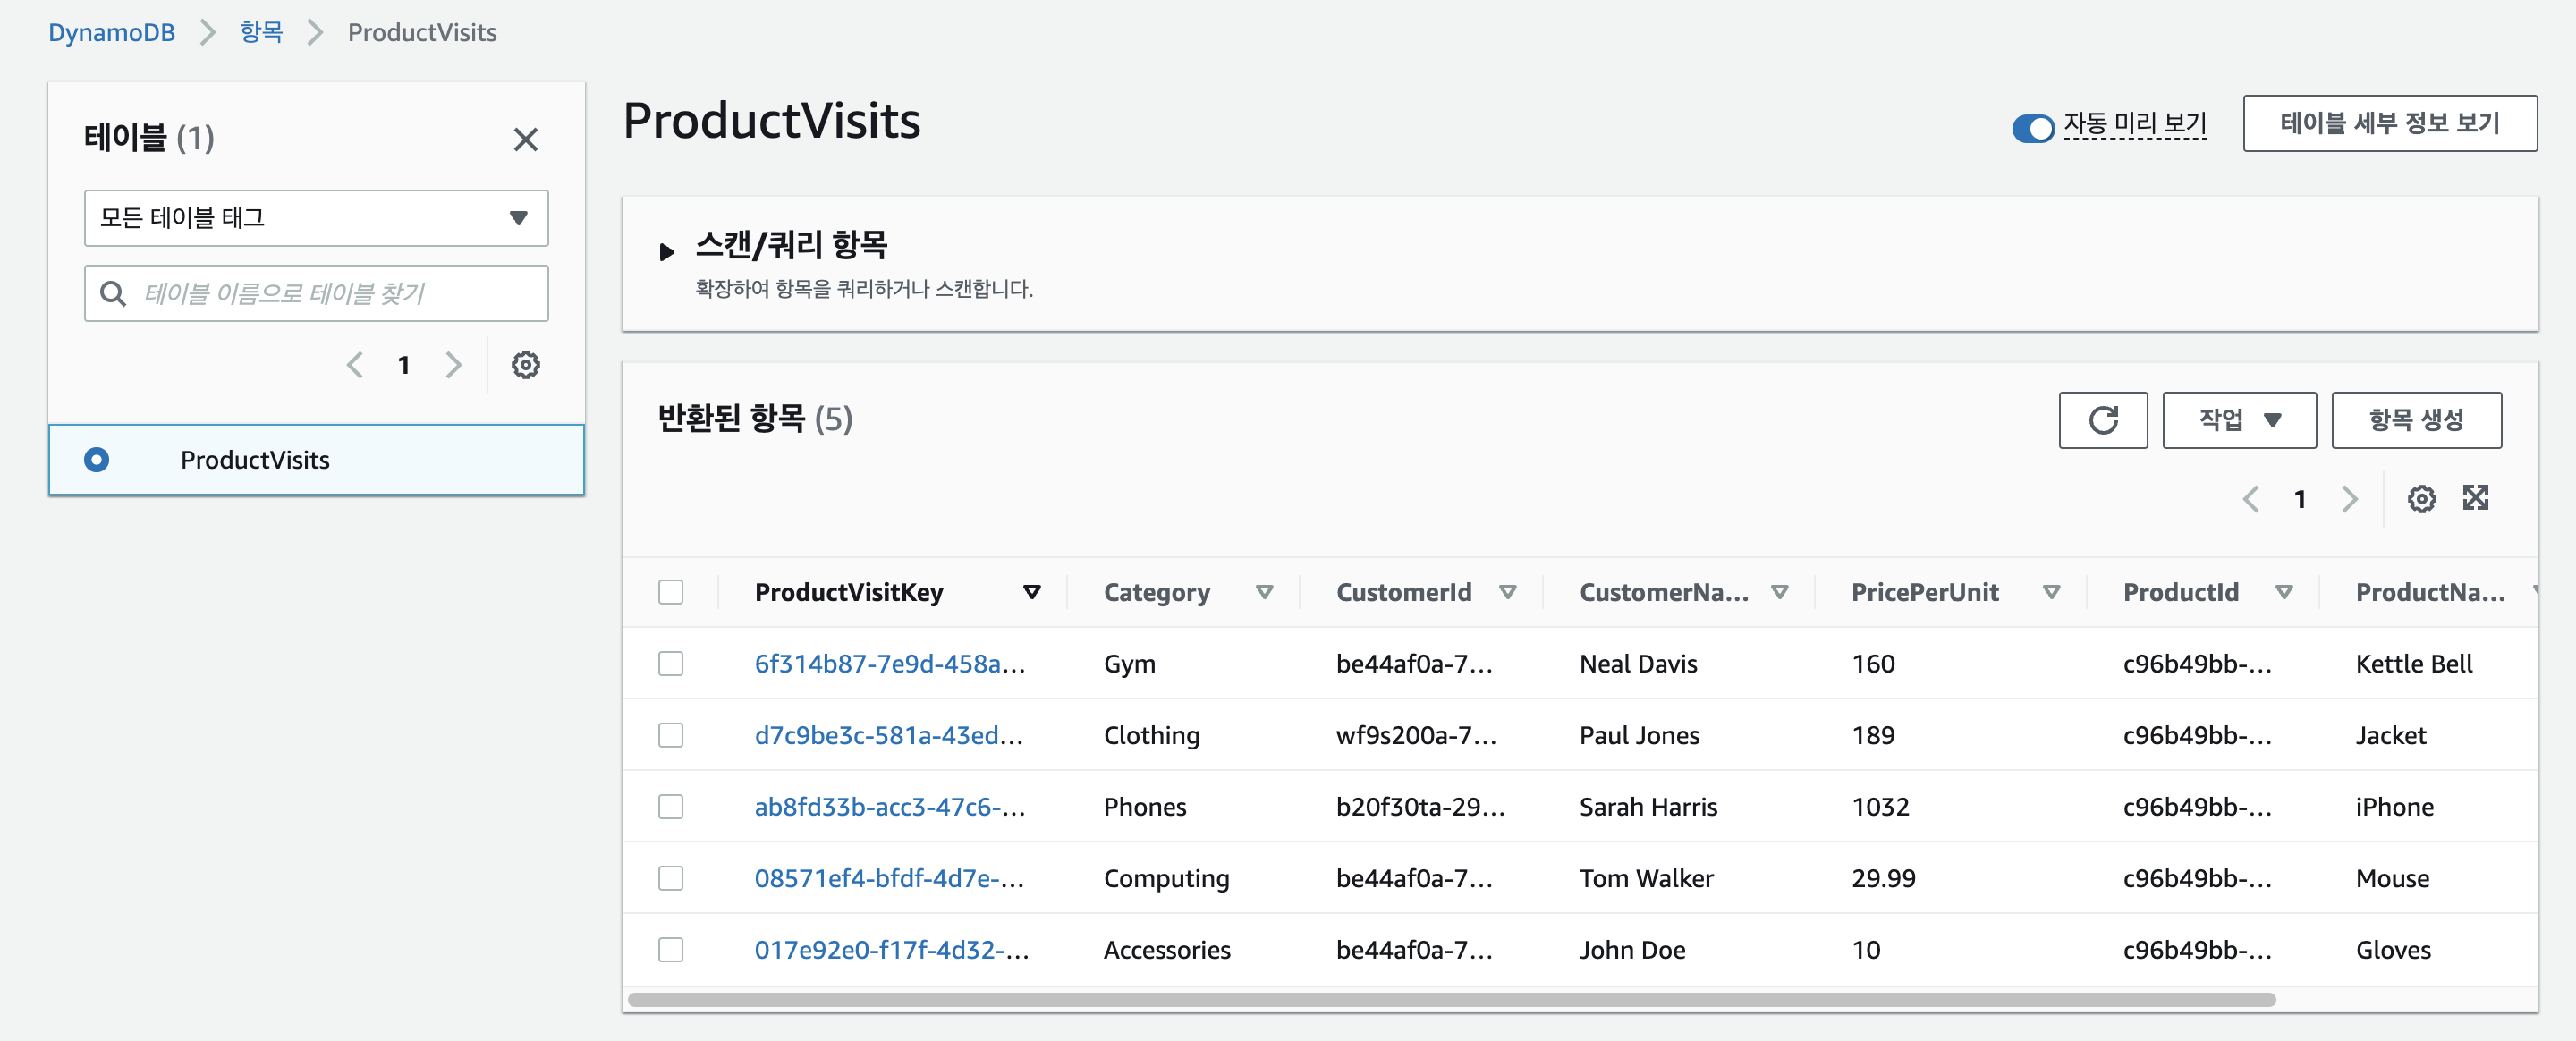
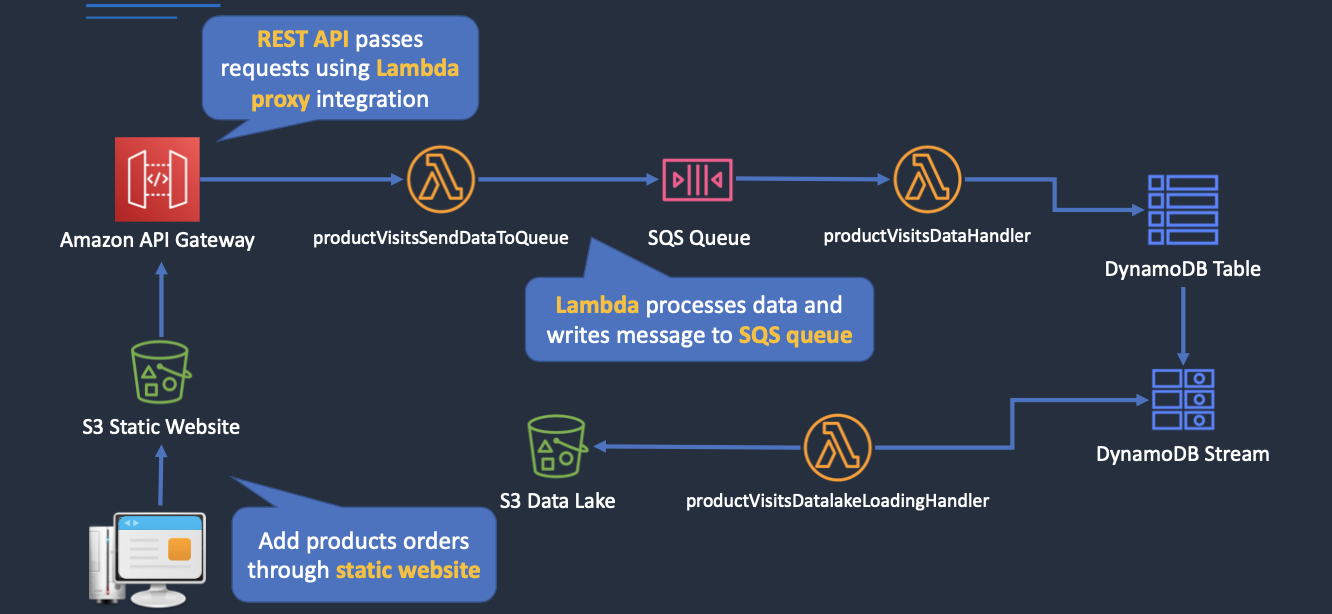
aws sqs send-message --queue-url SQS_URL --message-body file://message-body-5.json2. DynamoDBStream을 활용한 S3 Data Lake 생성
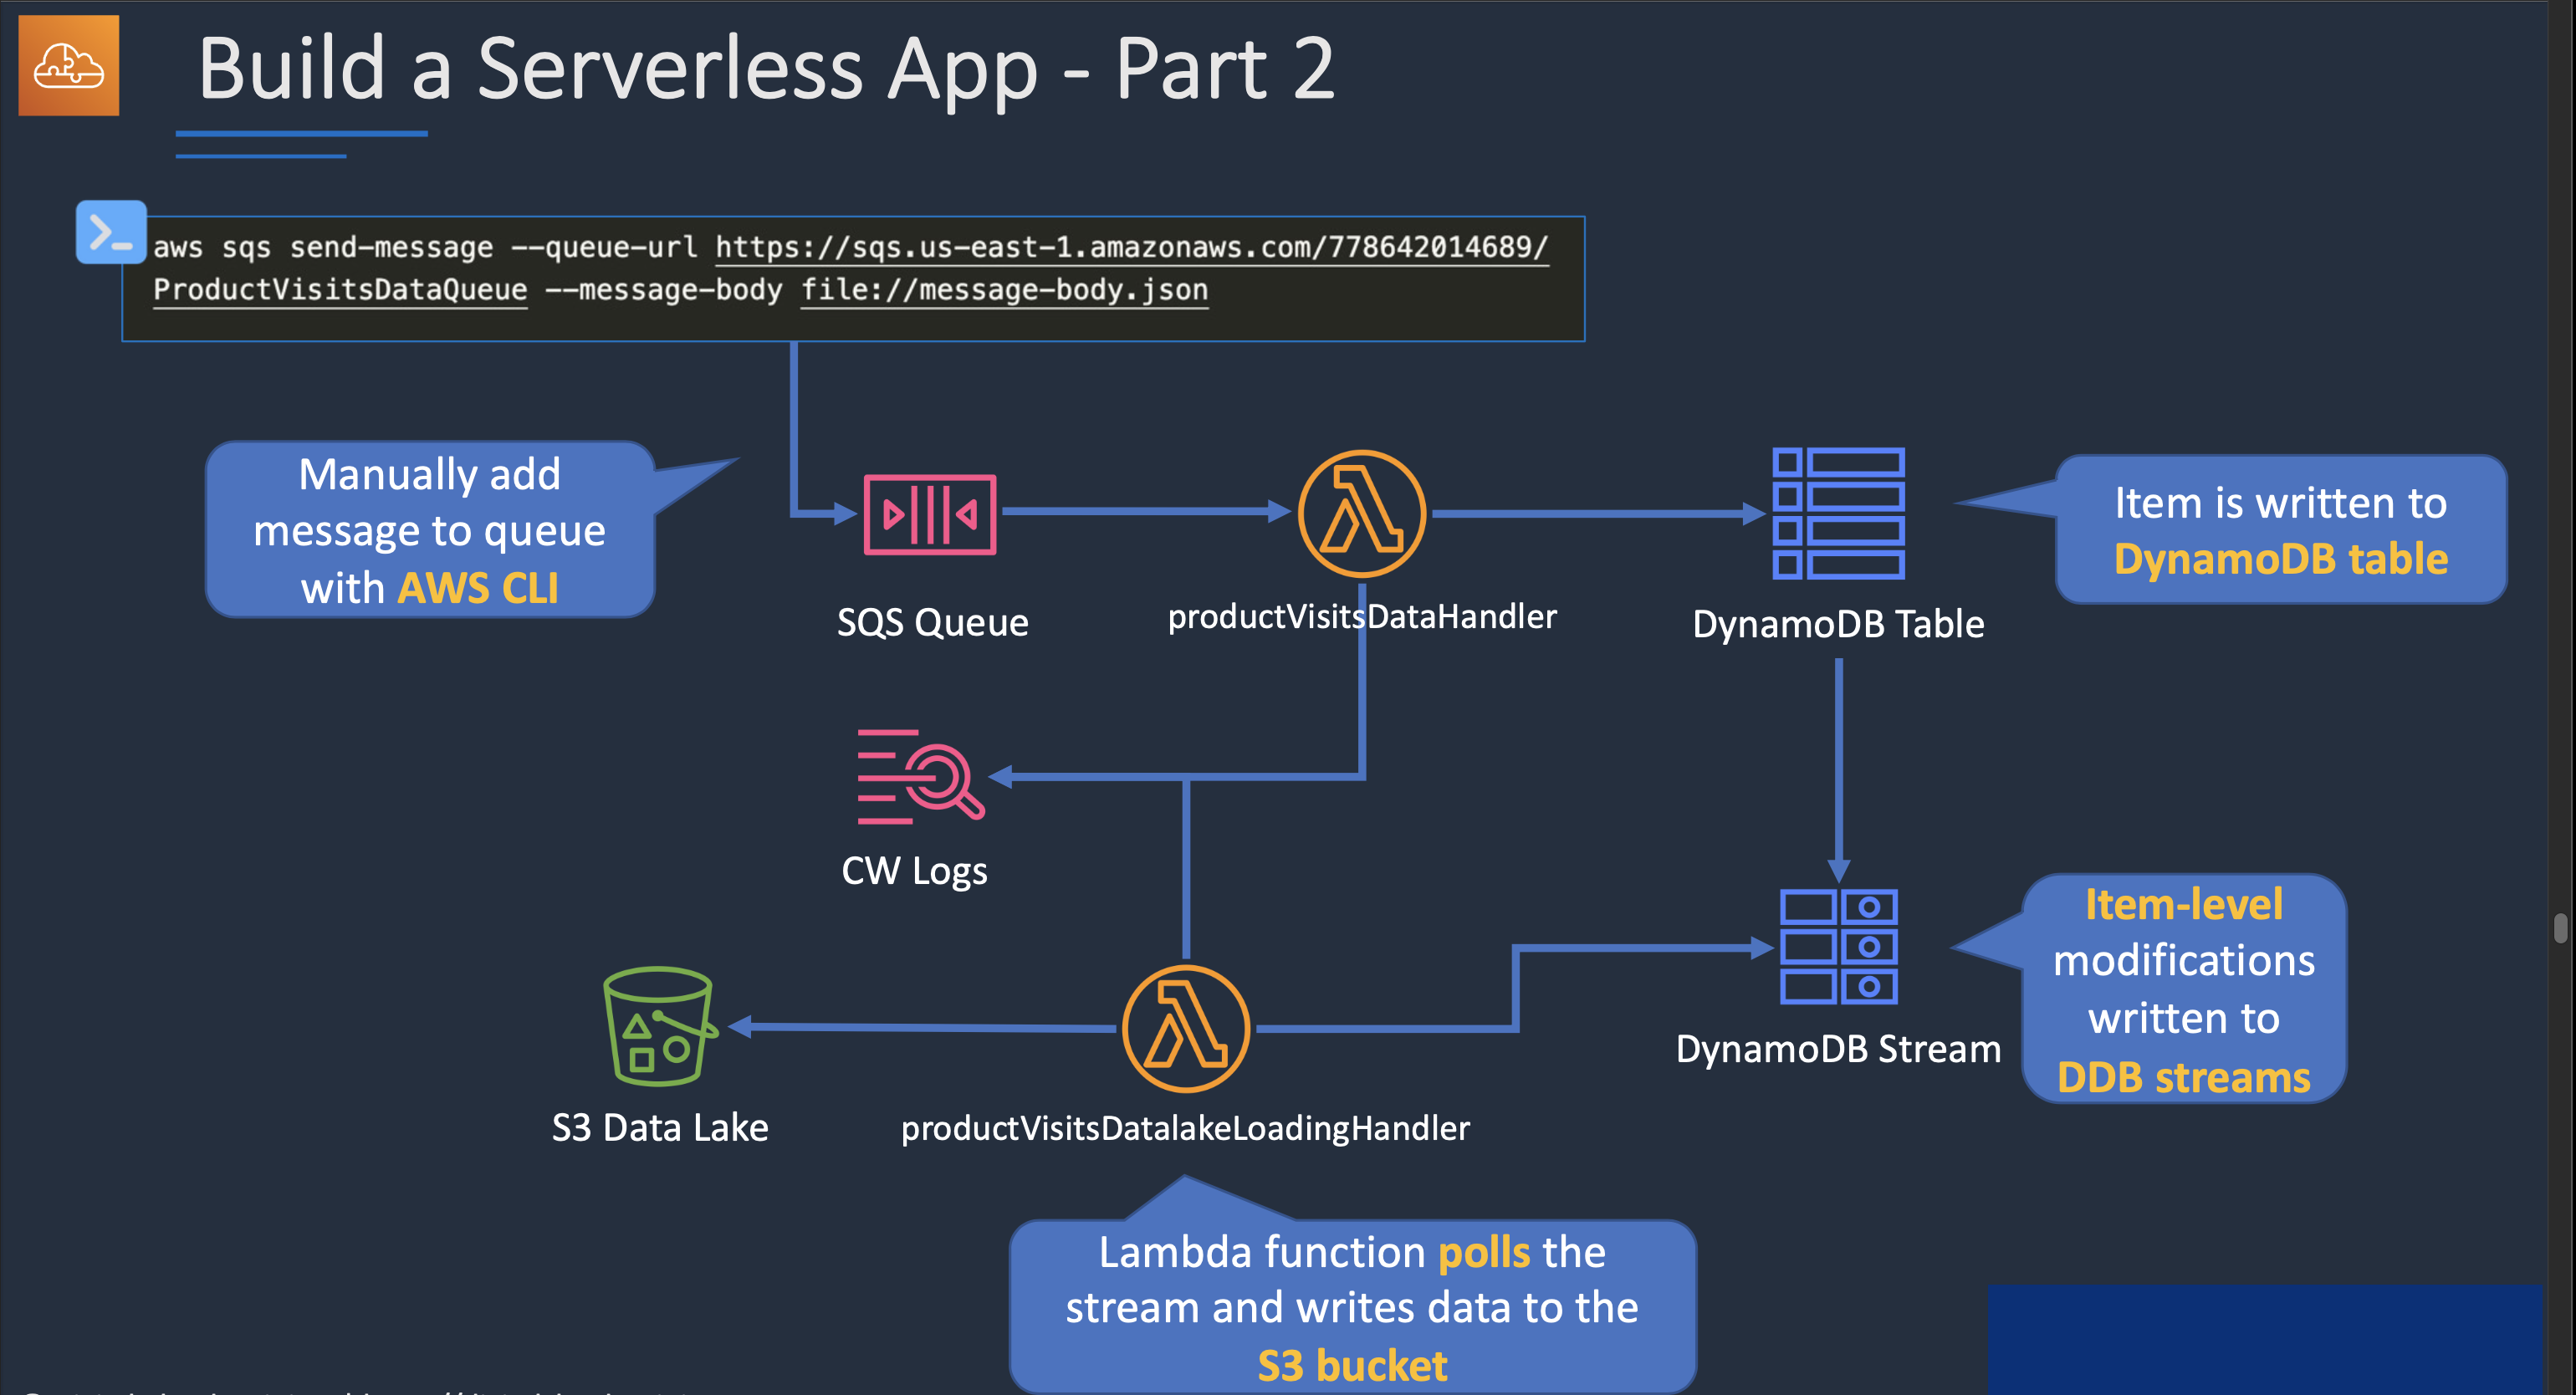
- DynamoDB에 쓰기 이벤트 발생 시, 이를 DynamoDBStream에서 람다 트리거 후 S3 Data Lake에 csv파일 전송
1) 버킷 및 IAM 정책, Lambda역할 생성
(1) 버킷 생성 (생략)
(2) I AM 정책 생성 및 & Lambda 역할 생성

{
    "Version": "2012-10-17",
    "Statement": [
        {
            "Effect": "Allow",
            "Action": "lambda:InvokeFunction",
            "Resource": "arn:aws:lambda:us-east-1:ACCOUNT_ID:function:productVisitsDatalakeLoadingHandler"
        },
        {
            "Effect": "Allow",
            "Action": [
                "logs:CreateLogGroup",
                "logs:CreateLogStream",
                "logs:PutLogEvents"
            ],
            "Resource": "arn:aws:logs:us-east-1:ACCOUNT_ID:*"
        },
        {
            "Effect": "Allow",
            "Action": [
                "dynamodb:GetRecords",
                "dynamodb:GetShardIterator",
                "dynamodb:DescribeStream",
                "dynamodb:ListStreams"
            ],
            "Resource": "arn:aws:dynamodb:us-east-1:ACCOUNT_ID:table/ProductVisits/stream/*"
        },
        {
            "Effect": "Allow",
            "Action": [
                "s3:*"
            ],
            "Resource": [
                "arn:aws:s3:::BUCKET_NAME",
                "arn:aws:s3:::BUCKET_NAME/*"
            ]
        }
    ]
}
2) 위 역할 적용 후 Lambda생성 및 코드 업로드
'use strict'
const AWS = require('aws-sdk')
const uuidv4 = require('uuid/v4')
AWS.config.update({ region: process.env.Region, apiVersion: '2012-08-10' })
const s3 = new AWS.S3();
module.exports.handler = async (event) => {
console.log('Received event:', JSON.stringify(event, null, 2));
const allPromises = event.Records.map(async (record) => {
try {
if (record.eventName == 'INSERT') {
let ProductVisitKey = record.dynamodb.NewImage.ProductVisitKey.S;
let ProductId = record.dynamodb.NewImage.ProductId.S;
let ProductName = record.dynamodb.NewImage.ProductName.S;
let Category = record.dynamodb.NewImage.Category.S;
let PricePerUnit = record.dynamodb.NewImage.PricePerUnit.S;
let CustomerId = record.dynamodb.NewImage.CustomerId.S;
let CustomerName = record.dynamodb.NewImage.CustomerName.S;
let TimeOfVisit = record.dynamodb.NewImage.TimeOfVisit.S;
let year = TimeOfVisit.split('T')[0].substr(0,4);
let month = TimeOfVisit.split('T')[0].substr(5,2);
let day = TimeOfVisit.split('T')[0].substr(8,2);
let hour = TimeOfVisit.split('T')[1].split('.')[0].substr(0,2);
console.log(`${ProductId} ${ProductName} ${Category} ${PricePerUnit}
${CustomerId} ${CustomerName} ${TimeOfVisit}`);
let row = [ProductVisitKey, ProductId, ProductName, Category, PricePerUnit,
CustomerId, CustomerName, TimeOfVisit];
let csvContent = row.join(',');
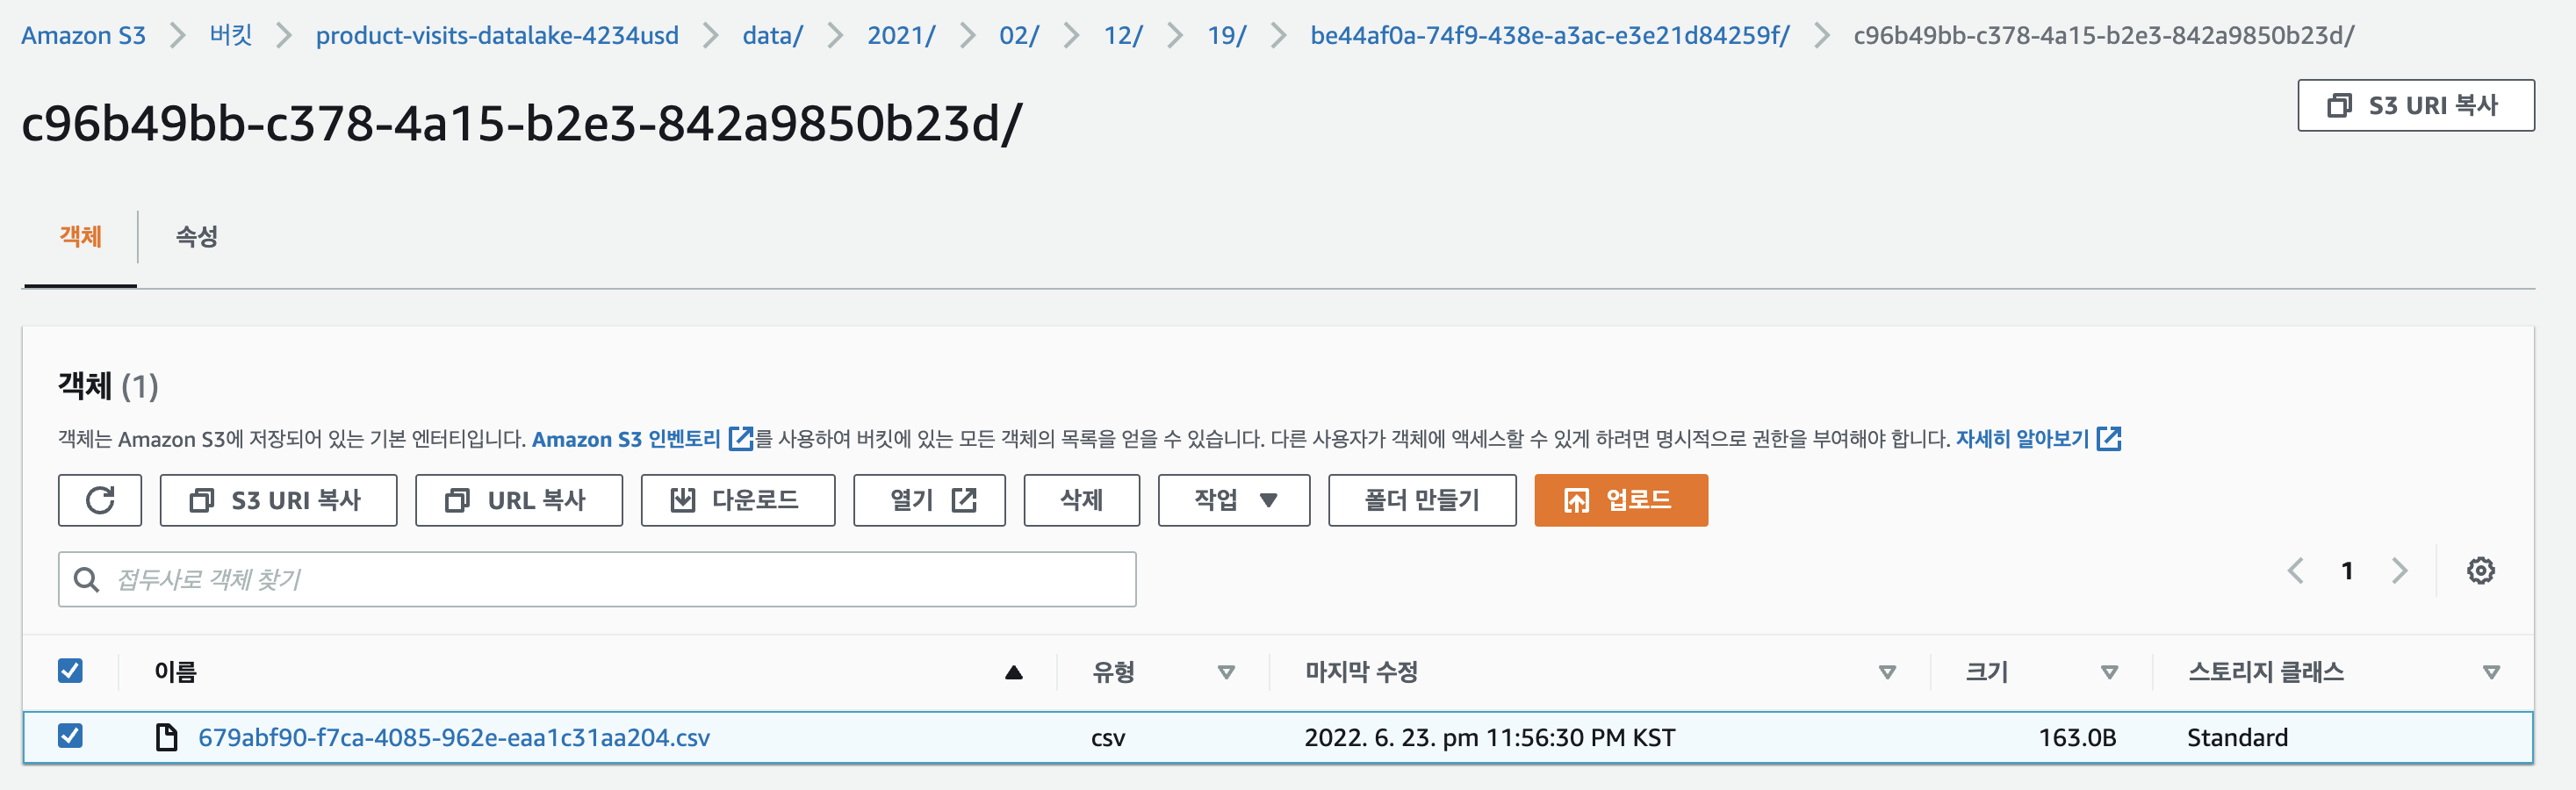
let s3KeyPrefix = `data/${year}/${month}/${day}/${hour}/${CustomerId}/${ProductId}/`
const s3Key = `${s3KeyPrefix}${ProductVisitKey}`;
console.log('Content uploaded to S3 to create CSV file.', s3Key);
var s3Path = await fileUpload(csvContent, s3Key);
console.log('Record saved as ', s3Path);
}
console.log('Product Visit record successfully processed.');
} catch (err) {
console.error(err.message);
console.error(err);
}
});
await Promise.all(allPromises);
return {}
}
/**
* @param {string} content Data
* @param {string} content Data
* @return {string} file url
*/
const fileUpload = async (content, fileS3Key) => {
// Ensure that it POST a base64 data to your server.
let buff = Buffer.from(content, 'utf8');
const type = 'csv';
const params = {
Bucket: 'BUCKET_NAME',
Key: `${fileS3Key}.${type}`, // type is not required
Body: buff,
ContentEncoding: 'utf8', // required
ContentType: `text/${type}` // required. Notice the back ticks
}
let location = '';
let key = '';
try {
const { Location, Key } = await s3.upload(params).promise();
location = Location;
key = Key;
} catch (error) {
console.error(error.message);
console.log(error)
}
console.log(location, key);
return location;
}3) DynamoDB 스트림 활성화 및 람다 트리거 적용
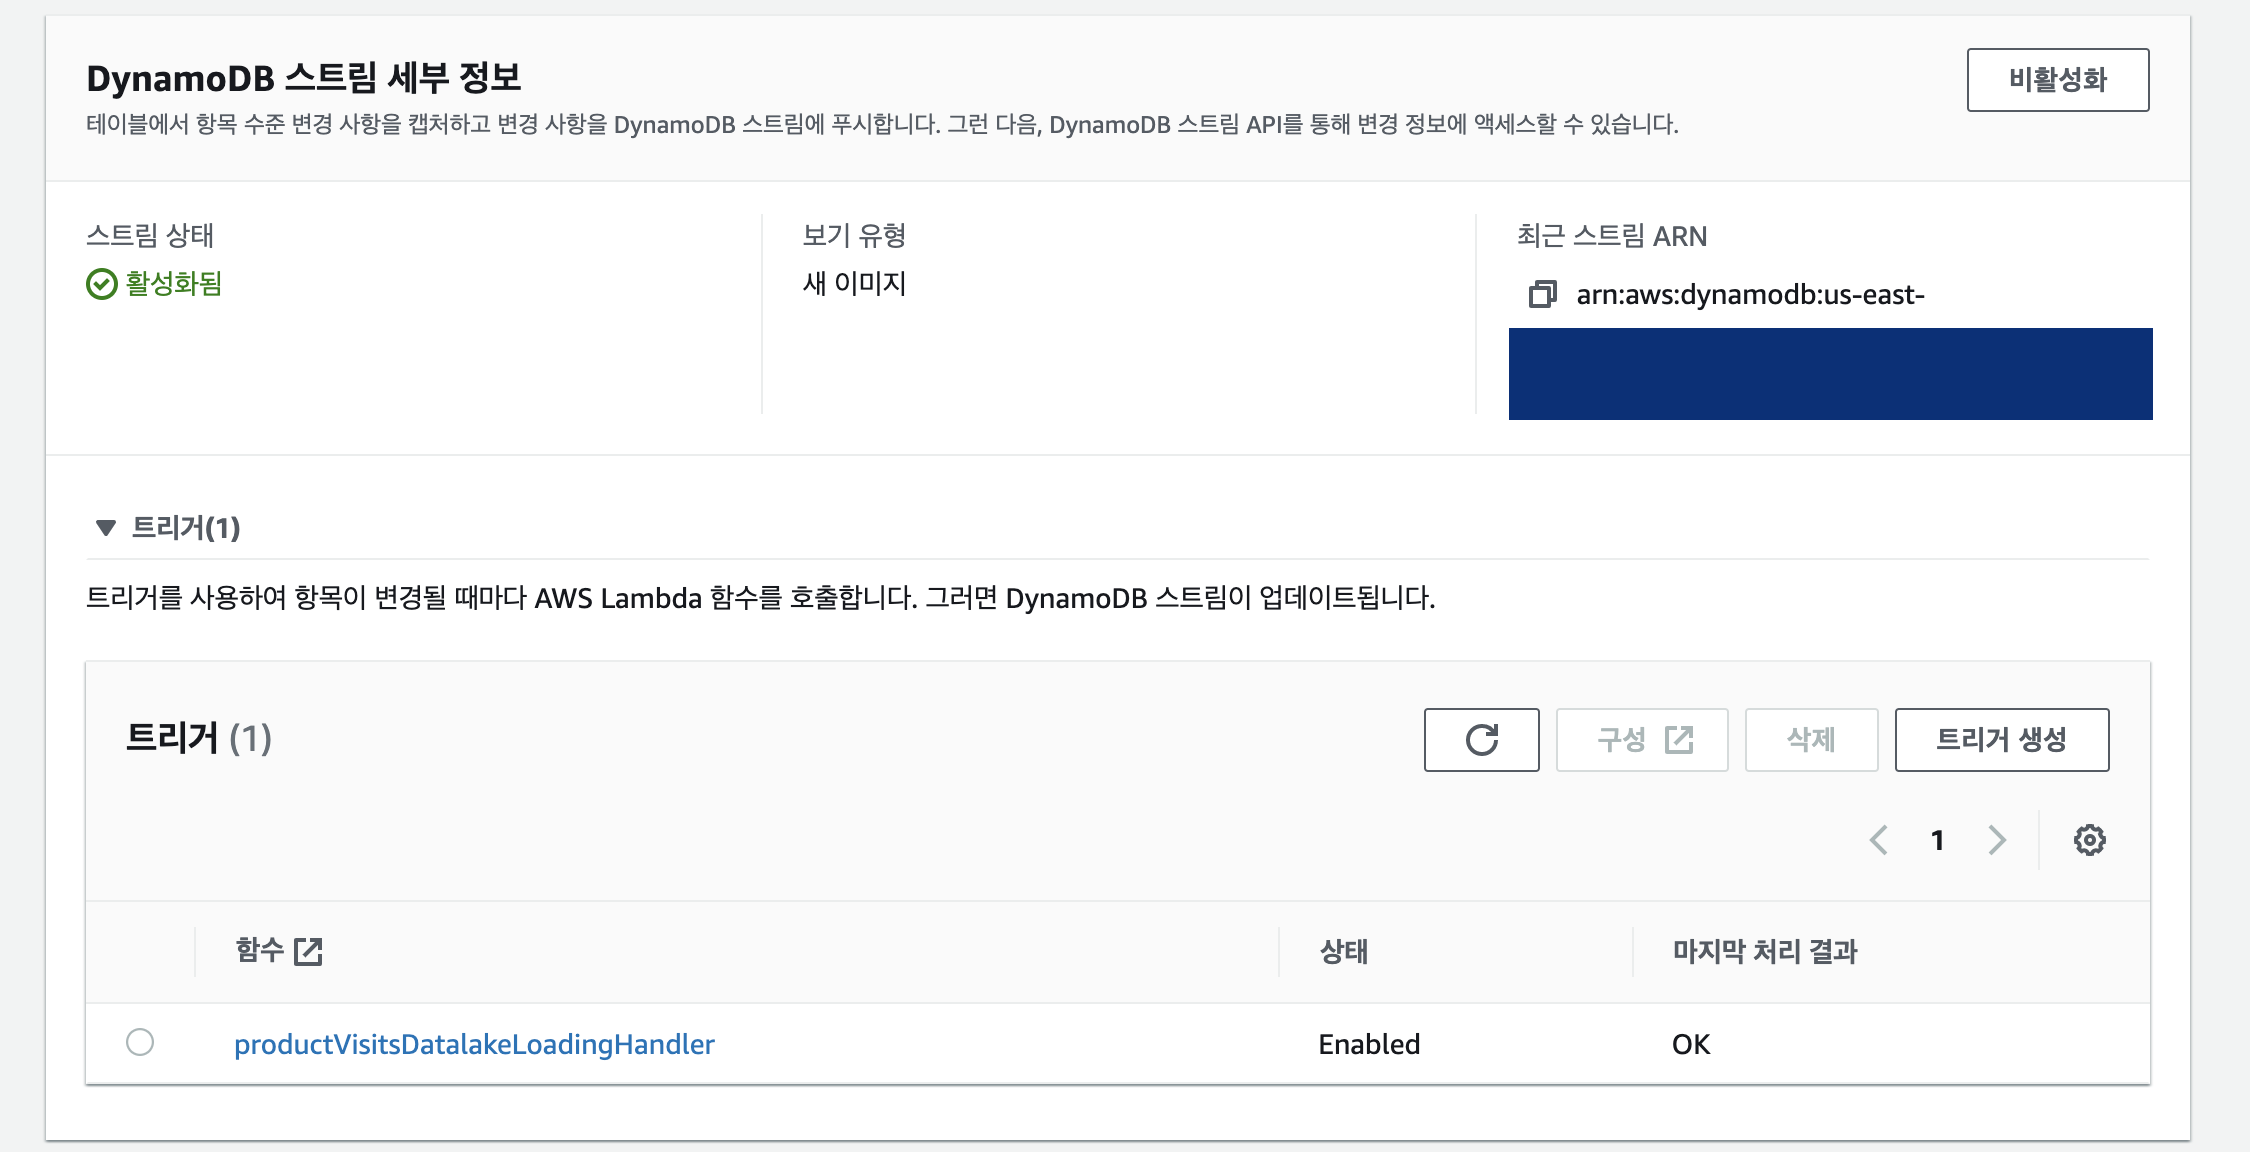
4) 수동 테스트
aws sqs send-message --queue-url SQU_URL --message-body file://message-body-1.json3. API Gateway를 활용한 SQS queue 전달
1) Lambda 함수 생성
(1) SQS Queue I AM 정책 & 역할 생성
{
    "Version": "2012-10-17",
    "Statement": [
        {
            "Effect": "Allow",
            "Action": [
                "logs:CreateLogGroup",
                "logs:CreateLogStream",
                "logs:PutLogEvents"
            ],
            "Resource": "arn:aws:logs:us-east-1:Account_ID:*"
        },
        {
            "Effect": "Allow",
            "Action": "sqs:SendMessage",
            "Resource": "arn:aws:sqs:us-east-1:Account_ID:ProductVisitsDataQueue"
        }
    ]
}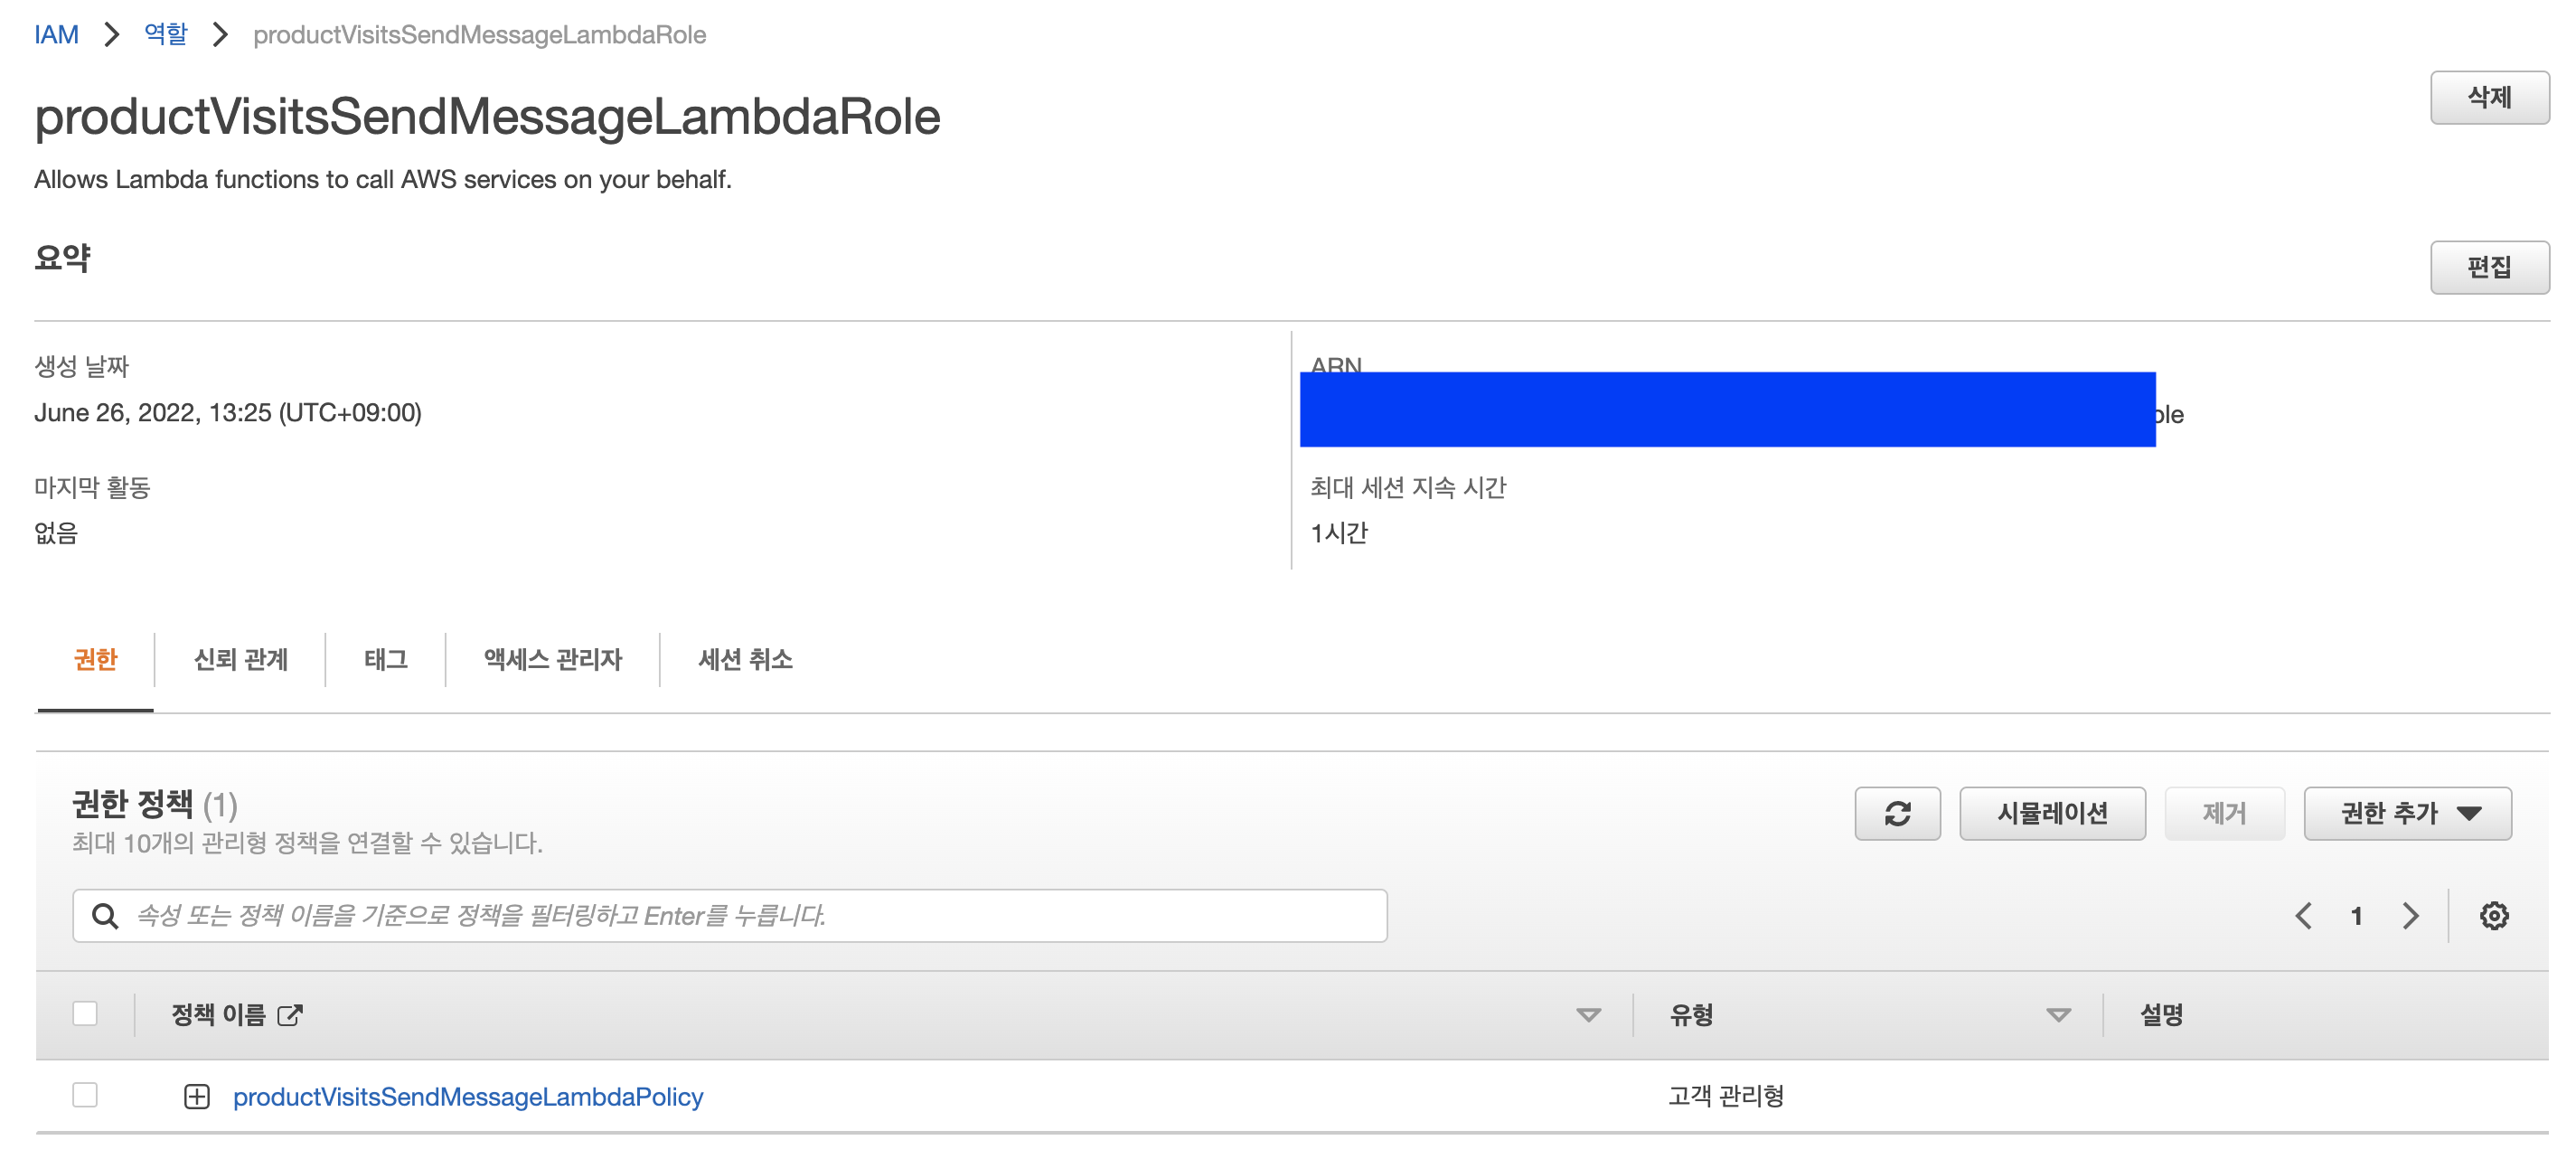
- Sending Queue 역할 생성
(2) 역할을 반영한 Lambda 생성
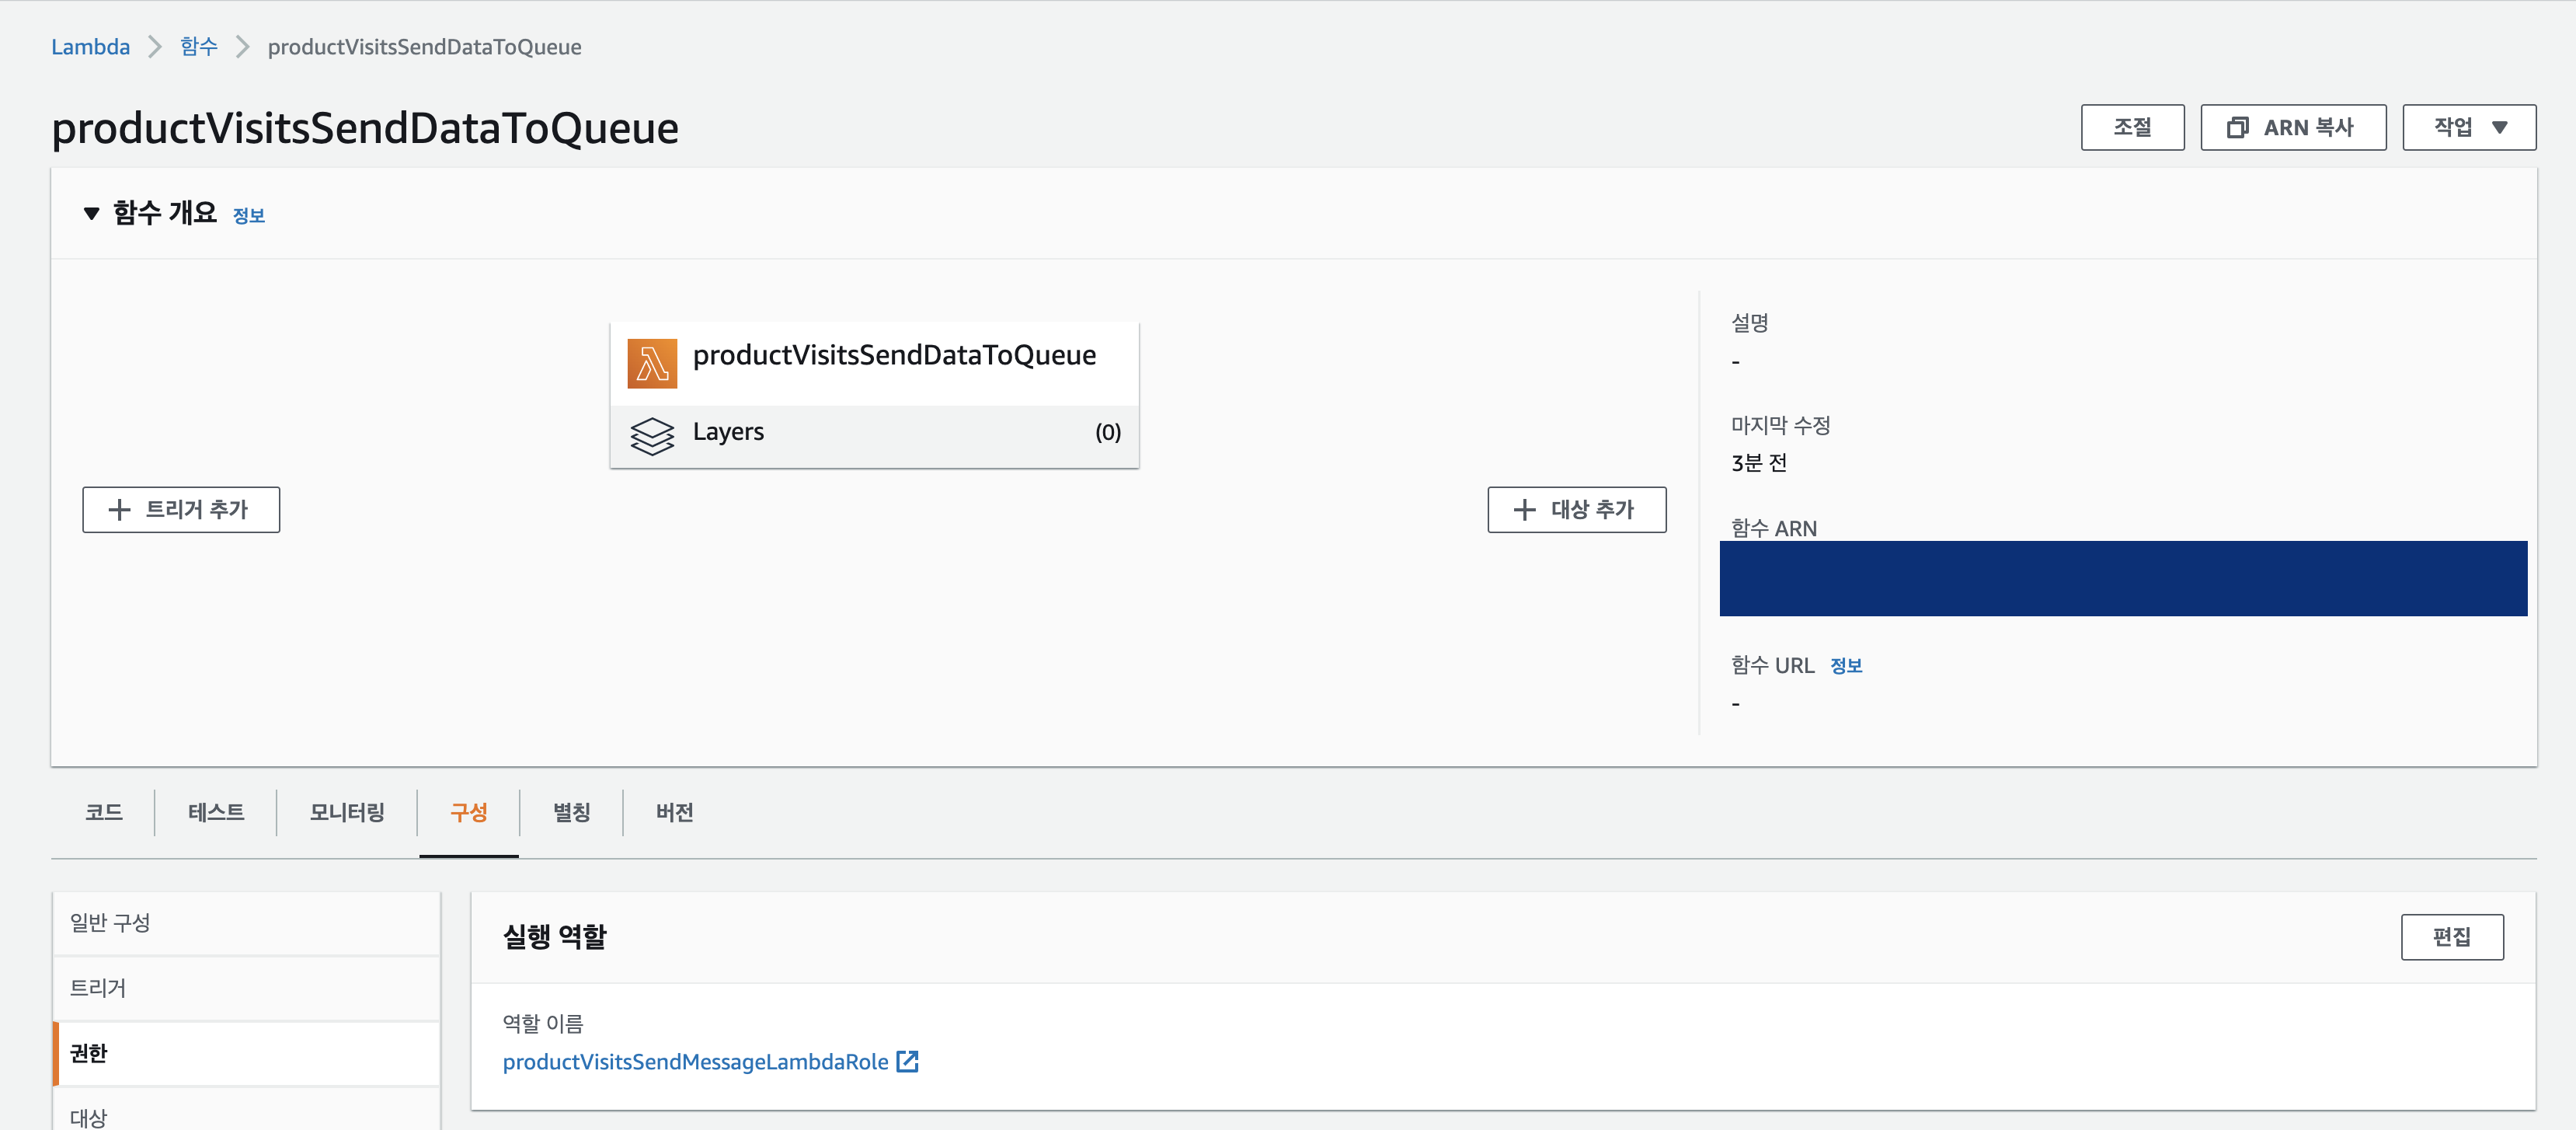
- 백엔드 코드 업로드는 생략
2) API GateWay 생성
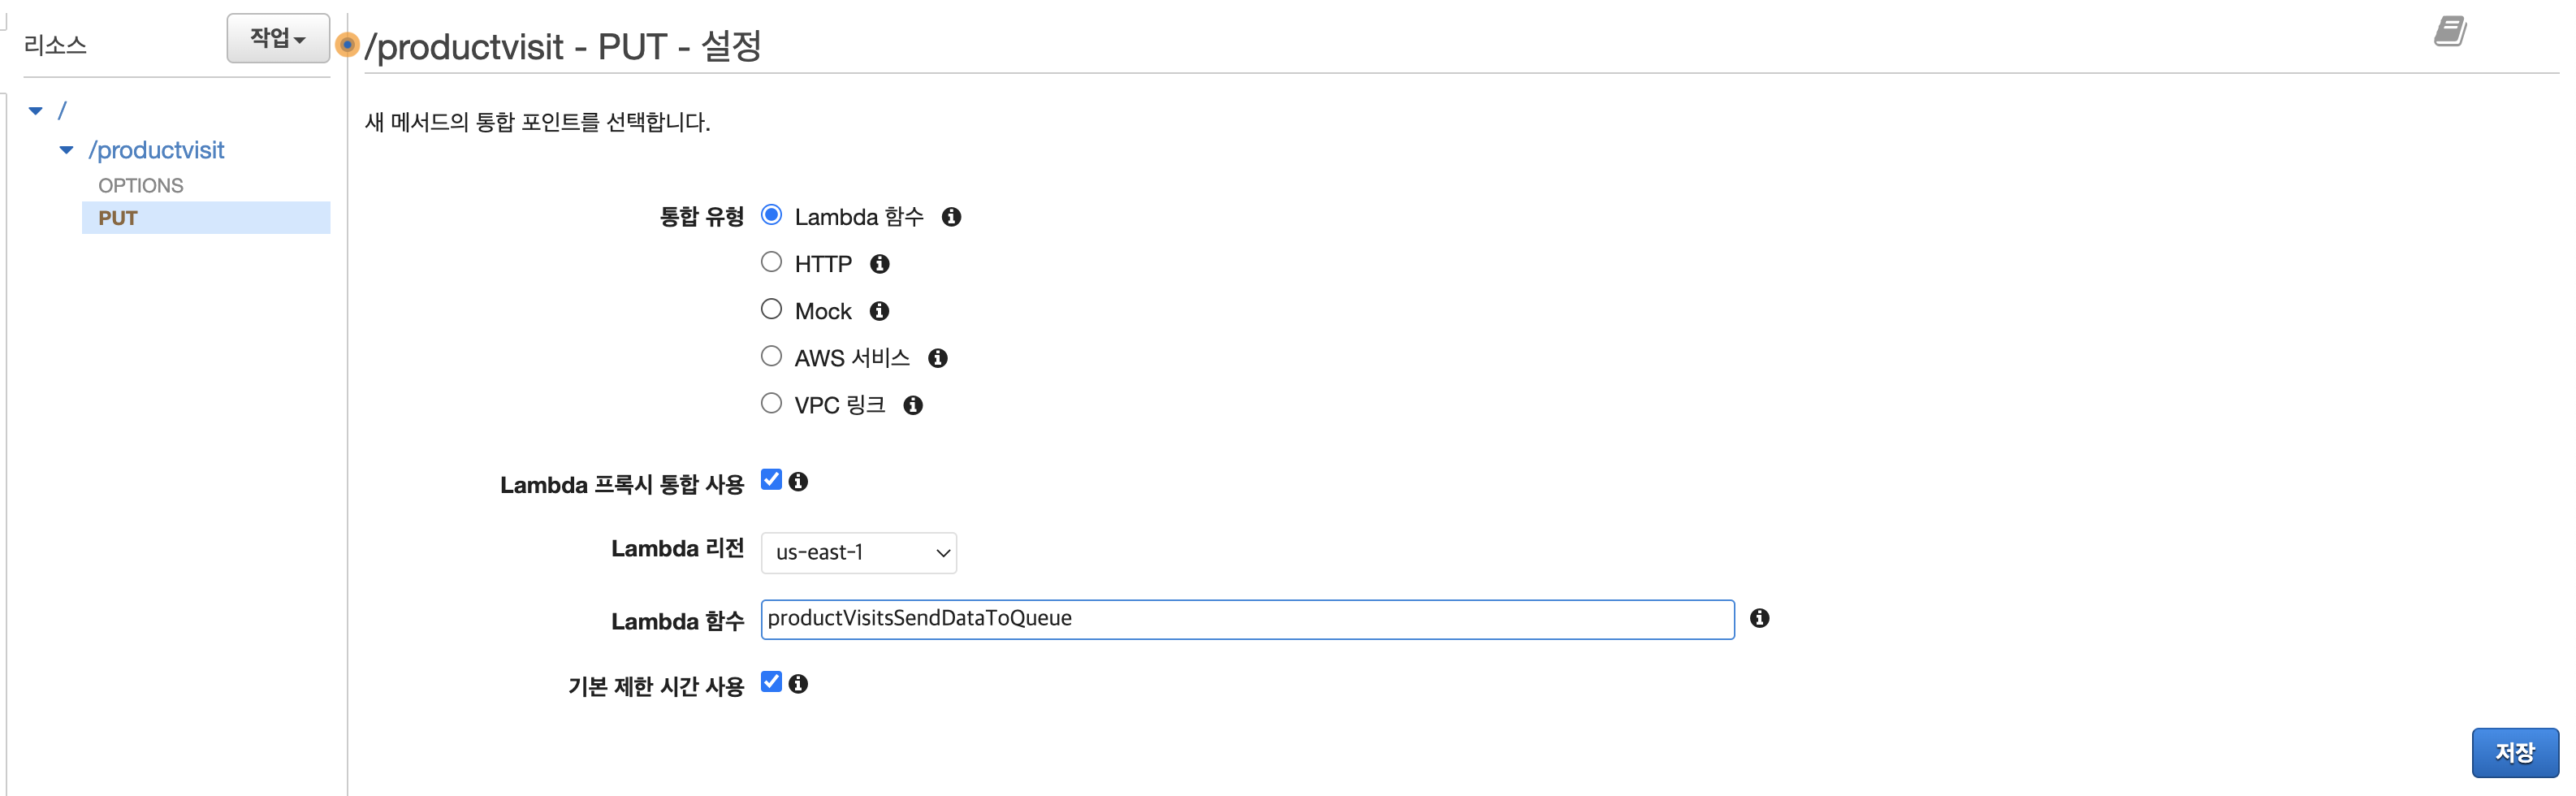
- 리소스 생성 후 Lambda 연결
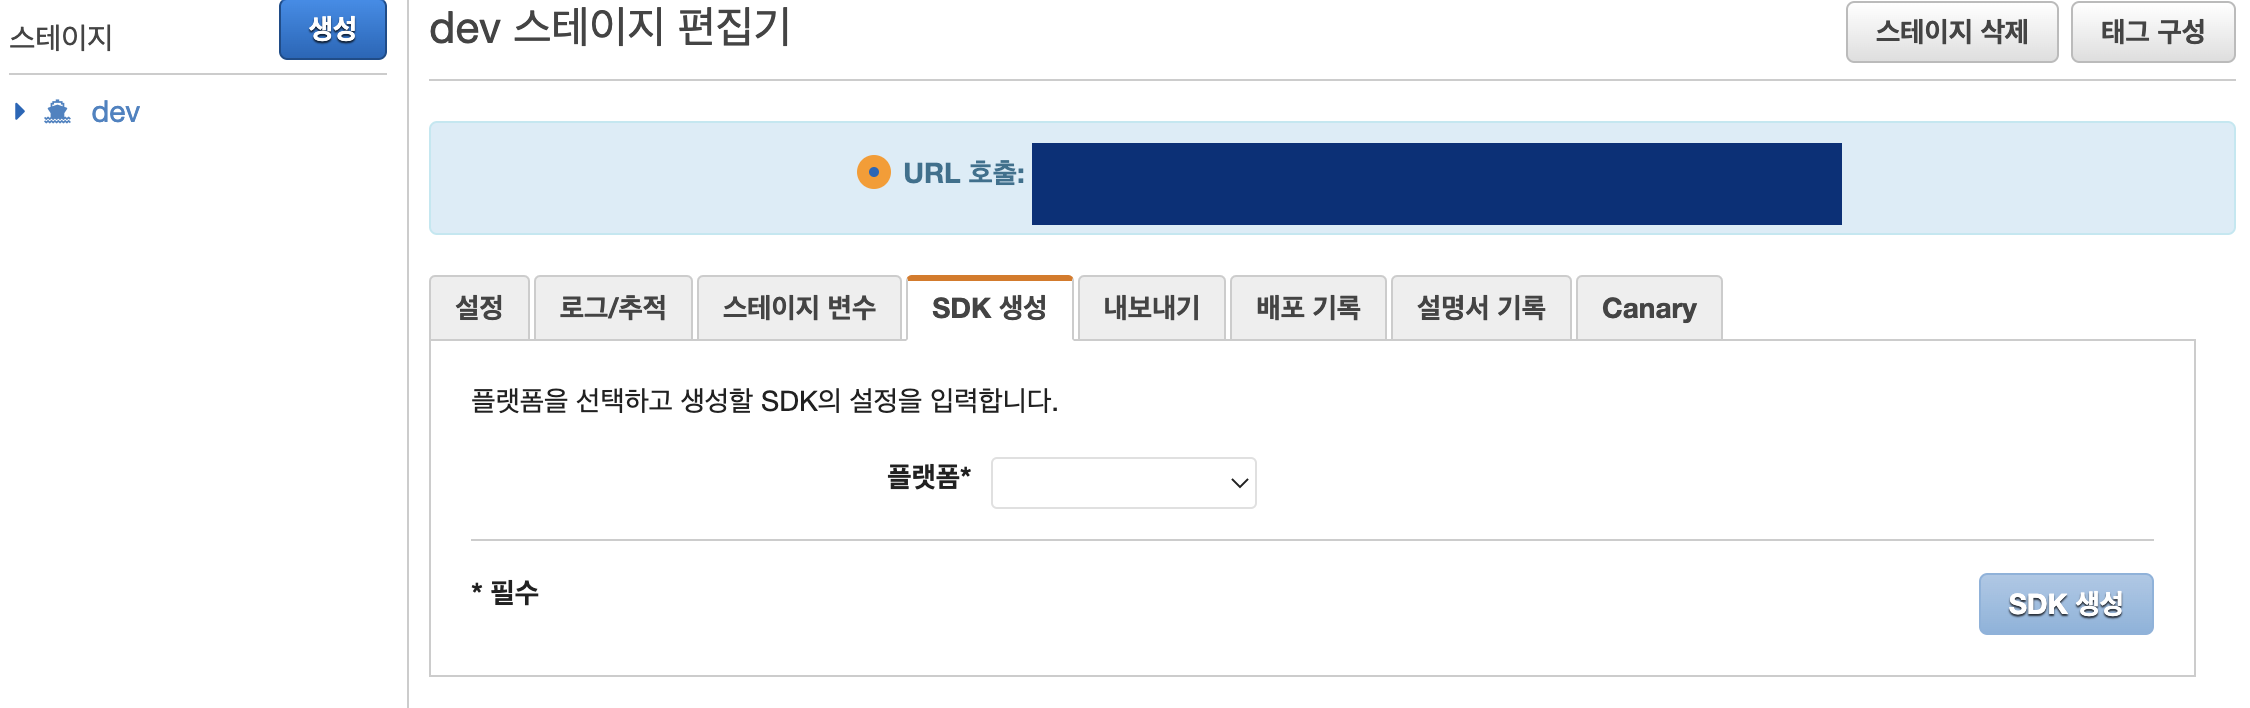
- Front에서 사용할 SDK 생성
3) S3 bucket 생성
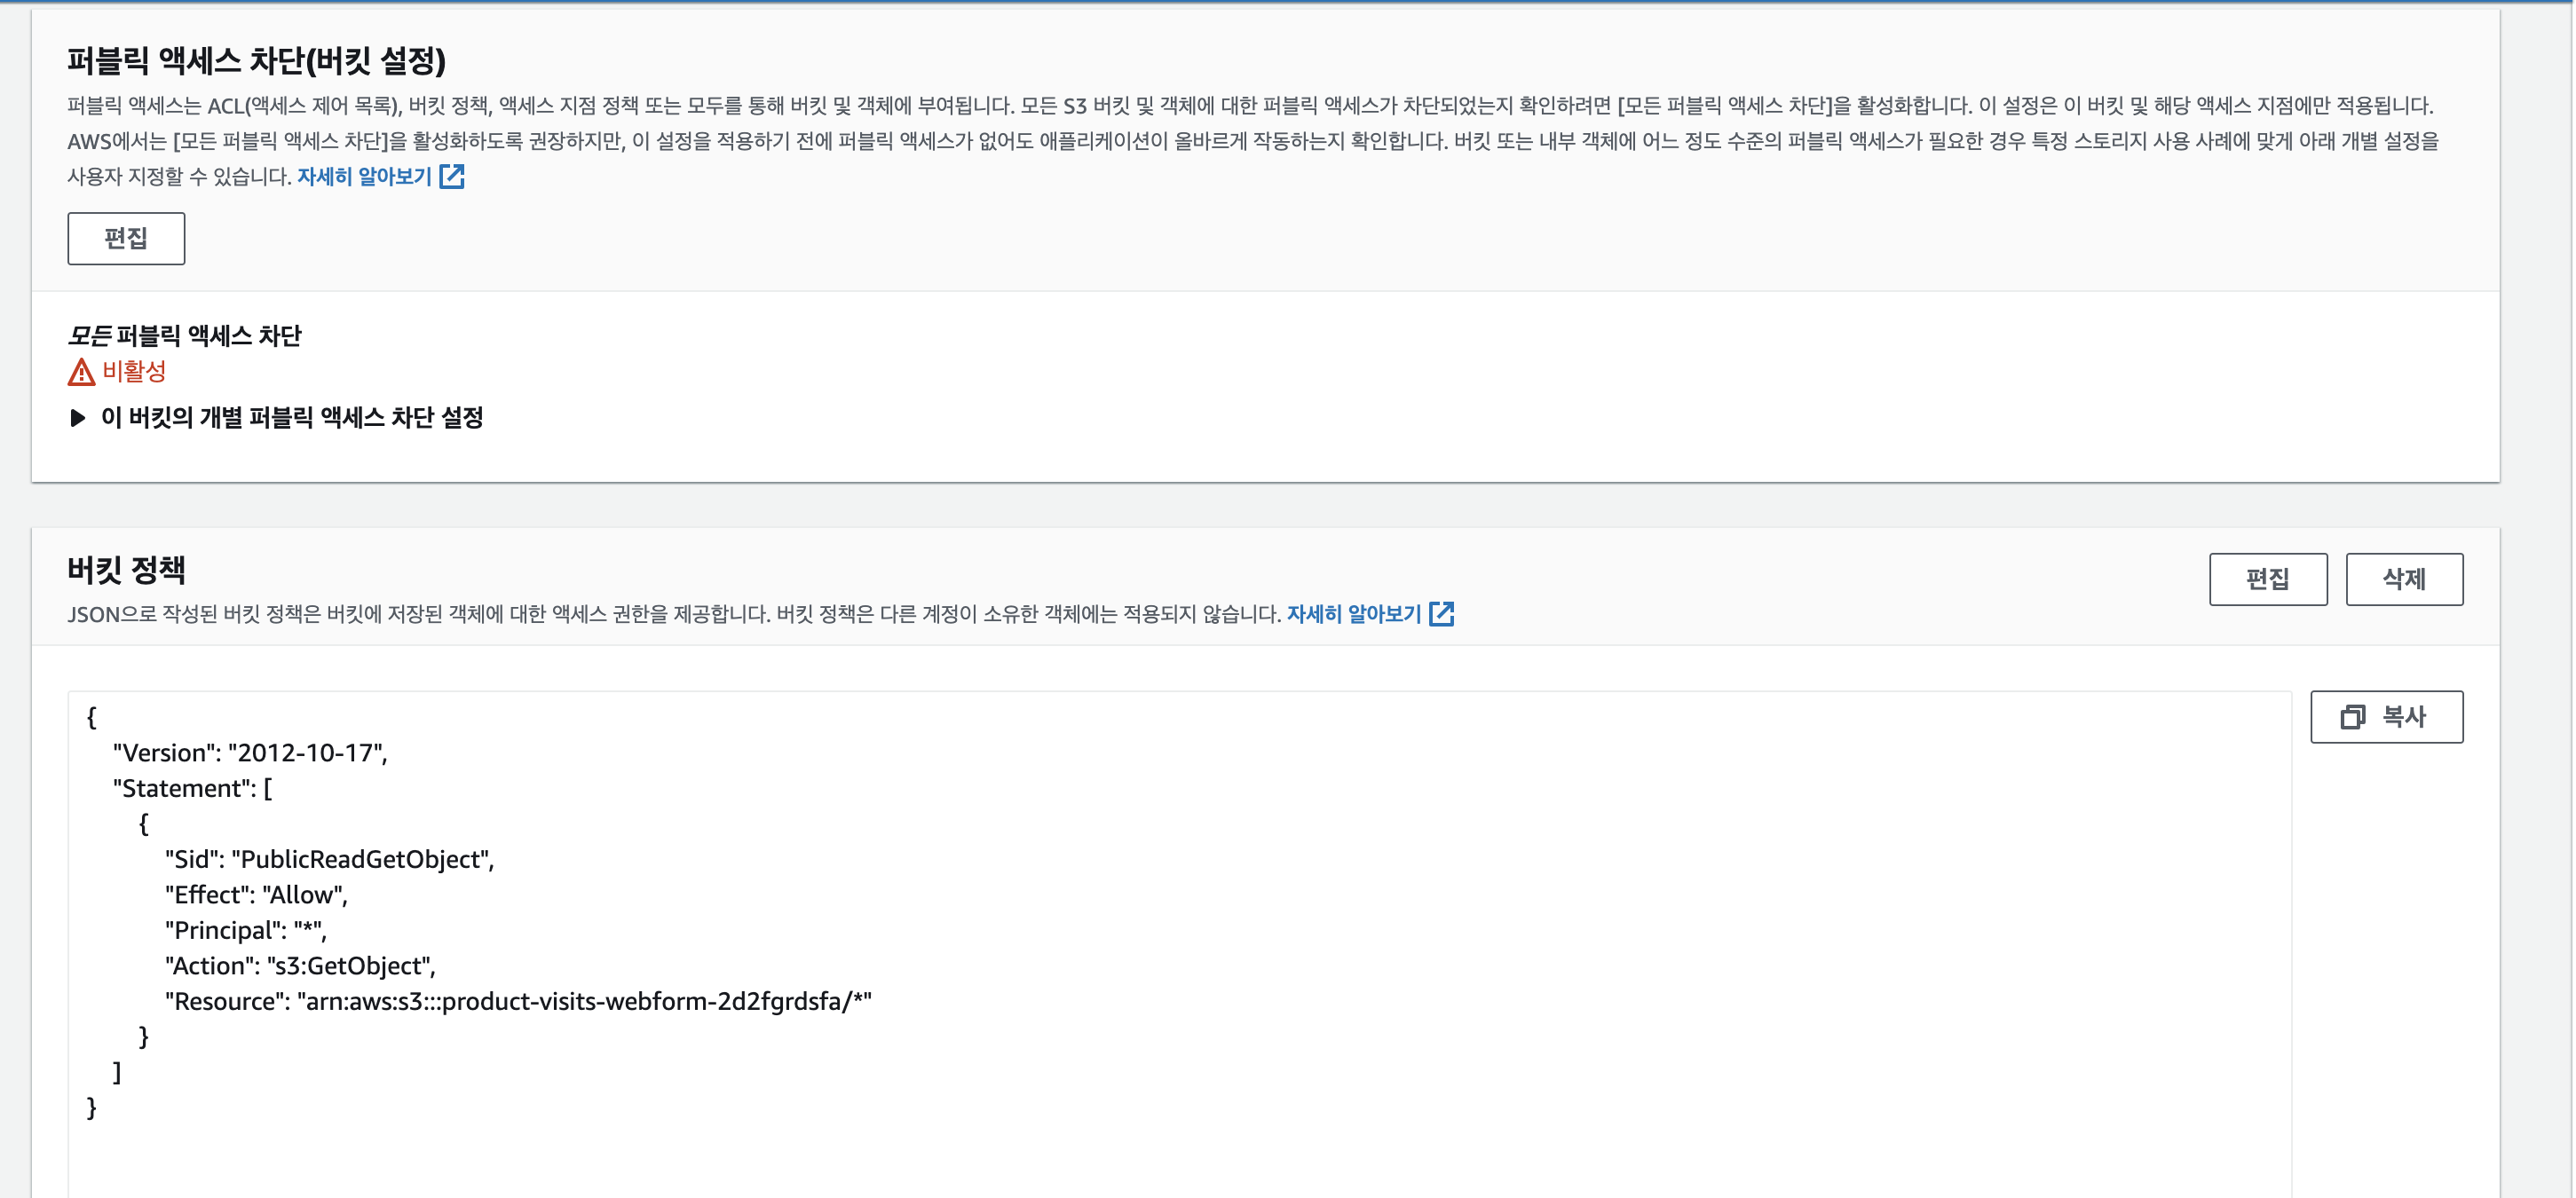
- 버킷 퍼블릭 엑세스 차단 비활성화
- Public 읽기 정책 설정
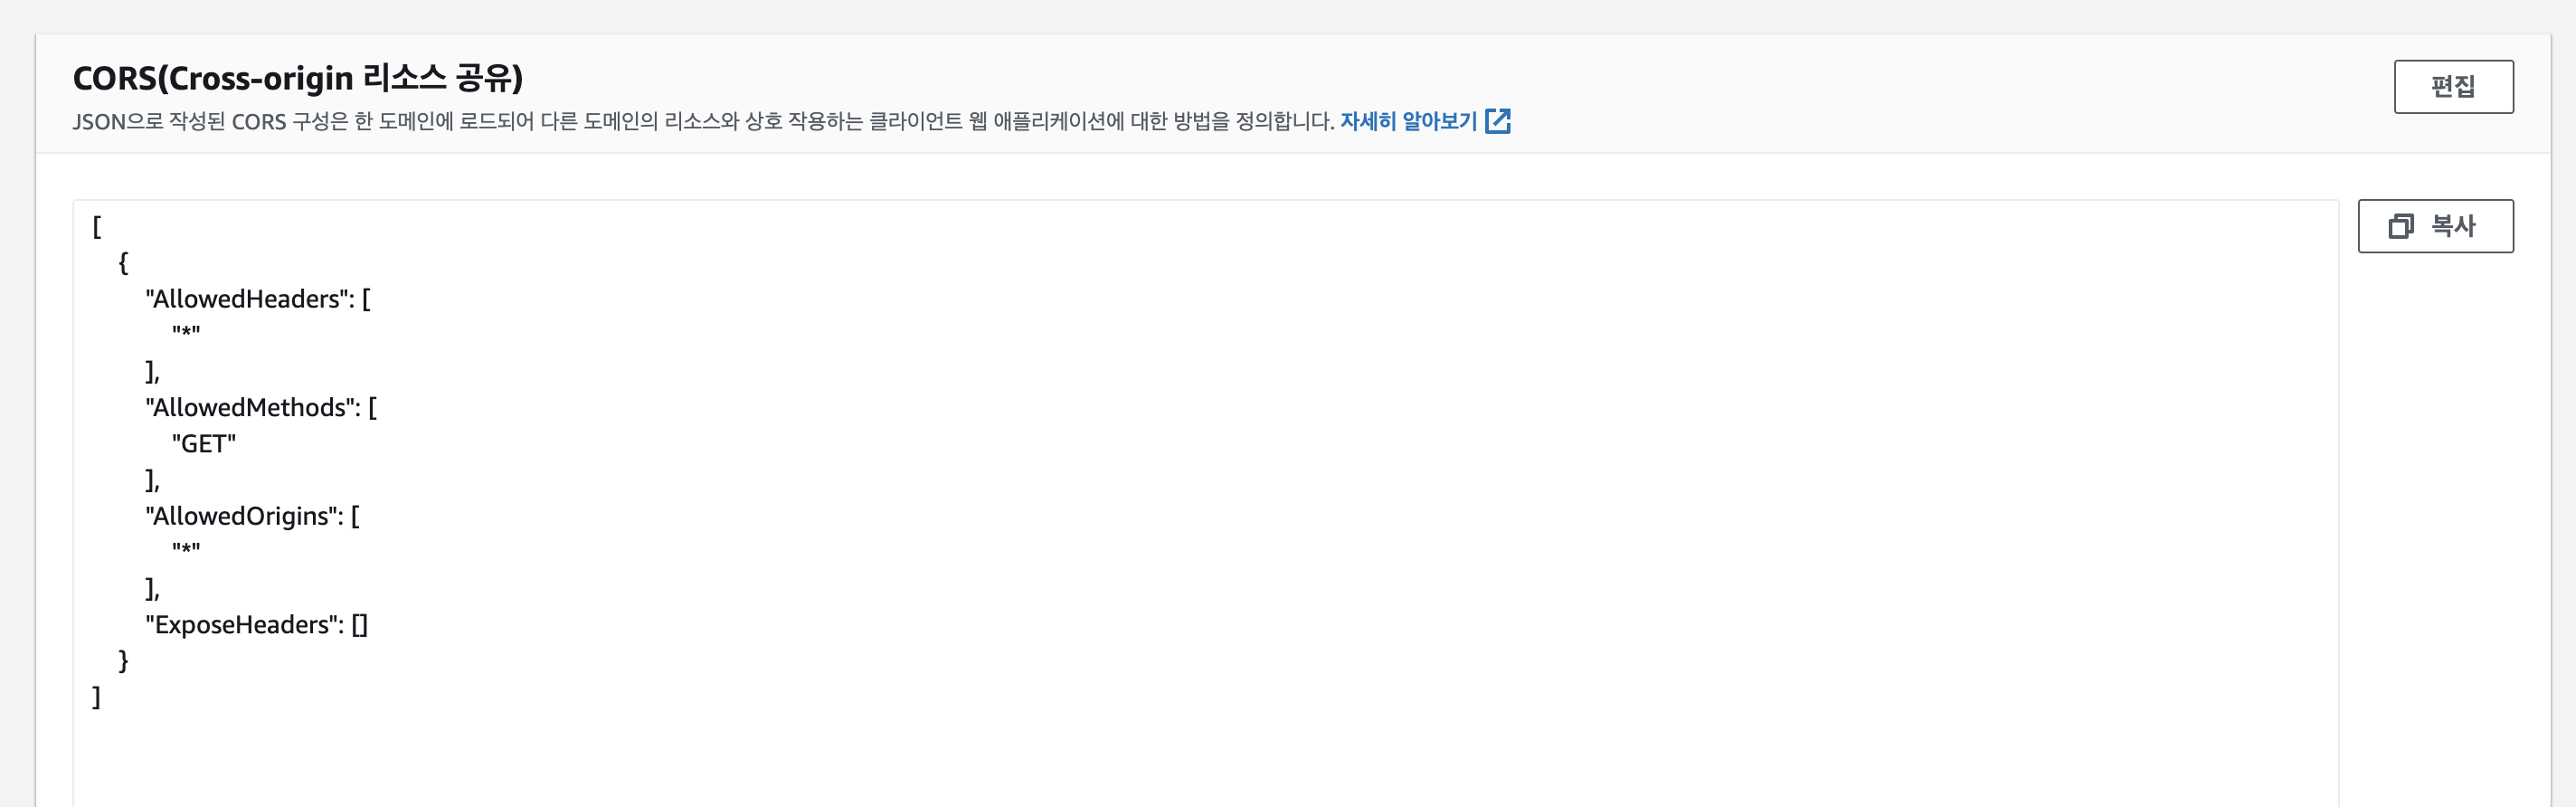
- CORS 리스소 공유 설정
참고) Build-serverless-app / DigitalCloud

Pay it forward