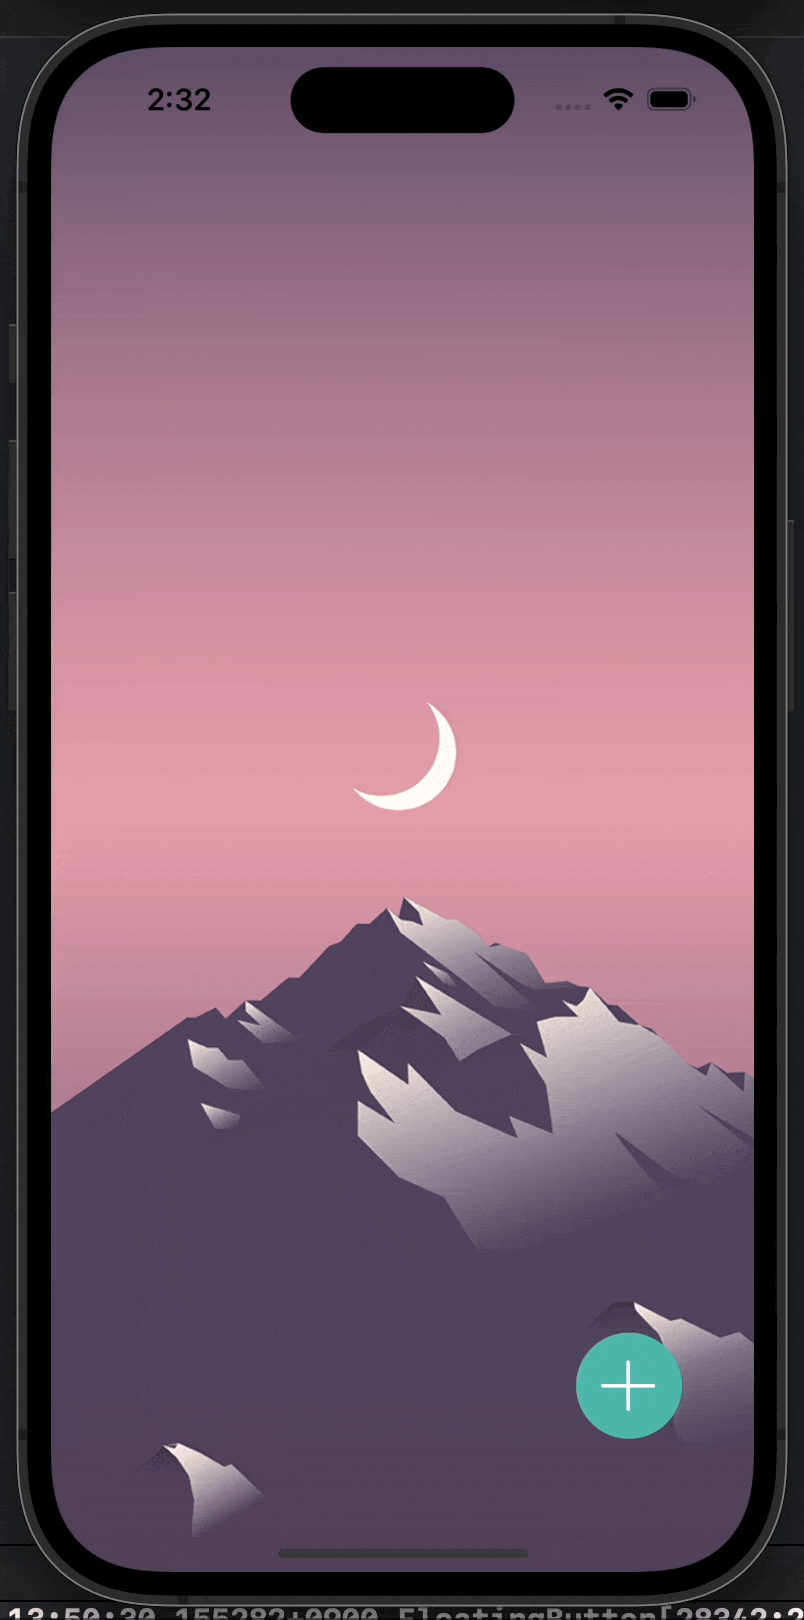
FloatinButton만들어보기
인프런에 autolayout강의가 있는데 대부분의 강의를 스토리보드로 진행을 하신다 애초에 스토리보드로 배우고 개념을 익힌 후에 코드를 짜는게 나아서 그런거라고 생각을하고 오히려스토리보드로 배우니까 내가 뭘 몰랐는지가 명확하게 그려지기는 했었다. 확실하진 않은데 이번 앱잼 프로젝트에 floatingButton이 생길수도있다는 이야기를 들었고 한번 연습해봤다.
present로 ViewController나누기
첫번째 구현방식은 버튼을 누르면 배경이 투명한 ViewController가 나온다는 개념이다 이렇게하면 장점이 코드가 깔끔해진다는거? 그리고 보통 floatingButton을 누르면 원래 화면과의 interaction이 없어야하는데 자연스럽게 그러한 기능이 구현이된다는 장점이있다.
그래서 코드를 보면
@objc func floatingButtonTapped() {
    let nextViewController = FloatingActionViewController()
    nextViewController.modalPresentationStyle = .overCurrentContext
    self.present(nextViewController, animated: false)
}
버튼을 누르면 FloatingActionViewController이 present되는데 이때 presentationStyle에 .overCurrentContext를 설정해줘야한다
presentStyle
presentStyle에는 총 네가지가 있다
- fullScreen
- currentContext
- overFullScreen
- overCurrentContext
이중에서 fullScreen과 currentContext는 아래에 있던 뷰 계층을 날려버린다 그렇기때문에 뒷배경을 보이게 하고 싶어서 투명도를 조절해도 아래 배경이 날라가기때문에 우리가 원하는 view모양이 나오지 않는다
반대로 over가 붙은 overFullScreen과 overCurrentContext는 그반대로 아래있던 뷰 계층을 유지시키기때문에 투명도를조절하면 뒷배경이 보이게된다
그렇다면 fullscreen과 currentContext의 차이는 뭘까 fullscreen은 present되는 view의 크기가 디바이스의 크기이고 currentContext는 내가 해당 present를 호출한 view의 크기만큼의 view가 present된다 즉 나는 지금 viewcontroller에서 호출했기때문에 둘다 결과는 똑같다고 생각하면된다
snapkit으로 constraint만들어서 조절하기
사실 내가 가장 신기했던 부분은 이 부분이었다. 처음에 이뷰를 만들겠다고 했을때는 remakeConstraints나 updateConstraints를 사용해야겠다고 생각했는데
private var firstButtonSpacing: Constraint?
private var secondButtonSpacing: Constraint?
private var thirdButtonSpacing: Constraint?
이렇게 각각의 centerY값의 offset값을 Constraint라는 타입으로 받아놓고
firstFoodButton.snp.makeConstraints { make in
    self.firstButtonSpacing = make.centerY.equalTo(floatingButton.snp.centerY).offset(0).constraint
    make.centerX.equalTo(floatingButton.snp.centerX)
    make.size.equalTo(50)
}

secondFoodButton.snp.makeConstraints { make in
    self.secondButtonSpacing = make.centerY.equalTo(floatingButton.snp.centerY).offset(0).constraint
    make.centerX.equalTo(floatingButton.snp.centerX)
    make.size.equalTo(50)
}

thirdFoodButton.snp.makeConstraints { make in
    self.thirdButtonSpacing = make.centerY.equalTo(floatingButton.snp.centerY).offset(0).constraint
    make.centerX.equalTo(floatingButton.snp.centerX)
    make.size.equalTo(50)
}
레이아웃을 잡을 때 변수로선언해놨던 constraints에다가 속성들을 넣어준다 다만 주의해야할점이있다면 기존 snapkit코드를 치면(보통 offset이나 inset까지만 코드를 쓰면)
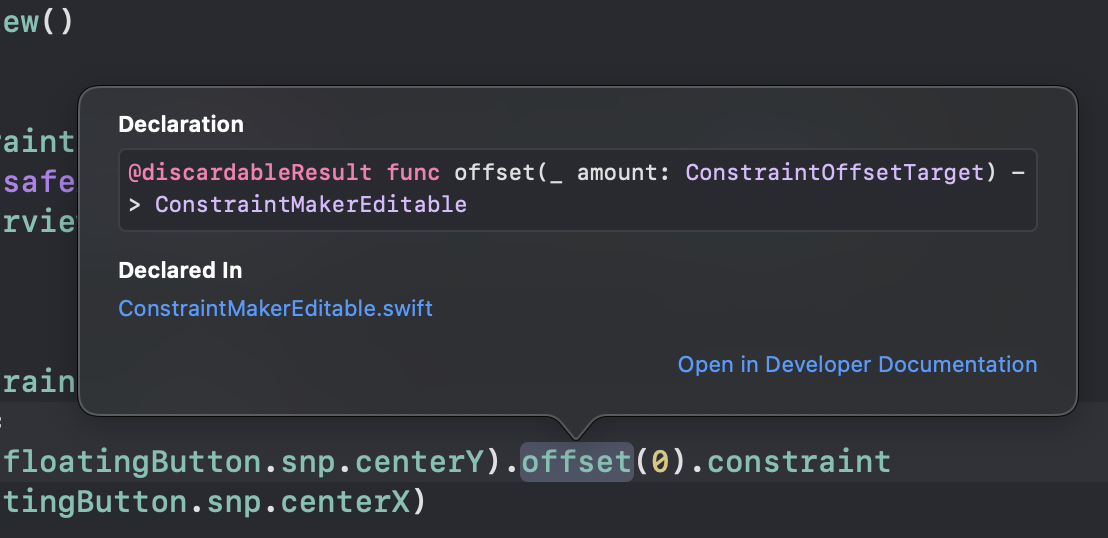
최종적으로 return되는 타입은 위와같이 ConstrainMakerEditable이다 그렇기때문에 이걸 Constraints타입으로 바꿔주려면 아래와같은 계산속성을 통해 constraints값을 받아서 변수에다가 넣어줘야한다
public class ConstraintMakerFinalizable {

    internal let description: ConstraintDescription

    internal init(_ description: ConstraintDescription) {
        self.description = description
    }

    @discardableResult
    public func labeled(_ label: String) -> ConstraintMakerFinalizable {
        self.description.label = label
        return self
    }

    public var constraint: Constraint {
        return self.description.constraint!
    }
}
그리고 해당 값을 업데이트하고싶다면 아래와같이 update를 해주면된다
firstButtonSpacing?.update(offset: -80)
secondButtonSpacing?.update(offset: -160)
thirdButtonSpacing?.update(offset: -240)
UIView.animate(withDuration: 0.3) {
    self.view.layoutIfNeeded()
}
이렇게 하면 해당 constraints값을 업데이트해주고 그 업데이트한 변경사항을 view에 바로 적용시키기 위해서 self.view.layoutIfNeeded()를 실행시켜주면된다.
