웹서버 안쪽에서 Python이 동작 할 경우,
Python으로 html code를 생성하는 등의 일을 할 수 있다.
apache에 *.py 라는 파일에 대한 요청이 들어오면,
해당 파일을 실행시킨 다음, 그 결과 값을 화면에 출력하게 해보자.
먼저, httpd.conf(conf는 나중에 꼭 찾아보자) 파일의 내용을 바꿔야 한다.
항상 백업하는 습관은 들이자! 문제가 생길 경우 원복해야하니, httpd.conf.bak으로 저장하자.
web server와 application을 연동할 때 사용하는 표준화된 방법 : cgi (common gateway interface)
그걸 가능하게 해주는 아팟치의 웹서버 기능이
LoadModule cgi_module modules/mod_cgi.so
이다. 앞에 #이 없어야 사용 가능함.
해당 확인 파일의 위치는
C:\Bitnami\wampstack-8.1.3-0\apache2\conf\httpd.conf
에 있다.
요청이 들어왔을 때, 웹서버가 htdocs에서 파일을 찾도록 하는 것이 아래 코드이다.
#### C:/Bitnami/wampstack-8.1.3-0/apache2/htdocs 라는 디렉토리를 찾고, 해당 디렉토리에서 '*.py'를 찾아라 라는 뜻이다. ####
DocumentRoot "C:/Bitnami/wampstack-8.1.3-0/apache2/htdocs"
<Directory "C:/Bitnami/wampstack-8.1.3-0/apache2/htdocs">
#
# Possible values for the Options directive are "None", "All",
# or any combination of:
#   Indexes Includes FollowSymLinks SymLinksifOwnerMatch ExecCGI MultiViews
#
# Note that "MultiViews" must be named *explicitly* --- "Options All"
# doesn't give it to you.
#
# The Options directive is both complicated and important.  Please see
# http://httpd.apache.org/docs/2.4/mod/core.html#options
# for more information.
#
Options Indexes FollowSymLinks

#
# AllowOverride controls what directives may be placed in .htaccess files.
# It can be "All", "None", or any combination of the keywords:
#   AllowOverride FileInfo AuthConfig Limit
#
AllowOverride None

#
# Controls who can get stuff from this server.
#
Require all granted

기존에 작성되어있던 내용에, 아래 내용을 추가한다!
변경하다 문제가 될 수 있으니, 기존 자료는 꼭 .bak을 붙여서 보관해두자.
<Files "*.py">
Options ExecCGI  # .py 란 파일은 CGI 방식으로 Execute(실행)시킬 것이다! 라는 뜻
AddHandler cgi-script .py  # .py 란 파일은 CGI로 실행 된다! 라는 뜻
</Files>
이러면, "Internal Server Error"가 뜬다.
도대체 뭐가 문제인지 확인하는 방법 : logs\error.log 에서 확인할 수 있다.
[Wed Mar 09 23:57:01.227583 2022][win32:error] [pid 21032:tid 1268][client 127.0.0.1:50061] AH02102: C:/Bitnami/wampstack-8.1.3-0/apache2/htdocs/helloworld.py is not executable; ensure interpreted scripts have "#!" or "'!" first line
-> 파일의 가장 윗쪽에다가 #! or !를 추가해라.
-> #! 라는 약속된 특수한 기호 뒤에 뭐가 붙어있는지를 본다.
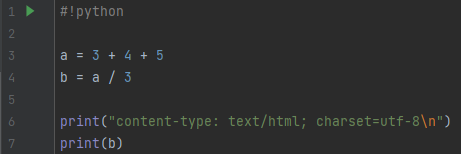
-> #!python이라고 적었다.
-> python의 문법에 따라서 해당 코드를 실행시킬 것이다.
그럼 이런게 뜸.. ㅋㅋ
[Thu Mar 10 00:02:18.728949 2022][cgi:error] [pid 21032:tid 1272][client 127.0.0.1:50091] malformed header from script 'helloworld.py': Bad header: 4.0
이 에러를 해결하기 위해, 파이썬 공식 사이트를 예시로 보여주었다. (개발자도구 - 네트워크 - 헤더)
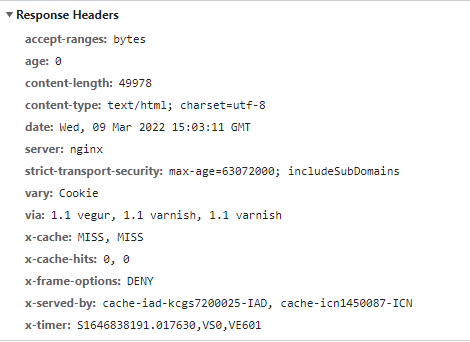
해당 내용에서 여기에 집중했다.
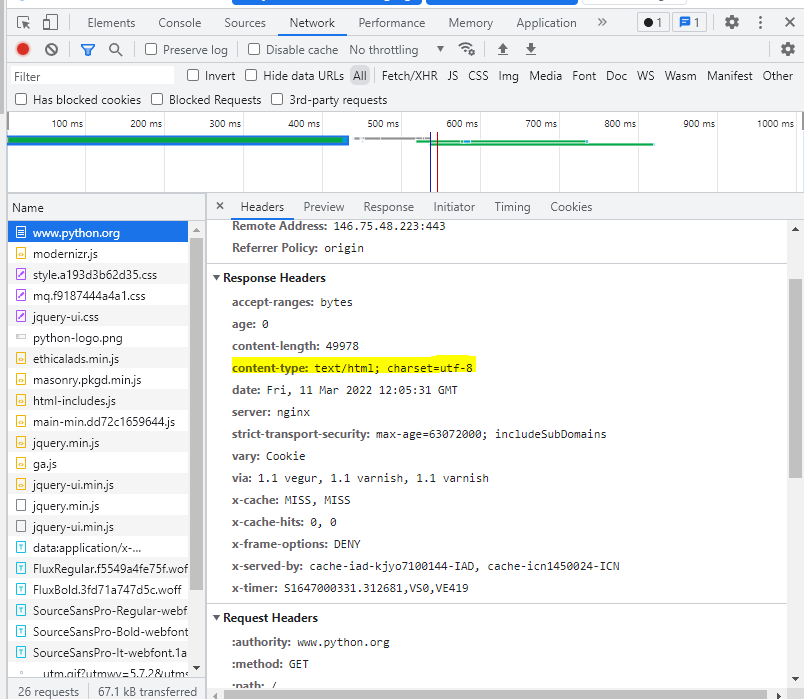
content-type: text/html; charset=utf-8 >> 필수적으로 필요하다!
웹서버는 웹브라우저에게 텍스트를 보낼거고, html이고, utf-8이란 방식으로 저장되어있으니까 참고해 라는 의미이다. (웹 서버가 웹 브라우저에게 전송하는 필수 타입이다.)
이것을 파이썬 파일에 넣어줄 것이다.
print("content-type: text/html; charset=utf-8\n")
\n은 약속된 것이다. 꼭 넣자!
print 구문을 이용하여 넣어주었는데, print를 통한 구동 방식은 내가 좀 더 공부해봐야 할 것 같다.

이 내용을 cmd 창에서 확인시켜주셨다.
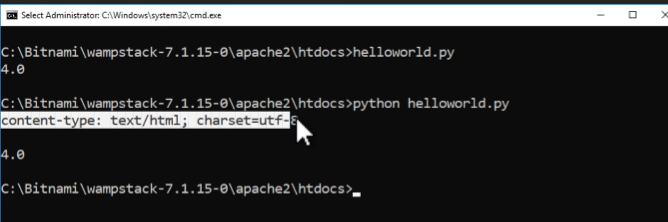
이렇게 하니까,
웹서버 뒷쪽(백엔드) 공간에서 파이썬이 동작한 후, 결과를 웹 서버에 주고, 그것을 웹 브라우저에게 준 것이다. 결과가 다음과 같이 출력되는 것을 확인할 수 있었다.
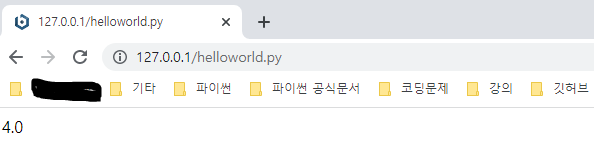
와!