외장 톰켓을 내장 톰켓으로 변경하기
.war파일을 .jar파일로 변경하는 것은 간단하다.
- build.gradle
plugins {

id 'org.springframework.boot' version '2.7.18'

id 'io.spring.dependency-management' version '1.0.11.RELEASE'

id 'java'

// jar로 빌드하므로 war값은 주석처리

// id 'war'*

}`

// 그리고 jar 빌드시 추가 설정이 들어간다

compileOnly 'org.springframework.boot:spring-boot-starter-tomcat'

runtimeOnly 'org.springframework.boot:spring-boot-starter-tomcat'

// =====================================================================

// WAR 플러그인은 2개의 의존 구성을 더한다.
// 1. providedCompile
// 2. providedRuntime
// 이 구성들은 컴파일이나 런타임 시에는 필요하지만 WAR 파일로 배포될 때는 제외된다.
// WAR 파일로 빌드될 때 Spring Boot의 내장 톰캣은 제외되도록 하기 위해 `implementation`이 아닌 `providedRuntime`으로 톰캣 라이브러리가 선언되어 있을 것이다. 이를 제거한다.

// jar 빌드시 필요없는 설정

//providedRuntime('org.springframework.boot:spring-boot-starter-tomcat')
//providedCompile 'org.springframework.boot:spring-boot-starter-tomcat'- SpringBootServletInitializer 상속 제거
@SpringBootApplication
public class MyApplication extends SpringBootServletInitializer {

    @Override
    protected SpringApplicationBuilder configure(SpringApplicationBuilder application) {
        return application.sources(MyApplication.class);
    }

    public static void main(String[] args) {
        SpringApplication.run(MyApplication.class, args);
    }
}SpringBootServletInitializer은?
SpringBootServletInitializer는 War 파일을 생성하기 위해서 상속받는 클래스 이므로 Jar 로 배포할 것이면 상속 받지 않아도 된다.
- build 하기
- 인텔리제이의 오른쪽 상단 메뉴바의
gradle버튼을 클릭
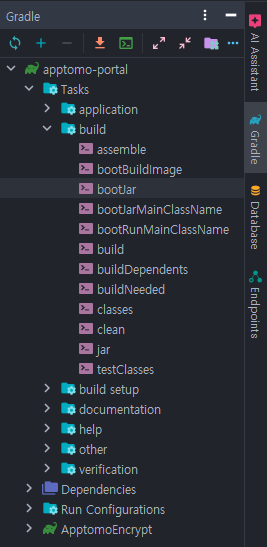
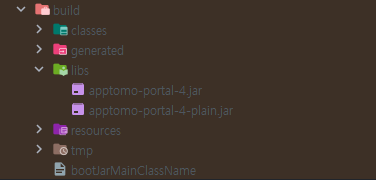
claen으로build > lib삭제 후build
- putty를 이용하여 yml 재설정
통상적으로 war에서는 webapp 파일을 사용하고 jar 에서는 resources > static 을 사용하므로 파일을 전체적으로 옮겨주었다.
spring:
  web:
     resources:
     // Spring Boot가 정적 리소스를 제공할 디렉터리를 지정
          static-locations: classpath:/static/
  thymeleaf:
		 // Thymeleaf 템플릿 파일이 위치한 디렉터리를 설정
          prefix: classpath:/templates/
          suffix: .html
          mode: HTML
          encoding: UTF-8
          enabled: true
          cache: false
          check-template-location: true
          servlet:
                content-type: text/html
  jackson:
	    // 기본 시간대 설정
          time-zone: Asia/Seoul
  mvc:
		  // Spring MVC에서 URL 매칭 전략을 설정
    pathmatch:
        matching-strategy: ant_path_matcher
      // 정적 리소스의 매핑 패턴을 설정
    static-path-pattern: "/**"


apptomo:
		 // 비밀번호 강도 설정
  security:
          password:
                  lifetime: 90
                  warn-lifetime-expire-before: 7
strength: 10- .jar 파일 실행!!

.jar 파일이 있는 디렉토리에 접근해 .jar 파일 실행
java --add-opens java.base/java.lang=ALL-UNNAMED
     --add-opens java.base/java.lang.reflect=ALL-UNNAMED
     -Dspring.config.location=/sw/apptomo/tomcat/yml/application-dev-postgresql.yml
     -Dspring.profiles.active=dev-postgresql
-jar apptomo-portal-4.jar-
--add-opens java.base/java.lang=ALL-UNNAMED: 일부 라이브러리(예: Spring Framework)가 리플렉션을 통해 비공개 메서드 또는 클래스에 접근해야 할 때 필요 -
--add-opens java.base/java.lang.reflect=ALL-UNNAMED: 리플렉션 작업 중java.lang.reflect패키지에 접근할 수 있도록 허용 -
-Dspring.config.location=/sw/apptomo/tomcat/yml/application-dev-postgresql.yml: 애플리케이션 경로를 명시적으로지정 -
-Dspring.profiles.active=dev-postgresql: 특정 프로파일을 활성화하여, 해당 환경에 맞는 설정이 적용 -
-jar apptomo-portal-4.jar:.jar파일 실행
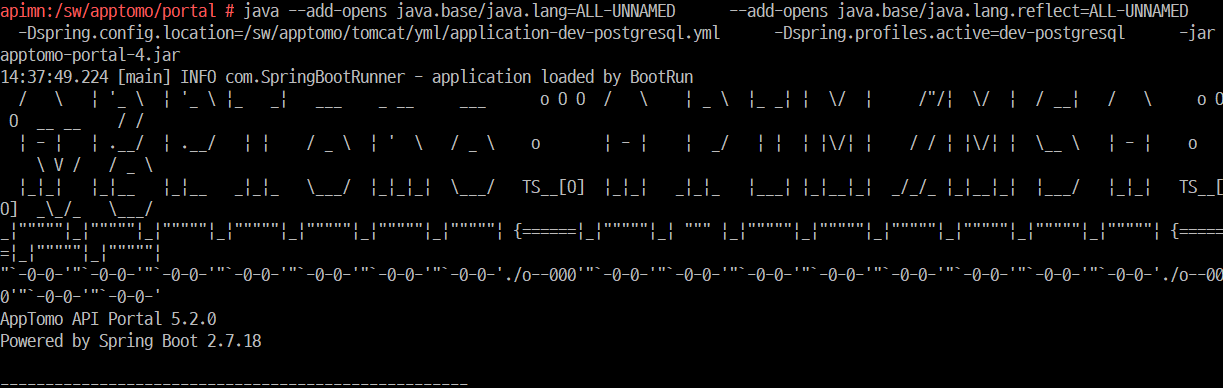
이렇게 실행이된다!!!!!!
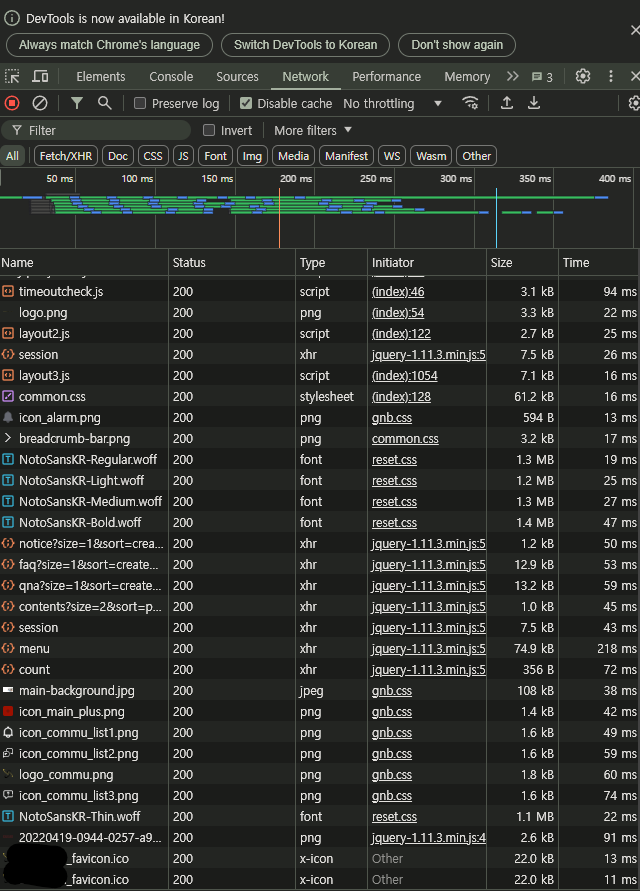
- 시큐리티 브레이크 포인트….

서버 연결은 완료 되었지만, js, css등등 파일들을 못읽는 상황이 발생했다.
이 문제는 Spring Security 설정에서 따로 정적 리소스들을 허용해주지 않았기 때문에 매핑하지 못한다.
- Spring Securty에서 정적 리소스 허용
@Override
public void configure(WebSecurity web) throws Exception {
    web.ignoring().antMatchers(
        "/res/**",             // 정적 리소스 허용
        "/resources/**",
        "/favicon.ico",
        "/robots.txt",
        "/prf");
    super.configure(web);
}- HTTP 보안 설정
// authorizeRequests에서 /res/**를 permitAll()로 추가해야 정적 리소스에 대한 접근을 보장
@Override
protected void configure(HttpSecurity http) throws Exception {
    http.authorizeRequests()
        .antMatchers(
		        "/res/**"
            "/",
            "/open/**",
            "/session",
            // 추가 경로들
        ).permitAll()
        .anyRequest().authenticated();
}- 커스텀 ResourceHandler 추가
    // Spring Boot가 정적 리소스 매핑을 처리하지 못하는 경우 명시적으로 ResourceHandler를 추가
    @Override
    public void addResourceHandlers(ResourceHandlerRegistry registry) {
        registry.addResourceHandler("/res/**")
                .addResourceLocations("classpath:/static/res/")
                .setCachePeriod(cachePeriod);
        registry.addResourceHandler("/favicon.ico")
                .addResourceLocations("classpath:/static/favicon.ico")
                .setCachePeriod(cachePeriod);
    }
👉
이렇게 .war 에서 .jar 로 파일이 변경되면서 내장 톰켓 설정을 완료했다….!