🐻 Node.js란?
자바스크립트로 서버 프로그래밍을 할 수 있도록 해주는 플랫폼.
구글의 크롬 V8 자바스크립트 엔진을 기반으로 한 비동기 IO를 지원하는 고성능 네트워크 서버.
Node (또는 공식적으로는 Node.js) 는 오픈소스, 크로스 플랫폼이며
개발자가 모든 종류의 서버 사이드 도구들과 어플리케이션을 JavaScript로 만들수 있도록 해주는 런타임 환경이다.
🌈 장점(왜 쓰는가?)
- 프론트엔드와 백엔드를 JavaScript언어로 관리 가능
- 비동기 처리로 퍼포먼스 증가하며 매우 빠름, 탁월한 생산성
- 프론트엔드 개발자가 직접 서버 개발을 할 수 있음
- 광범위한 커뮤니티 (활성화)
🌈 단점
- 싱글스레드여서 하나의 작업이 시간 많이 걸리면 전체 시스템 성능 저하.
- 코드의 가독성이 좋지 않음. 그러므로 유지보수 어려워 질 수 있음.
- 컴파일 시 에러를 확인 할 수 없고 실행해야 알 수 있음.
🌈 적합한 어플리케이션
- 짧은 시간에 대량의 클라이언트 요청을 처리하는 웹 어플리케이션 개발에 적합
- 간단하지만 많은 양의 처리를 요하는 서버를 구축할 때 효율이 좋음.
- CPU의 사용이 높게 필요한 어플리케이션의 경우 부적합
🐻 Express.js 란?
- node.js 개발을 위해 만들어진 간편한 웹 프레임워크
- node.js의 핵심 모듈인 http와 Connect 컴포넌트를 기반으로 함
- java의 스프링, python의 장고와 같은 개념
🌈 특징
- node로만 코드를 작성하는 것보다 효율적으로 서버를 개발 할 수 있음.
- 미들웨어 구조로 개발자가 필요한 것만 선택하여 Express와 결합 해 사용할 수 있음.
🌈 Express 프레임워크 사용하기
NodeJS의 웹프레임워크(Express.js)를 사용하면 간편하게 웹서버를 구축 할 수 있다.
👆 express 설치
1) vscode 에디터 오픈(지정 폴더로)한 뒤,npm init하기
(이후 여러 질문들이 나오면 그냥 다 엔터치고 넘김)2) express 설치하기
npm install express
2) package.json 확인하기(express로 프로젝트를 생성했을때 생성되는 package.json)
{
  "name": "myapp",
  "version": "1.0.0",
  "private": true,
  "scripts": {
    "start": "node ./bin/www"
  },
  "dependencies": {
    "body-parser": "~1.13.2",
    "cookie-parser": "~1.3.5",
    "debug": "~2.2.0",
    "express": "~4.13.1",
    "jade": "~1.11.0",
    "morgan": "~1.6.1",
    "serve-favicon": "~2.3.0"
  }
}
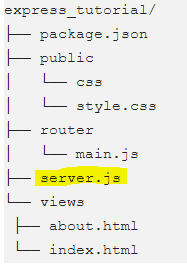
3) Express 서버 생성
server.js파일을 생성하고 아래와 같이 코드 입력하기
let express = require('express');
let app = express();
let server = app.listen(3000, function(){
    console.log("Express server has started on port 3000")
})

또는

const express = require('express');
const path = require('path');
const app = express();

const http = require('http').createServer(app);
http.listen(8080, function () {
  console.log('listening on 8080')
});
❗ Router를 아직 정의하지 않았기 때문에 이 자체는 아무것도 하지 않는 웹서버이다.
5) Router로 Request 처리하기
브라우저에서 Request 가 왔을때 서버에서 어떤 작업을 할 지 Router 를 통하여 설정해주기5-1) 간단한 router 작성 방식
app.get('/', function(req, res){
    res.send('Hello World');
});
❗ 이제server.js를 실행해보면 http://localhost:3000/ (또는 http://localhost:8080/ ) 으로 접속하였을 때, Hello World 를 반환
🪐 서버를 실행할 때는? 아래와 같이 명령어를 입력한다
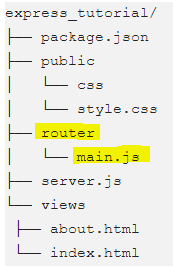
node server.js5-2) router 폴더를 만들고 그 안에 main.js 파일을 생성해서 router 코드 작성하기
module.exports = function(app)
{
     app.get('/',function(req,res){
        res.render('index.html')
     });
     app.get('/about',function(req,res){
        res.render('about.html');
    });
}
❗ module.exports 는 router 코드를 따로 작성했기에, server.js 에서 모듈로서 불러와야한다
❗ server.js파일 내에 router 불러오기
var router = require('./router/main')(app);
- 이하 과정은 리액트가 아닌 서버에서 페이지 나누기(리액트 프로젝트를 폴더로 넣어도 같다)
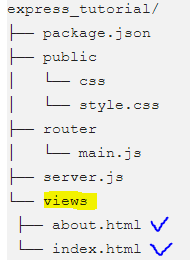
6) HTML 페이지를 띄우기
html페이지를 띄우기 위해 html 페이지 만들기
views/ 디렉토리를 만들고, 그 안에 index.html 과 about.html 을 생성하기
// index.html
<html>
  <head>
    <title>Main</title>
    <link rel="stylesheet" type="text/css" href="css/style.css">
  </head>
  <body>
    Hey, this is index page
  </body>
</html>
// about.html <html> <head> <title>About</title> <link rel="stylesheet" type="text/css" href="css/style.css"> </head> <body> About... what? </body> </html>html을 만들었으면, 이제 server.js파일로 돌아와서 변경사항을 업데이트 한다
var express = require('express');
var app = express();
var router = require('./router/main')(app);  // router 파일 불러오기

app.set('views', __dirname + '/views');
app.set('view engine', 'ejs');
app.engine('html', require('ejs').renderFile);  // 서버가 HTML 렌더링을 할 때, EJS 엔진을 사용하도록 설정

var server = app.listen(3000, function(){
    console.log("Express server has started on port 3000")
});
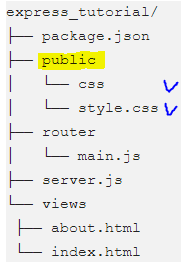
7) 정적 파일 (Static files) 다루기 ➡ .js파일, .css파일, image파일 등
서버에서 정적파일을 다루기 위해선,express.static()메소드를 사용public/css 디렉토리를 만들고 그 안에 style.css 파일을 생성하기
body{
	background-color: black;
	color: white;
}
이후에 server.js 의 아래에 해당 코드를 추가해주기
app.use(express.static('public'));이제 서버를 실행(
$ node server.js)하고 http://localhost:3000/ 에 접속했을 때 css 가 적용된 페이지가 나타나면 성공

node.js 재밌어 보이네요! 글 잘 읽었습니다 :(