1, 폰트
한글 기준으로 작업하기 때문에 보통 아래 url로 들어간다.
https://fonts.google.com/?subset=korean&script=Kore
마음 드는 폰트 get~

get embed code~
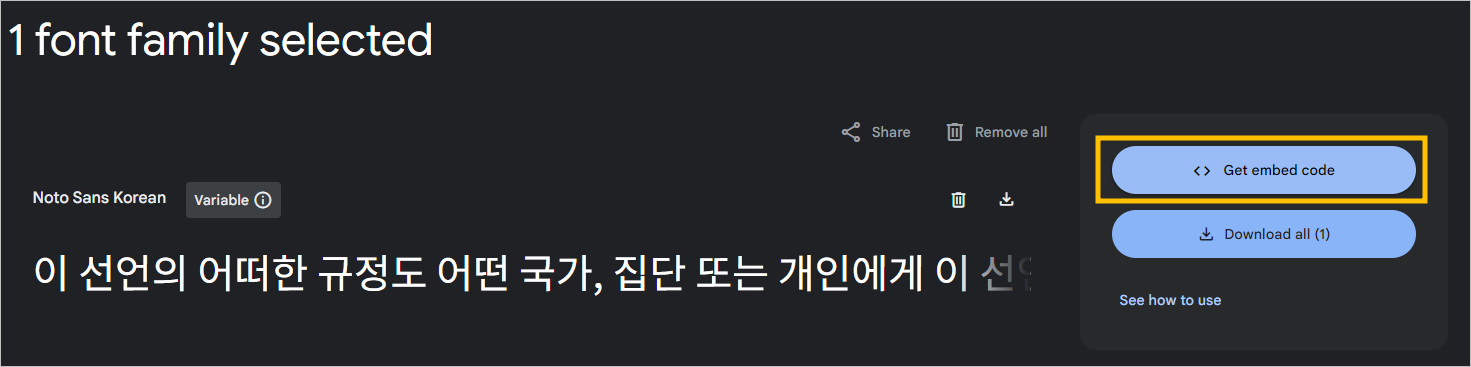
import 체크하고 1번 복사,
2번은 개인적으로 일부만 활용했다.
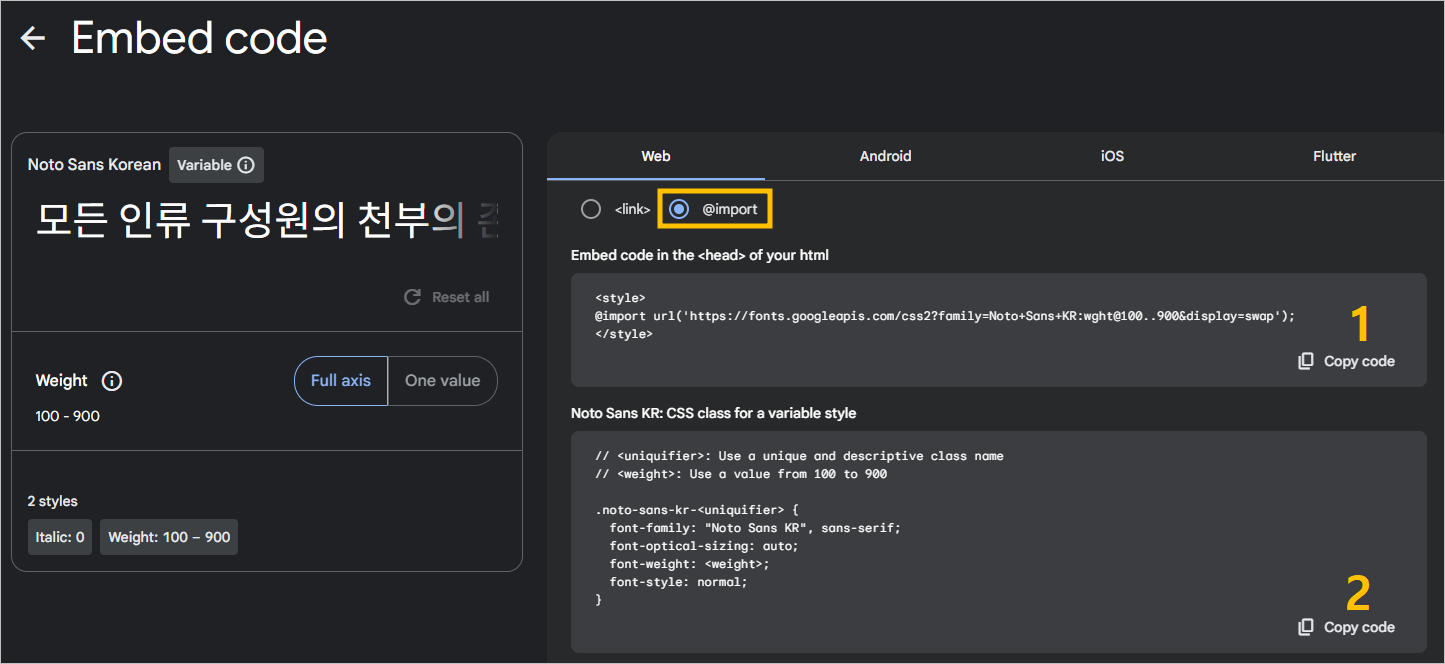
css파일에 붙이면 된다.
@import url('https://fonts.googleapis.com/css2?family=Nanum+Gothic&display=swap');

* {
    font-family: "Nanum Gothic", sans-serif;
}
2, 아이콘
https://fonts.google.com/icons 에서
마음 드는 아이콘 클릭하면 옆에서 필요한 코드가 뿅 나온다.
그중에서 1번을 css파일에, 2번을 html파일에 최초 한 번씩만 복붙하고,
3번은 아이콘명으로 선택에 따라 바꿔주면 된다.
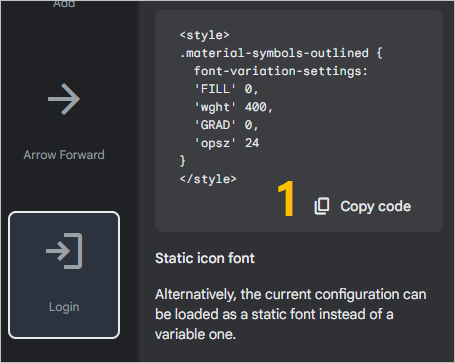
1번 활용할 때 다른 요소들과 수평 중앙 정렬하도록 코드 추가했다.
.material-symbols-outlined {
font-variation-settings:
'FILL' 0,
'wght' 400,
'GRAD' 0,
'opsz' 24;
vertical-align: middle; /* 수평 중앙 정렬 */
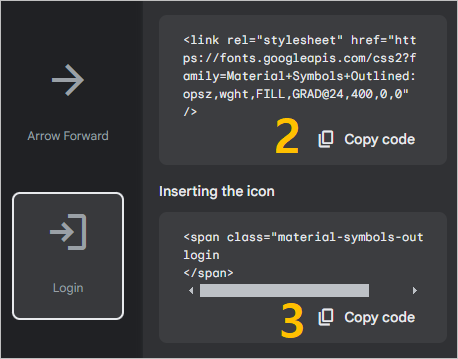
}2번에 대해, 밑의 Static icon font는 위의 Variable icon font보다 코드가 좀 더 짧아서 선호한다.
<link href="/css/top.css" rel="stylesheet" type="text/css" />
<link rel="stylesheet"
href="https://fonts.googleapis.com/css2?family=Material+Symbols+Outlined:opsz,wght,FILL,GRAD@24,400,0,0" />
<style type="text/css">
</style>
3번 활용할 땐 button 태그에 넣어도 좋다.
<button type="submit" class="iconBtn">
	<span class="material-symbols-outlined">search</span>
</button>

<button class="dropbtn">
	<span class="material-symbols-outlined">menu</span>
</button>
다만, url 담는 태그에 활용 시에는 a 태그로 대체하는 게 편하다. 대신 a 태그에 type="button" 지정해주면 된다.
<a type="button" class="iconBtn" href="/login/loginForm">
	<span class="material-symbols-outlined">
	login
	</span> 로그인
</a>
특히 id별 특화되는 url:
<a type="button" class="iconBtn" th:href="@{/cart/cart}">
	<span class="material-symbols-outlined">
	shopping_cart
	</span>
</a>
a 태그 쓰든, button 태그 쓰든 배경색 & 경계선 제거해주면 아이콘이 깔끔하게 나온다.
.iconBtn {
	border: none;
	background-color: transparent;
	color: #96a9fe;
	cursor: pointer;
	margin-right: 10px;
}
예시 이미지:

+) 1번에 대한 chat gpt의 설명:
FILL: 아이콘의 채움 여부를 결정합니다.
. 0: 채우지 않음 (outline 형태)
. 1: 채움 (filled 형태)
wght: 아이콘의 굵기를 설정합니다. (400이 기본값)
. 숫자가 커질수록 굵어집니다.
GRAD: 아이콘의 기울기를 조정합니다. (0이 기본값)
. 음수 또는 양수 값으로 기울기를 설정할 수 있습니다.
opsz: 아이콘의 옵티컬 사이즈(크기)를 설정합니다.
. 일반적으로 숫자가 클수록 아이콘이 커집니다.
