요소에 접근하기
[19, 44, "good", false] 배열을 접근하여 0번째부터 출력해보자.
배열의 index는 0번째부터 시작합니다.
let myArray=[19,44,'good',false]
console.log(myArray)

let first=myArray[0]

console.log(first)       //19
console.log(myArray[1])  //44
console.log(myArray[2])  //good
요소를 수정하기
[19,44,'good',false] 배열에서 0번째 값을 500으로 수정해보자
let myArray=[19,44,'good',false]
myArray[0] =500       //0번째의 값을 500으로 할당
console.log(myArray)  //[500,44,'good',false]
배열길이 구하기
[19,44,'good',false] 배열의 길이를 구해보자
배열의 길이는 배열의 index보다 1이 더 크다
let myArray=[19,44,'good',false]
console.log(myArray.length)      //4
배열의 요소 추가 및 삭제하기

push를 사용하여 배열의 요소를 추가해보자
let myArray=[19,44,'good',false]
myArray.push('kiwi')
console.log(myArray)  //[500, 44, "good", false, "kiwi"]
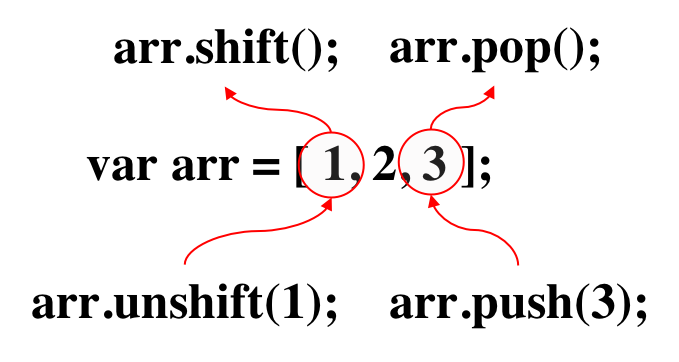
pop,shift를 사용하여 배열의 요소를 삭제해보자.
- pop은 배열의 맨끝 요소부터 삭제해주는 기능
let myArray=[19,44,'good',false]
myArray.push('kiwi')
console.log(myArray)  //[500, 44, "good", false, "kiwi"]

myArray.pop()         //맨끝 요소를 삭제해라
console.log(myArray) //[500, 44, "good", false]- shift는 배열의 첫번째요소부터 삭제해주는 기능
let myArray=[19,44,'good',false]
myArray.push('kiwi')
console.log(myArray)  //[500, 44, "good", false, "kiwi"]

myArray.shift()         //맨첫번째요소를 삭제해라
console.log(myArray)  //[44, "good", false, "kiwi"]
중첩배열 (nested array)
[19,44,'good',[100,200,500],false] 이처럼 배열안의 또다른 배열에 접근하기 위해서는 myArray[3][0]와 같이 사용합니다.
let myArray=[19,44,'good',[100,200,500],false]
console.log(myArray[3][0])  //3번째 요소의 배열에서의 0번째 요소를 출력, 100
배열의 길이 응용
배열의 총길이는 myArray1.length 수식을 이용해서 구하는건데,
이 수식을 이용하여 배열의 마지막 요소를 구하려면 다음과 같이 [배열의 총길이-1]를 적용하면 된다.
myArray1.length-1에서 1을 왜 빼는가하면
배열의 마지막 index는 배열의 총길이에서 1을 뺀것과 같기 때문이다.
let myArray1=[19,44,'good',[100,200,500],false]
let myArray2=[900,800,700,600]
let myArray3=[7,77,777,7777,77777,777777]

//배열의 길이와
//배열의 인덱스를 이용하여
//배열의 가장 마지막 요소

console.log(myArray1[4])  //false
console.log(myArray2[3])  //600
console.log(myArray3[5])  //777777

//myArray1.length
console.log(myArray1[5-1])
//배열의 총길이인 5에서 1을 빼면 4이기 때문에 배열의 4번째요소 fasle출력
console.log(myArray1[myArray1.length-1])
//배열의 총길이인 5에서 1을 빼면 4이기 때문에 배열의 마지막요소 false출력
Slice

slice()메서드는 어떤 배열의 begin부터 end까지(end미포함)에 대한 얕은 복사본을 새로운 배열 객체로 반환한다. 이때, 원본 배열은 바뀌지 않는다
const arr=[10, 20, 30, 40, 50]

//1번째부터 (맨끝 3번째를 제외한) 2번째 요소 출력
console.log(arr.slice(1,3));  // [20, 30]
//인자가 양수일 경우 배열의 처음부터 2번째 이후의 모든 요소 출력
console.log(arr.slice(2));    // [30, 40, 50]
//인자가 음수일 경우 배열의 끝에서 2개의 요소 출력
console.log(arr.slice(-2));   // [40, 50]
//시작인덱스가 음수이면 배열의 맨끝에 시작해서 끝인덱스 전까지 출력
console.log(arr.slice(-3,3));  // [30]
Assignment. slice 2
array 감옥에 갇힌 2를 구해주세요.
단, slice 메서드를 사용해야 하며, slice 메서드 괄호 안에는 음수만 들어갈 수 있습니다.
let prisoners = [[0, 1],[1,2],[0,0]];
saveNumberTwo(prisoners) // 2
function saveNumberTwo(prisoners) {
 prisoners=[[0, 1],[1,2],[0,0]];
  let temp = prisoners.slice(-2)
  // slice 메서드의 괄호 안에 음수만 넣어주세요

  let answer=temp[0][1];   //2
  //전체 배열의 1번째 요소내에 내부배열의 1번째 요소 추출
  // 변수 answer에 특정한 값을 대입해주세요.

  return answer;
}

 console.log(saveNumberTwo())
splice
splice 메서드는 배열 내의 특정한 요소를 삭제하거나, 다른 요소로 대치하거나 새로운 요소를 추가할 때 사용한다.
인자의 순서에 주의!

splicy메서드는 필요에 따라 인자를 최소 1개만 쓸 수도 있다.
- 첫번째 인자 : 배열의 index의 시작점
- 두번째 인자 : 삭제할 요소의 개수
- 세번째 인자 이후 : 추가하고 싶은 요소
보통 댓글 삭제 기능을 구현할 때 splice 메서드를 많이 활용한다고 한다.
//num배열에서 두번째인자 3을 제거하고 10을 대신 넣어보자
let num = [1,2,3,4,5];
num.splice(2,1,10);

console.log(num); // [ 1, 2, 10, 4, 5 ]


//다음 배열에서 우유를 제거하고 두유를 대신 넣어보자
function goToMart() {
  let shoppingCart = ['햄', '김밥김', '단무지', '우유', '시금치', '쌀', '당근', '계란'];
  // 여기에 코드를 작성해주세요
  shoppingCart.splice(3,1,'두유');
  return shoppingCart;
}
console.log(goToMart())
Assignment. splice의 응용 (다차원 배열에 for문을 돌리는 방법)
10이상의 숫자만 배열을 담아 리턴하라
let numBox = [[1,2,15,3],[4,5,6,10],[31,7,8,9,20]];

function extractOverTen(list) {
  let temp = [];
  for(let i=0; i < list.length; i++) {
    for(let j=0; j <= list[i].length; j++) {
    	//배열의 값이 10보다 크거나 같으면 true
      if(list[i][j] >= 10) {
      //push() 배열의 요소를 추가함
        temp.push(list[i][j]);
      }
    }
  }
  return temp;
}

extractOverTen(numBox) // [ 15, 10, 31, 20 ]
그림참고

Assignment. 바구니에서 곰팡이를 제거하는 함수를 작성해라
let basket = [['양파','곰팡이'],['곰팡이','빵','딸기잼'],['귤','곰팡이','사과']];

function removeGerm(arr) {
  // 여기에 코드를 작성해주세요!]

  let temp=[];
  for(let i=0; i<arr.length; i++){
    for(let j=0; j<=arr[i].length; j++){
      //배열에 곰팡이가 포함되어 있지 않으면 true,포함되어있으면 false
      if(arr[i][j] != '곰팡이') {
        //push(): 배열의 요소 추가
        temp.push(arr[i][j]);
      }
    }
  }

  return temp;
}

console.log(removeGerm(basket))
//["양파", undefined, "빵", "딸기잼", undefined, "귤", "사과", undefined]
filter
filter()메서드는 조건을 주고 해당 조건이 참인 요소를 모아 새로운 배열로 반환하는 메서드이다.
배열에서 원하는 데이터만 추출하고 싶을 때 자주 사용하는 사용성이 좋은 메서드이다.
또한, filter메서드는 새로운 배열을 반환해주고, 중복값을 제거해주지 않는다. 따라서 중복값이 나올 수 있다.
기본구문
arr.filter(callback(element[, index[, array]])[, thisArg])
-
callback : 각 요소에 대한 조건값
-
element : 처리할 현재 요소 (필수)
-
index : 현재 인덱스 (선택)
-
array : filter를 호출한 배열 (선택)
-
thisArg : callback을 생행 할 때 this로 사용하는 값 (선택)
// 배열안의 숫자가 10보다 크면 새로운 배열에 요소로 들어간다

let numbers=[10, 4, 32, 1, 5, 3, 2];

// #1. 첫번째 방법 , filter()인자에서 바로 함수를 써주는 방법
//let result=numbers.filter((value)=>value>10);

//console.log(result); //[32]


// #2. 두번째 방법 , 밖에서 함수를 선언하고 filter()인자에서 callback하는 방법
function isBiggerThanTen(value){
  return value>10;
}

let result=numbers.filter(isBiggerThanTen);

console.log(result);
Assignment. filter 1
// Assignment 1
// 'ap'가 들어간 과일들로 이루어진 새로운 배열을 filter()이용하여 반환해라
let fruits = ['apple', 'banana', 'grapes', 'mango', 'orange'];

//아래의 함수를 완성해주세요.
function filtered (){
let result=fruits.filter((value) => value.includes('ap'));
return result;
}

let filterStart=filtered();

console.log(filterStart);

console.log(result);    //[ 'apple', 'grapes' ]
concat
concat()메서드는 주어진 배열에 기존 배열을 합쳐서 새로운 배열을 반환합니다.
기본구문
array.concat([value1[, value2[, ...[, valueN]]]])
- value1 ~ valueN : 기존 배열에 합칠 배열 또는 값
- 리턴값 : 기존배열과 파라미터로 받은 값(value1~valueN)을 합쳐서 새로 만든 배열
const alpha=['a', 'b', 'c'];

//배열 2개 이어붙이기
const arr = [1, [2,3]];

console.log(alpha.concat(arr));  //["a", "b", "c", 1, [2, 3]]

//배열 3개 이어붙이기
console.log(alpha.concat(1, [2,3])) //["a", "b", "c", 1, 2, 3]
concat()은 요소의 중복과 상관없이 배열을 합쳐줍니다.
const numbers = [1, 2, 3];
const numbers2 = [3, 4, 5];

console.log(numbers.concat(numbers2));
// [ 1, 2, 3, 3, 4, 5 ]
그렇다면 filter를 사용해서 배열의 중복을 없애보자
let array1 =  [1,2,3];
let array2 = [3,4,5];

let result = array1.concat(array2);

//console.log(result);    //[1, 2, 3, 3, 4, 5] ->중복!
let eraseDuplicates = result.filter((el,index)=>
result.indexOf(el)===index);

console.log(eraseDuplicates);  //[1, 2, 3, 4, 5]
혹은 Set객체를 사용해서 중복된 값을 제거할 수도 있다.
let array1 =  [1,2,3];
let array2 = [3,4,5];

let arr = array1.concat(array2);
let result2 = [...new Set(arr)];
console.log(result2);  //[1, 2, 3, 4, 5]
Assignment1. month1&2 배열을 concat()을 이용해서 하나의 배열로 합쳐주세요.
let month1 = ['Jan', 'Feb', 'March', 'Apr', 'May', 'June'];
let month2 = ['July', 'Aug', 'Sept', 'Oct', 'Nov', 'Dec'];

// 아래의 함수를 완성해주세요.
function combineMonth() {
  //join메서드로 배열의 모든 요소에 \n추가해 줄바꿈처리하기
  return month2.concat(month1).join('\n')
}

console.log(combineMonth())
//month2와 month1이 합쳐지면서 각 요소마다 줄바꿈처리하여 호출
Assignment2. num 배열안의 요소들을 concat()을 이용해서 하나의 배열로 합쳐지게 해주세요.
let num = [[11, 12, 13], [14, 15, 16], [17, 18, 19]];

//아래의 함수를 완성해주세요.
function makeNewArr () {

//배열의 인덱스로 접근
return num[0].concat(num[1]).concat(num[2])

}

console.log(makeNewArr())
//[11, 12, 13, 14, 15, 16, 17, 18, 19]
Populating
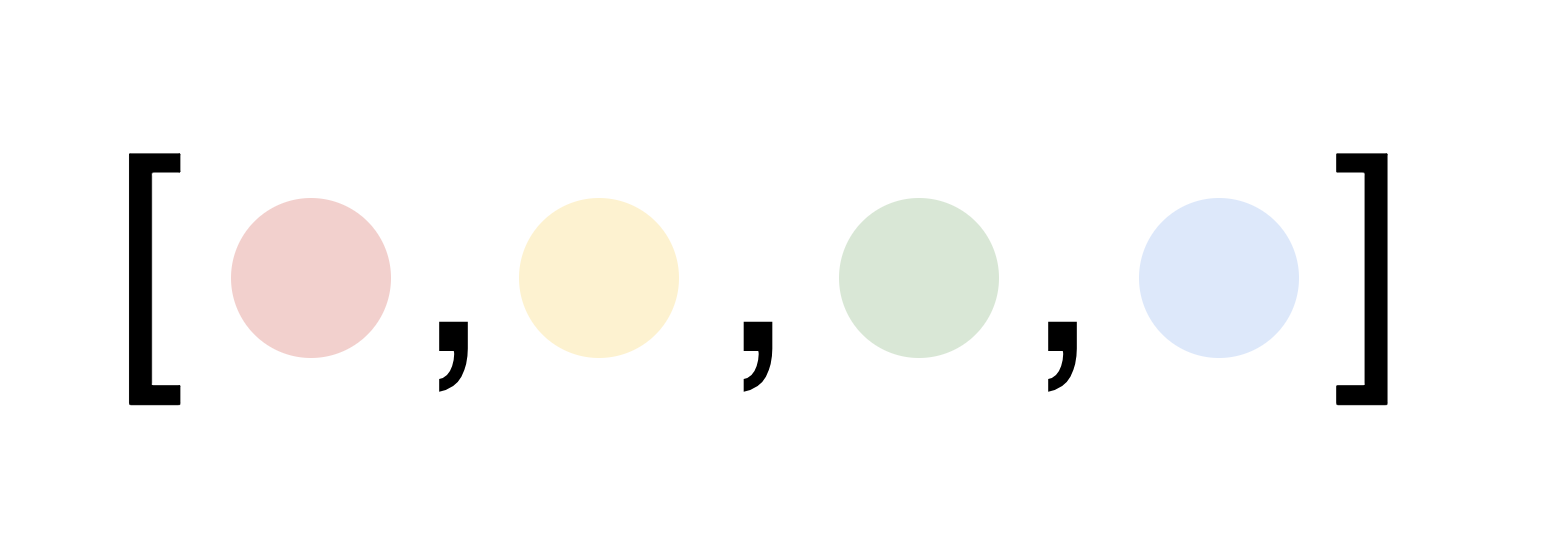
보통 []을 써서 배열을 만들지만 new Array()메서드를 쓰는 방법도 있다.
console.log(new Array(4))

위의 그림처럼 4개의 공간을 가진 배열이 나온다. 이처럼 n개의 공간을 가진 빈 배열을 만들기 위해서 우리는 new Array(n)이라는 메서드를 사용한다. (빈 배열이고 요소없지만 arr.length를 출력하면 4가 나옴)
빈 배열에 값을 할당하려면 반복문을 이용하면 된다.
let arr=new Array(4);
//for문을 통해 배열의 값에 할당
for(let i=0; i<arr.length; i++){
  arr[i] = i+1;
}

console.log(arr);   //[1,2,3,4]
Assignment. new Array 메소드를 이용하여 0부터 9까지 각자 제곱한 수를 배열에 넣어주세요.
function makeSquare () {
  let arr=new Array(10); // 여기에 new Array method를 적용해주세요
  // 여기에 for 반복문을 적어주세요.
  for(i=0; i<arr.length; i++){
    //Math.pow() 거듭제곱 구하는 메서드
    arr[i]=Math.pow(i,2);
  }
  return arr;
}

console.log(makeSquare());
//[0, 1, 4, 9, 16, 25, 36, 49, 64, 81]