앞서 만든 일기는 어딘가에 저장되는 기능은 만들지 않았으므로 배열에 저장할 것이다.
React에서 배열은 게시글이나 리스트, 피드를 표시하는데 자주 사용된다.
오늘 목표
리스트 렌더링 (조회)하기
- 배열을 이용하여 React에서 List를 렌더링 해보고 개별 컴포넌트 만들기.
1. 리스트 조회하기
(1) 리스트를 표현하는 컴포넌트 DiaryList 만든다.
(2) 임의의 배열 diaryList를 만든다.
- App.js
import { useState } from 'react';
import './App.css';
import DiaryEditor from './component/DiaryEditor';
import DiaryList from './component/DiaryList';

const diaryList = [
  {
    id: 1,
    author: "오이",
    content: "오늘은 이랬어",
    emotion: 3,
    created_date: new Date().getTime()
   },
  {
     id: 2,
    author: "라나",
    content: "오늘은 이랬어",
     emotion: 1,
    created_date: new Date().getTime()
  },
  {
     id: 3,
    author: "사과",
    content: "오늘은 이랬어",
    emotion: 2,
    created_date: new Date().getTime()
   },
   {
    id: 4,
    author: "김지원",
    content: "오늘은 이랬어",
    emotion: 5,
    created_date: new Date().getTime()
  },
]

function App() {
  return (
    <div className="App">
      <DiaryEditor/>
      <DiaryList diaryList={diaryList}/>
    </div>
  );
}

export default App;
(3) DiaryList 컴포넌트는 배열을 prop으로 전달받는다.
(4) DiaryList에서 내장함수 map을 이용하여 리스트 형태로 렌더링.
- DiaryList 컴포넌트
import DiaryItem from './DiaryItem';
import styles from './DiaryList.module.css';

export default function DiaryList({ diaryList }) {
    return <section className={styles['diary-list']}>
        <h2 className={styles.title}>일기 리스트</h2>
        <strong>{diaryList.length}개의 일기가 있습니다.</strong>
        <ul>
            {diaryList.map((item) => (
                <DiaryItem key={item.id} {...item}/>
            ))}
        </ul>
    </section>
};

// props를 받아오지 못할 경우를 위한 default
DiaryList.defaultProps = {
    diaryList: [],
}
(4) 렌더링될 아이템을 별도의 컴포넌트 DiaryItem로 분리해서 작성.
- DiaryItem 컴포넌트
import styles from './DiaryItem.module.css'

export default function DiaryItem({ id, author, content, emotion, created_date }) {
    return <li className={styles['diary-item']}>
        <div className={styles.info}>
            <span>작성자 : {author} | 감정점수 : {emotion}</span>
            <span className={styles.date}>{new Date(created_date).toLocaleString()}</span>
        </div>
        <div className={styles.content}>
            <p>{content}</p>
        </div>
    </li>
};
<span className={styles.date}>{new Date(created_date).toLocaleString()}</span>
: 그냥 created_date를 사용하면 사람이 이해하기 어려운 초 단위가 나오므로toLocaleString()을 통해 사람이 이해하기 쉬운 날짜로 표현한다.
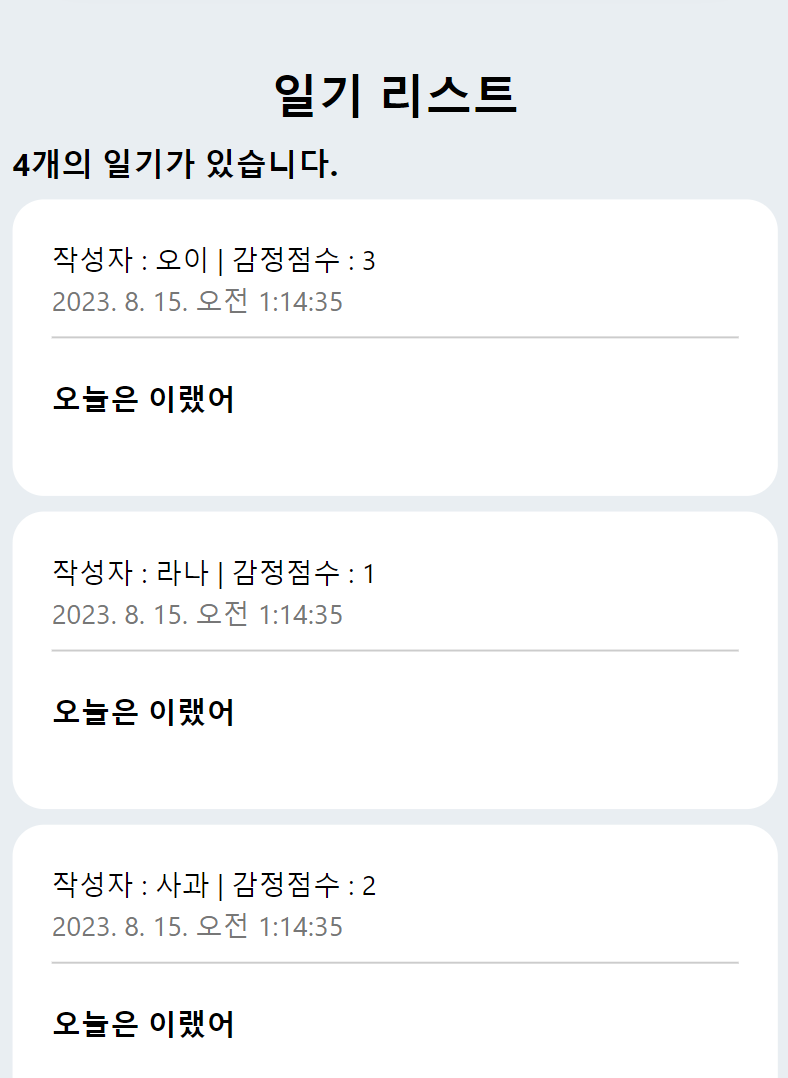
완성본

퍼블리셔 공부 블로그 입니다
많은 도움이 되었습니다, 감사합니다.