게시판에 글을 작성하고 파일을 업로드, 다운로드하는 기능을 구현해보겠습니다.
글작성은 폼태그에서 글 내용을 전송하여 간단한 insert문을 작성하면 돼서 파일 업로드,다운로드에 대해 자세히 다루겠습니다.
NoticeFileVO
파일에 대한 정보를 저장할 NoticeFileVO 클래스를 만듭니다.
@Data
public class NoticeFileVO {
	private Long fileNum;
	private Long noticeNum;
	private String fileName;
	private String oriName;
}
그리고 mapper.xml에 파일을 저장할 쿼리를 작성합니다.
	<insert id="setFileAdd" parameterType="NoticeFileVO">
		INSERT INTO NOTICE_FILE VALUES(null,#{noticeNum},#{fileName},#{oriName})
	</insert>
fileNum은 mysql의 autoincrement를 사용해서 null을 넣었습니다.
NoticeMapper.java에 mapper를 등록하고 NoticeService에서 파일 저장을 처리할 겁니다.
write.jsp
컨트롤러로 데이터를 보낼 form을 만들어줍니다.
			<form action="write" method="post" enctype="multipart/form-data">
                <div style="width: 100%;">
                    <input type="text" style="width: 100%;" id="title" name="title" placeholder="제목을 입력하세요">
                    <input type="text" style="width: 100%;" id="id" name="id" value="manager">
                </div>
                <div>
                    <input  type="file" name="files" id="files" class="files form-control form-control-sm" multiple>
                </div>


                <div class="file_drag" id="file_drag">
                  <div id="plz_drag">파일을 마우스로 끌어 오세요</div>
                  <div class="file_list_header" style="display: none;">
                    <div class="file_list_header_task">
                      <button type="button" id="removeAll_button"><span class="blind">X</span></button>
                    </div>
                    <div class="file_list_header_title"><span class="text">파일명</span></div>
                    <div class="file_list_header_volume"><span class="text">총용량 </span><span id="fileSize">0</span></div>
                  </div>

                  <ul id="fileList"></ul>
                </div>

                <textarea name="contents" id="summernote"></textarea>

                <button type="submit">작성</button>
			</form>
제목, 이름, 내용, 파일을 전송할 폼태그를 만듭니다. 글 뿐만 아니라 파일도 전송할 거기 때문에 form태그에 enctype="multipart/form-data"를 작성합니다.
NoticeVO
파일에 데이터를 noticeVO객체로 받기 떄문에 private MultipartFile[] files;를 멤버변수에 추가합니다.
@Data
public class NoticeVO  {
	private Long noticeNum;
	private String id;
	private String title;
	private String contents;
	private Date regDate;
	private Long hit;
	private Long ref;
	private Long step;
	private Long depth;
	private MultipartFile[] files;
}
Controller
컨트롤러에서 데이터를 받아서 noticeService로 noticeVO객체를 넘겨줍니다.
	@PostMapping("write")
	public String setWrite(NoticeVO noticeVO)throws Exception{
		int result = noticeService.setWrite(noticeVO);
		return "redirect:./notice";
	}
FileManager
noticeSercie에서 파일정보를 DB에 저장하고 파일은 HDD에 저장할 것입니다.
HDD에 저장하기 위해 FileManager클래스를 생성하고 saveFile메서드를 작성합니다.
public String saveFile(MultipartFile multipartFile, String path)throws Exception{
		// 1. 중복되지 않는 파일명 생성(UUID, Date)
		String fileName = UUID.randomUUID().toString();

		// 2. 확장자
		StringBuffer buffer = new StringBuffer();
		buffer.append(fileName);
		buffer.append("_");
		buffer.append(multipartFile.getOriginalFilename());

		// 3. 파일 저장
		File file = new File(path, buffer.toString());
		multipartFile.transferTo(file);

        // fileName 리턴
		return buffer.toString();
	}
NoticeService
application.properties에서 설정한 파일이 저장될 path(D:/gdshop/notice/)경로를 가져옵니다.
해당 경로로 file객체를 생성하고 경로에 디렉토리가 없으면 생성해줍니다.
noticeVO에 파일이 있으면 saveFile에서 파일을 하드에 저장하고 앞에 uuid가 붙은 파일명을 리턴합니다.
그리고 noticeFileVO객체를 생성하여 게시글 번호, uuid가 붙은 파일명, 원래의 파일명을 설정하고 DB에 저장을 합니다.
@Service
@Slf4j
public class NoticeService {

	@Autowired
	private NoticeMapper noticeMapper;
	@Autowired
	private FileManager fileManager;
	@Value("${app.notice}") //	D:/gdshop/notice/
	private String path;


	public int setWrite(NoticeVO noticeVO)throws Exception{
		int result = noticeMapper.setWrite(noticeVO);

		File file = new File(path);

		if(!file.exists()) {
			boolean check = file.mkdirs();
		}

		for(MultipartFile f :noticeVO.getFiles()) {
			if(!f.isEmpty()) {
				log.info("file => {}",f.getOriginalFilename());
				// HDD에 저장
				String fileName = fileManager.saveFile(f, path);

				// DB에 저장
				NoticeFileVO noticeFileVO = new NoticeFileVO();
				noticeFileVO.setNoticeNum(noticeVO.getNoticeNum());
				noticeFileVO.setFileName(fileName);
				noticeFileVO.setOriName(f.getOriginalFilename());
				noticeMapper.setFileAdd(noticeFileVO);
			}
		}
		return result;
	}
}
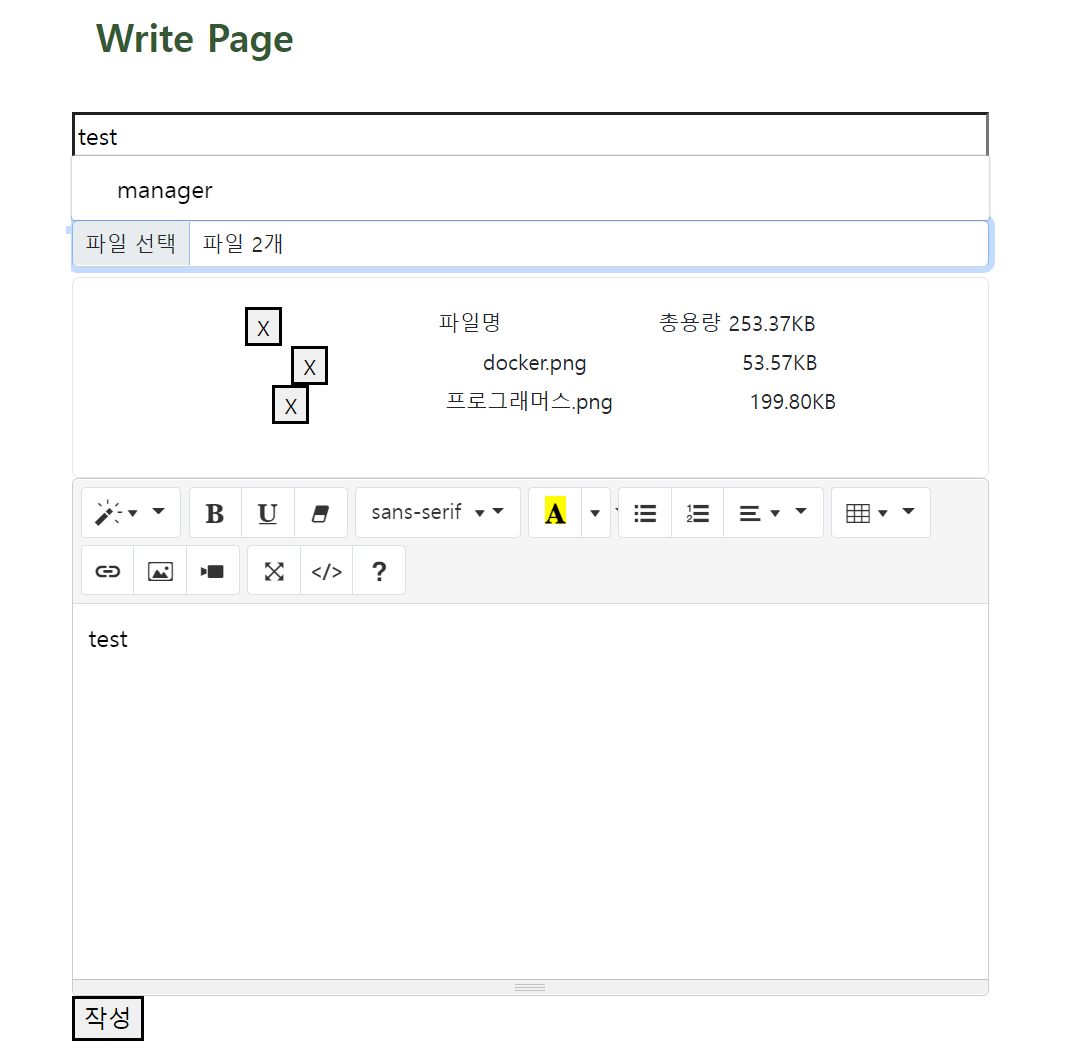
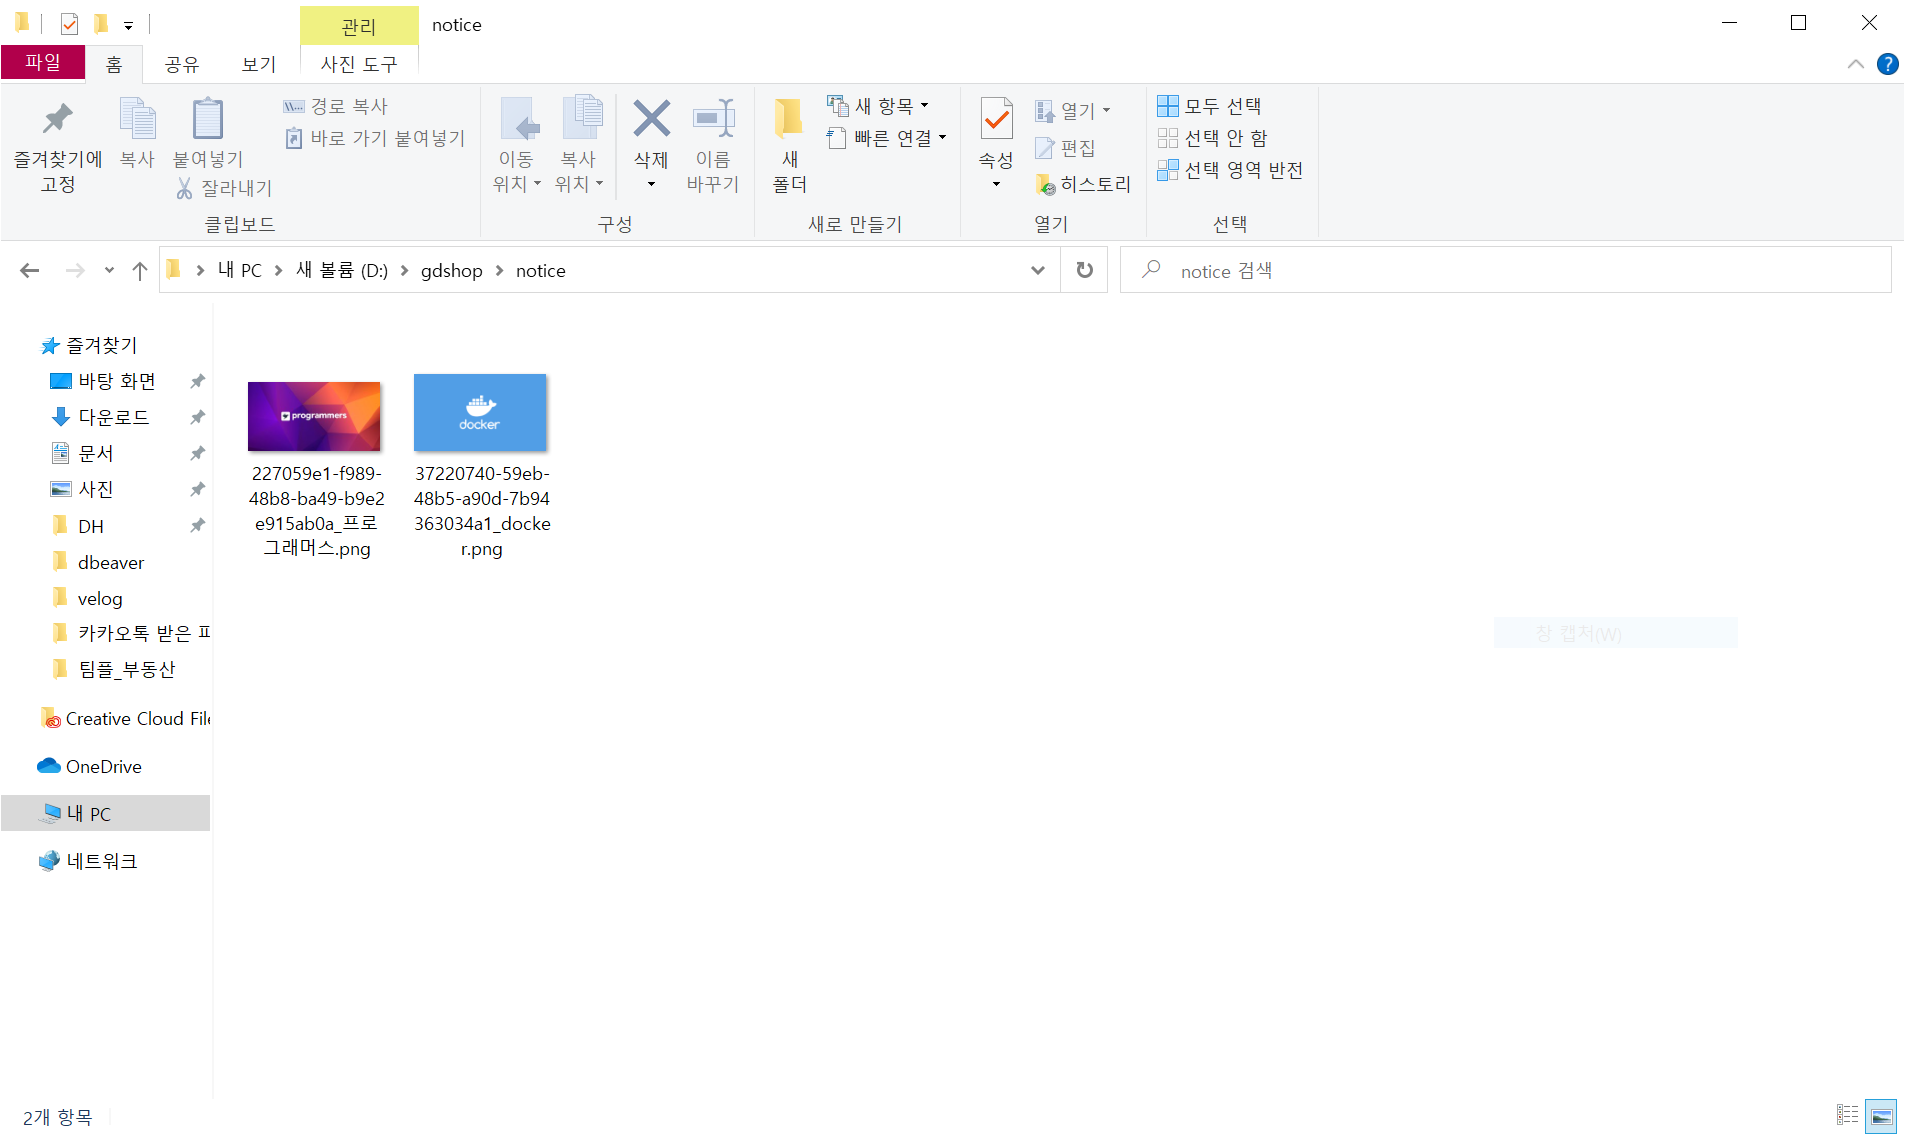
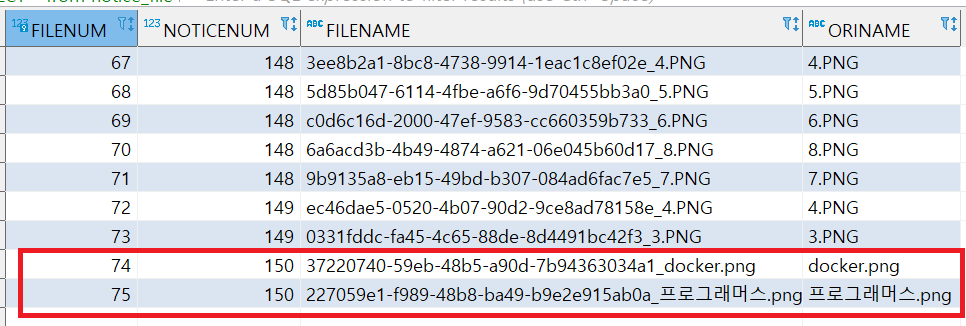
결과
docker와 프로그래머스 이미지를 등록한 결과 하드와 DB에 저장된 것을 확인할 수 있습니다.