이전에 했던 dynamic_tableView를 가져와서 진행
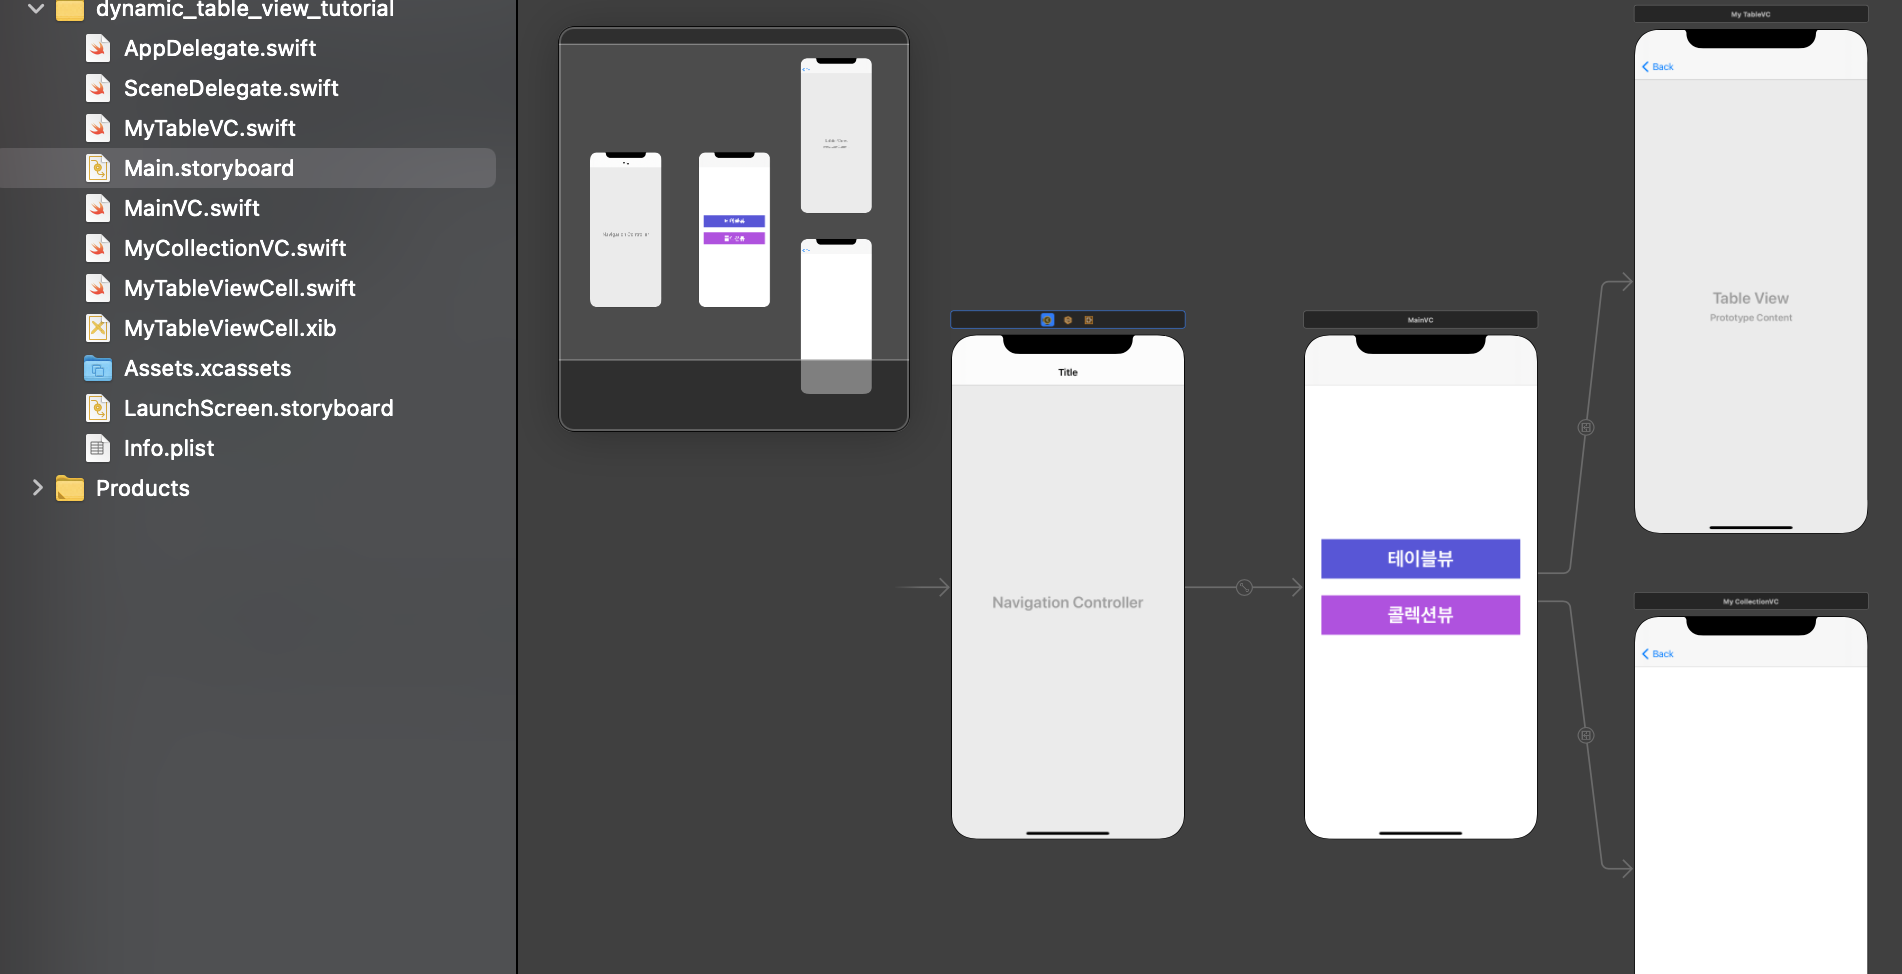
navigation controller를 통해 화면에서 back이 가능하도록 했고, 각각의 Swift파일에 각각의 클래스를 만들어 연결시켜주었음.
collectionView
먼저, ViewController에 collectionView를 넣어주고 그 위에 segmented control을 넣은 상태
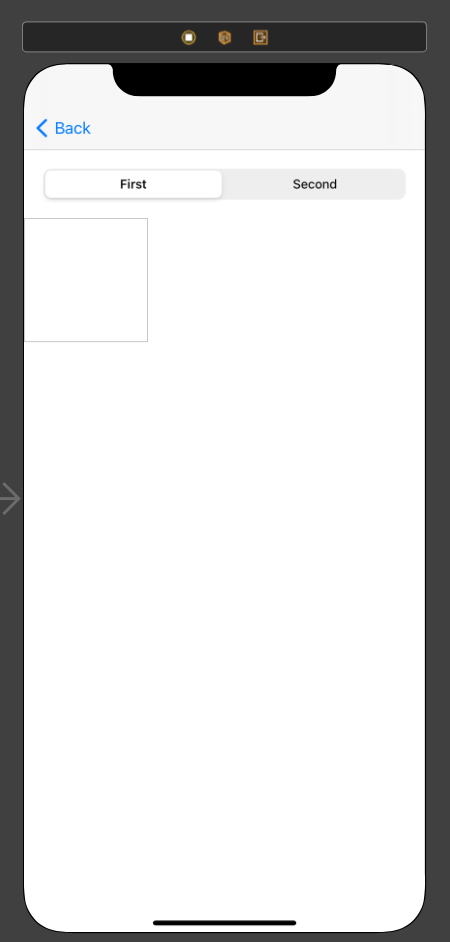
cell을 설정하는 방법은 두 가지
-> 메인 스토리보드 자체에서 만들기
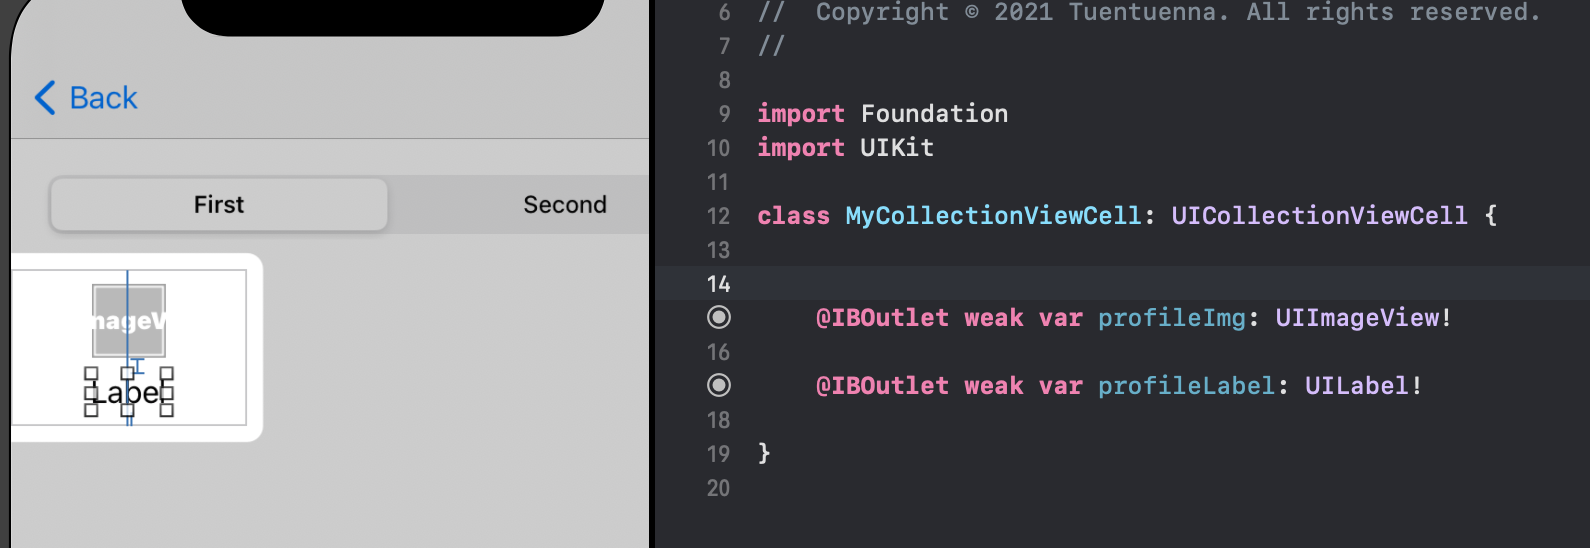
드래그해서 Outlet을 만들어줌.
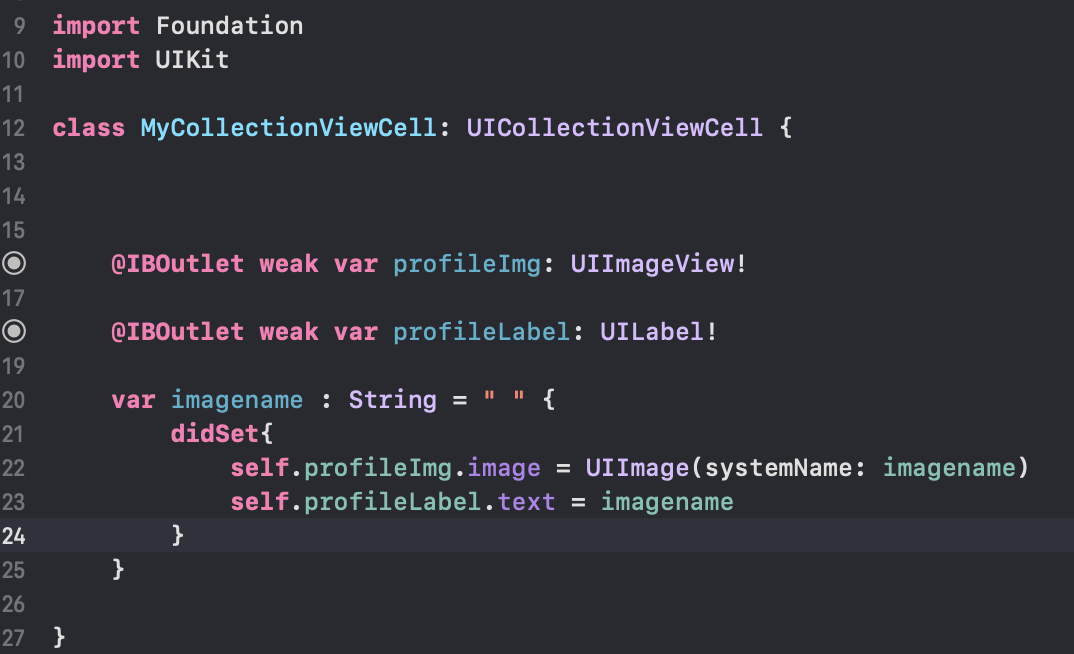
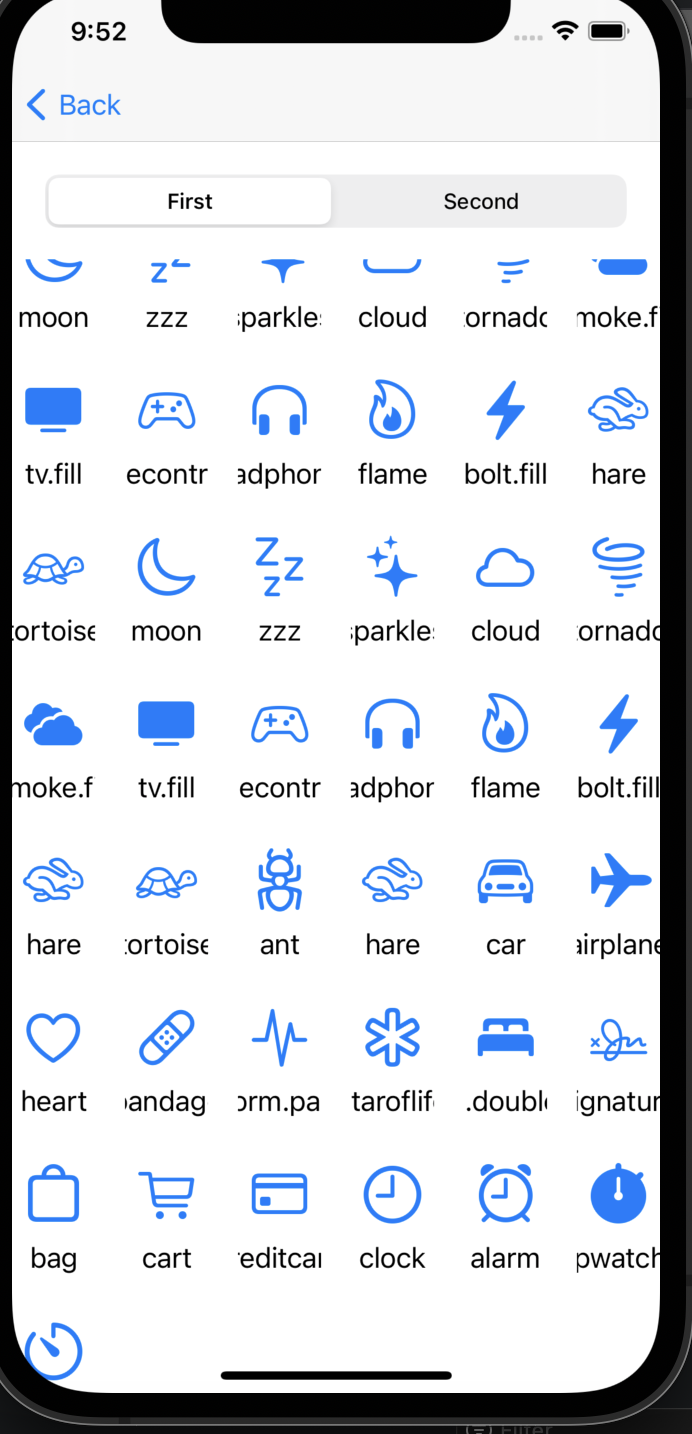
새로운 Swift파일에 MyCollectionViewCell class를 만들어주고 imagename을 선언하여 설정해줌. 설정해주기 위해 MyCollectionVC swift파일에 이렇게 작성해줌.


이때까지의 MyCollectionVC 코드와 결과화면
import Foundation
import UIKit

class MyCollectionVC: UIViewController {


    @IBOutlet weak var mysegmentControl: UISegmentedControl!
    @IBOutlet weak var myCollectionView: UICollectionView!

    fileprivate let systemImageNameArray = [
        "moon", "zzz", "sparkles", "cloud", "tornado", "smoke.fill", "tv.fill", "gamecontroller", "headphones", "flame", "bolt.fill", "hare", "tortoise", "moon", "zzz", "sparkles", "cloud", "tornado", "smoke.fill", "tv.fill", "gamecontroller", "headphones", "flame", "bolt.fill", "hare", "tortoise", "ant", "hare", "car", "airplane", "heart", "bandage", "waveform.path.ecg", "staroflife", "bed.double.fill", "signature", "bag", "cart", "creditcard", "clock", "alarm", "stopwatch.fill", "timer"
    ]

    //MARK: - Lifecycles
    override func viewDidLoad() {
        //정대리님 유투부 커뮤니티 참고(상속)
        super.viewDidLoad()
        print("MyCollectionVC - viewDidLoad() called")

        //콜렉션 뷰에 대한 설정
        myCollectionView.autoresizingMask = [.flexibleWidth, .flexibleHeight]
        myCollectionView.dataSource = self
        myCollectionView.delegate = self
    }
}

//콜렉션뷰 델리게이트 - 액션과 관련된 것들
extension MyCollectionVC: UICollectionViewDelegate {

}

// 데이터와 관련된 것들
extension MyCollectionVC: UICollectionViewDataSource {
    func collectionView(_ collectionView: UICollectionView, numberOfItemsInSection section: Int) -> Int {
        return self.systemImageNameArray.count
    }

    //각 콜렉션뷰 셀에 대한 설정
    func collectionView(_ collectionView: UICollectionView, cellForItemAt indexPath: IndexPath) -> UICollectionViewCell {

        let cellId = String(describing: MyCollectionViewCell.self)
        print("cellId = \(cellId)") // cellId가 MyCollectionViewCell 그대로 출력.

        //셀의 인스턴스
        let cell = collectionView.dequeueReusableCell(withReuseIdentifier: cellId, for: indexPath) as! MyCollectionViewCell

        cell.imagename = self.systemImageNameArray[indexPath.item]

        //데이터에 따른 셀 UI변경
        //이미지에 대한 설정
        cell.profileImg.image = UIImage(systemName: self.systemImageNameArray[indexPath.item])
        //라벨 설정
        cell.profileLabel.text = self.systemImageNameArray[indexPath.item]

        return cell
    }


}
셀의 특성을 더 추가함.

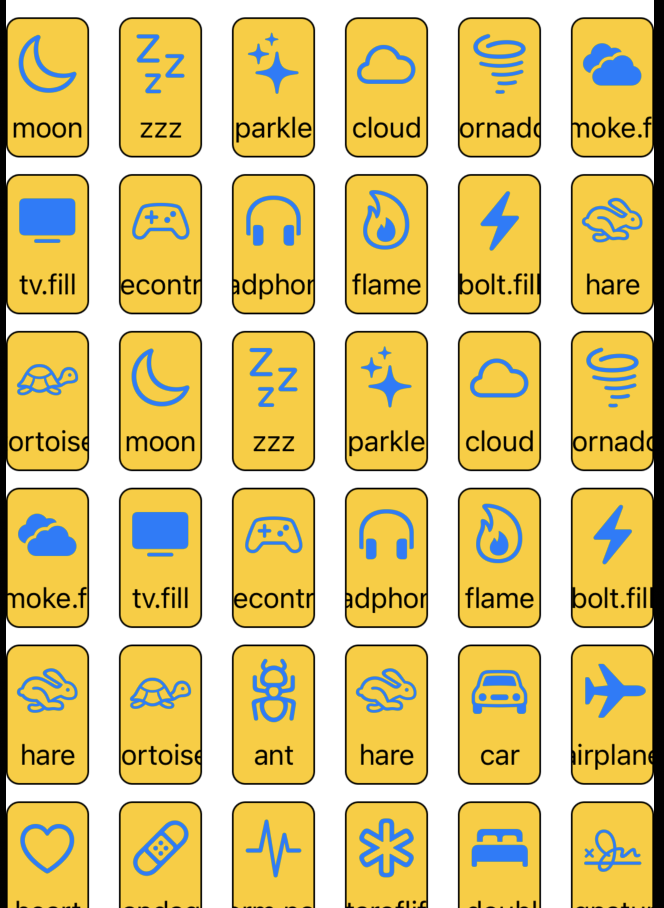
위 코드를 MyCollectionViewCell에서 따로 작성가능함.(awakeFromNib()을 이용해서해야함)

위는 스토리보드에 직접 cell을 넣어서했지만 따로 nib파일을 만들어서 할 수 있음. nib을 만들 때 class를 잘 설정해주고 Identifier도 같은 이름으로 설정해줌.

nib파일과 함께 Swift파일도 만들어 안에 class를 선언해줌. 아까의 방법에서는 레지스터를 안해도 됐었는데, 이 방법에선 레지스터를 해줘야함.
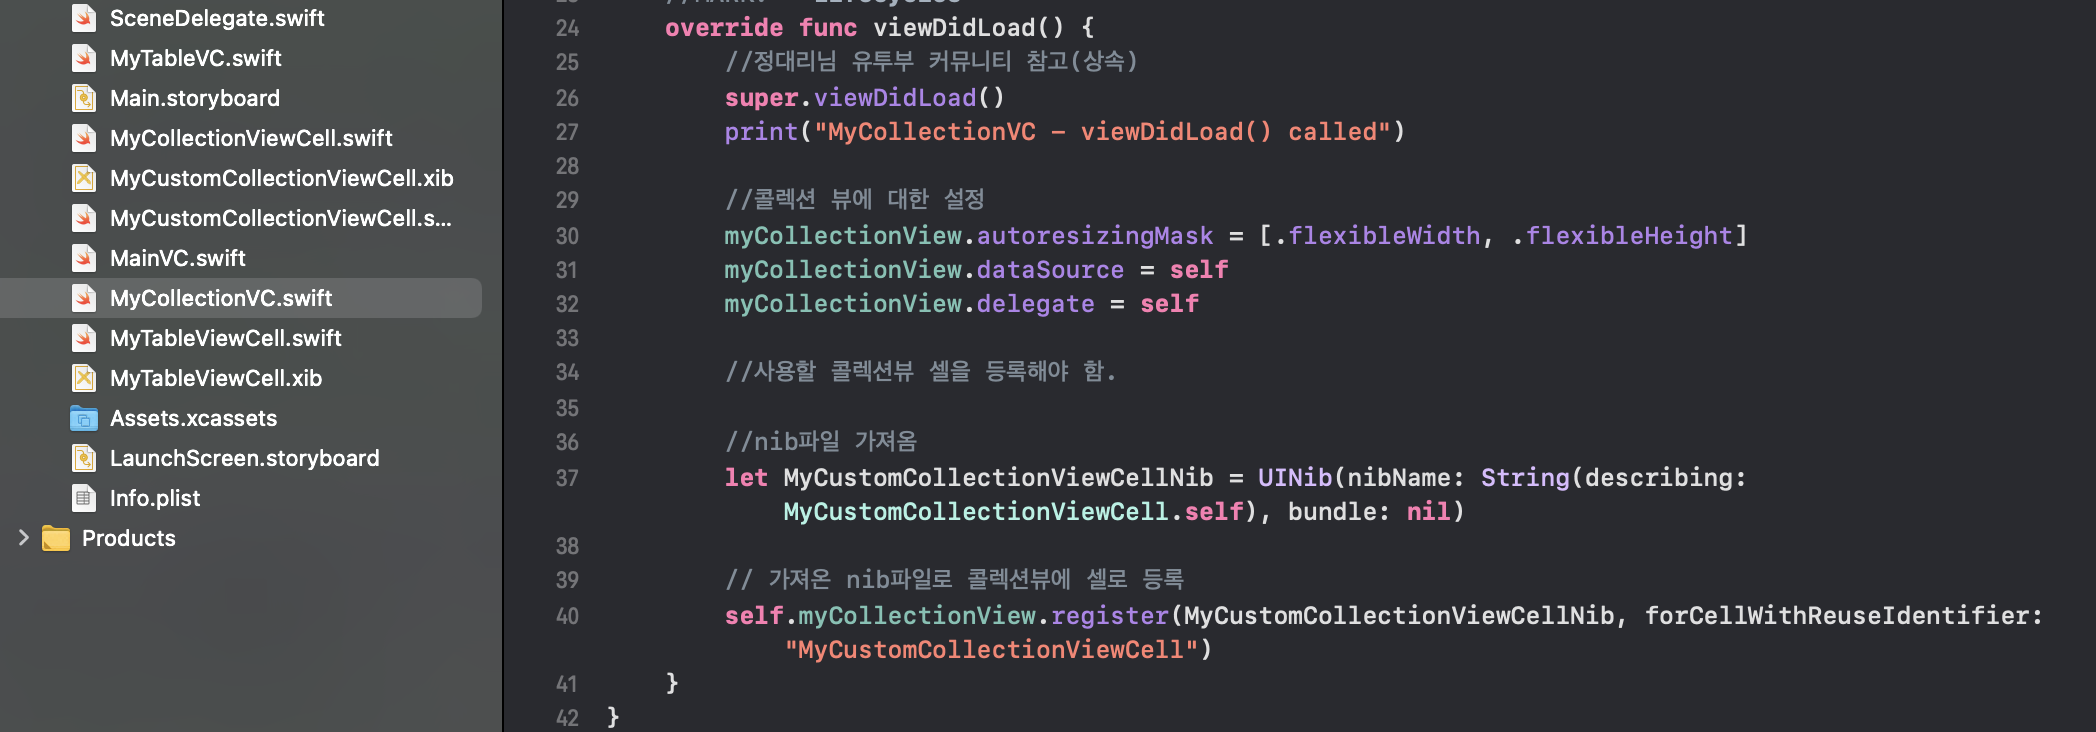
아래에 아까와 같지만 이름이 다르게 다시 선언함.

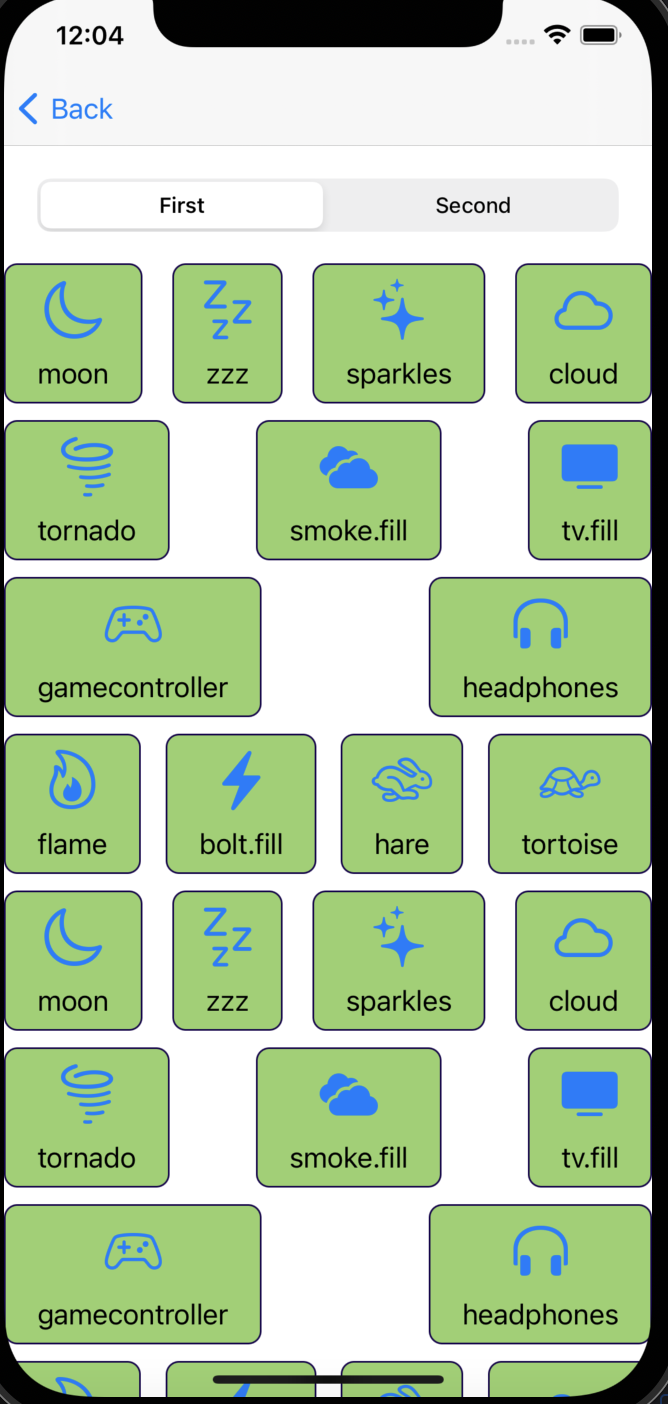
Compositional layout
-1%202.jpg)
layout을 설정하여 count가 1, 2, 3인 경우를 만들어보겠다.

segmentedControl의 index값에 따라 바뀌도록 switch문을 이용함.
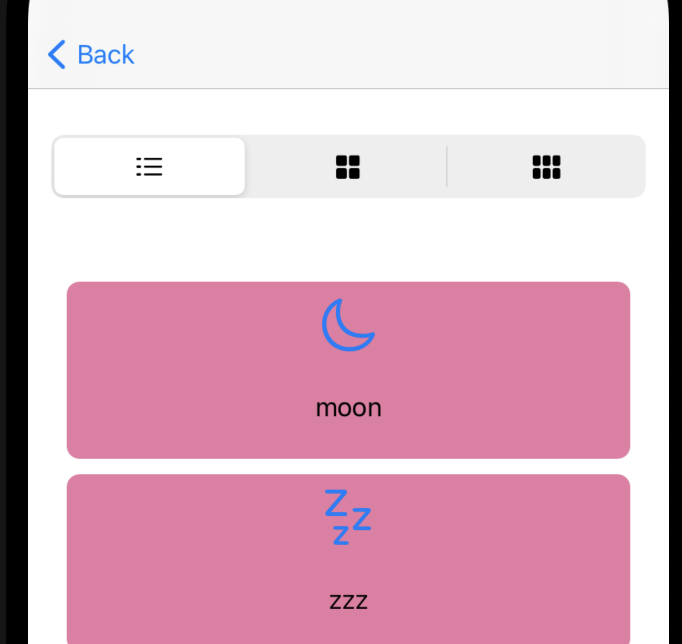
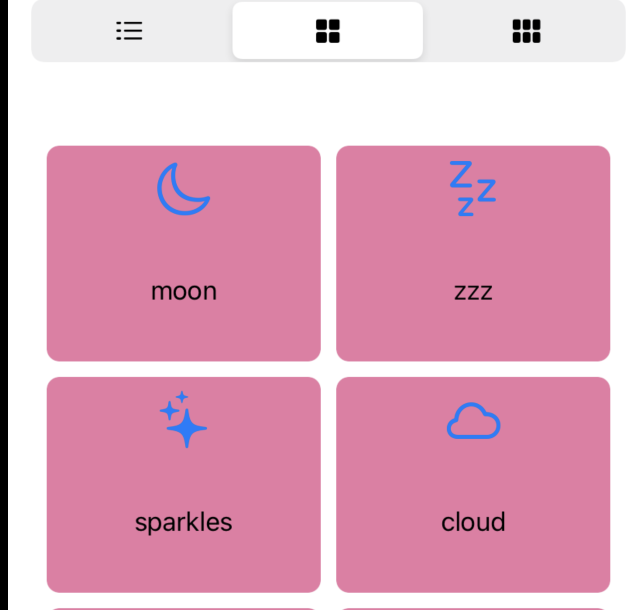
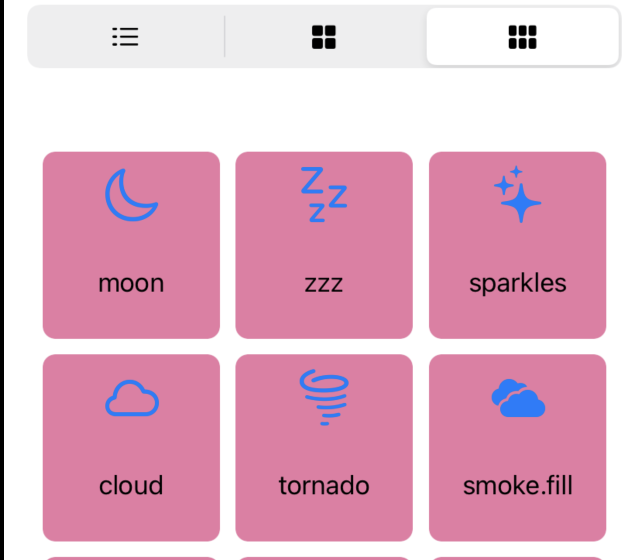
컬렉션뷰의 전체코드
import Foundation
import UIKit

class MyCollectionVC: UIViewController {


    @IBOutlet weak var myCollectionView: UICollectionView!
    @IBOutlet weak var mySegmentedControl: UISegmentedControl!

    fileprivate let systemImageNameArray = [
        "moon", "zzz", "sparkles", "cloud", "tornado", "smoke.fill", "tv.fill", "gamecontroller", "headphones", "flame", "bolt.fill", "hare", "tortoise", "moon", "zzz", "sparkles", "cloud", "tornado", "smoke.fill", "tv.fill", "gamecontroller", "headphones", "flame", "bolt.fill", "hare", "tortoise", "ant", "hare", "car", "airplane", "heart", "bandage", "waveform.path.ecg", "staroflife", "bed.double.fill", "signature", "bag", "cart", "creditcard", "clock", "alarm", "stopwatch.fill", "timer"
    ]


    override func viewDidLoad() {
        super.viewDidLoad()

        //콜렉션뷰에 대한 설정
        myCollectionView.autoresizingMask = [.flexibleWidth, .flexibleHeight]
        myCollectionView.dataSource = self
        myCollectionView.delegate = self

        //닙파일 가져옴
        let MyCustomCollectionViewCellNib = UINib(nibName: "MyCustomCollectionViewCell", bundle: nil)
        //가져온 닙파일로 콜렉션뷰에 셀로 등록한다.
        myCollectionView.register(MyCustomCollectionViewCellNib, forCellWithReuseIdentifier: "MyCustomCollectionViewCell")

        //콜렉션뷰의 콜렉션뷰 레이아웃 설정

        self.myCollectionView.collectionViewLayout = createCompositionalLayoutForFirst()
    }

    @IBAction func onCollectionViewTypeChanged(_ sender: UISegmentedControl) {
        switch sender.selectedSegmentIndex {
        case 0:
            self.myCollectionView.collectionViewLayout = createCompositionalLayoutForFirst()
        case 1:
            self.myCollectionView.collectionViewLayout = createCompositionalLayoutForSecond()
        case 2:
            self.myCollectionView.collectionViewLayout = createCompositionalLayoutForThird()
        default:
            break
        }
    }

}

extension MyCollectionVC {
    //컴포지셔널 레이아웃설정
    fileprivate func createCompositionalLayoutForFirst() -> UICollectionViewLayout{
        //컴포지셔널 레이아웃 생성
        let layout = UICollectionViewCompositionalLayout{
            (sectionIndex: Int, layoutEnvironment: NSCollectionLayoutEnvironment) -> NSCollectionLayoutSection? in

        //아이템에 대한 사이즈
            let itemSize = NSCollectionLayoutSize(widthDimension: .fractionalWidth(1.0), heightDimension: .fractionalHeight(1.0))
        //아이템 만들기
            let item = NSCollectionLayoutItem(layoutSize: itemSize)

        //아이템 간격
            item.contentInsets = NSDirectionalEdgeInsets(top: 5, leading: 5, bottom: 5, trailing: 5)

        //그룹사이즈
            let groupHeight = NSCollectionLayoutDimension.fractionalWidth(1/3)

            let groupSize = NSCollectionLayoutSize(widthDimension: .fractionalWidth(1.0), heightDimension: groupHeight)
        //그룹만들기
            let group = NSCollectionLayoutGroup.horizontal(layoutSize: groupSize, subitem: item, count: 1)
        //섹션만들기
            let section = NSCollectionLayoutSection(group: group)
        //섹션에 대한 간격
            section.contentInsets = NSDirectionalEdgeInsets(top: 20, leading: 20, bottom: 20, trailing: 20)

            return section
        }
        return layout
    }

    fileprivate func createCompositionalLayoutForSecond() -> UICollectionViewLayout{
        //컴포지셔널 레이아웃 생성
        let layout = UICollectionViewCompositionalLayout{
            (sectionIndex: Int, layoutEnvironment: NSCollectionLayoutEnvironment) -> NSCollectionLayoutSection? in

        //아이템에 대한 사이즈
            let itemSize = NSCollectionLayoutSize(widthDimension: .fractionalWidth(1.0), heightDimension: .fractionalHeight(1.0))
        //아이템 만들기
            let item = NSCollectionLayoutItem(layoutSize: itemSize)

        //아이템 간격
            item.contentInsets = NSDirectionalEdgeInsets(top: 5, leading: 5, bottom: 5, trailing: 5)

        //그룹사이즈
            let groupHeight = NSCollectionLayoutDimension.fractionalWidth(0.4)

            let groupSize = NSCollectionLayoutSize(widthDimension: .fractionalWidth(1.0), heightDimension: groupHeight)
        //그룹만들기
            let group = NSCollectionLayoutGroup.horizontal(layoutSize: groupSize, subitem: item, count: 2)
        //섹션만들기
            let section = NSCollectionLayoutSection(group: group)
        //섹션에 대한 간격
            section.contentInsets = NSDirectionalEdgeInsets(top: 20, leading: 20, bottom: 20, trailing: 20)

            return section
        }
        return layout
    }
    fileprivate func createCompositionalLayoutForThird() -> UICollectionViewLayout{
        //컴포지셔널 레이아웃 생성
        let layout = UICollectionViewCompositionalLayout{
            (sectionIndex: Int, layoutEnvironment: NSCollectionLayoutEnvironment) -> NSCollectionLayoutSection? in

        //아이템에 대한 사이즈
            let itemSize = NSCollectionLayoutSize(widthDimension: .fractionalWidth(1.0), heightDimension: .fractionalHeight(1.0))
        //아이템 만들기
            let item = NSCollectionLayoutItem(layoutSize: itemSize)

        //아이템 간격
            item.contentInsets = NSDirectionalEdgeInsets(top: 5, leading: 5, bottom: 5, trailing: 5)

        //그룹사이즈
            let groupHeight = NSCollectionLayoutDimension.fractionalWidth(0.35)

            let groupSize = NSCollectionLayoutSize(widthDimension: .fractionalWidth(1.0), heightDimension: groupHeight)
        //그룹만들기
            let group = NSCollectionLayoutGroup.horizontal(layoutSize: groupSize, subitem: item, count: 3)
        //섹션만들기
            let section = NSCollectionLayoutSection(group: group)
        //섹션에 대한 간격
            section.contentInsets = NSDirectionalEdgeInsets(top: 20, leading: 20, bottom: 20, trailing: 20)

            return section
        }
        return layout
    }
}
//데이터와 관련
extension MyCollectionVC: UICollectionViewDataSource{

    func collectionView(_ collectionView: UICollectionView, numberOfItemsInSection section: Int) -> Int {

        return self.systemImageNameArray.count
    }

    //셀에 대한 설정
    func collectionView(_ collectionView: UICollectionView, cellForItemAt indexPath: IndexPath) -> UICollectionViewCell {

        let cell = collectionView.dequeueReusableCell(withReuseIdentifier: "MyCustomCollectionViewCell", for: indexPath) as! MyCustomCollectionViewCell

        cell.imagename = self.systemImageNameArray[indexPath.item]


        return cell
    }


}
//액션과 관련
extension MyCollectionVC: UICollectionViewDelegate {

}
전체는 깃허브에 올림.
