Axios 사용법 기초
프론트에서 서버에 데이터 요청하는 법(React로 fetch, axios 사용)
- 우선 참고한 강의 영상
프론트에서 서버에 데이터 요청하는 방법 (React로 fetch, axios 사용하기)
모의로 서버와 클라이언트를 만들어보자
- server와 client 폴더를 생성서버부터 설정해봅시다
-
server 경로에서 nodejs 프로젝트니까
npm init -
다음 express를 사용할거니까
npm i express, npm 웹페이지에서 express 검색하면 사용 가이드가 쭉 나온다. 그 중 sample code를 가져오자 -
node app.js로 서버 실행, http://localhost:3000/에 접속하여 확인해보자. -
이제 간단한 To Do List를 만들어보자.
-
nodejs는 처음써보는데 장고, 스프링 하던거랑 큰 틀은 차이가 없어보인다.
-
todoList 객체 하나 만들어주고, get 요청 시 todoList를 반환하고, post 요청 시 request body를 파싱해서 todoList에 새롭게 넣어준다.
-
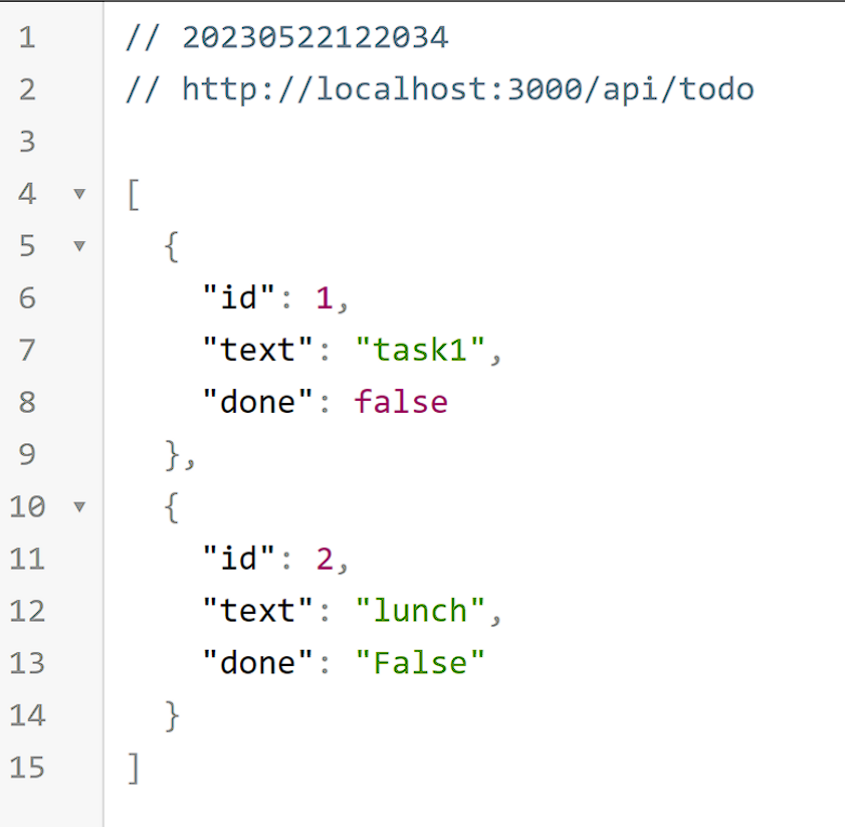
get 요청하면 요렇게 json 데이터가 나온다.
-
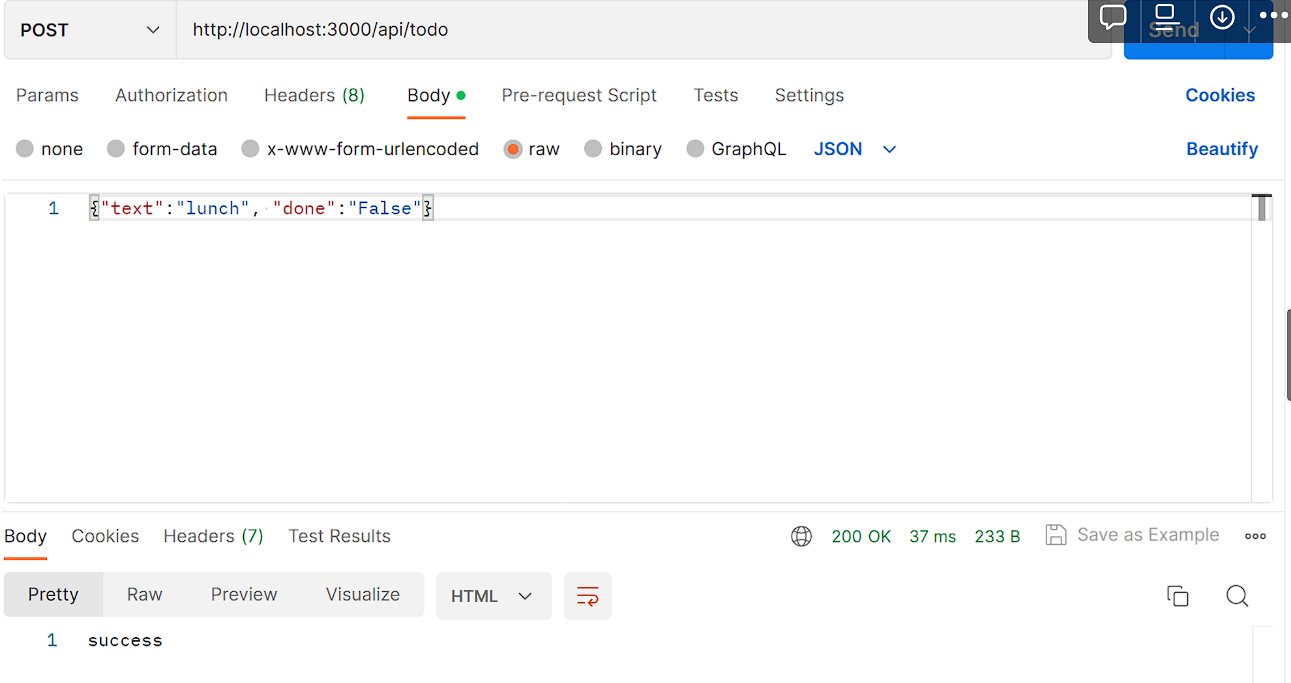
Postman을 이용하여 Post 요청도 정상적으로 처리되는 것을 확인
-
여기까지 하면 기본적인 서버 세팅 끝
-
code
```jsx
const express = require("express");
const bodyParser = require('body-parser');
const app = express();

app.use(bodyParser.json()) // for parsing application/json
app.use(bodyParser.urlencoded({ extended: true })) // for parsing application/x-www-form-urlencoded

let id = 2;
const todoList = [
  {
    id: 1,
    text: "task1",
    done: false,
  },
];

app.get("/", function (req, res) {
  res.send("Hello World");
});

app.get("/api/todo", function (req, res) {
  res.json(todoList);
});

app.post('/api/todo', function (req, res){
    const {text, done} = req.body;
    todoList.push({
        id: id++,
        text,
        done,
    })
    return res.send('success');
});

app.listen(3000, () => {
  console.log("server start!");
});
```
다음은 Client 부분 작성
-
우선 client 디렉터리로 가서 reat app을 하나 만들어주자 → 하던대로
npx create-react-app -
포트 3000은 서버가 쓰고 있으니 3001로 열자
-
우선 fetch에 대해 알아보자
function App() { fetch("http://localhost:3000/api/todo") .then((response) => response.json()) .then((data) => console.log(data)); return ( <div className="App"> <h1>To Do List!</h1> </div> ); } -
이 같이 작성하고 개발자 도구를 열어보면 CORS 에러가 나온다.
-
CORS 정책? Cross Origin Resource Sharing
-
Client는 localhost:3001 (react 개발 서버)
-
Server는 localhost:3000
-
이 둘은 지금 포트가 다르기 때문에 데이터의 출처(Origin)가 다르다는 것
-
어차피 둘 다 내 컴퓨터에서 포트만 다른건데? No! 막 꺼내가면 안됨!
-
따라서 Origin이 다르면 데이터를 꺼내가는 것을 무조건적으로 막음
-
그렇다면 CORS 정책은 어느 쪽에서 풀어줘야 할까? 꺼내지는 쪽인 서버가 풀어야 함
-
npm install cors를 수행하고 서버 쪽 파일에 코드를 추가해주자.const cors = require('cors') app.use(cors()) -
CORS 설정을 하고 다시 요청하면?
-
-
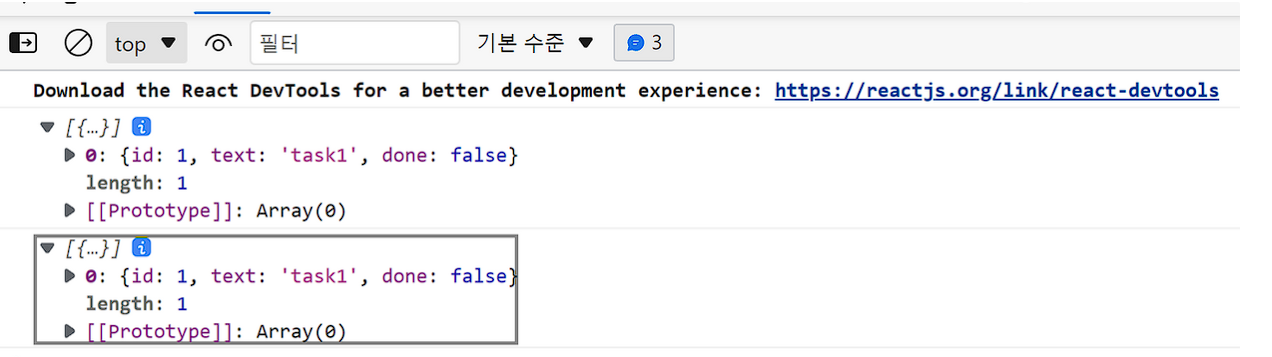
데이터가 잘 나온다.
-
이걸 이용해서 웹 페이지에 출력해보자.
function App() {
  // const [loading, setLoading] = useState(false);
  const [todoList, setTodoList] = useState([]);
  useEffect(() => {
    fetch("http://localhost:3000/api/todo")
      .then((response) => response.json())
      .then((data) => setTodoList(data));
  }, []);

  return (
    <div className="App">
      <h1>To Do List!</h1>
      {todoList.map((todo) => (
        <div key={todo.id}>
          <div>{todo.id}</div>
          <div>{todo.text}</div>
          <div>{todo.done ? "Y" : "N"}</div>
        </div>
      ))}
    </div>
  );
}
-
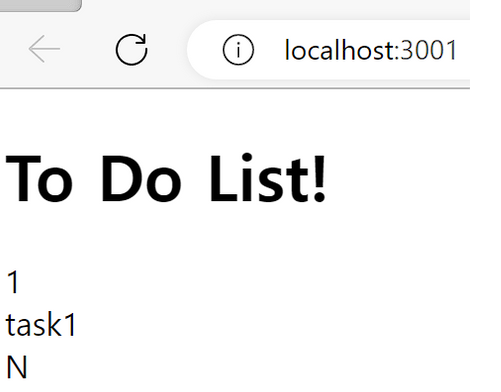
출력도 잘 된다. 여기서 중요한건 useState의 활용과 useEffect를 이용해 첫 컴포넌트 생성 시에만 api를 호출하여 데이터를 받아온다는 것
-
그 다음으로는 데이터를 서버에 보내보는 것도 해보자
const onSubmit = (event)=>{ event.preventDefault(); const text = event.target.text.value; const done = event.target.done.value; fetch('http://localhost:3000/api/todo',{ method:'POST', headers:{ 'Content-Type':'application/json', }, body: JSON.stringify({ text, done, }), }) } return ( <div className="App"> <h1>To Do List!</h1> <form onSubmit={onSubmit}> <input name="text"/> <input name="done" type="checkbox"/> <input type="submit" value='추가'/> </form> {todoList?.map((todo) => ( <div key={todo.id} style={{display:"flex"}> <div>{todo.id}</div> <div>{todo.text}</div> <div>{todo.done ? "Y" : "N"}</div> </div> ))} </div> ); -
입력 form을 하나 만들고 onSubmit 함수를 하나 작성하자.
-
onSubmit을 수행하면 입력 받은 text와 done을 활용해서 fetch를 수행한다.
-
api 주소를 입력하고, method를 지정해준다. 지정 안 하면 GET 고정이다.
-
Header 필드도 작성해서 json 타입임을 알려주자.
-
그 다음 입력 데이터를 JSON 형식으로 직렬화를 해주어야 한다.
-
submit type의 input은 자동으로 get요청을 한다. 이전에 배웠던 사실
- 이를 막으려면 event.preventDefault()를 써야함.
-
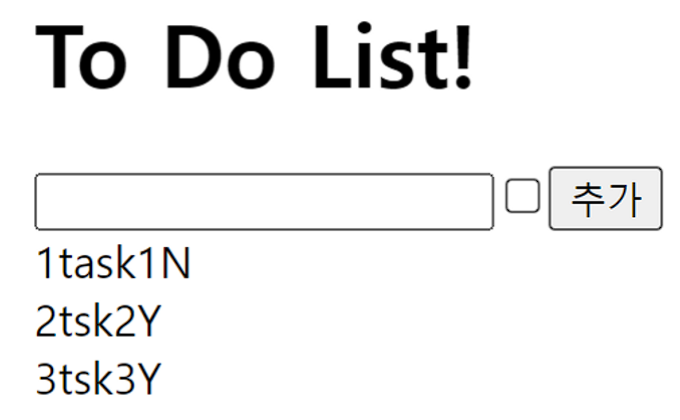
그 결과 입력 폼이 생성 되고 정상적으로 데이터 등록도 된다.
-
그 다음 우리가 원하는 것은 서버에 데이터가 추가 되었을 때 바로 갱신이 되는 것
-
fetch 요청(POST)이 끝났을 때 다시 데이터를 fetch(GET)하고 싶다!
-
그렇다고 POST fetch 요청 뒤에 then(~~) 짜면 코드가 중복된다. 별로다…
-
함수로 따로 빼서 수행해봅시다.
const [todoList, setTodoList] = useState([]); const fetchData = () => { fetch("http://localhost:3000/api/todo") .then((response) => response.json()) .then((data) => setTodoList(data)); } useEffect(() => { fetchData(); }, []); const onSubmit = (event)=>{ event.preventDefault(); const text = event.target.text.value; const done = event.target.done.checked; // 체크 박스 체크 여부 fetch('http://localhost:3000/api/todo',{ method:'POST', headers:{ 'Content-Type':'application/json', }, body: JSON.stringify({ text, done, }), }).then(()=> fetchData()); } -
이렇게 작성하면 추가 이후 바로 화면이 갱신되는 것을 볼 수 있다.
-
다음으로 axios를 이용해보자. 더 쉽다.
-
fetch(GET) 부분을 다음처럼 바꿔보자.
const fetchData = () => { axios.get("http://localhost:3000/api/todo").then((response) => { setTodoList(response.data); }); }; -
훨씬 깔끔해졌다. 더 깔끔하게 하려면 async, await을 사용할 수 있다.
const fetchData = async () => { const response = await axios.get("http://localhost:3000/api/todo"); setTodoList(response.data); }; -
더 직관적으로 변했다. async, await에 관해서는 좀 더 찾아봐야겠다.
-
마찬가지로 POST 도 바꿔보자
const onSubmit = async (event) => { event.preventDefault(); const text = event.target.text.value; const done = event.target.done.checked; // 체크 박스 체크 여부 await axios.post("http://localhost:3000/api/todo", {text, done}); fetchData(); }; -
이러한 기능을 자주 쓰면 커스텀 훅으로 만들어도 되는데 이미 라이브러리가 존재한다.
-
로딩, 에러 처리도 마찬가지 커스텀 훅을 불러와서 써보는 것도 나중에 해보자.