이전 글에서 결제정보를 저장했으니 해당 정보를 들고와서 구매한 상품에 대해 리뷰를 작성할 수 있도록 해보자.
먼저 리뷰를 저장할 데이터베이스 테이블과 엔티티를 만들자.
리뷰에는 다음과 같은 데이터들이 들어갈 것이다.
- 사용자 id
- 상품 id
- 제목
- 내용
- 평점
- 사진(존재한다면)
다음 데이터들을 저장할 데이터베이스 테이블을 만들고 엔티티로 매핑해주자
리뷰 엔티티
import jakarta.persistence.*;

@Entity
public class Review {

    @Id
    @ManyToOne
    @JoinColumn(name = "user_id", updatable = false, insertable = false)
    private Users users;

    @Id
    @ManyToOne
    @JoinColumn(name = "product_id", updatable = false, insertable = false)
    private Products products;

    @Column(name = "title")
    private String title;

    @Column(name = "rating")
    private int rating;


    @Lob
    @Column(name = "content", columnDefinition = "text")
    private String content;

    @Lob
    @Column(name = "photo")
    private String photo;  // 사진 파일 경로 또는 URL
역시나 마찬가지로 리뷰 데이터를 조작할 수 있도록 리포지토리,서비스,컨트롤러를 작성해주자.
리뷰 리포지토리
package com.shoppingmall.repository;

import com.shoppingmall.domain.Review;
import jakarta.persistence.EntityManager;
import jakarta.persistence.PersistenceContext;
import jakarta.persistence.TypedQuery;

import java.util.List;

public class ReviewRepository {

    @PersistenceContext
    private final EntityManager em;

    public ReviewRepository(EntityManager em) {
        this.em = em;
    }

    public Review writeReview(Review review){
        em.persist(review);
        return review;
    }

    public List<Review> getReviewByUserId(String user_id){
        TypedQuery<Review> query = em.createQuery("SELECT u FROM Review u WHERE u.users.id = :user_id", Review.class);
        query.setParameter("user_id",  user_id);
        return query.getResultList();
    }

}
리뷰 서비스
package com.shoppingmall.service;

import com.shoppingmall.domain.Products;
import com.shoppingmall.domain.Review;
import com.shoppingmall.domain.Users;
import com.shoppingmall.repository.ReviewRepository;
import jakarta.transaction.Transactional;
import org.springframework.web.multipart.MultipartFile;

import java.util.List;

@Transactional
public class ReviewService {

    private final ReviewRepository reviewRepository;
    private final FileStorageService fileStorageService;  // 파일 저장 서비스
    public ReviewService(ReviewRepository reviewRepository, FileStorageService fileStorageService) {
        this.reviewRepository = reviewRepository;
        this.fileStorageService = fileStorageService;
    }

    public Review writeReview(Users user, Products products, String title, String content, int rating, MultipartFile photo){
        String photoPath = "";

        if(photo != null)
            photoPath= fileStorageService.storeFile(photo);

        // 리뷰 저장 로직 구현
        Review review = new Review();
        review.setUsers(user);
        review.setProducts(products);
        review.setContent(content);
        review.setTitle(title);
        review.setRating(rating);
        if(photoPath.length() > 0) review.setPhoto(photoPath);
        return reviewRepository.writeReview(review);
    }

    public List<Review> findReviewByUserId(String user_id){
        return reviewRepository.getReviewByUserId(user_id);
    }
}
리뷰 컨트롤러
import com.shoppingmall.domain.Products;
import com.shoppingmall.domain.Users;
import com.shoppingmall.service.ProductService;
import com.shoppingmall.service.ReviewService;
import com.shoppingmall.service.UserService;
import org.springframework.security.core.annotation.AuthenticationPrincipal;
import org.springframework.security.core.userdetails.UserDetails;
import org.springframework.stereotype.Controller;
import org.springframework.ui.Model;
import org.springframework.web.bind.annotation.GetMapping;
import org.springframework.web.bind.annotation.PostMapping;
import org.springframework.web.bind.annotation.RequestParam;
import org.springframework.web.multipart.MultipartFile;

@Controller
public class ReviewController {

    private final UserService userService;
    private final ProductService productService;
    private final ReviewService reviewService;

    public ReviewController(UserService userService, ProductService productService, ReviewService reviewService) {
        this.userService = userService;
        this.productService = productService;
        this.reviewService = reviewService;
    }

    @GetMapping("/reviewPopup")
    public String openReviewPopup(@RequestParam("itemId") Long itemId, Model model) {
        // itemId를 이용해 아이템 정보를 가져와서 모델에 추가
        model.addAttribute("itemId", itemId);
        // 필요한 다른 정보들도 모델에 추가
        return "/review"; // 팝업 창에 표시할 HTML 파일 이름
    }

    @PostMapping("/submitReview")
    public String submitReview(@RequestParam("itemId") int itemId,
                               @RequestParam("title") String title,
                               @RequestParam("content") String content,
                               @RequestParam("rating") int rating,
                               @RequestParam("photo") MultipartFile photo,
                               @AuthenticationPrincipal UserDetails userDetails) {
        // 리뷰 저장 로직 구현
        Users users = userService.findById(userDetails.getUsername());
        Products products = productService.findById(itemId);
        reviewService.writeReview(users, products, title, content, rating, photo);
        // 리뷰 저장 후 팝업 창 닫기 또는 다른 처리
        return "redirect:/"; // 팝업 창 닫기 위해 리다이렉트
    }
}
* 리뷰 저장 후, 다음과 같이 처리하면 팝업이 닫기지 않는다. 예전에 사용해봤던 ResponseEntity를 사용해서 성공했다는 응답을 받으면 프론트쪽에서 창을 닫도록 해야할 것 같다.(테스트자체에는 크게 문제가 없어서 그냥 사용했다)
다음은 결제 정보를 보여줄 수 있는 창을 만들어야한다. 이참에 타 쇼핑몰과 같이 사용자 아이콘을 누르면 최근 주문 내역이 보여지도록 하는 페이지를 만들고, 개인 정보는 따로 버튼을 통해서 접근할 수 있도록 하자.
그러기위해서 먼저 백엔드쪽에서 수정이 필요하다.
결제정보 리포지토리에 해당 함수 추가
public List<Purchases> getPurchaseWithinOneMonth(String user_id) {
        LocalDateTime now = LocalDateTime.now();
        LocalDateTime oneMonthBef = now.minusMonths(1);

        String jpql = "SELECT p FROM Purchases p WHERE p.users.id = :user_id AND p.created BETWEEN :oneMonthBef AND :now";
        TypedQuery<Purchases> query = em.createQuery(jpql, Purchases.class);
        query.setParameter("user_id", user_id);
        query.setParameter("now", now);
        query.setParameter("oneMonthBef", oneMonthBef);

        return query.getResultList();
    }
해당 함수는 창에 들어가는 시점에서 1달 전에 구매한 상품들만 리스트에 저장하여 가져올 수 있도록 하는 함수다. 이 함수를 컨트롤러에서 사용해서 최근 주문 내역을 가져올 것이다.
컨트롤러에서 사용가능하도록 서비스에도 추가
public List<Purchases> getPurchaseWithinOneMonth(String user_id){
        return purchasesRepository.getPurchaseWithinOneMonth(user_id);
    }
컨트롤러에서 해당 메소드 사용
@GetMapping("/user/status")
    public String profilePage(@AuthenticationPrincipal User user, Model model) {
        Users users = userService.findById(user.getUsername());
        List<Purchases> purchases = purchaseService.getPurchaseWithinOneMonth(users.getId());
        model.addAttribute("user", users);
        model.addAttribute("purchase", purchases);
        return "/user/status";
    }
이로서 모든 준비가 끝났다. 이제 프론트쪽 코드를 작성하고 테스트해보자
프론트 코드
status.html
<!DOCTYPE html>
<html lang="ko">
<html xmlns:th="http://www.thymeleaf.org">
<head>
    <meta charset="UTF-8">
    <title>회원정보</title>
    <link href="/css/status.css" rel="stylesheet" />
</head>
<body>
<div class="header">
    <a href="/" id="home_logo">
        <img src="/images/icons/logo.png" />
    </a>
</div>
<div id="body_container">
    <div class="aside">
        <div id="profile">
            <div style="display: grid">
                <label th:text="${user.id}" style="padding-bottom: 12px"></label>
                <label th:text="${user.role} + ' 등급'" style="padding-bottom: 12px"></label>
            </div>
            <button id="status">회원정보</button>
            <form th:action="@{/logout}" method="post">
                <button id="logout" type="submit">로그아웃</button>
            </form>
        </div>
        <div id="link_box">
            <button class="link" id="coupon">쿠폰함</button>
            <button class="link" id="order">주문내역</button>
        </div>
    </div>
    <div id="content" style="border-left: #e0e6eb solid 1px">
        <div>
            <h2 style="text-align: center">최근 주문 내역</h2>
        </div>
        <ul>
            <li th:each="item : ${purchase}">
                <div class="order_box" style="display: flex">
                    <div class="photo">
                        <a th:href="'/products/'+${item.product_id}">
                            <img id="image" th:src="@{'/images/uploads/' + ${item.products.photo}}" alt="Product Image" width="150" height="150">
                        </a>
                    </div>
                    <div class="product_name">
                        <a  class="product_name" th:href="'/products/'+${item.product_id}" th:text="${item.products.product_name}"></a>
                    </div>
                    <div class="product_info">
                        <span th:text="${item.price} + '원'"></span>
                        <span th:text="${item.product_cnt} + '개'"></span>
                    </div>
                    <div class="but_box">
                        <button th:onclick="'openReviewPopup('+${item.product_id}+')'">리뷰 작성</button>
                        <button onclick="cancelOrder()">주문 취소</button>
                    </div>
                </div>
            </li>
        </ul>
    </div>
</div>
<script>
    function openReviewPopup(itemId) {
        const url = '/reviewPopup?itemId=' + itemId; // 팝업으로 열릴 URL
        const windowFeatures = 'width=600,height=400,menubar=no,toolbar=no,location=yes,status=no,resizable=yes,scrollbars=yes';

        window.open(url, 'ReviewPopup', windowFeatures);
    }


    function cancelOrder(itemId) {
        // 주문 취소 로직을 여기에 추가
        alert("Cancel order for item: " + itemId);
    }

</script>
</body>
</html>
review.html
<!DOCTYPE html>
<html xmlns:th="http://www.thymeleaf.org">
<head>
    <meta charset="UTF-8">
    <title>Write a Review</title>
    <style>
        .rating span {
            font-size: 2em;
            cursor: pointer;
            color: #ccc; /* 기본 색상 (비활성화된 별) */
        }

        .rating span.active {
            color: #f5c518; /* 활성화된 별 색상 (노란색) */
        }
    </style>
</head>
<body>
<h2>Write a Review</h2>
<form action="/submitReview" method="post" enctype="multipart/form-data">
    <input type="hidden" name="itemId" th:value="${itemId}">

    <div class="rating">
        <span onclick="rate(1)" onmouseover="highlight(1)" onmouseout="resetHighlight()">★</span>
        <span onclick="rate(2)" onmouseover="highlight(2)" onmouseout="resetHighlight()">★</span>
        <span onclick="rate(3)" onmouseover="highlight(3)" onmouseout="resetHighlight()">★</span>
        <span onclick="rate(4)" onmouseover="highlight(4)" onmouseout="resetHighlight()">★</span>
        <span onclick="rate(5)" onmouseover="highlight(5)" onmouseout="resetHighlight()">★</span>
    </div>
    <input type="hidden" id="rating" name="rating">


    <div>
        <label for="title">Title</label>
        <input type="text" id="title" name="title" required>
    </div>

    <div>
        <label for="content">Content</label>
        <textarea id="content" name="content" rows="4" required></textarea>
    </div>

    <div>
        <label for="photo">Attach Photo</label>
        <input type="file" id="photo" name="photo">
    </div>

    <div>
        <button type="submit">Submit Review</button>
    </div>
</form>
<script>
    let currentRating = 0;

    function rate(value) {
        currentRating = value;
        document.getElementById('rating').value = value; // 선택한 별점 값 저장
        highlight(currentRating);
    }

    function highlight(value) {
        const stars = document.querySelectorAll('.rating span');
        stars.forEach((star, index) => {
            if (index < value) {
                star.classList.add('active');
            } else {
                star.classList.remove('active');
            }
        });
    }

    function resetHighlight() {
        highlight(currentRating);
    }
</script>
</body>
</html>
테스트 결과
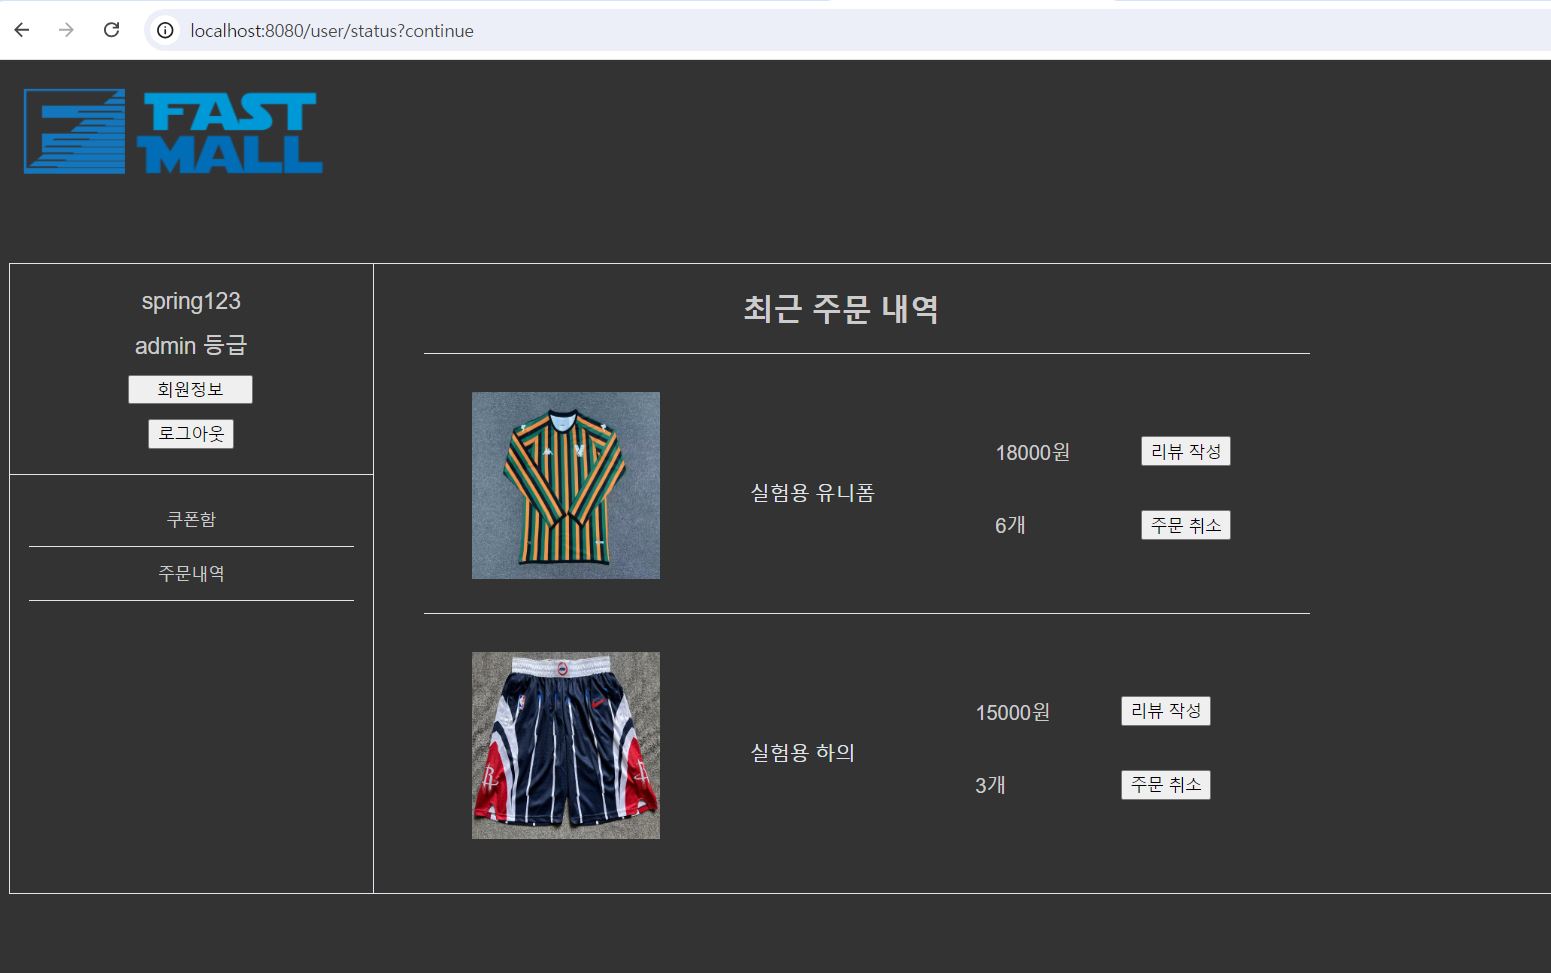
먼저, 원래 개인정보창을 보여주던 곳을 위 사진과 같이 최근 주문 내역을 볼 수 있도록 하고, 개인정보는 버튼을 눌러서 갈 수 있도록 만들었다.
쿠폰함과 주문내역은 아직 구현되지 않았다.
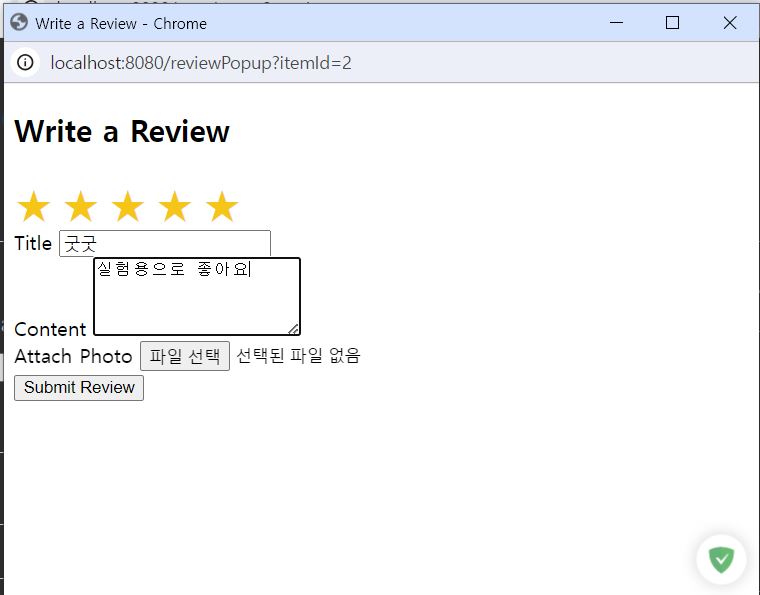
리뷰 작성 버튼을 클릭하면 다음과 같이 팝업이 뜨며 리뷰를 작성할 수 있는 칸들이 나온다. 별은 눌러서 평점을 매길 수 있게 만들었다.
등록 버튼을 눌러 저장이 완료되면 위 코드에서는 그냥 팝업에서 홈 화면으로 리다이렉트 해버린다.

다음과 같이 리뷰가 데이터베이스에 저장이 된다.
이제 진짜 얼마 남지 않았다. 지금 상태에서 세부적인 부분을 수정하거나 추가하면 어느정도 구색은 갖춘 쇼핑몰이 될 것이다. 마지막까지 굴러보도록 하자.