기말고사와 계절학기를 지나니 너무 늦어버렸다... 마감 기한을 정해두지 않으니 시간이 조금 남더라도 그 시간에 그냥 쉬어버리는 자신을 발견하고는 마감 기한을 설정하기로 하였다. 마감기한은 개강하기 전까지 즉, 7/23~9/1까지 이 프로젝트를 끝내기로 결정하였다. 빠르게 완성시키는 것을 일단 목표로 잡고, 만일 시간이 남는다면 코드를 리팩토링하거나 버그 수정, 사용자 기준에서 보았을 때 편하게 사용할 수 있도록 하려면 어떻게 해야할지에 대해 생각해보고 수정 혹은 추가를 해보도록 하자.
변명이 길었다. 이제 데이터베이스에 상품을 넣어서 해당 상품을 장바구니에 추가되도록 코드를 짜보도록하자.
먼저 상품을 데이터베이스에 추가하여야한다.
어떤 값들이 저장되어야할까? 대충 필수적인 것을 간추려보면 다음과 같을 것이다.
- 상품을 판매하는 업체, 판매자의 id
- 상품의 이름
- 상품의 가격
- 상품의 카테고리(분류를 위함)
- 상품의 이미지
- 상품의 설명을 위한 텍스트
여기에 추가적으로 배송비, 출고지와 같은 정보들이 더 추가될 것 같다.
위 내용을 토대로 상품 데이터베이스를 만들어보자.
* 문득 쇼핑몰에서 판매할 때, 판매자는 어떤식으로 상품을 등록하는 것인지 궁금해져서 지마켓, 옥션을 참고해보았다. 회원가입된 아이디를 판매자의 권한을 얻을 수 있도록 추가적인 전환과정이 필요했고, 전환을 하게되면 상품이미지나 설명, 배송비와 같은 정보들을 입력해주어 상품을 등록하는 것이였다. 즉, 회원가입한 id를 통해 구매자나 판매자를 분류할 수 있고, 분류하였을 때 판매자라면 상품을 등록할 수 있다는 것이다. 그렇다면 우리는 id를 통해 매핑할 수 있는 구매자와 판매자의 데이터베이스도 따로 만들어두면 좋을 수도 있을 것 같다.
그래서  다음과 같이 데이터 베이스를 생성하였다. 위 데이터베이스를 만드는데에는 2015년 지마켓의 데이터베이스 설계를 참고하였다. 위 설계과정을 보면서 느낀건 내가 하고있는건 진짜 어린애들 장난으로 만드는 웹이라는 생각이 들었다. 실무에서는 진짜 치밀하게 설계를 다 해놓고 개발을 하는구나 라는 생각이 들었다. 다음 프로젝트를 만든다면 데이터베이스나 의존관계등을 미리 설계해두고 들어가는 것도 연습해봐야겠다.
아무튼, 데이터베이스를 만들었으니 이제 상품을 추가해두고 해당 상품이 노출되도록 해보자!
* 상품을 설명하는 데이터베이스를 따로 만들어서 products의 id로 매핑하여 해당 상품에 대한 설명을 가져오는 걸로 하자
일단 엔티티와 상품등록을 위해 리포지토리, 서비스 클래스를 추가하고 판매등록 폼을 만들어 실험해보도록 하자.
상품 엔티티
package com.shoppingmall.domain;

import jakarta.persistence.*;

@Entity
public class Products {
    @Id
    @Column(name = "id")
    @GeneratedValue(strategy = GenerationType.IDENTITY)
    private int id;

    @OneToOne
    @JoinColumn(name = "id")
    private Category category;

    // Foreign key field
    private String seller_id;

    @ManyToOne
    @JoinColumn(name = "seller_id", insertable = false, updatable = false)
    private Users user;

    @Column(name = "product_name")
    private String product_name;

    @Column(name = "price")
    private int price;

    @Lob  // 대용량 데이터를 저장할 때 사용

    @Column(name = "description")
    private String description;  // 상품 설명
    @Column(name = "photo")
    private String photo;  // 사진 파일 경로 또는 URL


    //getter and setter 생략
상품 리포지토리
import com.shoppingmall.domain.Products;
import com.shoppingmall.domain.Users;
import jakarta.persistence.EntityManager;
import jakarta.persistence.PersistenceContext;

public class MemoryProductRepository implements ProductRepository{
    @PersistenceContext
    private final EntityManager em;

    public MemoryProductRepository(EntityManager em) {
        this.em = em;
    }

    public Products save(Products products) { //사용자가 잘 들어갔는지 확인용
        em.persist(products);
        return products;
    }
}
상품 서비스
import com.shoppingmall.domain.Category;
import com.shoppingmall.domain.Products;
import com.shoppingmall.domain.Users;
import com.shoppingmall.repository.ProductRepository;
import com.shoppingmall.repository.UserRepository;
import com.shoppingmall.session.SessionConst;
import org.springframework.beans.factory.annotation.Autowired;
import org.springframework.stereotype.Service;
import org.springframework.web.multipart.MultipartFile;

@Service
public class ProductService {

    @Autowired
    private UserRepository userRepository;

    @Autowired
    private ProductRepository productRepository;

    @Autowired
    private FileStorageService fileStorageService;  // 파일 저장 서비스

    public Products saveProduct(String product_name, String description, int price, MultipartFile file, int categoryId, String seller_id) {
        // 파일 저장
        String photoPath = fileStorageService.storeFile(file);

        Users user = userRepository.findById(seller_id);

        // 상품 생성
        Products product = new Products();
        product.setSeller_id(SessionConst.sessionId);
        product.setProduct_name(product_name);
        product.setDescription(description);
        product.setPrice(price);
        product.setPhoto(photoPath);
        product.setUser(user);  // user를 설정하면 자동으로 userId도 설정됨

        // 카테고리 설정
        Category category = new Category();
        category.setId(categoryId);
        product.setCategory(category);

        // 상품 저장
        return productRepository.save(product);
    }
}
상품 등록 실험용 html
<!DOCTYPE html>
<html lang="en">
<head>
    <meta charset="UTF-8">
    <title>Title</title>
</head>
<script src="https://ajax.googleapis.com/ajax/libs/jquery/3.5.1/jquery.min.js"></script>
<script src="/js/productAdd.js"></script>
<script>
    const categoryDetails = {
        1: {
            "상의": 1,
            "하의": 2,
            "속옷": 3,
            "양말": 4
        },
        2: {
            "운동화": 5,
            "스니커즈": 6,
            "구두": 7,
            "슬리퍼": 8
        },
        3: {
            "백팩": 9,
            "캐리어": 10,
            "크로스백": 11
        },
        4: {
            "목걸이": 12,
            "반지": 13,
            "귀걸이": 14,
            "선글라스": 15
        }
    };

    function updateDetails() {
        const categorySelect = document.getElementById('category');
        const detailSelect = document.getElementById('detail');

        detailSelect.innerHTML = '';

        const selectedCategoryId = categorySelect.value;
        const details = categoryDetails[selectedCategoryId];

        if (details) {
            Object.keys(details).forEach(detail => {
                const option = document.createElement('option');
                option.value = details[detail];
                option.textContent = detail;
                detailSelect.appendChild(option);
            });
        }
    }

    document.addEventListener('DOMContentLoaded', () => {
        updateDetails();
    });
</script>
<body>
<form id="productForm" action="/products/add" method="post" enctype="multipart/form-data">
  <input id="name" type="text" name="name" placeholder="Product Name" required>
  <textarea id="description" name="description" placeholder="Product Description" required></textarea>
  <input id="price" type="number" name="price" placeholder="Product Price" step="1" required>
  <input id="image" type="file" name="file" required>
    <label for="category">Category:</label>
    <select id="category" onchange="updateDetails()">
        <option value="1">의류</option>
        <option value="2">신발</option>
        <option value="3">가방</option>
        <option value="4">액세서리</option>
    </select>

    <!-- Detail Select Box -->
    <label for="detail">Detail:</label>
    <select id="detail" name="categoryId">
        <!-- Options will be populated based on selected category -->
    </select>
  <button type="submit">Add Product</button>
</form>
</body>
</html>
2024-07-23) submit시 해당 내용들이 매핑이 되지 않는다는 오류와 함께 데이터베이스에 등록되지 않음
2024-07-24 01:12) submit은 되도록 만들었으나 외래키 위반 오류(상품의 판매자id는 user의 id필드를 외래키로 받음)가 발생
01:29) 외래키를 받으려면 해당 키가 해당 테이블에 이미 존재해야 한다.
그래서 Category에 정보를 추가하고 넣어보니 성공하였다!
user의 id는 세션관련 코드를 수정하니 성공적으로 들어갔다!

2024-07-25 ~07-26 12:15) 데이터베이스에 저장이 되었음을 확인했으니 이제 저장된 데이터를 불러와보도록 하자.
저장된 데이터를 불러오기위해서 보통은 id를 사용하지만, Products의 아이디는 자동생성이기 때문에 알 수가 없다. 또한, 보통 상품을 찾을 때는 상품의 태그, 이름, 판매자 id를 통해 찾는 경우가 대부분이므로 먼저 상품의 이름을 통하여 데이터를 불러와보도록하자!
그러기위해 ProductRepository에 몇가지 메소드를 추가하자
import com.shoppingmall.domain.Products;
import org.springframework.data.jpa.repository.JpaRepository;

import java.util.List;

public interface ProductRepository {
    Products save(Products product);

    List<Products> findByName(String name);

    List<Products> findByCategory(int category);

    List<Products> findBySellerId(String seller_id);

}
import com.shoppingmall.domain.Products;
import com.shoppingmall.domain.Users;
import jakarta.persistence.EntityManager;
import jakarta.persistence.PersistenceContext;
import jakarta.persistence.TypedQuery;
import java.util.List;
public class MemoryProductRepository implements ProductRepository{
@PersistenceContext
private final EntityManager em;
public MemoryProductRepository(EntityManager em) {
this.em = em;
}
@Override
public Products save(Products products) { //사용자가 잘 들어갔는지 확인용
em.persist(products);
return products;
}
@Override
public List<Products> findByName(String name){
TypedQuery<Products> query = em.createQuery("SELECT u FROM Products u WHERE u.product_name = :name", Products.class);
query.setParameter("name", name);
List<Products> productsList = query.getResultList();
return productsList;
}
@Override
public List<Products> findByCategory(int category) {
TypedQuery<Products> query = em.createQuery("SELECT u FROM Products u WHERE u.category = :category", Products.class);
query.setParameter("category", category);
List<Products> productsList = query.getResultList();
return productsList;
}
이제 오버라이드한 함수중 이름을 통한 검색으로 먼저 실험을 해볼것이니 ProductService에서 저 함수를 사용하고, SearchController와 searchResult.html을 조정해주면 될 것같다.
//ProductService에 다음 메소드 추가
 public List<Products> searchByName(String name){
        return productRepository.findByName(name);
} @GetMapping("/search")
public String search(@RequestParam("query") String query, Model model) {
// 여기서 query는 요청 파라미터의 이름입니다.
// 예를 들어, /search?query=검색어 형식으로 요청이 들어온다면,
// "검색어" 부분이 query 매개변수로 전달됩니다.
// 이후 검색어에 따라 데이터를 조회하거나 다른 비즈니스 로직을 수행할 수 있습니다.
// 이 예제에서는 간단히 검색어를 모델에 추가하여 검색결과 페이지로 전달합니다.
List<Products> products = productService.searchByName(query);
model.addAttribute("products", products);
// 검색결과를 표시할 템플릿 이름을 반환합니다.
return "searchResult"; // search-result.html과 같은 템플릿 파일을 찾게 됩니다.
}Product 리스트를 모델로 받아 View로 옮기자
<form action="/search">
    <!--타임리프를 통해 query값을 매핑해서 화면에 보여주기-->
    <h1><span style="color: #3180d1" th:text="${query}"></span>검색결과 페이지 입니다</h1>
    <table>
        <thead>
        <tr>
            <th>판매자</th>
            <th>상품이름</th>
            <th>사진</th>
            <th>설명</th>
            <th>가격</th>
        </tr>
        </thead>
        <tbody>
        <tr th:each="product : ${products}">
            <td th:text="${product.seller_id}"></td>
            <td th:text="${product.product_name}"></td>
            <td><img th:src="@{${product.photo}}" alt="Product Photo" width="100" height="100"/></td>
            <td th:text="${product.description}"></td>
            <td th:text="${product.price}"></td>
        </tr>
        </tbody>
    </table>
</form>
결과
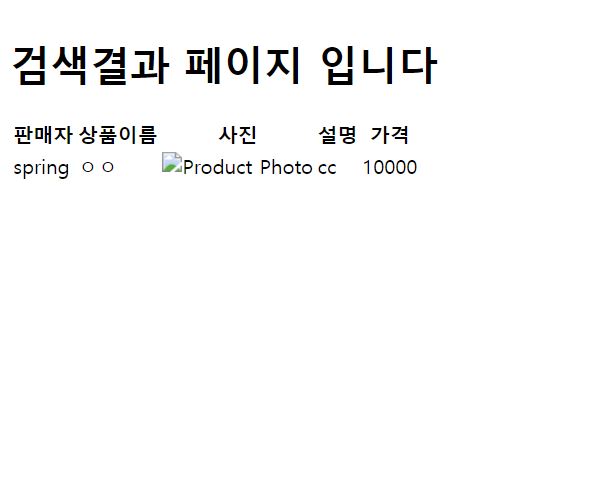
결과창을 보면 알겠지만 문제가 하나 있다. 사진을 받을 때, 사진의 이름을 그냥 그대로 받아서 저장한 것이라서 사진을 경로를 통해 불러올 수 있도록 해야한다.
또한, 추가적인 실험결과 상품추가 시, 난수 시스템이 성능저하가 일어나서 매우 느리게 작동된다고 오류가 떴다. 이것들을 고치고 나머지 검색 기능과 카테고리 연결을 해주도록 하자.
2024-07-26 17:20) chatGPT에게 물어보니 난수를 만드는데에는 아주 빠른 시간이 사용된다고 한다. 그래서 FileStorageService와 연관이 있는 문제라고 생각했다.(물론 어제만 노트북 혹은 네트워크의 성능저하로 발생했을 가능성도 존재) 그래서 먼저 FileStorageService를 알맞게 고쳐서 새로운 상품을 하나 더 추가해보자. 그 후에는 사진이 출력되도록 해보자
일단 사진을 uploads파일에 넣는것에서부터 문제가 있다고 생각했다. 왜냐하면 폴더가 원하는 위치에 생성되어있지 않았기 때문이다. 그리고, 같은 이름을 사용하는 사진을 넣어 충돌이 발생하는 경우가 생길 수도 있다고 판단했다.(어제 오류도 이 문제때문에 발생했을 가능성도 있다.) 따라서 파일 이름에 타임스탬프를 사용하여 중복된 파일이름을 가지지않도록 했다.
package com.shoppingmall.service;

import org.springframework.stereotype.Service;
import org.springframework.web.multipart.MultipartFile;

import java.io.File;
import java.io.IOException;
import java.nio.file.Files;
import java.nio.file.Path;
import java.nio.file.Paths;
import java.nio.file.StandardCopyOption;
import java.text.SimpleDateFormat;
import java.util.Date;

@Service
public class FileStorageService {

    private final Path fileStorageLocation;

    public FileStorageService() {
        this.fileStorageLocation = Paths.get("shoppingmall/src/main/resources/static/images/uploads").toAbsolutePath().normalize();

        try {
            Files.createDirectories(this.fileStorageLocation);
        } catch (Exception ex) {
            throw new RuntimeException("Could not create the directory where the uploaded files will be stored.", ex);
        }
    }

    public String storeFile(MultipartFile file) {
        String originalFileName = file.getOriginalFilename();
        String fileExtension = "";
        if (originalFileName != null && originalFileName.contains(".")) {
            fileExtension = originalFileName.substring(originalFileName.lastIndexOf("."));
        }

        // 현재 시간을 기반으로 타임스탬프 생성
        String timeStamp = new SimpleDateFormat("yyyyMMddHHmmssSSS").format(new Date());
        String uniqueFileName = timeStamp + fileExtension;

        try {
            Path targetLocation = this.fileStorageLocation.resolve(uniqueFileName);
            Files.copy(file.getInputStream(), targetLocation);
            return uniqueFileName;
        } catch (IOException ex) {
            throw new RuntimeException("Could not store file " + uniqueFileName + ". Please try again!", ex);
        }
    }
}
이제 테스트를 해보도록 하자! 테스트 결과는

성공이다
이제 이름으로 검색하는 알고리즘을 테스트 해보자
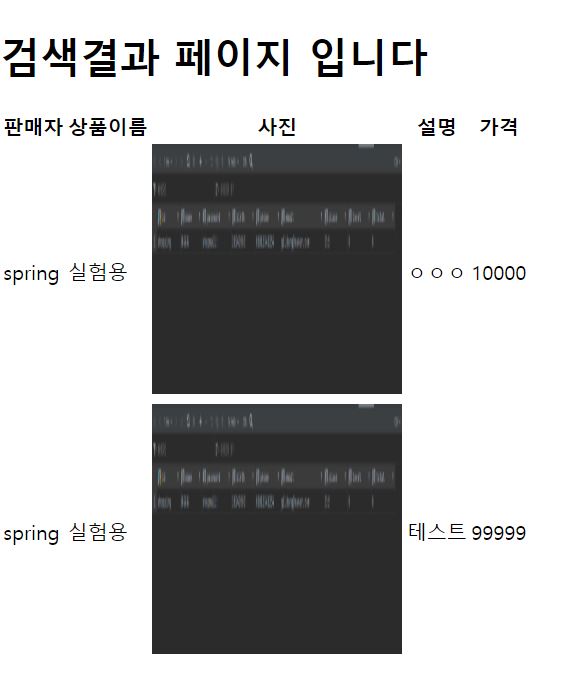
다음과 같이 "실험용"으로 검색 시, query로 실험용을 받아서 데이터베이스에서 가져오도록 한다.
내용이 길어지니 다음 글에서 카테고리를 통한 검색, 판매자 id를 통한 검색을 구현해보고, 장바구니 기능을 구현해보자!