메트릭스 효과 만들기
canvas 만들기
먼저 canvas를 이용하여 메트릭스 효과를 만들 것이다. html 파일을 만들어 canvas태그를 만들자
<!DOCTYPE html>
<html lang="en">
<head>
    <meta charset="UTF-8">
    <meta http-equiv="X-UA-Compatible" content="IE=edge">
    <meta name="viewport" content="width=device-width, initial-scale=1.0">
    <title>Document</title>
</head>
<body>
    <canvas id="canvas1"></canvas>
</body>
</html>
이제 스크립트와 style의 가독성을 위해서 외부파일을 만들어 연결해줄 것이다.
<!DOCTYPE html>
<html lang="en">
<head>
    <meta charset="UTF-8">
    <meta http-equiv="X-UA-Compatible" content="IE=edge">
    <meta name="viewport" content="width=device-width, initial-scale=1.0">
    <link rel="stylesheet" href="style.css">
    <script src="./script.js" defer></script>
    <title>Document</title>
</head>
<body>
    <canvas id="canvas1"></canvas>
</body>
</html>
스타일을 수정하자.
canvas는 canvas의 크기를 css에서 수정이 가능하나, 권장하지 않는다. canvas 속성을 설정하지 않으면 기본 크기는 300 * 150의 크기를 가진다.
최소한의 속성만을 설정하자.
canvas의 속성은 position만 설정하고 나머지는 전체설정과 body로 설정한다.
* {
  margin: 0;
  padding: 0;
  box-sizing: border-box;
}
body {
  overflow: hidden;
  background: black;
}
canvas {
  position: absolute;
  top: 0;
  left: 0;
}
기본 설정
캔버스를 활용하려면 먼저 태그를 가져오고 getContext 객체를 이용해야 한다.
const canvas = document.getElementById('canvas1');
const ctx = canvas.getContext('2d');
또한 우리는 캔버스의 태그에서 크기 속성을 조절하지 않았다. 우리가 만들고자 하는 작품의 크기는 창의 너비와 높이이다.
따라서 창의 크기에 따라 캔버스 너비와 높이를 결정해야한다.
캔버스의 크기는 다음과 같이 확인할 수 있다
const canvas = document.getElementById('canvas1');
const ctx = canvas.getContext('2d');
console.log(canvas.width) // 300
console.log(canvas.height) // 150
위의 콘솔창의 결과 처럼 아무런 설정하지 않았기에 300, 150을 확인 할 수 있다.
우리가 만들 캔버스의 크기는 300, 150처럼 작은 크기를 만들지 않는다.
따라서 해당 캔버스의 너비와 캔버스의 크기를 창의 크기로 설정할 것이다.
이때 window의 객체로 창의 크기를 확인 할 수 있는 innerWidrh와 innerHeight 객체를 이용한다.
const canvas = document.getElementById('canvas1');
const ctx = canvas.getContext('2d');
canvas.width = window.innerWidth; //창의 너비만큼 캔버스크기 설정
canvas.height = window.innerHeight; //창의 높이만큼 캔버스크기 설정
스크립트 구성
우리는 문자열들을 비처럼 내리기 위해서 문자열들을 저장한 변수와 각각의 문자열들을 가져와서 fillText를 하고 한곳에 덮어쓰면 안되니 x, y를 변수를 주어 계속 다른 위치에 그릴 수 있도록 조작해야한다.
2개의 클래스를 만들고 1개의 함수로 표현을 하고자 한다.
1개의 클래스는 문자를 담고 있는 클래스이고 다른 하나는 문자의 위치와 작성되는 문자의 갯수를 판단하는 클래스를 만들 것이다.
또한 함수는 animation 함수로 무한히 쓰고 지우면서 애니메이션으로 표현 될 수 있는 함수를 만들 것이다.
const canvas = document.getElementById('canvas1');
const ctx = canvas.getContext('2d');
canvas.width = window.innerWidth;
canvas.height = window.innerHeight;

// 문자열을 담고 외부에서 결정되는 위치에 따라 그리는 위치를 결정
class Matrix{
    constructor() {

    }
    // 실제로 글자를 그리는 함수
    draw(){

    }
}

//위치와 문자의 갯수를 결정하는 클래스
class Effect{
    constructor() {

    }
    //matrix의 갯수를 결정하는 함수
    initialize(){

    }

}
//이 친구를 활용해 캔버스에 그리기를 시작할 것임.
function animate() {

}
클래스 작성
Matrix의 클래스는 문자열을 관리하기 위해 생성자로 문자열을 생성한다. 우리는 히라가나와 카타가나, 숫자, 알파벳으로 이루진 문자열을 무작위 출력하기 전에 먼저 해당 문자열을 담는다.
class Matrix{
    constructor() {
        this.character = 'アァカサタナハマヤャラワガザダバパイィキシチニヒミリヰギジヂビピウゥクスツヌフムユュルグズブヅプエェケセテネヘメレヱゲゼデベペオォコソトノホモヨョロヲゴゾドボポヴッン0123456789ABCDEFGHIJKLMNOPQRSTUVWXYZ';
    }
그리고 이 문자열을 무작위의 위치에서 그릴 것이다. 그러나 y축은 무작위가 아닌 순서를 가져야 한다. x축이 결정되면 y축은 순서대로 내려가야 됨
matrix 클래스의 draw 메소드는 실제로 캔버스에 그리는 역할을 한다. 순서대로 나열되어 있는 문자를 무작위로 가져오는 코드를 작성하자
class Matrix{
    constructor() {
        // 문자열을 담아 관리한다.
        this.character = 'アァカサタナハマヤャラワガザダバパイィキシチニヒミリヰギジヂビピウゥクスツヌフムユュルグズブヅプエェケセテネヘメレヱゲゼデベペオォコソトノホモヨョロヲゴゾドボポヴッン0123456789ABCDEFGHIJKLMNOPQRSTUVWXYZ';
    }
    // 실제로 글자를 그리는 함수
    draw(){
        this.text = this.character.charAt(Math.floor(Math.random()*this.character.length))
    }
}
chracter는 문자열을 담고 있으며 문자열을 가져오는 것은 charAt 함수로 가져 올 수 있다.
또한 random은 0~1 사이의 숫자를 가져옴으로 문자열읠 길이만큼 곱하여 0~문자열 길이를 가져올 수 있도록 하고 이 수는 실수임으로 소숫점 자리를 모두 제거하는 함수인 floor를 사용하였다.
x축을 결정할때 문자와 문자가 겹치면 안된다. 따라서 x축은 무조건 폰트 크기를 넘어야 된다.
y축도 마찬가지이다.
x와 y를 사용하기 위해 생성자로 만들자, 또한 폰트 크기를 결정하기 위해 fontSize도 만들면 되겠다. x,y,fontSize는 외부에서 값을 가져와야 됨으로 생성자 매개변수로 만든다.
class Matrix{
    constructor(x,y,fontSize) {
        // 문자열을 담아 관리한다.
        this.character = 'アァカサタナハマヤャラワガザダバパイィキシチニヒミリヰギジヂビピウゥクスツヌフムユュルグズブヅプエェケセテネヘメレヱゲゼデベペオォコソトノホモヨョロヲゴゾドボポヴッン0123456789ABCDEFGHIJKLMNOPQRSTUVWXYZ';
        this.x = x;
        this.y = y;
        this.fontSize = fontSize;
    }
    // 실제로 글자를 그리는 함수
    draw(){
        this.text = this.character.charAt(Math.floor(Math.random()*this.character.length))
    }
}
작성된 draw 메소드는 text에만 문자열을 넘겨주고 있음으로 이 문자를 그리는 색상과 위치를 결정하는 코드를 만들자.
draw에 매개변수로 context 객체를 추후에 넘겨 줄 수 있도록 매개변수를 만들어주고 색상과 fillText를 만들어 놓자.
//matrix 클래스의 draw 메소드
    draw(context){
        this.text = this.character.charAt(Math.floor(Math.random()*this.character.length))
        context.fillStyle = '#0aff0a';
        context.fillText(this.text, this.x * this.fontSize, this.y * this.fontSize);
    }
만약 matrix만 실행된다면 심심하게 문자한개만 그려질 것이다. 여러개의 문자와 위치를 결정하는 클래스의 내부코드를 만들자
x축을 결정하는 조건은 폰트사이즈보다 크면서 매트릭스처럼 정렬을 이루는 것이다.
x축을 columns라고 할때 컬럼의 크기는 캔버스 너비에서 폰트 사이즈만큼 나눈 값이 되겠다.
너비가 1000일때 폰트사이즈가 20이라고 하면 50개의 폰트를 넣을 수 있는 칼럼이 결정되는 것이다.
만들 클래스는 캔버스의 너비와 높이를 외부변수로 가져오기 때문에 매개변수로 넣고 이하 변수들은 생성자 내부에 만들 것이다.
initialize함수는 columns의 크기만큼 matrix를 생성하고 matrix 클래스 생성자에 받아온 값들을 넘겨 줄 것이다.
class Effect{
    constructor(canvasWidth, canvasHeight) {
        this.canvasWidth = canvasWidth;
        this.canvasHeight = canvasHeight;
        this.fontSize = 20;
        this.columns = this.canvasWidth / this.fontSize;
    }
    //matrix의 갯수를 결정하는 함수
    initialize(){
        for(let i = 0; i < this.columns; i ++){

        }
    }
}
여기서 matrix의 클래스를 effect 클래스 내부에서 초기화 시킬 것인데 여러개로 생성된 matrix를 담을 배열 공간이 필요하다. 배열을 초기화시키고 배열 변수에 담도록 하자
class Effect{
    constructor(canvasWidth, canvasHeight) {
        this.canvasWidth = canvasWidth;
        this.canvasHeight = canvasHeight;
        this.fontSize = 20;
        this.columns = this.canvasWidth / this.fontSize;
        this.matrix = [];
    }
    //matrix의 갯수를 결정하는 함수
    initialize(){
        for(let i = 0; i < this.columns; i ++){
            this.matrix[i] = new Matrix(i, 0, this.fontSize)
        }
    }
}
이대로 작성하게 되면 문제가 발생한다. matrix의 y의 값을 결정하지 않았기때문에 아래로 내려가지 않을 것이다. y도 마찬가지 y축으로 내려갈때 fontSize보다 커야 되며 그려나가면서 y를 누적연산자로 증가시킨다. 또한 캔버스 밖으로 나갔을 경우를 생각하여 0으로 초기화 해준다.
외부에서 받아오는 캔버스 높이가 필요하겠다
또한 effect 클래스 내부에서 만든 initialize 함수의 자동실행을 위해 생성자에 실행값을 적는다.
class Matrix{
    constructor(x,y,fontSize,canvasHeight) {
        // 문자열을 담아 관리한다.
        this.character = 'アァカサタナハマヤャラワガザダバパイィキシチニヒミリヰギジヂビピウゥクスツヌフムユュルグズブヅプエェケセテネヘメレヱゲゼデベペオォコソトノホモヨョロヲゴゾドボポヴッン0123456789ABCDEFGHIJKLMNOPQRSTUVWXYZ';
        this.x = x;
        this.y = y;
        this.fontSize = fontSize;
    }
    // 실제로 글자를 그리는 함수
    draw(context){
        this.text = this.character.charAt(Math.floor(Math.random()*this.character.length))
        context.fillStyle = '#0aff0a';
        context.fillText(this.text, this.x * this.fontSize, this.y * this.fontSize);
        if(this.y*this.fontSize > this.canvasHeight){
            this.y = 0;
        }else{
            y += 1;
        }
    }
}

//위치와 문자의 갯수를 결정하는 클래스
class Effect{
    constructor(canvasWidth, canvasHeight) {
        this.canvasWidth = canvasWidth;
        this.canvasHeight = canvasHeight;
        this.fontSize = 20;
        this.columns = this.canvasWidth / this.fontSize;
        this.matrix = [];
        this.initialize();

    }
    //matrix의 갯수를 결정하는 함수
    initialize(){
        for(let i = 0; i < this.columns; i ++){
            this.matrix[i] = new Matrix(i, 0, this.fontSize, this.canvasHeight)
        }
    }
}
이제 animate 함수를 만들어 실행 시켜보자
먼저 ctx 객체로 스타일을 결정하고 draw함수를 실행시켜야 된다.
draw함수는 현재 matrix 클래스 내부에 메소드로 존재한다. 우리는 이 메소드를 effect클래스 내부에서 여러번 초기화 하였으며 각각의 초기화된 클래스는 배열로 담아두었다
배열에 담긴 클래스는 각각의 메소드를 가지고 있고 우리는 이 메소드를 활용하여 ctx 객체를 심어 fillText가 실행되도록 할 것이다.
그러기 전 effect클래스를 초기화 해주자
배열로 담겨있는 matrix 객체들은 foreach로 가져올 수 있고 foreach로 각각 가져온 value들의 메소드를 활용하면 된다.
const effect = new Effect(canvas.width, canvas.height)

//이 친구를 활용해 캔버스에 그리기를 시작할 것임.
function animate() {
    effect.matrix.forEach(matrix => {matrix.draw(ctx)});
    requestAnimationFrame(animate);
}

animate();
이제 실행되면서 캔버스를 그려 나갈 것이다.
style과 font를 결정해야한다.
font의 사이즈를 결정하고 캔버스를 그려나가면서 서서히 사라지는 효과를 위해 fillRect로 지워 나가자, 또한 fillRect의 스타일을 결정한다.
function animate() {
    ctx.fillStyle = 'rgba(0,0,0,0.1)';
    ctx.fillRect(0,0,canvas.width, canvas.height);
    ctx.font = effect.fontSize + 'px monosapce';
    effect.matrix.forEach(matrix => {matrix.draw(ctx)});
    requestAnimationFrame(animate);
}

animate();
한번만 실행되는 이유는 y가 0으로 초기화 되지 않는다. 이유는 matrix 클래스에 canvasHeight를 생성하지 않아서 이다. text도 같이 생성해주자
class Matrix{
    constructor(x,y,fontSize,canvasHeight) {
        // 문자열을 담아 관리한다.
        this.character = 'アァカサタナハマヤャラワガザダバパイィキシチニヒミリヰギジヂビピウゥクスツヌフムユュルグズブヅプエェケセテネヘメレヱゲゼデベペオォコソトノホモヨョロヲゴゾドボポヴッン0123456789ABCDEFGHIJKLMNOPQRSTUVWXYZ';
        this.x = x;
        this.y = y;
        this.text='';
        this.fontSize = fontSize;
        this.canvasHeight = canvasHeight;
    }
    // 실제로 글자를 그리는 함수
    draw(context){
        this.text = this.character.charAt(Math.floor(Math.random()*this.character.length))
        context.fillStyle = '#0aff0a';
        context.fillText(this.text, this.x * this.fontSize, this.y * this.fontSize);
        if(this.y*this.fontSize > this.canvasHeight){
            this.y = 0;
        }else{
            this.y += 1;
        }
    }
}
0로 초기화 되는 시점에 따라 사라지는 시점이 달라진다. 랜덤함수와 크기를 적절히 세팅하여 조건식에 추가하자
draw(context){
this.text = this.character.charAt(Math.floor(Math.random()*this.character.length))
context.fillStyle = '#0aff0a';
context.fillText(this.text, this.x * this.fontSize, this.y * this.fontSize);
if(this.y*this.fontSize > this.canvasHeight && Math.random() > 0.9){
this.y = 0;
}else{
this.y += 1;
}
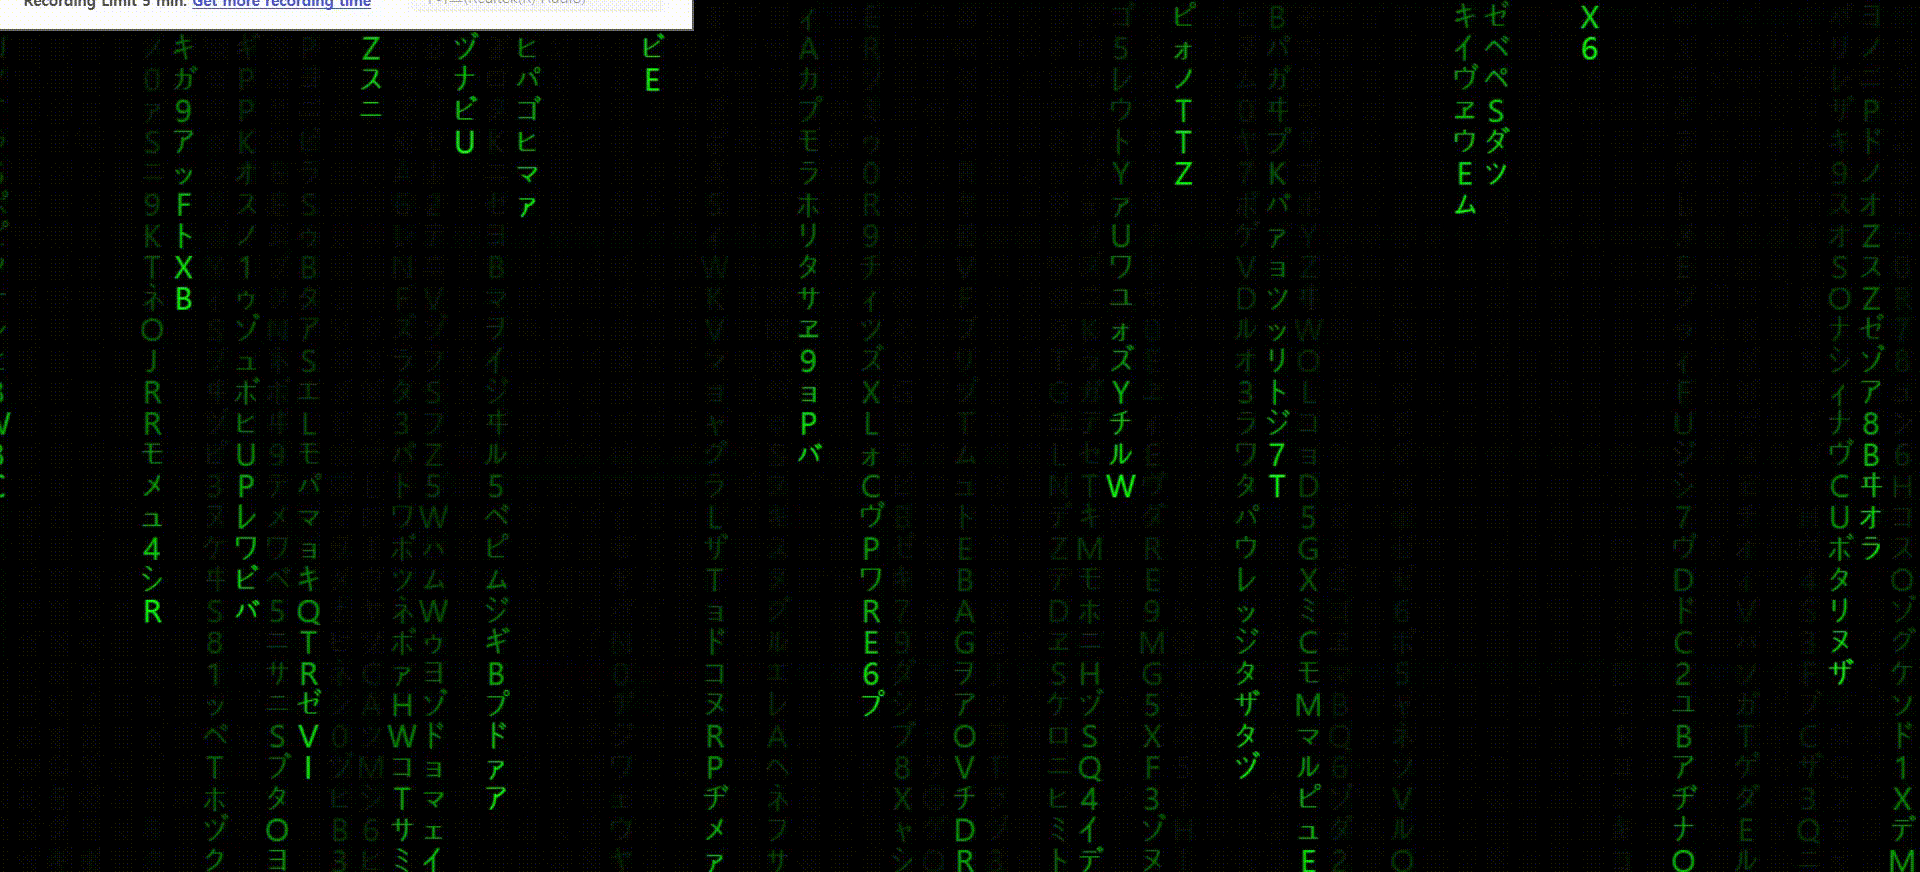
}여기까지 해도 메트릭스의 글자처럼 효과를 낼 수 있다
이제 속도를 조절 할 수 있도록 변수를 만들어 보자
프레임은 미리초 단위로 그려나가면 된다. 즉, 조건을 만족하지 않으면 그리지 않고 조건을 만족할때 다시 그리면 된다.
굉장히 적은 초만큼 프레임이 결정된다.
우리는 nextFrame이라는 변수를 만들고 timer가 nextFrame보다 클때 한번 실행 시키고 timer를 다시 0로 만들어 멈춘다. 다시 timer을 증가시키고 무한히 반복하면 우리가 원하는 프레임을 만들 수 있다.
먼저 애니메이션이 동작하는 할때마다 animate에 매개변수를 넣으면 '실수'로 증가되는 것을 볼수 있다. animate 함수의 매개변수를 이용하여 deltaTime을 만들자
deltaTime 은 timeStemp(animate 매개변수) - lastTime을 하고
lastTime에 timeStemp를 넣으면 이전 값과 현재값의 차이로 deltaTime이 점차 증가되는 것을 볼 수 있다. 이 deltaTime을 timer에 누적연산자로 누적시키고 Fram의 수보다 클때 timer를 초기화 및 캔버스를 그리면 된다.
const fps = 30;
const nextFrame = 1000/fps;
let lastTime = 0;
let timer = 0;

function animate(timeStemp) {
    const deltaTime = timeStemp - lastTime;
    lastTime = timeStemp;
    if(timer > nextFrame){
        ctx.fillStyle = 'rgba(0,0,0,0.1)';
        ctx.fillRect(0,0,canvas.width, canvas.height);
        ctx.font = effect.fontSize + 'px monosapce';
        effect.matrix.forEach(matrix => {matrix.draw(ctx)});
        timer = 0;
    }else{
        timer += deltaTime;
    }
    requestAnimationFrame(animate);
}

animate(0);
animate 함수에 매개변수를 넣어서 실행해야 동작한다.
이제 frame의 수치로 조절할 수 있게 되었다.
여기서 문제가 하나 더있다.
만약 윈도우창을 조절하게되면 윈도우창따라 조절되지 않는 문제가 발생한다.
이벤트리스너로 resize를 조절 할 수 있도록 하자
이벤트가 발생할때마다
캔버스의 크기를 다시 조절하고 resize함수를 다시 만들고 initialize함수를 비롯하여 matrix 배열을 다시담아 실행하도록 하자
const canvas = document.getElementById('canvas1');
const ctx = canvas.getContext('2d');
canvas.width = window.innerWidth;
canvas.height = window.innerHeight;

// 문자열을 담고 외부에서 결정되는 위치에 따라 그리는 위치를 결정
class Matrix{
    constructor(x,y,fontSize,canvasHeight) {
        // 문자열을 담아 관리한다.
        this.character = 'アァカサタナハマヤャラワガザダバパイィキシチニヒミリヰギジヂビピウゥクスツヌフムユュルグズブヅプエェケセテネヘメレヱゲゼデベペオォコソトノホモヨョロヲゴゾドボポヴッン0123456789ABCDEFGHIJKLMNOPQRSTUVWXYZ';
        this.x = x;
        this.y = y;
        this.text='';
        this.fontSize = fontSize;
        this.canvasHeight = canvasHeight;
    }
    // 실제로 글자를 그리는 함수
    draw(context){
        this.text = this.character.charAt(Math.floor(Math.random()*this.character.length))
        context.fillStyle = '#0aff0a';
        context.fillText(this.text, this.x * this.fontSize, this.y * this.fontSize);
        if(this.y*this.fontSize > this.canvasHeight && Math.random() > 0.9){
            this.y = 0;
        }else{
            this.y += 1;
        }
    }
}

//위치와 문자의 갯수를 결정하는 클래스
class Effect{
    constructor(canvasWidth, canvasHeight) {
        this.canvasWidth = canvasWidth;
        this.canvasHeight = canvasHeight;
        this.fontSize = 25;
        this.columns = this.canvasWidth / this.fontSize;
        this.matrix = [];
        this.initialize();

    }
    //matrix의 갯수를 결정하는 함수
    initialize(){
        for(let i = 0; i < this.columns; i ++){
            this.matrix[i] = new Matrix(i, 0, this.fontSize, this.canvasHeight)
        }
    }
    // resize 이벤트 발생 시 실행
    resize(width, height){
        this.canvasWidth = width;
        this.canvasHeight = height;
        this.columns = this.canvasWidth / this.fontSize;
        this.matrix = [];
        this.initialize();
    }
}

const effect = new Effect(canvas.width, canvas.height)

const fps = 30;
const nextFrame = 1000/fps;
let lastTime = 0;
let timer = 0;

//이 친구를 활용해 캔버스에 그리기를 시작할 것임

function animate(timeStemp) {
    const deltaTime = timeStemp - lastTime;
    lastTime = timeStemp;
    if(timer > nextFrame){
        ctx.fillStyle = 'rgba(0,0,0,0.1)';
        ctx.fillRect(0,0,canvas.width, canvas.height);
        ctx.font = effect.fontSize + 'px monosapce';
        effect.matrix.forEach(matrix => {matrix.draw(ctx)});
        timer = 0;
    }else{
        timer += deltaTime;
    }
    requestAnimationFrame(animate);
}

animate(0);
// resize 이벤트 발생
window.addEventListener('resize', function () {
    canvas.width = window.innerWidth;
    canvas.height = window.innerHeight;
    effect.resize(canvas.width, canvas.height);
})