1. 깃허브 계정과 동일한 이름의 레포지토리를 생성
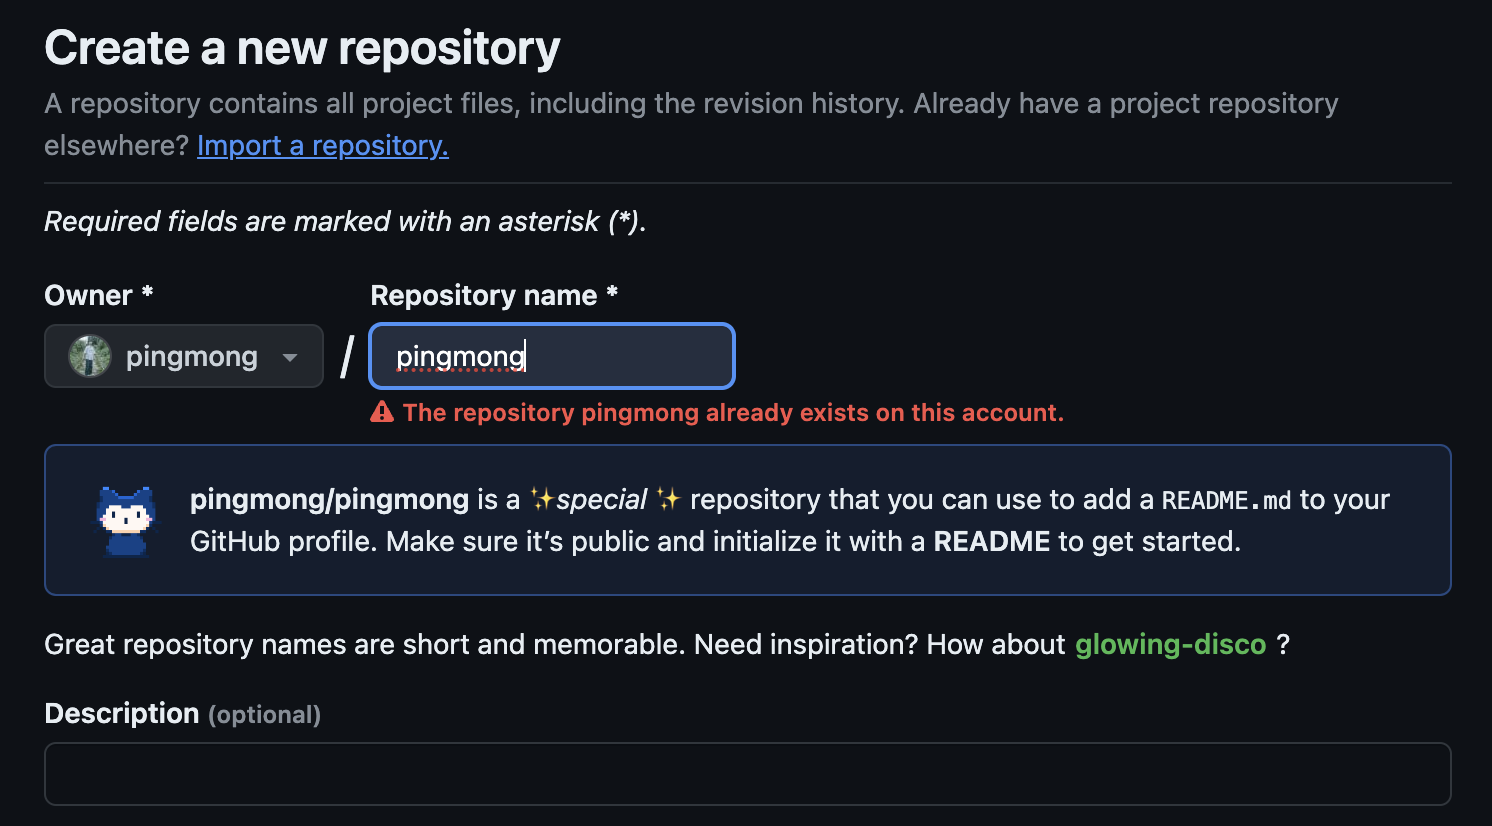
본인의 이름과 동일한 레포지토리를 생성한다.
이미 만들어져있어 오류 메세지가 뜨지만 처음 만든다면 제대로 만들어질 것이다.
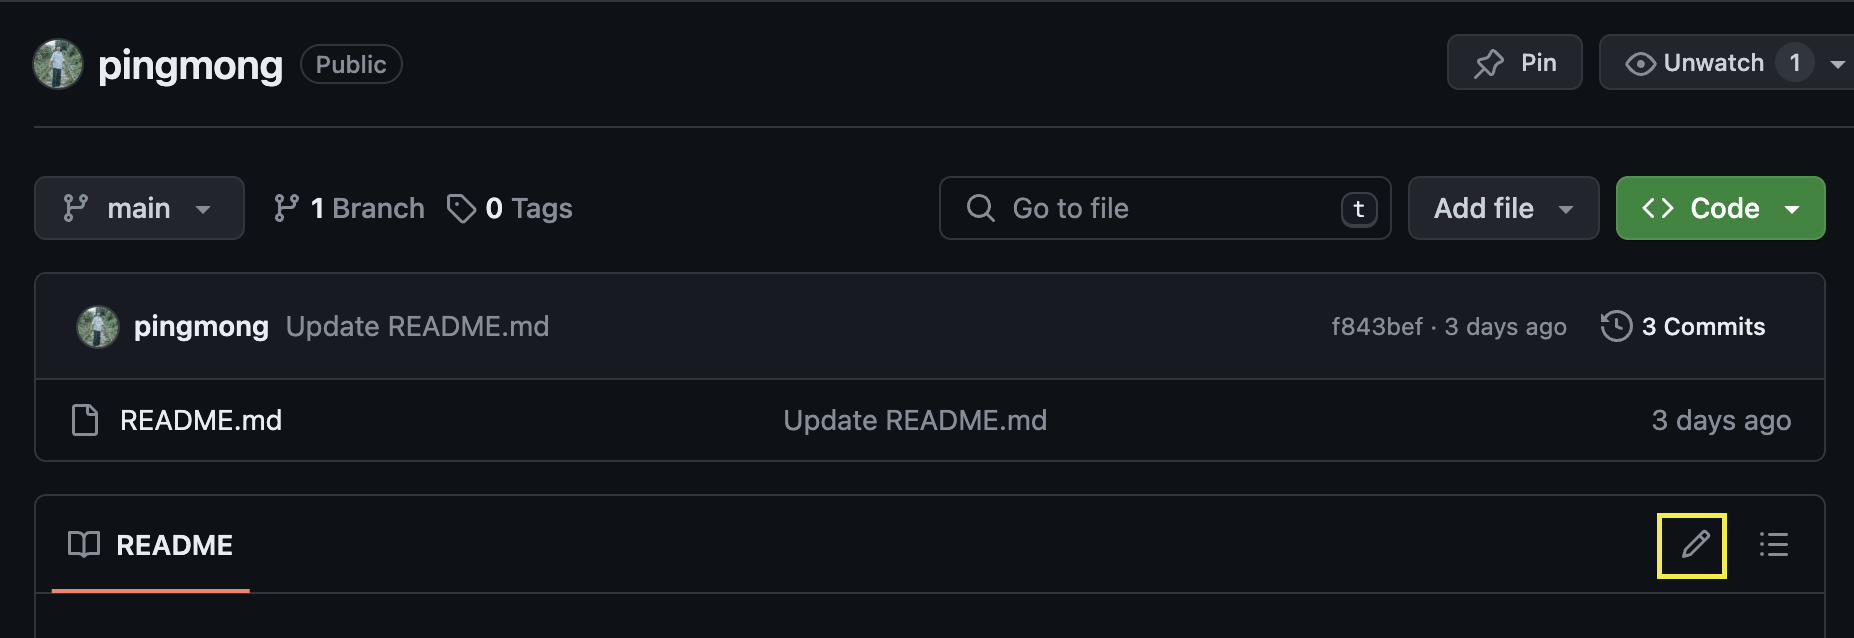
만들어진 레포지토리에 들어가 수정 버튼을 누른다.
2. Header, Footer
오픈 소스 : https://github.com/kyechan99/capsule-render
마크다운 작성 결과 미리보기 : https://stackedit.io/app#
https://capsule-render.vercel.app/api?
뒤에 쿼리 파라미터 작성을 통해 커스텀이 가능하다.
해당하는 링크에 들어가면 설명과 예시까지 자세히 나온다!

나름 만족중(?)
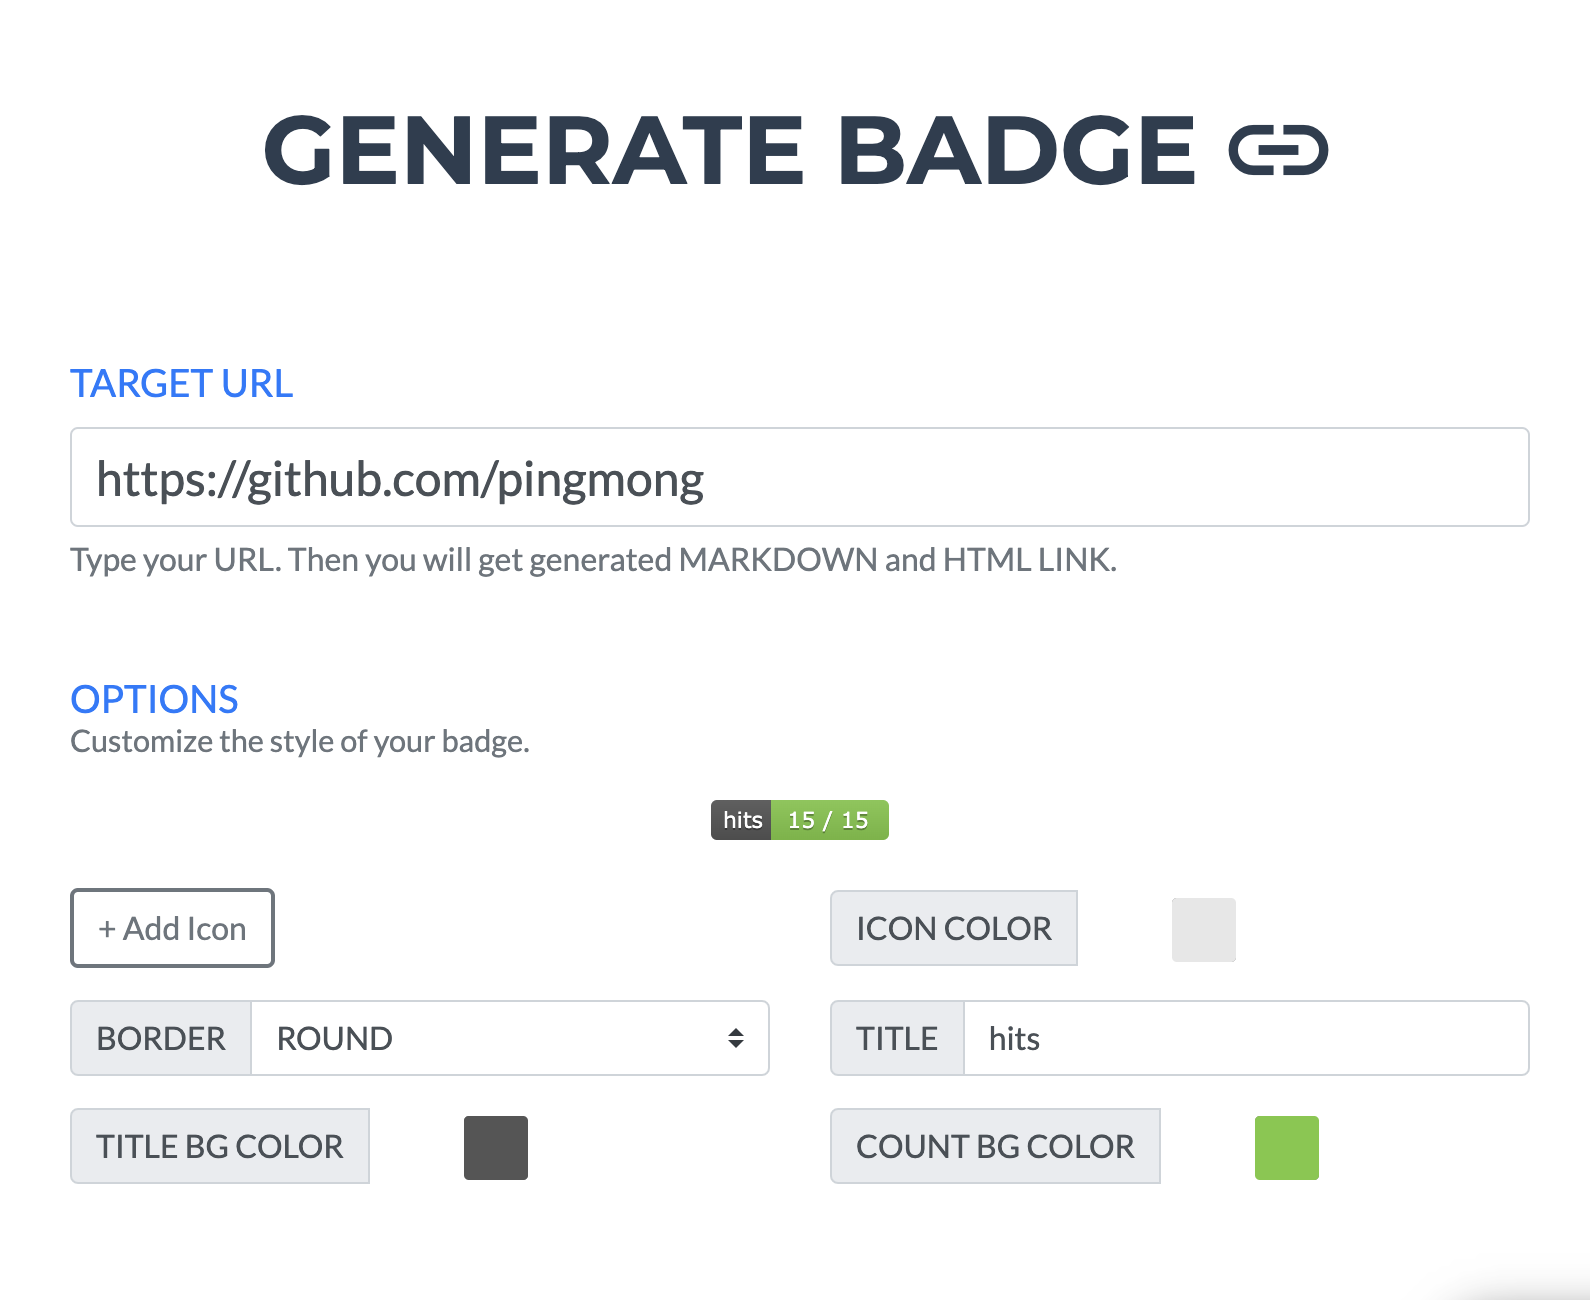
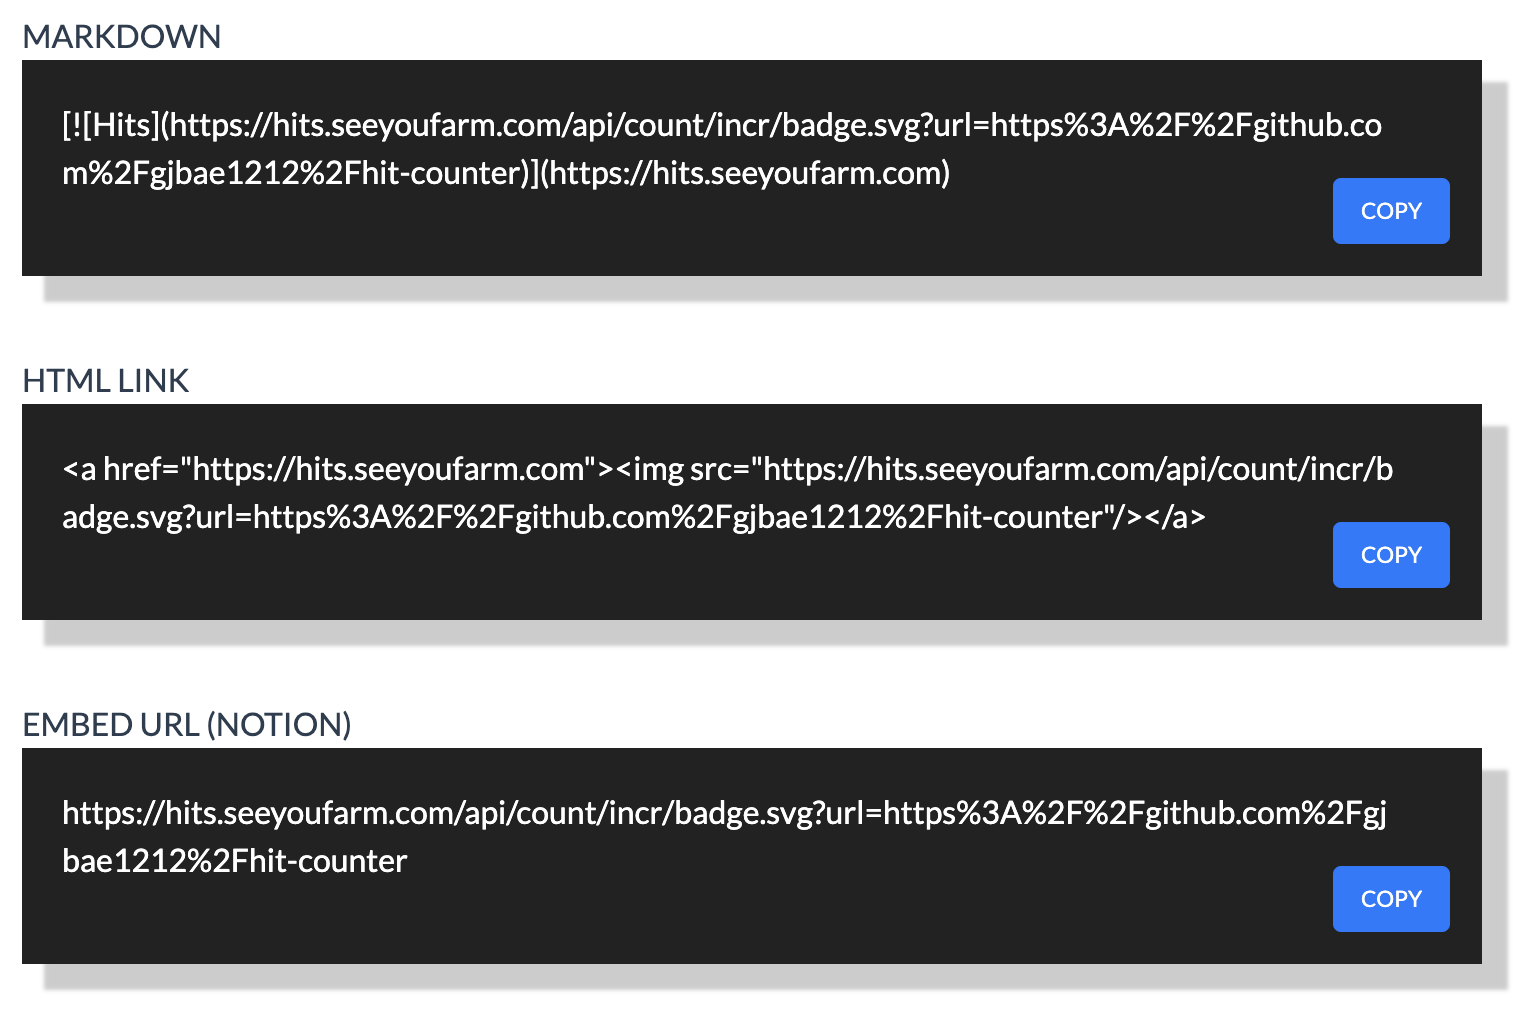
3. 방문자 수 Hits
뱃지 생성 사이트 : https://hits.seeyoufarm.com/
위 사이트에 가면 뱃지 생성이 가능하다.
 |  |
|---|
- TARGET URL에 깃허브 URL을 입력한다.
- OPTION에 원하는 대로 선택한다.
- 커스텀한 후 아래의 코드를 복사하면 완료!
뱃지 구성 = ICON + TITLE | 오늘의 방문자 수 / 총 방문자 수
![]()
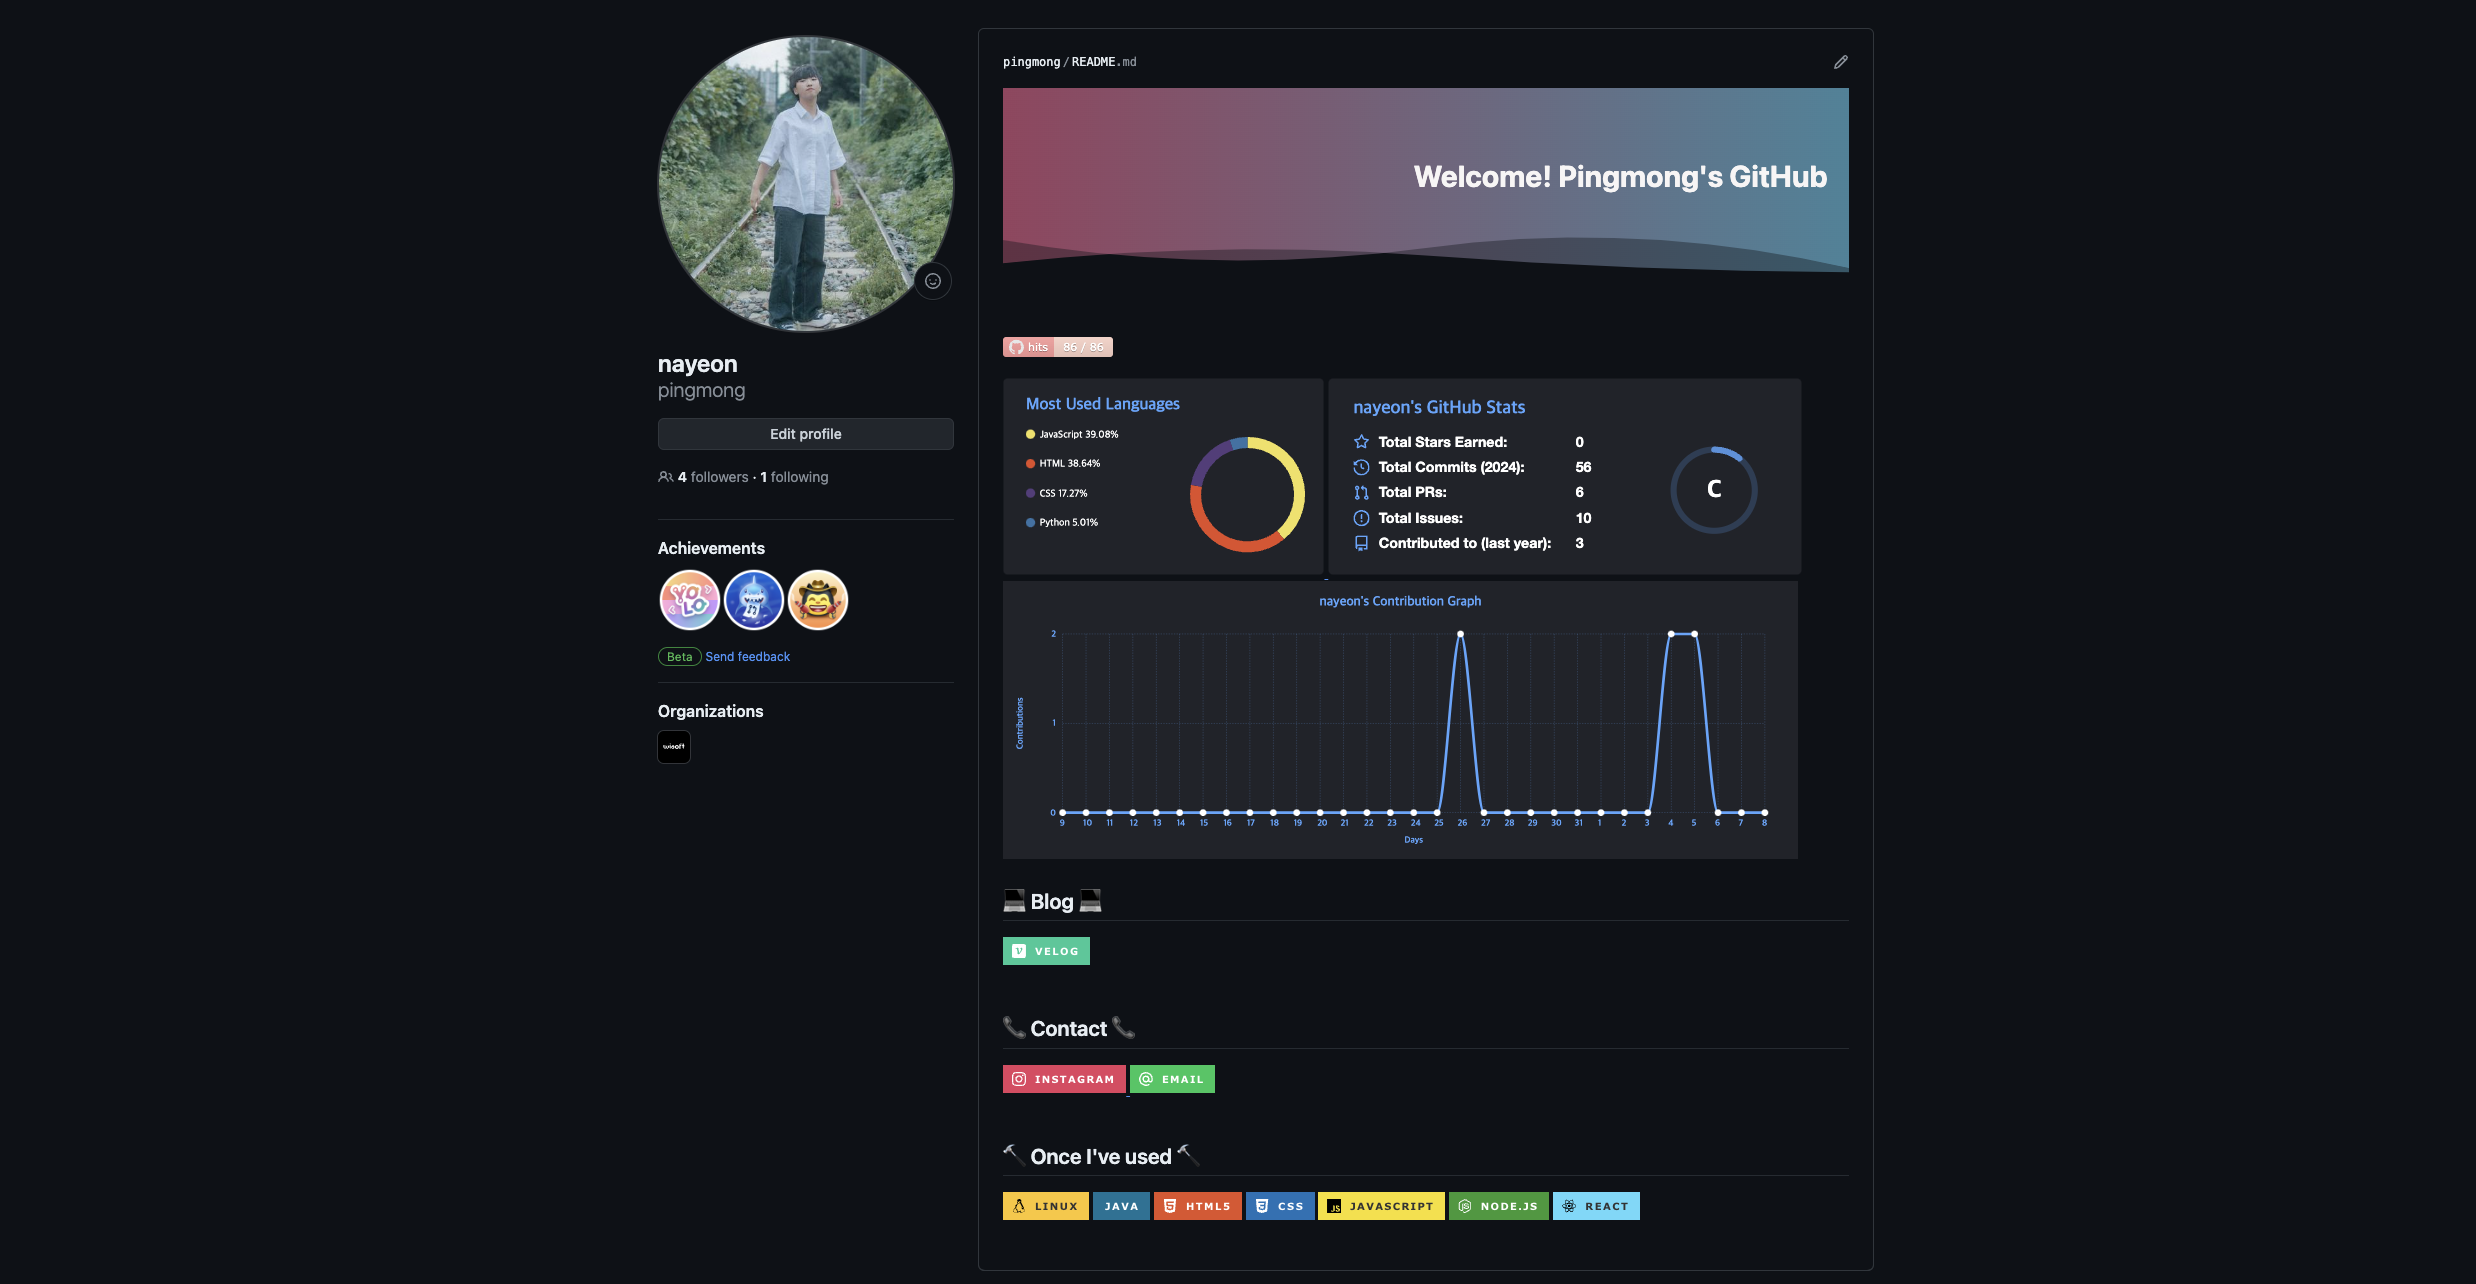
4. GitHub status
오픈 소스 : https://github.com/anuraghazra/github-readme-stats
오픈 소스 : https://github.com/ashutosh00710/github-readme-activity-graph
프로필에 자주 사용하는 언어, 깃허브 총 commit/star 개수나 날짜별 contribution graph를 보여주는 곳이다.
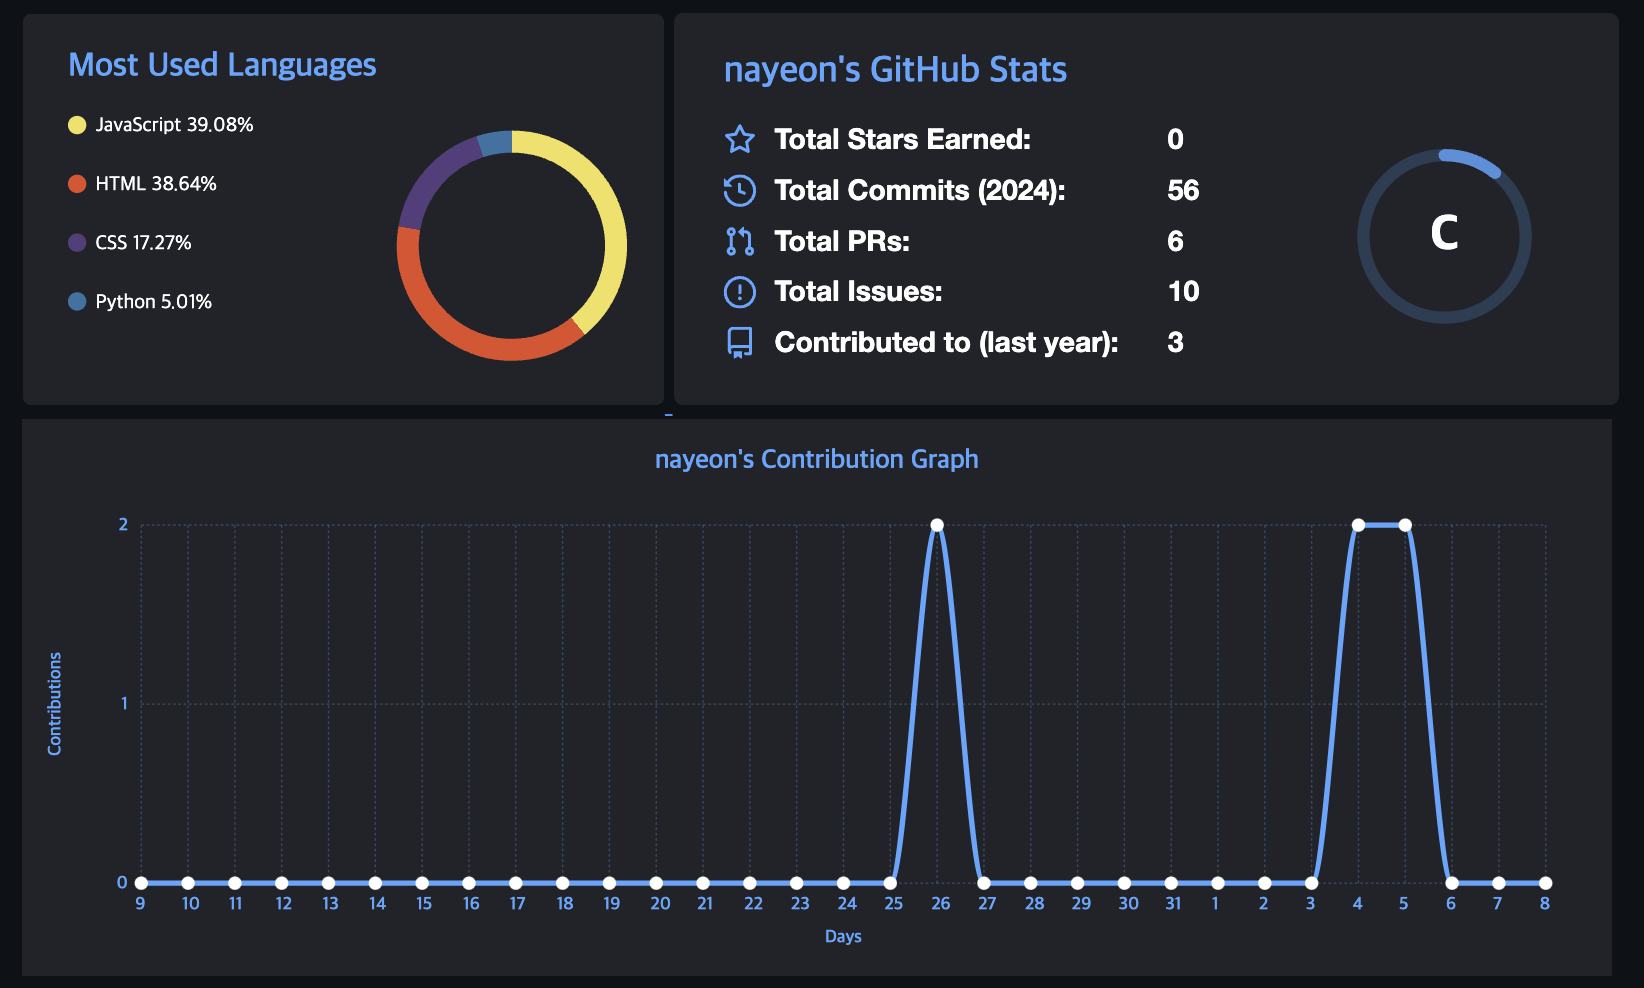
c라고 등급이 떡하니 적혀있는게 살짝 쪽팔리다...
username: 깃허브 아이디
include_all_commits: true / false (전체 커밋 수 / 올해 커밋 수)
theme: 테마 (e.g. dark, radical, merko, gruvbox, tokyonight, onedark, cobalt, synthwave, highcontrast, dracula)
.
.
.
이 외에도 많은 옵션이 있으니 필요하면 사이트에 직접 들어가면 된다.
<a href="https://github.com/anuraghazra/github-readme-stats">
    <img src="https://github-readme-stats.vercel.app/api/top-langs/?username=pingmong&layout=donut&show_icons=true&theme=material-palenight&hide_border=true&bg_color=20232a&icon_color=58A6FF&text_color=fff&title_color=58A6FF&count_private=true&exclude_repo=Face-Transfer-Application" width=38% />
</a>
<a href="https://github.com/anuraghazra/github-readme-stats">
  <img src="https://github-readme-stats.vercel.app/api?username=pingmong&show_icons=true&theme=material-palenight&hide_border=true&bg_color=20232a&icon_color=58A6FF&text_color=fff&title_color=58A6FF&count_private=true" width=56% />
</a>
<a href="https://github.com/ashutosh00710/github-readme-activity-graph">
    <img src="https://github-readme-activity-graph.vercel.app/graph?username=pingmong&theme=react-dark&bg_color=20232a&hide_border=true&line=58A6FF&color=58A6FF" width=94%/>
</a>
5. 버튼 만들기
뱃지 제작 사이트 : https://shields.io/
대부분은 직접 만들지 않고 https://simpleicons.org/ 사이트를 참고하여 만든다.
<img src="https://img.shields.io/badge/표시할텍스트-색상코드?style=flat-square&logo=이름&logoColor=white"/>표시할 텍스트: 내가 표시하고 싶은 텍스트를 입력
색상 코드: # 제외 6자리 숫자를 입력
logo: simple icons의 로고 이름을 그대로 가져옴
logoColor: 로고 컬러를 설정할 수 있다. default로 white를 설정해놓을 것
style: plastic, flat, flat-square, for-the-badge, social 중 택 1
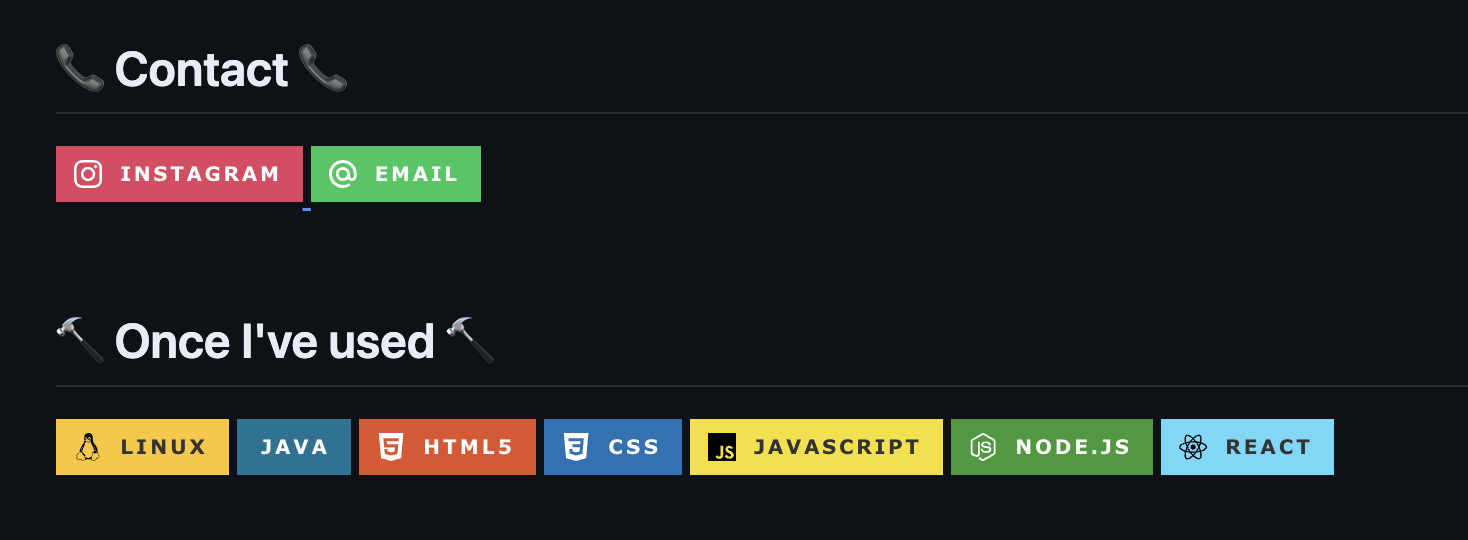
<a> 태그로 감싼 후 href에 링크를 입력하면 원하는 사이트로 이동이 가능한 버튼, 즉 바로가기 버튼을 만들 수 있다.
<a href="https://www.instagram.com/na___y.k/?hl=ko">
	<img src="https://img.shields.io/badge/Instagram-E4405F?style=for-the-badge&logo=Instagram&logoColor=white">
</a>
마무리
학교 동아리에서 과제로 내주어서 만들어 본 프로필이지만 나중에 좀 더 꾸미게 된다면 더 도움이 되지 않을까 싶다.
